Everyday Mom's Meals: Pie
_____
Showing posts with label Pie. Show all posts

Monday, June 22, 2020

Just For Daddy


I hope everyone had a great Father's Day celebrating with all the special guys in your life! I am blessed to be the little girl of an amazing daddy; and wife to the best I could have asked for to our boys.

I have to share a secret with you. This week's new recipes was actually a dessert on Easter. Then it went into my draft folder and I forgot about it. Oops. When I stumbled upon it a couple weeks ago, I was so annoyed with myself, but then remembered that Father's Day would be the perfect occasion to share it because it is hands down my daddy's favorite dessert I make him.  In fact, this pie wasn't our Easter meal dessert, but one I made for dad as a treat since we couldn't be together on the holiday thanks to lock down. Pie porch pick up it was!

I've made a few different versions of this pie over the years, and this by far is the easiest and my favorite. Filled with coconut flavor, and perfect to make the day before as well. Oh, and it can also be made into a mini version using those mini pie shells you can find in the baking aisle. I know because that is what I made for our Father's Day dessert! Since we wanted to eat on the deck and my uncle was joining us, I figured a mini version would be more outside friendly. And they were SO cute!

Let's talk toasted coconut. First off, start it in a cold pan. Second, don't let the heat get above low. Third, do NOT take your eye off it for a second. Seriously. It can go from white to black in about 5 seconds. So toast it slow, stirring often and you will be fine. And before you ask "Do I really need to toast it?" My answer is always yes. There is a huge difference in flavor between out of the bag and toasted. It truly makes the difference in this pie.

However you spent Father's Day, I hope you got to hug that special man in your life and tell him how much you appreciate everything he does for you every single day!

Easy Coconut Cream Pie
1 (9 oz.) graham cracker pie shell
2 (3.4 oz.) boxes instant coconut cream pudding
3 1/2 c. milk
3 cups shredded sweetened coconut, divided use
1 (8 oz. ) tub Cool Whip

In a large bowl whisk together milk and pudding mixes until smooth (there will be some tiny chunks from the coconut) Chill for 5-10 minutes until soft set. While pudding chills, heat 1 1/2 cups coconut in a skillet on low heat. Stirring constantly, toast until golden brown. Remove from heat and set aside. When pudding is set, add remaining coconut and mix well. Pour into pit shell. Chill for 2 hours to set. Top with Cool Whip and toasted coconut. Chill until serving.*NOTE* If you want to make the mini version, follow recipe except use 2 (6 count) packages mini graham cracker pie shells, found in the baking aisle.


Shared at Weekend Potluck


Sunday, August 19, 2018

Yes, I Bake

I have never hidden the fact that I am not one of those home cooks who pride themselves in their baking skills. Not once have I pretended it's my thing. Can I do it? Sure, to a degree. Do I enjoy it as much as others do? Not at all. But that's okay. We all have our strengths!

So when I decide to, and really put forth an effort, you can imagine how excited I get when something turns out as yummy as I hoped. In fact, this was my second baked dessert in less than 3 weeks, so I felt like I was on a roll! (If you didn't catch my Tropical Orange Cake, be sure to check it out!)

A few weeks ago, my parents were coming over to help us with a few things around the house, and I was "paying" them will grilled steak, roasted red potatoes, fresh Indiana sweet corn, and decided THIS would be dessert. It was such a hit, my daddy even asked for seconds!

I had actually just found the recipe that same morning, while looking for ways to use up the strawberries in the fridge before they had a chance to go bad. I had stocked up at Aldi's when they were $.99/pound, and the boys hadn't finished them yet, so I had extra.

For someone who shutters at the thought of making a pie crust...this was calling my name. Crustless pie? Yes, please!

If you can cut, stir and pour you can make this! Believe me, if I can, you can too! Just look how pretty it is too! A great way to take full advantage of summer berries before it's too late; and the pumpkin/apple flood begins!

Crustless Strawberry Pie
1 c. plus 2 TBS white sugar, divided
1 c. flour
1/4 tsp. salt
1 stick butter, melted and cooled a little
2 tsp. vanilla 
2 eggs
2 1/4 c. strawberries, quartered

Preheat oven to 350. Grease a 9 inch pie plate. In a large bowl mix together flour, 1 c. sugar and salt. In a medium bowl whisk together butter, eggs  and vanilla. Pour into dry ingredients. Stir to combine. Fold in strawberries. (Batter will be thick) Transfer to pie plate. Add remaining 1/4 cup strawberries to top, pressing in a bit. Sprinkle top with remaining sugar. Bake for 35-40 minutes until toothpick in center comes out clean. (It can have crumbs on it, but NO liquid batter.) Transfer to wire rack to cool. 


Inspired by Averie Cooks

Shared at Meal Plan Monday 
Shared at Weekend Potluck

Wednesday, November 4, 2015

Thanksgiving Planning

Have you started yet? If not, don't worry, I'm sure most haven't, but as we've already established, I'm a planner. With a capital P. Not to mention, I have to plan ahead so I can share yummy ideas with all of you , in time so that you can plan!

I have to admit, the family isn't complaining about all the planning and recipe testing. It kinda makes November one month long feast. Which is actually kinda funny since I don't cook on the actual holiday! Well, okay, that's not completely true. I usually do have to take something with us to our family gathering(s), but I'm not in charge of the huge meal. I have been before. I have been the one prepping food for the whole week, while the turkey defrosts in the fridge, but it just isn't normally how it works out. So really, the fact that I try to come up with a few things that might work for your holiday, is a big advantage to my boys!

My favorite thing on Thanksgiving is pumpkin pie. The end. No contest. But...it has to be my mom's pumpkin pie. Sure, I like others, but I will never enjoy any of them as much as hers. Hence why even though she makes it on Turkey Day, we demand she make it again on Christmas Day as well. We can't get enough of it. In fact, both myself and my child have been known to request it instead of cake on our birthdays. Yes, it is that good.

So you can understand why I don't have a recipe for it on the blog, nor will I ever. I won't make it. She does. That's all I need. But I still want pumpkin desserts in my life, so I find other ways. These came out of my recipe for pumpkin fluff, taken to the next level. Add some easy mini pie shells, and you have a party on a plate. Plus, you could easily make a ton of these if your Thanksgiving crowd is a big one. They truly are the perfect little holiday bite.

If you have began to plan your menu for the big day, I applaud you. If you are more the "wait until the last possible minute" that's okay too...we will get through it together!

Mini Pumpkin Tarts
1 box (2 count) refrigerated pie crusts
1 (15 oz.) pumpkin puree
1 (3.5 oz.) box instant vanilla pudding
1 c. Cool Whip, extra for garnish
1/2 tsp. ground cinnamon
1/4 tsp. ground ginger
1/8 tsp. ground nutmeg
1/8 tsp. ground cloves
Cooking Spray

Preheat oven to 450. Allow pie crusts to come to room temperature. Using a 2 inch cutter (cookie cutter, glass, etc.) cut out circles from dough. (You should get between 12-18) Spray muffin tin with cooking spray. Place a dough circle in each one. Spray again with nonstick spray. Bake for 8 minutes until golden brown. Cool on wire rack. In a medium bowl combine pumpkin, pudding mix (powder only), and 1 cup Cool Whip. In a small bowl combine cinnamon, ginger, cloves and nutmeg. Add 1/2 tsp. of mixture to pumpkin. Stir well. Scoop about 1 TBS of mixture into cooled pie shells. (I use a cookie scoop) and sprinkle with extra spice mixture. Chill until serving. *NOTE* When baking shells, they might bubble up in the middle a bit. When you remove them from the oven, carefully press down in the middle with the backside of a spoon to reshape. Don't worry if they break a little, the filling will cover it up, just make sure you don't break through the bottom.  You will also have to do more than one batch of shells to use all filling.


Shared at Weekend Potluck

Tuesday, December 24, 2013

Merry Christmas Eve!!

Today, since it's Tuesday, normally I would not have a new recipe for you. However, being a special day, I wanted to have something yummy to share. So, I asked my dear sweet friend Bekki (whom you usually see on Saturday with Soul Food Saturday) to come into the EMM kitchen and whip something up. But, what she has to share is actually something I made years ago that I shared with her and she decided to try too.

About 7 years ago I hosted Adam's family for the first time on Christmas Eve. It was actually a last minute type of thing due to illness, and while I wasn't responsible for all the food, I wanted to make dessert something truly yummy and festive for my first holiday party in our home! This recipe was so incredibly easy and was a huge hit with everyone. Bekki took the original and has made it her own. If you're looking for something for tonight or tomorrow, there is still time to make this!

Happy Christmas Eve to all of you, thank you for sharing some of your day with me.
Today I am sharing a recipe that is now part of our family table, and has graced the Everyday family table as well. During my childhood every Christmas Eve was spent at my Mama Lupe’s house. Her home was always warm, and smelled of spices, and delicious food. It always started with dinner and continued through the night. There was always a big pot of home made hot chocolate on the stove, and big pots waiting for the mountain of tamales being made by all aunts, uncles, and cousins. The younger of us were shuffled out of the small kitchen with mugs full of chocolate that warmed our hands and our bellies. But no matter the amount of times we were asked to please step out we were back nosing in discussion or stealing “tastes” of the delectable meat fillings lining the counter top. The house was filled with music and Christmas movies always had a place in part of our evening. The fireplace reminded us children that Santa would be coming, but it never seemed soon enough. We often thought if we laid close enough to it that maybe, just maybe we’d catch a glimpse of that snow white beard and hear the reindeer bells. Now that we have all grown up, many of us with families of our own are making new memories. 2 of my husband’s absolute favorite treats are ice cream and cookies. I haven’t found any that didn’t make him happy. So this recipe had to be tested in our house, and shared with ones we love. Peppermint ice cream with an Oreo crust, how could that be bad? With whipped topping and white chocolate peppermint bark pieces on top. Yes it really is that good! Grab a spoon and a friend this one is best shared!

Peppermint Oreo Pie Adapted from Taste of Home
2 Oreo cookie crusts
1 half gallon peppermint Ice Cream, softened
2-8oz Cool Whip, thawed
1 package White chocolate peppermint bark pieces
1 jar hot fudge sauce for drizzle on top
Plastic wrap for wrapping before freezing
Thaw cool whip in the fridge completely before using. Place ice cream on a plate on your counter to soften, enough to scoop easily with a large spoon. Remove wrapping from pre-made Oreo pie shells and set aside. Take cool whip out and mix containers to ensure they are completely thawed and free of lumps, then set aside. When ice cream has softened just enough, scoop half of container into first pie shell. And repeat with the second half into the second shell. Top each with cool whip and sprinkle peppermint bark pieces to finish. Wrap in each in plastic wrap and place in the freezer.
Remove just before serving and allow at least 10 minutes before slicing.
 *Being frozen it could be difficult to slice through, so care and patience is necessary here* 
Drizzle hot fudge over each slice as desired. Enjoy! Merry Christmas, and let them eat Peppermint Oreo Pie!


Monday, October 28, 2013

After School Snack Inspiration

After school snacks. We all had our favorites, and our children have theirs. But there have always been stand-bys that moms everywhere depend on, knowing they will be loved no matter how many times the little ones come home to them. Cookies and milk. Veggies with dip. Apple slices and caramel. Peanut Butter and bananas. They are what we turn to when the child walks through the door starving, and you want to make sure they get a little nosh, but don't ruin their supper. And the last one in that list was the inspiration for this dessert.

Oh, and have you seen the mini graham cracker pie shells in the baking aisle? They were also inspiration for this recipe. I've used them several times now and love them. They allow me to make mini desserts that are cute, simple and the perfect serving size! If you haven't, they are right there next to the other pre-made crusts!

Basically I had bought these mini pie shells but had no idea what I was going to do with them yet. Then I started thinking of new flavor combinations for pies, and with my brainstorming, this happened. If you love the flavors of banana and peanut butter together, you're gonna flip for this! Plus, something magical happens when the pudding meets the peanut butter and then they both meet the Cool Whip. It's a wonderful thing.

Now, I know some out there are going to look at this recipe and be critical of just how much help I took from the store. That's fine, go ahead and hate. But I'm okay with it, and I know many of my fellow crazy busy moms out there will appreciate it. If you have the time to make fresh banana pie filling, go for it! Or if you prefer to use a box of instant pie filling, go ahead. I actually probably would have done that myself had I not been able to find the canned variety.

These would be perfect if you're hosting a Halloween party later this week. Kids will enjoy the flavor and size. Adults will love the flavors reminding them of their childhood. It's a win win dessert...

Mini Peanut Butter and Banana Pies
12 mini graham cracker pie shells
1 (21 oz.) can banana cream pie filling
1 (4 serving) box instant vanilla pudding
1 c. cold milk
1 tub Cool Whip
1/2 c. creamy peanut butter
Roasted Peanuts, chopped, for garnish

In a medium bowl combine pudding mix and milk. Whisk for 2 minutes. It will be thick. Stir in peanut butter. Mix well. Gently fold in Cool Whip. Divide pie filling among pie shells, about 2 TBS each. Add peanut butter mixture to a gallon sized plastic bag. Cut off tip, creating a pastry bag. Pipe peanut butter mixture evenly over each pie. Top with chopped peanut. Chill to set, about an hour. Refrigerate any leftovers. *NOTE* When measuring out the peanut butter, first run the measuring cup under hot water. This will allow the peanut butter to slide out easily.


Shared on The Country Cook November 1, 2013


Peanut Butter at Very Good Recipes

Saturday, August 31, 2013

Soul Food Saturday #20

Happy Labor Day weekend! I hope you have something fun, or maybe relaxing, planned for this 3 day gateway to fall. Okay, so I'm not wishing summer away by any means, but with September coming in less than 24 hours, I'm trying to embrace the fact the hot, sunny days are going to become further and farther between. But I'm sure we still have some beautiful weather ahead of us, and hopefully you'll get out and enjoy some this weekend! Bekki is here with the perfect holiday dessert, especially if you're having guests. It takes one of my all time favorite ice cream parlor treats and put a new spin on it!


I saved the best for last. Since most of us have a 3 day weekend and are celebrating Labor Day, we can’t leave out the dessert. This pie transforms banana split toppings into one delicious slice. After having a nice cookout this is a perfect way to end the meal. Super easy to prepare and in advance so it doesn't get in the way of other celebrating that must be had this weekend. This is one you’ll want to keep around, because someone is going to want your secret recipe. Enjoy!


Banana Split Pie {Adapted from Valley View Women’s club Cookbook}
 2 graham cracker crusts
2 cups confectioners’ sugar
1 stick unsalted butter
2 tbs. vanilla
1 8oz. package Cream Cheese, softened
6-7 bananas, sliced
1 large can crushed pineapple, drained
1 tub whipped topping
1 c. Maraschino cherries
1 c. macadamia nuts, chopped
 
In a large bowl, cream together butter, sugar, vanilla and cream cheese. Pour half of    mixture into each pie crust. Layer bananas on top of filling and press them in gently. Then layer pineapple on top of bananas. Lastly finish each pie with a layer of whipped topping, and top with cherries and nuts.


Wednesday, July 24, 2013

In Lieu Of Birthday Cake

For those of you who don't know, this past Sunday was Mr. Everyday's 39th birthday. We were lucky enough to have it land on the weekend, so I was able to plan a nice dinner for him, along with his parents, (little man was at Vacation Bible School) with some summer time favorites to treat him with. And to finish it off...nope not birthday cake...something even better (to him) a new raspberry pie recipe!

To me, everyone should get to have what they want for dessert on their birthday. For some, that is cake, every single year, but for others, we like to mix it up. One year I can remember asking my mom for her Peach Custard Pie. Another...I wanted pumpkin...and my birthday is in February. She was happy to oblige, after all it was my special day. Years later she had to laugh because my son requested her to make the same thing for his birthday...pumpkin pie...and his in in September. I can't say I blame him. Mom makes a pretty darn good pumpkin pie! 

The past few years, my choice as been a giant cookie cake. I'm sure you've seen the ones. The ginormous chocolate chip cookies that are frosted...oh Mylanta...they are so yummy! But for Mr. Everyday's special day, if I can include something with words raspberry pie, I know I will score major wife points! In fact, a few years ago, I attempted my very first raspberry pie from scratch for his birthday. Yeah...I got extra smooches that day! 

This year, my mom actually saved this recipe for me from the evening paper, because she knew her favorite son- in -law (yeah, he's the only one too) would flip for it. And flip for it he did...we all did. Myself, my in-laws and Alex all thought it was incredibly tasty! I'm not a huge raspberry fan, and even I was licking the spoon. Sweet, creamy, fruity... it hits all the right notes. Plus the crust...well, it's too good for words! 

I'm so happy I am able to use my love of the kitchen to treat my special guy to something extra special on his special day! If you have a raspberry lover in your house, they will adore you forever because of this pie. And when it's your birthday, don't forget to request exactly what you want for dessert...it's your right...seriously...I think it's in the constitution! Okay, maybe not, but it should be!

Raspberry Cream Pie with Coconut Crust Adapted from Dash Insert
1 (5.3 oz.) package shortbread cookies
2/3 c. packed sweetened coconut
1 stick butter, melted
3 (6 oz.) containers fresh raspberries, divided
1 (14 oz.) can sweetened condensed milk
3 large egg yolks, beaten
2 tsp. cornstarch
4 oz. cream cheese, at room temperature
Powdered Sugar

In a food processor, pulse cookies until finely ground. Add coconut and pulse to mix. Add butter. Pulse to mix (will resemble dough). Spoon into an 8-inch pie plate. Using fingers, press in bottom and up sides to form crust. Freeze for 15 minutes.

Place a fine mesh strainer over a small sauce pan. Press 1 container of the raspberries into strainer. Using the back of a wooden spoon, press them through, "juicing" them. You need approximately 1/3 cup of juice. Discard solids. Whisk juice, egg yolks, cornstarch and condensed milk. Cook over medium heat, stirring constantly, until it just starts to simmer, about 8 minutes. Remove from heat and transfer to a medium bowl. Using electric mixer, beat in cream cheese until smooth. Allow to cool 5 minutes. Poor into crust. Refrigerate at least 2 hours. Top with other 2 containers of raspberries and sprinkle with powdered sugar before serving. 


Shared on Lady Behind The Curtain July 24, 2013
Shared on The Country Cook July 26, 2013


Friday, May 10, 2013

Chocolate Fiend I'm Not

I know hundreds of women are gasping right now as they read it. But alas, it's true. Now, don't get me wrong, I like chocolate. It's very yummy. But I'm just not one of those "If I were stranded on a desert island, I would have to chocolate" kinda girls. I'm more, give me some pasta and salt kinda island wanderer.

I like desserts and sweets as much as the next person, but a lot of times they include fruit or icing. Yes, I love fruit cobblers and pies; and anything with icing, frosting or a glaze will be promptly devoured. Now I will say one of my favorite desserts is brownies, so I do have certain chocolate favorites, it's just not something I crave.

But I know so many of you out there have to have the stuff. Can't live without it. Would dry up and blow away if someone took away your stash. (And don't try to hide it, or feel bad. Most of us have a stash of something hidden away to enjoy when nobody is looking!) I would say every year during Lent, I have more friends give up chocolate than anything else. And by the end, they are "jonesing for a fix" like no other! I get it. I might not relate to it, but I understand it.

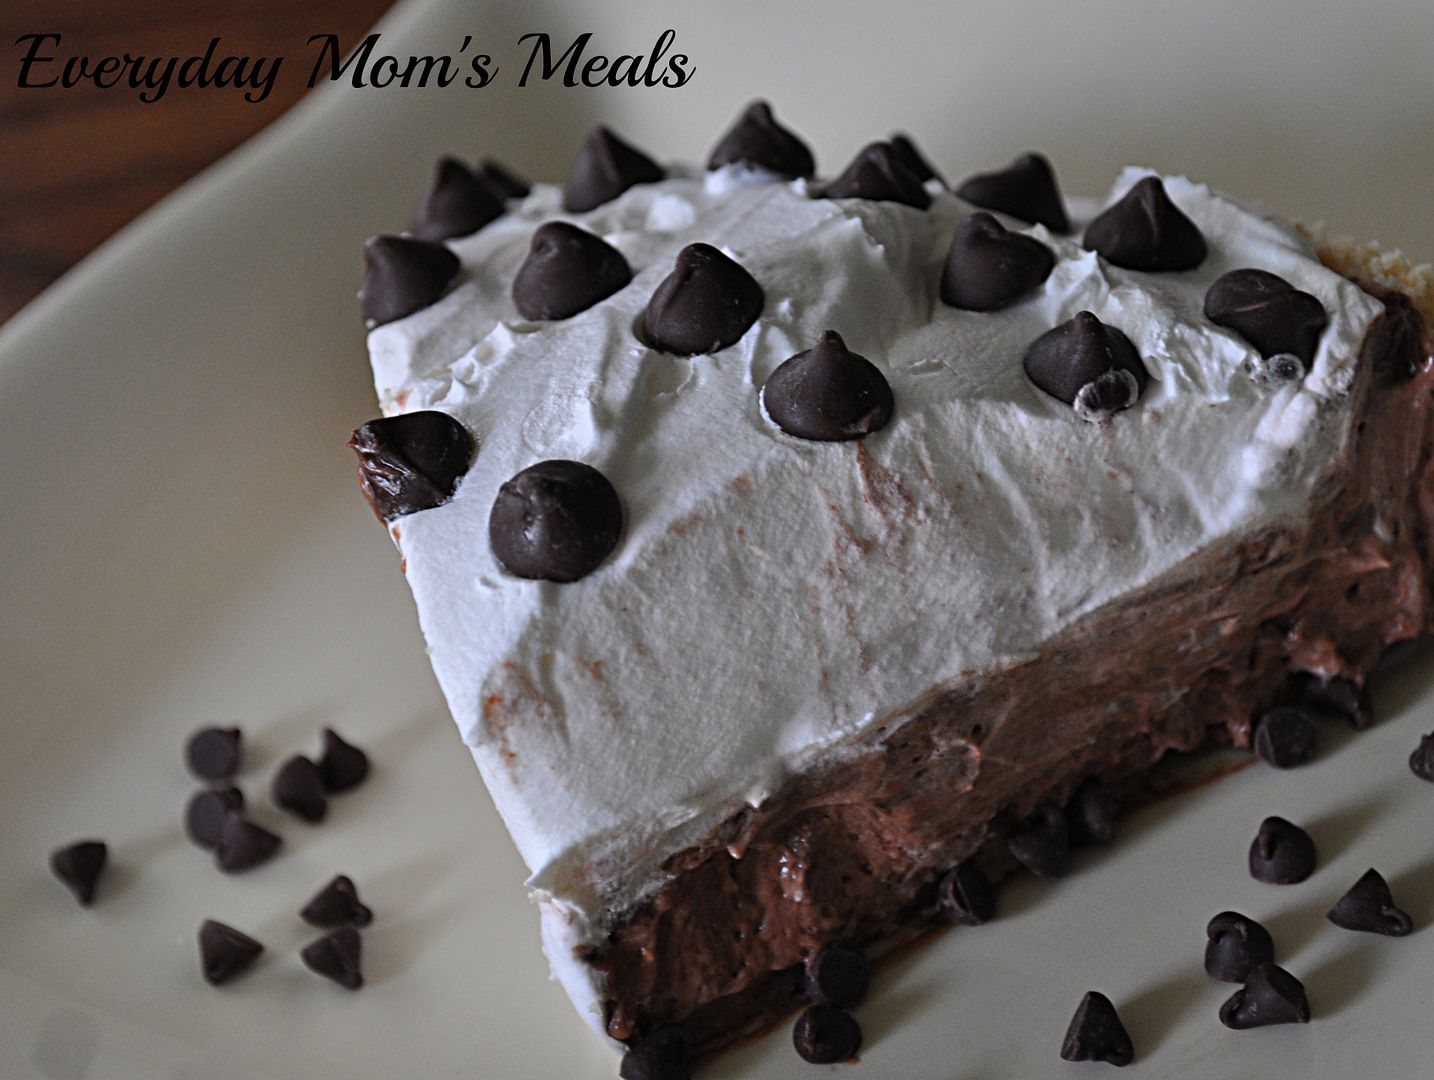
So, once again your everyday mom is here to the rescue. For all of you who need it like the grass needs the rain, I've got a real treat for you! This pie is super simple, and PACKED with chocolate flavor! We're talking a chocolate lover's dream!

Maybe this could be something easy you could whip up for mom this weekend. (If you don't know, Mother's Day is Sunday!) Get Daddy and the kids in the kitchen to make a special treat for their favorite lady!

If you are a chocolate fiend, embrace it! You are in very good company! And if you are at a support group meeting soon, walk a few doors down to "Carbs Anonymous"...where you'll find me!

Double Chocolate Chip Cream Pie
1 shortbread pie crust (found in the baking aisle with the other pre-made crusts)
2 ( 4 serving size) boxes instant chocolate pudding
3 1/2 c. milk
1 1/2 c. mini chocolate chips
1 ( 8 oz.) tub Cool Whip
3/4 c. regular chocolate chips, for topping

In a large mixing bowl combine pudding mixes and milk. Whisk for 2 minutes until well combined. Set in fridge for 5 minutes until soft set. Add 1/2 c. Cool Whip and fold gently. Add mini chocolate chips and fold again. Pour into crust and spread evenly. Top with remaining Cool Whip and spread to cover. Decorate top with regular chocolate chips. Chill for 4 hours before serving.


Shared on The Country Cook May 10, 2013
Shared on Make Ahead Meals May 13, 2013
Shared on Mandy's Recipe Box May 14, 2013
Shared on Lady Behind The Curtain May 15, 2013


Chocolate at Very Good Recipes
Pin It

Friday, March 8, 2013

Mr. Everyday's Suggestion

Most of the time my husband's contribution to what we are eating is sitting down, clearing his plate and saying "Mmm...that was really good." It's not that he isn't allowed input, or doesn't want to give any, he just knows the kitchen is pretty much my domain and he trusts in the fact that if I'm stirring, chopping and sauteing, it's going to be something yummy. But every once in a while, he will see something that peaks his interest and then I get a random email through the day "Saw this and thought it looked good." And that's exactly how this recipe came to me last week.

He happened to see them online and then brought the recipe home to me. The minute I saw it, apples when on my grocery list for the next day. It's a pretty genius idea...I wish I had thought of it! They reminded me of my grandma's Apple Dumplings a little, and I knew we would love them! What's not to love with something that is as easy as it is delicious and pretty? I think they would be a great dessert for guests. Imagine their joy when you serve them an individual apple pie...inside of an apple!

I find recipes in all sorts of places: cookbooks, blogs, television, word of mouth...and sometimes even emails from my husband! But as long as they are yummy I don't care where they come from!

Apple Pie Baked Apples  
5 Granny Smith Apples, make sure 4 can stand on their own
1/4 c. white sugar, plus a little extra for top
1 TBS brown sugar
1 TBS cinnamon, plus a little extra for top
1 refrigerated pie crust, cut into 1/4" strips

Preheat oven to 375. Cut tops off of 4 apples and discard. The 5th apple, peel, core and chop very thin. Set aside. Using a melon scoop, hollow out 4 apples and add to other chopped apple. Be careful not to puncture outside, leaving about 1/2" interior. Add sugars and cinnamon to chopped apple. Mix well. Spoon apple mixture into 4 apples. Top each with a lattice pattern of 5 strips of dough. Press gently to adhere. Sprinkle with cinnamon and sugar. Place in a 8x8 baking dish. Cover with foil and bake 20 minutes. Remove foil and bake an additional 25 minutes until golden brown.
*NOTE* Sometimes an additional (6th) apple is needed to be chopped to obtain enough filling. I had more than enough with 5. Also, a couple of mine "oozed" a little during baking causing the apples to split on the side. No problem...they are still delicious!


Shared on The Country Cook Mar. 8, 2013
Shared on Make Ahead Meals Mar. 11, 2013
Shared on Lady Behind The Curtain Mar. 13, 2013
Shared on Miz Helen's Country Cottage Mar. 14, 2013


Friday, January 11, 2013

Sundae In A Crust

I know I shared my Cranberry Orange Scones with you on Monday, but I feel like this is our first real sweet treat of the new year. Maybe because it's a pie. Maybe because unlike the scones which can also be a breakfast pastry, this is strictly dessert. Or maybe...just maybe it's because it contains chocolate! In fact, the main ingredient is indeed chocolate! So, if you are still trying to work off all the sweets you enjoyed during the holidays, you might want to save this for a later date (Maybe for your sweetie for Valentine's Day?) but if your sweet tooth is always in need of a boost, then you have come to the right place! To me, this remind me of two things. One, with the flavor of chocolate and the nuts scattered throughout, to me it resembles my Easy Chocolate Fudge (hence where the name comes from). And two, with the way I chose to garnish it, it was almost like eating an ice cream sundae inside of a pie crust; and for me, that's a very good thing. See, the older I get, the more milk and it's products, such as ice cream are not my friend. I do okay with small amounts, and cheese doesn't seem to bother me at all, but my days of big bowls of Rocky Road are over. Sad, I know. But for those who aren't deprived like me, this would taste fantastic ala mode! I know it's the new year and so many of us are trying even harder to watch what we eat and start 2013 on the right track, but I know deep down, even those of you who are hitting the gym every morning need a little pick me up now and again, so maybe one tiny piece of this would make a nice reward, or stay home from the gym and eat the whole pie...nobody will ever know!

Fudge Pie
1 9" deep dish pie shell, unbaked
1 c. sugar
1/4 c. flour
1/4 c. cocoa
2 eggs, beaten
1 stick butter, melted
1/4 tsp. vanilla
1/2 c. chopped pecans
Whipped Cream, optional
Maraschino Cherries, optional

Preheat oven to 350. If pie crust is frozen, place on a baking sheet and allow to thaw 15 minutes. In a large mixing bowl combine flour, sugar, cocoa, eggs, butter and vanilla. Stir well to combine. Fold in nuts and stir. Pour batter into shell. Place in oven (on baking sheet) and bake for 25 minutes or until toothpick inserted into center comes out clean. Garnish with whipped cream and cherries, if desired.


Shared on The Country Cook Jan. 11, 2013
Shared on Make Ahead Meals Jan. 14, 2013
Shared on Mandy's Recipe Box Jan. 15, 2013
Shared on Lady Behind The Curtain Jan. 16, 2013

Tuesday, December 4, 2012

An Oldie But A Goodie

This is something I have literally been making f.o.r.e.v.e.r! I think the first time I did, Alex wasn't even eating solid food yet, because I remember him eyeing it while he was eating his pureed sweet potatoes and squash! Technically this is of course, perfect for breakfast or a weekend brunch, but like so many other dishes that fall into those categories, we have only ever eaten it for supper! It's a great weeknight meal that will have your family thinking you spent all day preparing it, when really, in about 15 minutes it can be baking in the oven while you are doing other things! I don't know about you, but this time of the year is seems to get busier and busier each year; and I don't even realize it until I'm smack dab in the middle of another hectic schedule trying to fit everything in, wondering where the time is going. And I know so many of you are in the same boat, just trying to get everything done, and still maintain somewhat of a normal schedule. In fact, I just told someone yesterday "Between everyday life, the holiday craze, and Adam's brother's wedding 4 days after Christmas, it's to the point when people ask to make plans with us I respond with 'Sure, we'll see you in 2013.'" So I love knowing that will just a little prep work, supper is working in the oven while I take those precious minutes and multitask. But, if you are planning on lots of visitors during the holidays, and they insist on eating other meals besides supper, (just kidding) definitely keep this one in mind for Christmas morning...or the day after...or the day after that....you never know how long they will stay!

Sausage and Cheese Quiche
1( 9") deep dish pie shell, frozen
1 lb. mild sausage
3 eggs
2/3 c. milk
2 c. sharp cheddar cheese, finely shredded, divided
Salt and Pepper to taste

Preheat oven to 375. Take pie shell from freezer and allow to sit at room temperature for 15 minutes. Brown sausage in large skillet over medium heat until no longer pink. Drain well. In a large bowl whisk eggs and milk. Add salt, pepper and sausage. Stir well to combine. Place 3/4 cup cheese in bottom of pie shell. Pour egg mixture in. Top with remaining cheese. Bake for 50 minutes until browned and set. Allow to set 5 minutes before serving.


Shared on Mandy's Recipe Box Dec. 4, 2012
Shared on Miz Helen's Country Cottage Dec. 6, 2012
Shared on The Country Cook Dec. 7, 2012

Wednesday, November 21, 2012

Harder In My Head...Again

Many moons ago, when I shared my recipe for Stuffed Peppers, I titled the post "Much Harder In My Head" because prior to making them, I thought they were a dish that would be very labor intensive and too hard for me, the everyday mom, to prepare. Well, I was wrong, way wrong; and I've once again found myself in the same situation.

I love pecan pie. Next to Pumpkin....and my mom's Peach Custard....and Sugar Cream....it's probably my favorite. (I love pie. Can you tell?) And I have always envisioned it to be one that I could never make at home due to my lack of baking skills. I've told you before, I like to bake, and I do periodically, but I'd much rather make a "meal" and either have a store bought dessert, or something that doesn't involve baking. Have you noticed how many "stir and chill" desserts I make? So when I was talking to my friend about pecan pie and she mentioned that her grandma had a really easy recipe that even she could make, I was intrigued. It's no offense to my friend, but if she can bake it I knew I could since she is kind of the same type of baker as I am. She will, and does, but prefers doing other kinds of cooking in the kitchen. She was kind enough to share grandma's recipe with me, and indeed...it was much harder in my head once again. This pie came was super simple (No doubt partly due to the use of a pre-made crust) and came out perfectly.

If you are looking for a fantastic dessert for you holiday table tomorrow, but can't handle the stress of something complicated, try this one out. Because if I can do it, you can too!

Pecan Pie
3 eggs, slightly beaten
1 c. light corn syrup
1 c. sugar
2 tbsp. butter, melted
1 tsp. vanilla
1 1/2 c. pecan halves
1 (9 inch) unbaked pie shell

Preheat oven to 350. Combine eggs, corn syrup, sugar, butter and vanilla. Blend well. Stir in pecans. Pour into pie shell. Allow to sit for a few minutes to allow pecans to "float" to top a bit. Bake for 50-55 minutes until a knife inserted half way between center and edge comes out clean. 
*NOTE* If crust browns too fast, carefully wrap aluminum foil around edges and continue baking. 


Shared on Lady Behind The Curtain Nov. 21, 2012


Thursday, July 26, 2012

Birthday Treat

As some of you know, this past weekend we celebrated Mr. Everyday's 38th birthday! It was so nice having his special day on a Saturday because I can't remember the last time he actually had his birthday as a "day off". We started celebrating Friday with a trip to Chicago with our aunt and uncle for a tour of Wrigley Field and some fun shopping. It was a great kick off to Adam's birthday weekend and so many wonderful memories were made. When Saturday came I wanted to make sure the fun continued, and of course that had to include food! Since I knew we would be celebrating on Sunday with his parents, and his mom would have a birthday cake for him, I decided to surprise him with a new version of his favorite pie on the face of this earth...raspberry! From the time we began dating, I knew one way to Adam's heart was through his stomach and raspberry pie. Last year was actually the first time in all these years I attempted to make him one, and it actually turned out pretty well for my first try. After all, it didn't even have to look the best, as long as it taste good, and he said it did! So this year, I wanted to take the filling I made for that pie and use it in a different way, and give him something new. These are very simple to make, and end up looking too cute! Plus the little something extra in the cream topping will appeal to any raspberry lover! I love my husband, and I enjoy being able to treat him whenever I can because he spoils me every day of my life!

Mini Raspberry Cream Pies
6 individual graham cracker pie shells
1 c. Cool Whip
4 TBS raspberry preserves
2/3 c. sugar
2 TBS cornstarch
1 tsp lemon juice
2 c. raspberries, fresh or frozen
1/2 c. water
In a small bowl combine Cool Whip and raspberry preserves. Set aside. In a medium sauce pan combine raspberries, sugar, cornstarch, water and lemon juice. Cook over medium heat, stirring constantly until thickened. Allow to cool. Fill each pie shell with about 1/4-1/3 c. pie filling. Top with raspberry cream and a small dollop of the raspberry filling. Chill for 2 hours before serving.


 Shared on Miz Helen's Country Cottage July 26, 2012
Shared on The Country Cook July 27, 2012
Shared on Addicted to Recipes July 29, 2012 
 
I was featured, I was Featured by Addicted to Recipes


Raspberries at Very Good Recipes

Thursday, June 21, 2012

If Life Hands You Lemons

Yes, you could make lemonade. Have a glass and cool off! Or, you could make this dessert. Actually you don't even need to wait for the lemons. Canned pie filling makes this so easy and quick you can have a beautiful, elegant dessert any night of the week. You could even entertain with this dessert. Did the hubby just call saying he invited his boss over for dinner? With this in your back pocket, no need to worry. I love everything lemon, I make no secret of it. But I especially love it during the hot months. (Yes, I'm the girl who goes to a fair and seeks out the Lemonade Shake Up booth before anything else) It's just one of those flavors that cools me off, refreshes me and makes me feel like I'm on vacation, even when I'm not! Kids will love these too because they are just their size! A big tray of these beside an opened pool says party to me! Stay cool this summer, and grab a glass of lemonade to wash down these delights!

Mini Lemon Tarts
Makes 6 tarts
1 (21oz) can lemon pie filling
8 oz. tub Cool Whip
Mini Graham Cracker Pie Shells (I found mine next to all the pie shells in the baking aisle)
Grated Lemon Zest, for garnish

In a medium bowl, combine pie filling and 3/4 of the tub of Cool Whip. Whisk with a wire whisk until well combined. Divide mixture equally into mini shells. Place on a baking sheet and refrigerate for 15 minutes, or until serving. Top each with remaining Cool Whip. Sprinkle with lemon zest.


Shared on The Country Cook June 22, 2012

Friday, May 18, 2012

Quickie Pie

Seriously, this pie could not be easier, unless you have someone else make it and bring it to you. But hey, sometimes we all need those "I can make this at the last minute in no time" desserts in our back pockets for those times when you get invited somewhere at the spur of the moment, or in my case your sweet tooth starts screaming to be fed! I love butterscotch pudding. It's always been my favorite kind. I was even the kid who would turn down chocolate Dilly bars from Dairy Queen if they had butterscotch ones too! To this day, if my husband wants to score extra bonus points he will come home with a can of Thank You brand butterscotch pudding!! So when I decided I wanted a piece of pie and and I wanted it NOW, how appropriate I had everything in the kitchen to make this. So easy. So creamy and the perfect flavor of butterscotch, this would be perfect for an outdoor party this summer, rather it's planned or totally impromptu!

Butterscotch Pie
1 (3.4oz) box instant butterscotch pudding
1 graham cracker crust
1 (8oz) tub Cool Whip
2 cups cold milk
1/2 c. pecan chips

In a large bowl, whisk together the pudding mix and milk for 2 minutes. Place in fridge and let sit about 2 minutes. Pour into crust and place back in fridge for about 10 minutes. When completely set, spread Cool Whip on top. Sprinkle w/ pecan chips.


Shared on The Country Cook May 18, 2012
Shared on Make Ahead Meals May 21, 2012 
Shared on Bobbi's Kozy Kitchen May 21, 2012 
Shared on Gooseberry Patch May 30, 2012
Pie at Very Good Recipes 
Pin It

Thursday, September 1, 2011

Better Late Than Never

A few weeks ago a member of this blogging family I am so honored to be a part of suffered a great loss, a tragedy beyond my comprehension. Jennie Perillo of  In Jennie's Kitchen suddenly found herself a widow. Her husband Mikey passed away unexpectedly, therefore changing her life forever. In the days after her loss, Jennie's only request to her fellow bloggers and fans, was to make a Peanut Butter Pie b/c it was Mikey's favorite. The amount of  support, sympathy and genuine love I witnessed pouring out of people simply by making a pie was overwhelming. I was so proud to be associated w/ so many people who walked into their kitchen, made something beautiful and w/o even speaking paid tribute to a man, and his wife, whom they have never met. However, I was unable to make a pie the day she had asked us to. So while I expressed my condolences to Jennie and her family I made a promise to myself to make my own peanut butter pie very very soon. I was looking online for one I wanted to try, and about half way down the page something caught my eye. "Alex's Peanut Butter Pie". Well, that's like kismet! What better recipe to try to honor another wife and mother than one named after the most precious thing in my life? I can't even begin to try to understand Jennie's loss. But what I can understand is the love of a wife and a mother and how empty my world would feel if this happened to me. My husband and I are a team. And if he was gone, it would feel as if half my soul had been ripped out of my body. So I will never attempt to say "I know what you're going through" b/c I don't. I've lost people in my life, some very recently, but nothing compares to losing your soul mate, your best friend. So this is my memorial to Mikey. May his spirit forever live in Jennie's heart, and may God wrap His loving arms around her and her family and bring them peace when they feel they can't go on; and light on their darkest days. And may the rest of us remember how precious each second is and always tell those we love how much they mean to us.

Monkey's Peanut Butter Pie Adapted from Original Recipe

8 oz cream cheese, softened
3/4 c. peanut butter
1 c. powdered sugar
1/4 c. peanut butter chips
1 chocolate pie crust
16 oz. Cool Whip, thawed
Chocolate Syrup

In a large bowl, mix cream cheese, powdered sugar and peanut butter until well combined. Fold in Cool Whip. Add in peanut butter chips and mix well.  Pour into prepared crust. Drizzle w/ chocolate syrup. Chill

To make the design on my pie, drizzle syrup in shape of a target. Then w/ a toothpick, draw lines from center of pie outward.


Shared on Around My Family Table Sept. 1, 2011
Shared on Something Swanky Sept. 1, 2011
Shared on Sweet as Sugar Cookies Sept. 3, 2011
Shared on Sweetology Sept. 5, 2011
Shared on Hugs & Cookies Sept. 6, 2011
Shared on Gooseberry Patch Sept. 7, 2011


Pin It

Wednesday, August 17, 2011

No Need To Fight

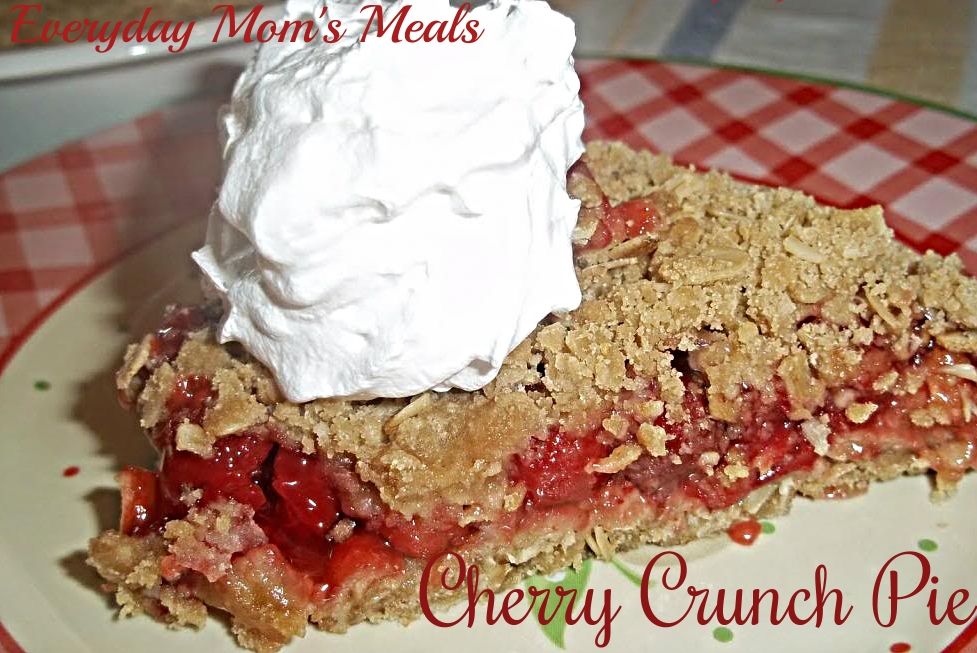
I love when food is so good, so tasty, your family is in a grudge match to see who can eat the last piece, last slice, last bowl. I personally take it as a compliment. Two weeks ago when we were at my mother in law's house for a group dinner, as people were starting to leave and not many of us were left, her brother (Adam's Uncle John) called back (And I mean w/ the phone, after driving home) asking "is there any cherry pie left?" When we answered "yes" he declared he was driving back (good thing he only lives down the road), bringing his own container, and taking the rest home. We all laughed about it b/c he was determined he was going to have the last of that cherry pie. Then a few days later I found out that the next day when my mother in law was headed down to Indy to see my sister in law, she declared, "Mom, bring the rest of the cherry pie w/ you". She quickly had to break it to her that Uncle John and already taken care of it. To which, she retorted, "Uncle John and I are in a cherry pie war." Isn't that hilarious? Now I didn't have any of that cherry pie, but dang it must have been killer! But I am pretty sure I know who made it, and if it's anything close to her blueberry pie that I L-O-V-E--I cant' say I blame them. So when this showed up at my "Church Supper" blog hop, shared by Julie's Eat and Treats, I host each Sunday the following day after this battle took place, I knew I had to make it and share it to hopefully keep the peace in the family :)

Cherry Crunch Pie
1/2 c. butter, softened
1 c. brown sugar
1 c. flour
1 c. oatmeal
1 can cherry pie filling

Preheat oven to 350. Mix first 4 ingredients together. Use 1/2 of mixture to form crust in bottom of pie plate. Press down firmly. Add cherries on top. Sprinkle other 1/2 of mix on top. Bake 30-40 minutes until brown on top.


Shared on Hugs & Cookies Aug. 17, 2011
Shared on This Chick Cooks Aug. 17, 2011
Shared on Lady Behind The Curtain Aug. 17, 2011
Shared on Around My Family Table Aug. 18, 2011
Shared on Prairie Story Aug. 18, 2011
Shared on It's A Keeper Aug. 18, 2011
Shared on Something Swanky Aug. 18, 2011
Shared on Miz Helen's Country Cottage Aug. 18, 2011
Shared on Coupon Cookin' Aug. 19, 2011
Shared on Sweet As Sugar Cookies Aug. 20, 2011
Shared on Jam Hands Aug. 21, 2011
Shared on Make Ahead Meals Aug. 22, 2011
Shared on Home Savvy A to Z Aug. 22, 2011
Shared on Sweetology Aug. 23, 2011
Shared on Everyday Sisters Aug. 28, 2011


Friday, August 5, 2011

Florida Favorite

Each year when we head south for our annual 2 weeks on New Smyrna Beach, there are certain things we each look forward to. Me---I love all the fresh seafood and produce. Alex--Manny's Pizza (the best pizza in the world, and actually we ALL look forward to this), and Crab Legs. And Adam? Oranges, fresh oysters, and Key Lime Pie!! You just can't beat the ones from the bakery at Publix grocery store. They make the best one we've ever had, and luckily there are 2 Publix in NSB, one being only 5 minutes from our condo. There is just something that screams vacation when you are sitting on the balcony, watching the waves roll in while enjoying a piece of this creamy tropical treat. Food is wonderful like that. It can transport you to a favorite place or time all w/o leaving your own kitchen. So I decided to try my hand at this favorite of my honey's b/c we are starting a very important journey in our house, that actually began while we were in Florida this year. During our vacation, we found out that Adam will be his brother Matt's bone marrow donor. (For those who haven't read previous posts, my brother in law was diagnosed w/ leukemia in May) Adam is so excited to be the one sibling (there are 4 kids total) who is a 100%, 10/10 match for his younger brother. Adam can't wait to do his part in helping Matt fight this thing all the way. And this week Adam starts his part of it by having his physical to make sure he is healthy enough and free of infection in order to do this. We are happy to be starting our end of this, and I know Adam is going to hit a homerun for his brother. And then in a few weeks Adam will be traveling to Indianapolis for the day for the actual procedure. So I thought my honey deserved an extra special treat this week, so why not one that will take him right back to his favorite place on earth?? I love you Adam and I'm so proud of this gift you are giving your brother, and really our entire family.

Key Lime Pie

5 egg yolks, beaten
1 14 oz. can sweetened condensed milk
1/2 c. key lime juice
1 9" prepared graham cracker crust

Preheat oven to 375.  Combine egg yolks, sweetened condensed milk and lime juice. Mix well. Pour into unbaked graham cracker shell. Bake for 15 minutes. Allow to cool. Top w/ whipped cream. Garnish w/ lime zest or lime slices.


Shared on Mangoes and Chutney Aug. 5, 2011
Shared on Amee's Savory Dish Aug. 5, 2011
Shared on Sweet As Sugar Cookies Aug. 6, 2011
Shared on The Saturday Evening Pot Aug. 8, 2011
Shared on Home Savvy Aug. 8, 2011
Shared on Jam Hands Aug. 8, 2011
Shared on My Faith and Family Aug. 9, 2011
Shared on Mandy's Recipe Box Aug. 9, 2011
Shared on Gooseberry Patch Aug. 10, 2011
Shared on This Chick Cooks Aug. 10, 2011
Shared on Lark's Country Heart Aug. 10, 2011
Shared on Lady Behind The Curtain Aug. 10, 2011
Shared on Hugs & Cookies Aug. 10, 2011
Shared on Miz Helen's Country Cottage Aug. 11, 2011
Shared on Around My Family Table Aug. 11, 2011
Shared on Something Swanky Aug. 11, 2011
Shared on Prairie Story Aug. 11, 2011
Shared on Country Cooks Across America Aug. 20, 2011
Shared on Everyday Sisters Sept. 11, 2011


Pin It