Everyday Mom's Meals: Cookies
_____
Showing posts with label Cookies. Show all posts

Sunday, October 11, 2020

Home School Halloween

Since deciding to home school Max for preschool, I have found myself constantly on the hunt for activities to have him learn in fun and hands on ways. He actually enjoys sitting and doing worksheets probably more than most kids his age, says he is "doing homework like Bubbie" but when I tell him we have something extra fun to do, his little eyes light up.

Some days it's a fun craft, others he gets time to play with his Play-do sets or paint. And then there are the times I find ways to incorporate life skills like math into a recipe so we can spend some time together in the kitchen. Today's recipe is a perfect example. 

First off, let's be very clear. This isn't a recipe at all. There are 3 ingredients and you assemble. That's it. Max and I literally spent 10 minutes start to finish on this batch. But hey, that was the perfect amount of time for a 4 year old's attention span. 

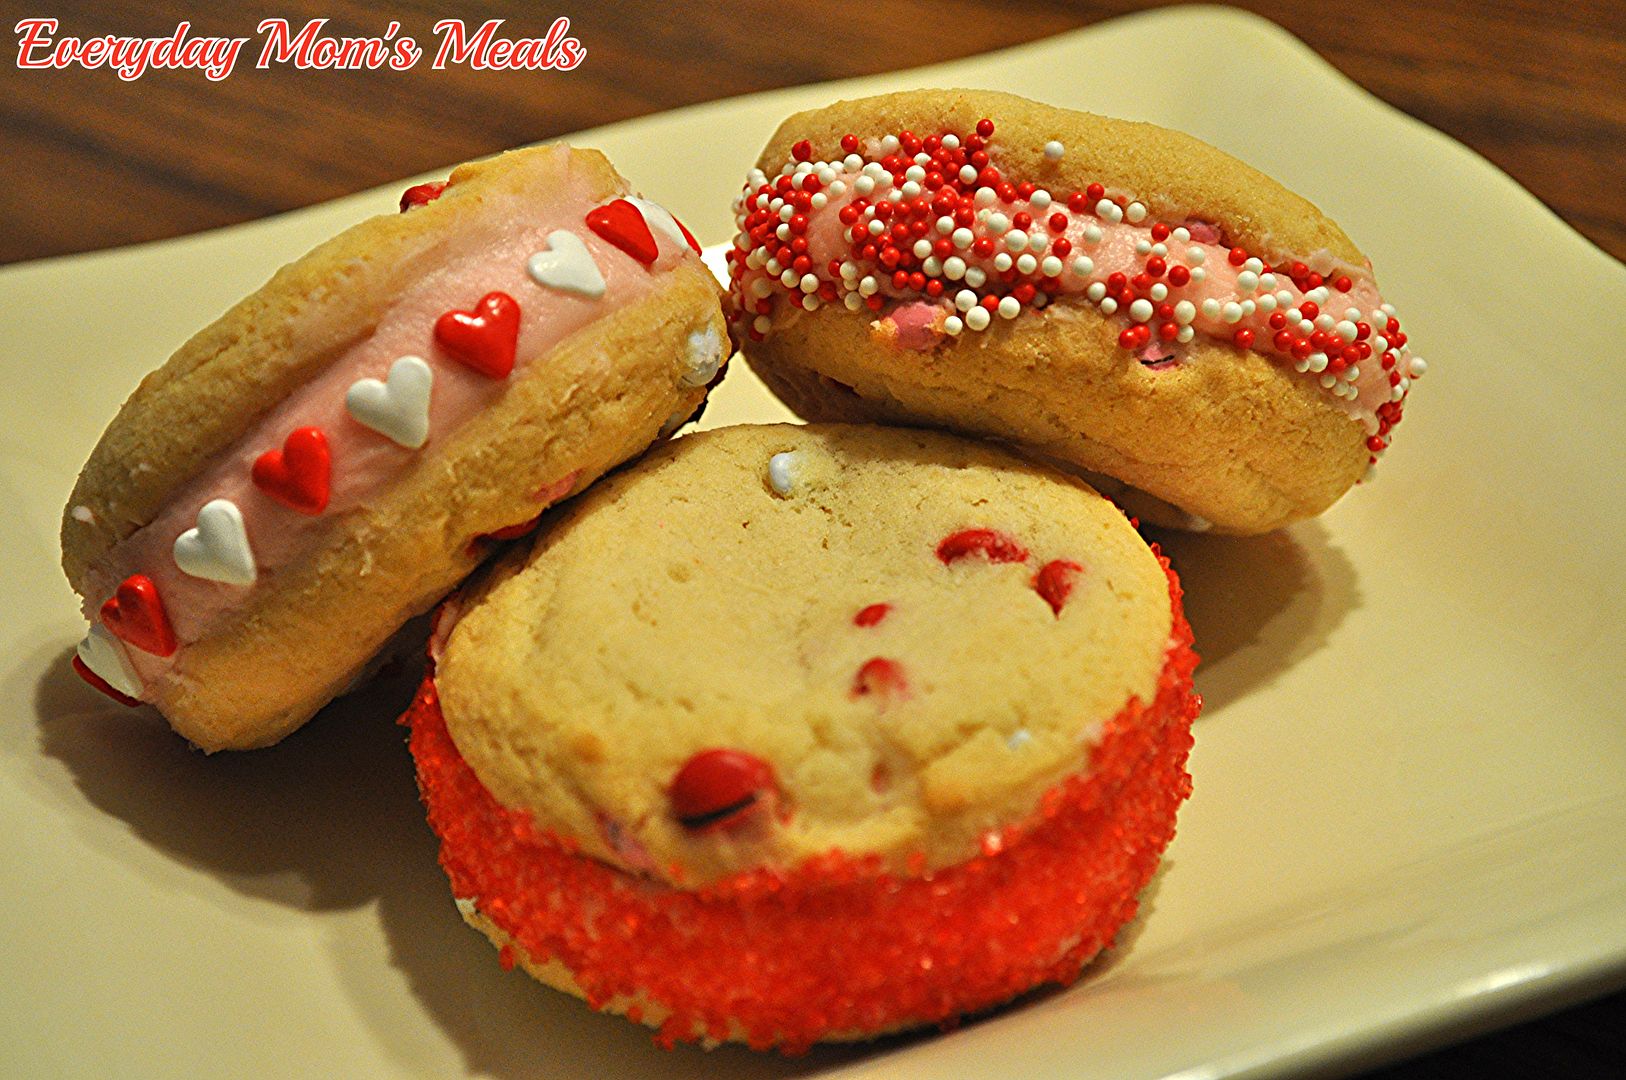
I used these for a couple different lessons. We talked about what shape the cookies were, what shape we piped the frosting on, and the dollop of jelly on top. "Mommy, we painted squares onto rectangles and then added a tiny circle of jelly." We counted out the number we made and made rows of them in equal amounts. 

It is moments like these I don't even think he realizes we are "doing school" or that he is learning. He's having fun and loves to show me what he knows. Who wouldn't love a math lesson you can eat at the end? 

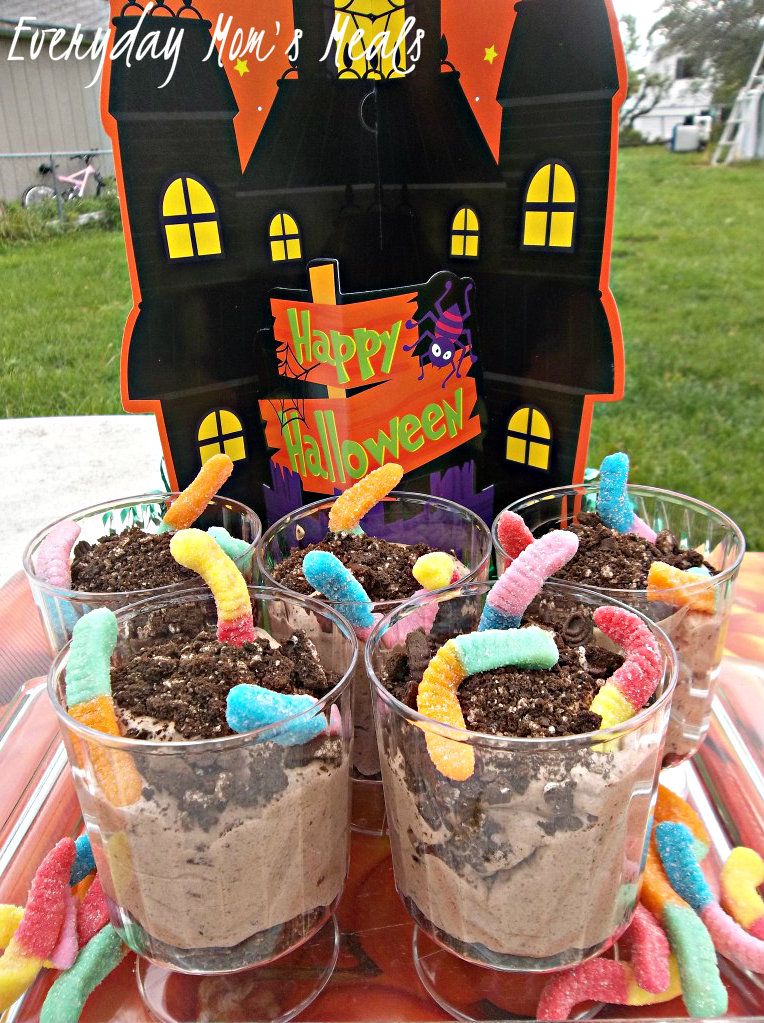
Max will also tell you these are "spooky but yummy", the perfect Halloween treat. If you're finding ways to celebrate at home this year, they definitely need to be on the menu. Maybe you are letting the kids have a few friends over instead of a big trick or treating group, you could easily have little cookie making kits pre-made for them to create their own. 

I never thought I was cut out to home-school, I realize that preschool is easy in the scheme of things, and know I could never do it full time until college. But for these years when he is still home with me, and I can watch him learn, have fun and enjoy discovering the world around him, I feel very blessed and am thankful to be his favorite teacher! 


Bloody Band-Aid Cookies
 
 Vanilla Sugar Wafer Cookies

Vanilla Frosting

Strawberry Preserves

Quart Size Plastic Storage Bags

Toothpick

Carefully scoop some of the frosting into a plastic bag. Do the same with the preserves. Close tightly and squeeze air out. Cut the tip of each bag. Pipe the frosting into a square in the center of the cookies. Smooth out with toothpick if necessary. Add a small dot of preserves. Serve immediately. 


Shared at Weekend Potluck

Shared at Meal Plan Monday


Wednesday, July 29, 2015

A Boy & His Beach

My boy is part fish. I accepted this a long time ago. He has a very special relationship with water. From body surfing in the waves of the Atlantic to spending hours playing in the pool, I know he must have gills I haven't found yet.

I shouldn't be surprised though. He comes by it naturally. His dad and I both love the water too. He gets the part fish DNA from me because I could be by/in the pool all day long. As far as the beach goes, his adoration for it comes from his daddy. I like the beach. I like to gaze at it. Walk on it. Maybe dip my toes in the ocean. But to lay in the sand, having it stick to my skin, and then swimming in the salt water...not so much. I like chlorine. But my boys can spend hours laying on the sand, digging, napping, they don't care as long as they are becoming one with "their" ocean.

So you can imagine how sad it sometimes is that we live in landlocked Indiana. Sure, we have our pool in the backyard, but it will never be as nice as the one in Florida. And yes, we could visit the beach at one of our many lakes...but it's not the same.

So when I want to bring a little beach to my little boy's Hoosier world, I find other ways; and this time it included a snack! Seriously, if you are having kids over for a day at the pool, or lake, or even a kids' birthday party, you've got to include these. They are as cute as they are yummy and they will go nuts for them!!

My boy loves his beach and ocean. Since we can only get him there 2 weeks every summer, I've got 50 other weeks in the year to nurture that love, and keep him as excited as he was when he stuck his toes in the sand for the very first time.

Sand and Surf Pudding Cups
1 (3.4 oz.) instant vanilla pudding mix
2 c. milk
1 c. vanilla wafer cookies, crushed
1 Fruit Roll Up
Teddy Grahams
Parfait Cups
Mini Umbrellas
Blue Food Coloring
 
In a medium bowl whisk together pudding mix and milk until smooth. Chill in fridge for 5 minutes to soft set. Remove and add food coloring until you get the desired color of blue you want. Carefully scoop into cups. Top with “sand” or crushed cookies. Cut fruit leather into 4 equal strips. Lay one in each cup. Add with a bear. Add umbrella. Chill in fridge for at least 30 minutes to finish setting.
*NOTE* Crushing the cookies are a great way for the kids to get involved. Simply put cookies in a Ziploc bag and let them pound away!


Friday, May 22, 2015

Happy Memorial Day!

The gateway to summer holiday is here! I'm sure for some of you, your Memorial Day weekend has already begun with a 4 day vacation from work. Lucky you! I know some schools around here are having their last day of classes today. Lucky them! 

But even for those of us who don't get a 3 or 4 day weekend, and have to go back to school on Tuesday, we can all agree on one thing. This weekend is about more than cookouts, barbecues, pool parties, and great food. It's about remembering those who have served, fought, and given the ultimate sacrifice to insure we can all enjoy the freedoms we do every single day. 

However, many of us include great food in our celebrations this weekend, so as your place for all things yummy, I had to be sure I had something to share! 

No matter what you've got cooking this holiday, you're going to need something sweet to end the meal with. But nothing too complicated! The host/hostess should have the time to enjoy the party too! Not be in the kitchen the whole time! 

How about a dessert that takes almost no time, and can even be made ahead? Not to mention as pretty as it is delicious? I've got just the answer! 

Be sure to take a minute during all the fun this weekend to reflect on all those brave men and women who gave their lives so we can rejoice in our liberties and proclaim "Let Freedom Ring!!"

Cherry Cheesecake Parfaits
1 small box instant cheesecake pudding
1 (20 oz.) can cherry pie filling
1 c. vanilla wafers, crushed
1  (12 oz.) tub Cool Whip
1 1/2 c. cold milk

In a medium bowl whisk together milk and pudding mix. Chill for 5-7 minutes to set. Layer ingredients into parfait cups or dishes: Cookies, Pudding, Pie Filling, Cool Whip. Top with an extra cherry. Chill until ready to serve.


Shared on The Country Cook May 22, 2015

Friday, February 7, 2014

After School Delight

Whenever I hear the words "after school snack" my mind goes to one image. Cookies, fresh from the oven, and a tall glass of milk. Why this picture pops into my head I'm not sure. I can't remember that being my after school snack one time growing up. Ha. Ha. I was more of a fan of salty snacks, and have never been a huge milk drinker. But for whatever reason, that's what pops into my head every single time.

And while we are on the subject of things we can't explain? Why exactly are kids so stinkin' hungry when they get home? The minute, and I mean very second, their feet hit the front door, their stomachs are screaming to be fed. How many moms hear on a daily basis, "Can I have a snack? I'm starving." It doesn't seem to matter when they eat lunch, or even how much they eat, by around 3 o'clock, they act as if they are malnourished and haven't ate for days.

If you were a kid who was treated to warm cookies and cold milk or not, I think we can all agree they are a match made in heaven; and a favorite treat for most of us. In fact, this dessert is a tribute to anybody that has ever taken a cookie, dipped it into their milk, savoring every single bite.

We're talking a no bake dessert. That uses cookies....dipped in milk! Let me say that again for those of you who are now coming too from fainting at just the thought of such bliss. An entire dessert of milk soaked cookies! Oh, and did I mention they are layered with Cool Whip? I know, you need a moment....

Your kids are going to flip for this. But I'm not going to lie, adults can't get enough either. My husband and son were literally fighting over the last piece. They licked the baking dish clean! In fact, this would be a great one to make for Valentine's Day! Something extra sweet for your sweeties!

Cookies and milk...something so simple can be so perfect and delicious. That's exactly how I would describe this recipe too!

Cookies and Milk No Bake Dessert From Gooseberry Patch
1 (13 oz.) package crunchy chocolate chip cookies
3/4 c. milk
1 ( 8 oz.) tub Cool Whip
Chocolate Chips

Dip each cookie in milk, coating whole surface. In a 9x13 pan layer cookies and Cool Whip, ending with Cool Whip. Top with chocolate chips. Cover and chill overnight.


Shared on The Country Cook Feb. 7, 2014

Chocolate at Very Good Recipes

Wednesday, July 3, 2013

Pie In A Glass

Having a big barbecue tomorrow? Or maybe a poolside or lake party? If so, and the dessert portion isn't planned yet, you're going to be SO happy you logged onto EMM today! 

I've said it time and time again, but for anyone who doesn't know yet, I am a lemon freak! From my hand soap to my water, I love all things lemon! Truly I am a huge citrus fan in general, but there is no doubt which is my favorite. And when it comes to yummy lemon things, summer time is my favorite season to enjoy them all! 

This recipe came about quite simply. I was hungry for lemon meringue pie, but had not desire to make one. I wanted that tangy and sweet flavor...but with almost no effort on my part. Enter the parfait. Let's face it. There aren't many desserts that are easier. You spoon multiple ingredients in a glass, layer flavor after flavor, and in about 10 minutes, dessert is done!

These would be great for your Independence Day party because they are so user friendly, spoon-able in the pool, or on the boat, or just from a comfy lounge chair. 

Pies are fantastic, but deconstructed pies in a glass that are both easy and delicious are sometimes even better! 
~From our family to yours, Happy July 4th! May it be safe, happy and most of all, filled with yumminess~

Lemon Pie Parfaits Makes 3-4 large parfaits
1 (21 oz.) can lemon pie filling
1 1/2 c. lemon wafer cookies, crushed
1 (8 oz. tub) Cool Whip
1/4 c. sugar
Lemon Slices

In bottom of glasses or dishes, sprinkle a few of the crushed cookies. Carefully layer lemon filling. Place Cool Whip in a plastic bag and cut off corner. Pipe Cool Whip on top of pie filling. Add more cookies. Repeat layers, ending with Cool Whip. Top each with a dusting of cookies. Dip lemon slices in sugar, coating both sides. Garnish each parfait with a lemon slice. Chill about an hour before serving. *NOTE* If you can't find the lemon wafer cookies, vanilla wafers would work just as well.


Saturday, June 22, 2013

Soul Food Saturday #10


Good Morning! How about a sweet treat to start the weekend? Bekki is here today with a simple cookie that includes one of my favorite flavors...butterscotch!!


Yes, last week I gave the oven a break. But this week I decided, let’s use it early in the day. Yep, I said early. A little secret to baking in the summer in my kitchen is baking in the morning before the heat sneaks up and warms up the house. This cookie is one of my husband’s absolute favorites. The photo clearly shows big piles of these cookies don’t stick around very long. It won’t be any different in your kitchen either. When vacation time comes around, we tend to pull a few extra treat recipes out. This is definitely one of those! So, grab a cup of coffee and hang out with me at the table while these oh so good cookies bake up for the ones we love most.
Oatmeal Butterscotch Cookies Adapted from Incredibly Easy Cookies
¾ c. butter or margarine, softened
¾ c. granulated sugar
¾ c. packed light brown sugar
2 eggs
1 tsp. vanilla extract
1 ¼ c. all purpose flour
1 tsp.  Baking soda
½ tsp. salt
½ tsp ground cinnamon
3 c. quick cooking or regular rolled oats, uncooked
1 ¾ c. (11 oz. package) Hershey’s Butterscotch chips
1 Heat oven to 375 degrees.
2. Beat butter, granulated sugar, and brown sugar with electric mixer on medium speed in large bowl until well blended. Add eggs, and vanilla; blend thoroughly. Stir together flour, baking soda, salt and cinnamon; gradually add to butter mixture, beating until well blended. Stir in oats and butterscotch chips; mix well. Drop by teaspoons onto ungreased cookie sheet.
3. Bake 8 to 10 minutes or until golden brown. Cool slightly. Remove to wire rack and cool completely.


Pin It

Wednesday, February 13, 2013

I Finally Did It...Just In Time

For a very long time now I have been wanting to try making my own buttercream frosting. See, I have this tiny obsession with good frosting. Cookies and cakes are great, but for me, they are simply a vessel to carry the frosting into my mouth. Yep, I was the kid that would eat the piece of birthday cake and inevitably leave behind cake after all the yummy frosting was gone.

However, I am kind of a frosting snob. I don't like whipped frosting at all. And for me to enjoy a buttercream, it has to be smooth. Those grainy ones you sometimes find on things from the supermarket bakery, well that just makes me mad. It looks great, but the minute I take a bite my sweet tooth is totally disappointed. The canned varieties are okay, and some flavors are even close, but there just isn't anything like the made from scratch, tastes like grandma's, kind.

After reading the recipe that has been collecting dust in the back of my recipe box for years now about 100 times over, I finally convinced myself I could do it. Plus, I had extra motivation. Our local Kroger market has these sugar sandwich cookies that are filled with some of the yummiest frosting I've ever had; and I'm a little addicted to them. I seriously can NOT step into that store without walking out with one. But I'm not there a lot...maybe once every couple weeks...so I needed to be able to sustain in between those visits. (I told you...I'm addicted)

This frosting is so super simple, I honestly felt like saying to myself "Really? That's it?" I can't believe I always thought it would be too involved. Especially now that I have my stand mixer. It literally did all the work for me.

Now this recipe will make enough to frost a 2 layer (8 inches each) cake, about a dozen cupcakes, or about 12-14 of these sandwich cookies. Since I was making the frosting from scratch, I took some help from the store with some cute Valentine's sugar cookies, but feel free to bake your own!

Be warned though. This stuff is dangerous. You will find yourself eating it straight from the bowl with a spoon, it's that delicious! Don't worry though, my lips are sealed....sealed with frosting!

Buttercream Frosting
1/3 c. softened butter
1 lb. powdered sugar
1/4 tsp salt
1 tsp vanilla extract
3-4 TBS milk

Using an electric or stand mixer, cream butter, salt and vanilla together until light and fluffy. Add powdered sugar a little at time, mixing between each. (Don't worry, it's going to appear very thick) Add milk and mix until creamy, and spreadable.

To make cookies, spread frosting onto bottom cookie. Top with another. Gently push down so frosting comes out sides. Using a butter knife, remove excess and smooth. Roll in sprinkles.


Shared on Lady Behind The Curtain Feb. 13, 2013
Shared on Miz Helne's Country Cottage Feb. 14, 2013
Shared on The Country Cook Feb. 15, 2013
Dessert at Very Good Recipes
Pin It

Saturday, December 22, 2012

Weekend Company {Guest Blogger Bekki}

Whew...3 days people! We are down to the wire! Are you ready for Christmas? Are the cookies baked, presents wrapped? Are the kids bouncing off the walls yet? Monkey is so excited for the 2 week vacation from school and the holidays, he can barely contain himself. I can't say I blame him though! Today I'm happy to have a returning guest, and loyal friend to EMM, Bekki back in the kitchen with me. She is such a sweet gal, because she stepped up when I needed this holiday guest blogger, and then she agreed to do next week's too! So, be sure to come back then to see what other yummy thing she is sharing, but for now, here she is with not one, but two holiday treats!


I am married to my wonderful husband Josh, have a beautiful 12 year old step daughter Amy and 2 furbaby sweethearts Minnie and Shadow. I am a self taught baker/cook. I taught Wilton cake decorating for a while, worked in a grocery store bakery and have even spent time baking wedding/birthday cakes as a hobby on the side. My love for cooking has been since childhood. Spending time with my mother, aunts, and grandmothers. Aiding in their recipes or just being there for the conversation. Its always been a source of calm, peace, and ultimate fulfillment. The idea that you add your love to each recipe and share it with the people you care about is such an amazing blessing to me in more ways then I can ever put on paper. I have decided writing a cookbook was something I could do to share my love of food with family, friends, and whomever else comes my way. I hope your day is blessed with all your favorite things.

Here we are, ready and waiting for parties with our families, long time traditions and warm evenings by the fire with a Christmas Story. Here’s a spin on milk and cookies for Santa. How about something warm with a little kick to keep him going. These candy cane cookies mix the idea of a powdered donut, a candy cane and a cookie all in one! Who wouldn't love to share that? These cookies along with a little grown up hot chocolate, add the flavor of coffee but nothing that will have you or your little ones flying through the house all through the night. I hope you all have a joyous Christmas, blessed to God’s fullest. Merry Christmas!


Christmas Candy Cane Crispers  Adapted by A Family Christmas
1c. butter, room temperature
1 1/4c. confectioners' sugar plus additional for coating
1 1/2tsp. vanilla
1 1/3c. flour
1c. rolled oats
1/2 tsp. salt
3/4 coarsley crushed candy canes
Preheat oven to 325 degrees. Grease and lightly flour a baking sheet.
In a large bowl beat together butter, confectioners' sugar and vanilla.
In another another bowl, stir together flour, rolled oats and salt; blend with butter mixture. Roll dough into 3/4 inch balls; roll in confectioners' sugar to coat. Place about 2 inches apart on prepare baking sheet. Flatten cookies with a fork, making a crisscross pattern with the fork tines. Sprinkle each with about 1/2tsp. crushed candy canes. Bake 18-20 minutes, or until edges are lighty browned. Cool on baking sheet for 2-3 minutes; transfer to wire rack to cool completely. Makes about 4 dozen.
Photo from A Family Christmas Cookbook

Fiesta Mexican Hot Chocolate Adapted from A family Christmas
2 c. hot milk
1/2 c. semi-sweet chocolate chips
1 tbs. instant coffee granules
1/2 tsp Vanilla
1/4 tsp. cinnamon
 Place hot milk, chocolate chips, coffee granules, vanilla and cinnamon
in a blender. Cover; mix thoroughly until chocolate chips are incorporated.
Beat with mixer until light and frothy. Makes 2 cups. 


Pin It

Friday, December 21, 2012

Grateful With A Heavy Heart

One week ago today evil found a small town in Connecticut. One week ago small children were taken from this earth much too soon; and adults gave their lives trying to protect them. One week ago parents in that small town got the news that no parent should ever have to hear~ their babies would not be coming home. Like many of you, I sat in horror watching the images on the television not able to comprehend or wrap my mind around how someone could take the lives of innocent children with no regard to basic human emotions. I literally sat in my living room staring out the window with tears rolling down my face.

What was I staring at? My son's school. We are blessed to live only 5 doors from his elementary school, and I can see his classroom window from my front porch. I will be honest and say part of me wanted to rush up to the school, take him out early and bring him home. Not because I thought this could happen here too, but because I just needed to see his face, hold him close and tell him I love him. That he is the most precious gift I've ever received and I would never let anything or anyone harm him. I'm sure many parents out there felt the same exact thing. However, I knew disrupting his day would only be selfish on my part, and frightening him wasn't the answer.

But let's face it, there are no answers. There are so many questions surrounding this massacre, and most will always go left unanswered. So how do we as a nation, which when something like this happens, gets very small, begin to heal? For my family it means prayer. We lift those affected up in prayer and ask God to place them in His loving arms of peace and love, showing them the light of tomorrow. We pray for the families who were left behind because we know there will always be an empty chair at the dinner table and an empty bed at night. We pray for too many families who on Christmas morning will be left with so many unwrapped presents under their tree. We pray for the children who were taken from their loved ones, knowing they are safe and loved in Heaven above, resting in the arms of their Father.

And we also look at our lives. We take a minute to realize how very blessed we are. I don't think I have ever been so happy to pick my son up from school, as I was last Friday. I looked into his eyes and said a silent prayer for all those Mommies who no longer could do so with their babies. I decided right there and then that the plans I had with Monkey for that evening would continue as planned. As I said on my Facebook page, "Baking cookies will never mean more. Something so trivial is so precious." I got up, put one foot in front of the other, attempted to get my head out of the fog of despair, and I spent the evening with my child loving him, laughing with him, enjoying him. Not because I could forget what was happening in that small New England town, but because I could not. None of us will ever forget; but if we stop living, evil wins. I knew I needed that special time with my son to help my broken heart, and to show God "I know just how blessed I am, how precious he is, and I will be thankful each second I am with him."

My heart still aches for those mommies and daddies in Newtown. With Christmas around the corner, I know the time of year only magnifies what they are feeling  and will continue to feel every Christmas in the future. May God somehow begin to heal their hearts, souls and minds. May they know His love and peace, remembering we all grieve with them. And may they know their little ones now fly with the angels, and watch over them every single day.

So, here is what Alex and I made last Friday~ made together, with love and gratitude .

Gingerbread Cookies
1/2 c. shortening
1/2 c. packed brown sugar
3 1/4 c. sifted all purpose flour
1 tsp salt                                                                                   
1 tsp baking soda
1/2 tsp ground cinnamon
1/2 tsp ground ginger
3/4 c. molasses
1/4 c. water
Cinnamon Candies if desired
Icing if desired

Cream shortening and sugar. Sift flour with salt, soda and spices. Blend flour mixture into creamed mixture alternately with molasses and water. Chill at least 1 hour.Preheat oven to 350. Roll dough to 1/4 inch thick. Cut with cookie cutters of your choice. Lift onto lightly greased cookie sheet (Or Silpat or Parchment paper) with spatula. Add candies if desired. Bake above oven center for about 12 minutes or until cookies spring back lightly in center. Do not overcook, they won't stay soft. Remove from sheets. Cool on wire racks. 

Rolling out the dough

Adding buttons

So proud of his baking skills!

The official taste test complete with Egg Nog!


Shared on The Country Cook Dec. 21, 2012

Friday, December 14, 2012

After School During The Holidays

It wasn't so long ago I was so blessed to be at home every day, all day with my little man. Okay, I guess it has been almost 4 years ago, but that time has gone by in the blink of an eye. See, until he started preschool 3 days a week, it was just me and him. And I am so thankful for that time I had, and especially during the holiday season. During a typical day, I was always trying to find fun activities for us to do, and things to keep him busy, stimulated, learning, and entertained, and at Christmas time, that usually put us in the kitchen. Either at the counter and oven making something yummy to surprise Daddy with after work, or at the dining room table making a fun, festive craft. I can still hear him asking "Mommy, what are we making today" morning after morning. Well, these days, his teacher (lucky guy) gets to spend the majority of his week with him, and with homework, Taekwondo and other obligations, I have to fit in our special time together in other ways. And I don't want to wait for Christmas Break, because this year, that doesn't happen until 3 days before Christmas, and between the holiday gatherings and a family wedding, we're going to be a little too busy to be in the kitchen, at least together. So I have to split the fun holiday treat making into 2 categories. Those that I know he wants to help with, and would be crushed if I did on my own, and those that while fun, he's really going to be more interested in eating than anything else. And that's why these first appeared at our house last Friday as an after school treat for my Monkey. Even thought I did them on my own, kids would be terrific at helping and would love getting their hands into that melted chocolate! It's always a fun time getting your kids into the kitchen with you, but that fun is only multiplied during the holiday season. Make the memories while you can, because take it from me, they grow up way too fast!

 Double Candy Cane Oreos
1 package Winter Oreos (the ones with the red center)
1/4 tsp peppermint extract
2 c. white chocolate chips
2 TBS vegetable shortening
Candy Canes, crushed

In a glass bowl combine chips and shortening. Microwave 1 minute. Stir. Microwave 30 seconds more. Stir until completely melted. Add peppermint extract. Stir well.  Dip cookies into chocolate. Place on cooling racks on a cookie sheet and place in fridge for about 10 minutes to set. To remove lift racks from sheet, and using your fingers on the underside of them, gently pop cookies off. They will stick a bit, so just be patient. Keep refrigerated.


Shared on The Country Cook Dec. 14, 2012
Shared on Mandy's Recipe Box Dec. 18, 2012

Cookies at Very Good Recipes
Pin It

Wednesday, October 24, 2012

Indoor Campout

A couple weeks ago Mr. Everyday had Saturday night plans with "the boys" celebrating a friend's birthday, and so Monkey and I were on our own for the evening. This type of thing doesn't happen often in our house on the weekend, so I wanted to make sure I made it a super fun time for the little man and I. When I get a chance to hang out with him, I want memories to be made! Well, this happened to only be a few days after his brand new Avengers sleeping bag arrived in the mail, and he was dying to try it. See, I bought it for our upcoming trip to Pennsylvania over the Thanksgiving holiday, and he just couldn't wait that long to use it! After all, a boy's very first sleeping bag is a very big deal. I knew it was going to be super chilly so having an actual camp out was not an option, so and indoor one it would be~complete with new pajamas, snacks and a movie! Our indoor camp out turned into a super-hero themed one with Spiderman 3 as the movie, Batman on the pjs, and of course the Avengers sleeping bag! I knew s'mores would be the perfect snack, and I could make my Mint Chocolate ones I shared over the summer, but I wanted something a little more autumn inspired. So with taking the ingredients of a regular s'more and tweaking them just a little, I got something that is the perfect treat for a fall bonfire, camping trip or even indoor camp out!


Pumpkin Ginger S'mores
Ginger Snap Cookies (small size)
Pumpkin Spice Marshmallows
White Chocolate Baking Bar, cut into small pieces

Roast marshmallows to desired doneness. (We like ours burnt!) Place a chocolate piece on cookie. Top with marshmallow and another cookie. Smoosh and enjoy!!
*NOTE* If you don't have the Pumpkin Spice marshmallows. Use original ones and add 1/8 tsp pumpkin pie spice to each s'more!


Shared on Lady Behind The Curtain Oct. 24, 2012
Shared on Miz Helen's Country Cottage Oct. 25, 2012
Shared on The Country Cook Oct. 26, 2012

Pumpkin at Very Good Recipes
Pin It

Tuesday, October 23, 2012

Make Your Kids Say "Ewww"...

Do you have anything planned fun planned for Halloween? A costume party? A classroom party? Maybe you are just like me and while you don't have a big gathering to attend, you still want to make the day as fun as possible for you little ones. And maybe like me you enjoy the fact that not only can you be the coolest mom ever with a sweet treat, but you also get a little thrill of totally grossing them out! If this is the case, then why not have something easy to make, fun to say and yummy to eat waiting on them after school on Halloween? Can you imagine the kiddies walking through the front door asking "Mommy, can we have a snack?" And you answering with "Sure, I've some worms in dirt for you." The looks of horror on their faces would be priceless (In fact, you might want to have the camera ready!) This is actually something I remember eating as a kid at our church Halloween party, and it was always so much fun! Eating something that sounds so gross always makes it taste better! Let's face it, with kids (especially boys) the more gross something sounds, but tastes great, the more they will love it! So, if you are looking for a entertaining, yet simple dessert for Halloween night when the ghosts and goblins stop by to say "Boo", I've got you covered!

Worms in Dirt
1 (3.4oz) package instant chocolate pudding
2 c. cold milk
1 (8oz) tub Cool Whip
1 (16oz) package chocolate sandwich cookies
Gummy Worms (I used the sour variety)

In a large bowl, combine pudding and milk. Whisk constantly for 2 minutes. Allow to set in fridge for 5 minutes. In a large plastic bag, add cookies and crush with a rolling pin. When pudding is set, add Cool Whip and half the crushed cookies. Stir well until mixture is all the same color. In small plastic cups place 1 TBS remaining crushed cookies. Spoon pudding mixture into another plastic bag, and cut corner off to make a pastry bag. Pipe pudding into plastic cups, filling about 3/4 the way. Top each with about 2 TBS remaining cookies and gummy worms.

~Join me for Tasty Tuesday on Formula Mom~

Shared on Mandy's Recipe Box Oct. 23, 2012
Shared on Lady Behind The Curtain Oct. 24, 2012
Shared on Miz Helen's Country Cottage Oct. 25, 2012
Shared on The Country Cook Oct. 26, 2012
Kids at Very Good Recipes
Pin It

Saturday, July 7, 2012

Weekend Company {Guest Blogger Bekki}

Happy Saturday to all of you. I hope your weekend is off to a good start. Maybe you're still enjoying some time off for the holiday, and if that's the case, lucky you! If you are in the part(s) of the country that are melting, I hope you're finding fun ways to stay cool. However you plan on spending the next 2 days, I'm so glad you decided to make EMM a part of it. This week's guest is a faithful and loyal EMM fan here to share a fantastic cookie recipe with all of us. Please welcome Bekki back to EMM~


Hello EMM foodies! I hope you had a blessed Independence day, that was filled with all your favorite dishes, and hopefully some fun new ones. I want to thank Mrs. Everyday for inviting me back to share another recipe with all of you. So grab a tall glass of milk for this one, your really going to enjoy it with this cookie recipe. And don't forget the different flavors of chips to mix with the butterscotch, or use another entirely.

I am married to my wonderful husband Josh, have a beautiful 12 year old step daughter Amy and 2 furbaby sweethearts Minnie and Shadow. I am a self taught baker/cook. I taught Wilton cake decorating for a while, worked in a grocery store bakery and have even spent time baking wedding/birthday cakes as a hobby on the side. My love for cooking has been since childhood. Spending time with my mother, aunts, and grandmothers. Aiding in their recipes or just being there for the conversation. Its always been a source of calm, peace, and ultimate fulfillment. The idea that you add your love to each recipe and share it with the people you care about is such an amazing blessing to me in more ways then I can ever put on paper. I have decided writing a cookbook was something I could do to share my love of food with family, friends, and whomever else comes my way. I hope your day is blessed with all your favorite things.

This recipe came from a favorite cookie cookbook of mine. Called Incredibly Easy Cookies. It has been changed here and there depending on what ingredients I have on hand. I've used butterscotch with chocolate and even peanut butter chips. Feel free to experiment as I did. They are always a crowd pleaser.

Oatmeal butterscotch cookies
3/4 c. butter or margarine, softened
3/4 c. granulated sugar
3/4c. packed light brown sugar
2 eggs
1 tsp. vanilla extract
1  c. all purpose flour
1 tsp.  baking soda1/2 tsp. salt
1/2 tsp ground cinnamon
3 c. quick cooking or regular rolled oats, uncooked
1 c. (11oz package) Hershey's Butterscotch chips

1 Heat oven to  375

2.Beat butter, granulated sugar, and brown sugar with electric mixer on medium speed in large bowl until well blended. Add eggs, and vanilla; blend thoroughly. Stir together flour, baking soda, salt and cinnamon; gradually add to butter mixture, beating until well blended. Stir in oats and butterscotch chips; mix well. Drop by teaspoons onto ungreased cookie sheet.

3. Bake 8 to 10 minutes or until golden brown. Cool slightly. Remove to wire rack and  cool completely.


Pin It

Tuesday, June 12, 2012

Taekwondo Night Treat

As most of you know, I'm a Taekwondo mom. Actually, I'm a TKD mom and wife. Both Adam and Alex participate in the sport, and love each and every minute! Currently Alex is training for a big competition coming up, and therefore, has extra nights of intense work-outs. Fridays are usually an "optional" day for us, sometimes they go, sometimes they take it off, but in the weeks leading up to a competition, they became mandatory. On this Friday night, they were going to be having pizza upon coming home, and I wanted to give them an extra special treat to have afterwards. I hadn't decided on anything when I remembered the 5 dozen mini chocolate chips cookies a friend had just given us.!!! And oh my gosh, she makes the best ever! But that is a lot of cookies, even for us, so I figured why not do something with them to make them into something even more fun? These would be great for a kid's birthday party or pool party this summer. Nothing says fun like cookies and ice cream! And you could do so many different kinds, letting the kids choose their favorites! My boys really liked their yummy surprise and I hope your family does too!

Mini Ice Cream Sandwiches
Mini Chocolate Chip Cookies
Vanilla Ice Cream
Assorted Sprinkles

Allow ice cream to soften a little. Spoon about a 2 tablespoons of ice cream onto one cookie. Top with another and push down to adhere. Using a butter knife, remove excess from side and smooth out. Put sprinkles on paper plates. Turn each "sandwich" on it's side and roll in sprinkles, allowing them to stick to the ice cream. Place in the freezer to harden for about an hour.

~Join me for Tasty Tuesday on Formula Mom~

Shared on Mandy's Recipe Box June 12, 2012
Shared on Chef in Training June 12, 2012 
Shared on Lady Behind The Curtain June 13, 2012 
Shared on Miz Helen's Country Cottage June 14, 2012 
Shared on The Country Cook June 15, 2012
Dessert at Very Good Recipes
Pin It

Saturday, April 21, 2012

Weekend Company {Guest Blogger Anne}

Good Morning everyone! I hope you had a fantastic week, and however you are spending your weekend, it includes some sunshine and fun along the way. If your family is anything like ours, our weekends are quickly becoming busier and busier as the days get warmer. I am determined to find some time to relax though~ somewhere, somehow! Today's guest is a fellow blogger who you might remember from the holidays when she hosted a fantastic countdown to Christmas on her blog, The Saturday Evening Pot, which I participated in. Be sure to stop by and say hello and visit her on Facebook too.  Please welcome Anne to EMM~


Hi, Everyone!  I'm Anne, also known as "The Lucky Wife", at the blog my husband and I co-author,  My husband, "The Chef", is trained in Culinary Arts by Johnson and Wales University.  So I figure I'm pretty lucky because I don't have to do much cooking in our home (per a deal we made when he went back to school for the degree in Culinary Arts, leaving law enforcement), and I get to taste test all of his culinary creations.
Now, this does not mean all you will find on our blog is fancy foods.  His work schedule does not permit much play time in our kitchen, and our young children do not have the more mature palettes to be able to appreciate the kinds of flavor variations we enjoy.  So you will find a good variety of recipes on our blog, including very basic, everyday family meals, such as Salmon and Sweet Corn Hash, as well as the dishes for the more advanced palettes, such as Peach and Sweet Tea Vodka Glazed Pork Tenderloin.  We've also got some great recipes for side dishes and for those days when you want to throw something in your trusty crockpot and let it cook while you're enjoying life, such as Slow Cooker Shredded Pork with "Skillet Apples".  Be sure you check out our daily paper, full of crockpot recipe ideas and information, The Crockpot Chronicles!  We also offer some kid-friendly food tips and information, like this Easy Toddler Smoothies Recipe (with a tip for eating yogurt mess-free!) and lots of creative lunchbox ideas.
Today I have something special, easy and fun to share with you.  It will be of particular interest for those of you with a child, grandchild or special niece or nephew who loves Elmo.  Both of my children are Elmo fans, and since we love food so much in our home, I got curious one day about what Elmo's favorite food is.  Any guesses?  Pizza!  And since his favorite fruit is banana, I decided to develop a recipe including Elmo's favorite foods, a fruit pizza.  The Chef suggested using strawberries to add some color (presentation!).  The end result was delicious and my children, of course, loved it.

Elmo's Favorite Food: Fruit Pizza with Banana (and Strawberries)
Ingredients:
Sugar cookies (you can make these yourself or buy them already made, the option I chose for convenience)
Vanilla pudding (again, you can make it or buy it already made, again, the option I chose for convenience)
Banana
Strawberries

Instructions:
Spread a layer of pudding over each cookie.  Cut banana and a few strawberries into toddler bite-sized pieces and position as desired on top of the pudding you had spread over each cookie.  Serve!


 Thank you so much, Krista, for having me as a weekend guest to share with your readers.  I know I do not have to tell them what a great resource your blog is for recipes!  I so enjoyed her participation on our 100-Day Countdown to Christmas series last year... check it out if you love Christmas and bookmark it or pin it for great ideas for Christmas this year (it comes quickly doesn't it?).  And thank you to those of you who took time to read what I had to share with you today.  The Chef and I would love to have you visit with us, and if you like what we offer, to become a part of our "foodie family"!


 Pin It

Tuesday, February 14, 2012

For My Little Valentine...

Happy Valentines Day!!! I hope however you are spending today (being a Tuesday, I'm sure most of you, like me, are spending at least the day portion at work, school, or home) I hope you get to at least be w/ those you lost most at some point. I know some say Valentines Day is just a ploy from the card, candy and flower industries, and I agree that we shouldn't need a day on the calendar to remind those who mean so much to us just how much we love them; but I don't see anything wrong w/ setting aside one day per year totally dedicated to love. Let's face it, there is so much hatred in the world today, if one day in February everyone gets a little extra love in their hearts, I say more power to us! Ever since Alex was born, Valentines Day has taken on a new meaning for Adam and I. Yes, we still celebrate w/ each other and yes we do buy gifts, and sometimes we even get to sneak away for a date night, but the day itself and the ideas it represents has been turned into a family day. We usually find some way to celebrate as a family the weekend of, or before, and then the day of, Adam and I enjoy giving Alex his treats as much as we do each others. (By the time you read this, Alex will be the proud owner of some cool new Pirates of the Caribbean action figures, Pirate book and a few other treats!) These would make a great after school treat for your little Valentines! Of course, Monkey was able to taste test these last week so that I could bring them to you today, and he would definitely agree that your kiddies would be so excited to have these waiting on them after school. So, Happy Valentines Day~ Take a minute to tell those you love how much your heart sings when they are around, and how you couldn't live without them. No matter how big or small they are!

Cupid Cookies
1 package chocolate cream cookies (Try to find one w/ 3 rows of cookies)
1 (12oz) package white chocolate chips
1 TBS shortening
Red food coloring
Sprinkles

In a glass bowl, combine chocolate chips and shortening. Microwave for 1 minute. Stir to melt. If not melted, heat for 30 seconds more. For the first row of cookies, use white as it. Dip one side of cookie only by angling it towards the chocolate. Let excess drip off. Add sprinkles. Place on parchment lined cookie sheet. For second row, add 3 drops of food coloring to get pink. Continue w/ dipping. The last row, add more coloring until you have a red color. Dip these. After all cookies are dip (or even between colors) place in freezer for 5 minutes to set. Remove and store in air tight container.
*NOTE* These would be great for the kids to help w/ too. Just divide chocolate after microwaving into 3 bowls for white, pink and red. If the chocolate gets too thick while dipping, microwave for another 30 seconds and stir. Keep heating until soft again.

~Join me for Tasty Tuesday on Formula Mom~

Shared on Mandy's Recipe Box Feb. 14, 2012
Shared on Celebrating Family Feb. 14, 2012
Shared on Chef in Training Feb. 14, 2012

Cookies at Very Good Recipes
 Pin It

Saturday, January 28, 2012

Weekend Company {Guest Blogger Tina}

Yay, it's the weekend again! I don't know about you, but I would like to start a petition to make the weekend 5 days long and the work/school week on the short end with only 2 :) I don't see the problem, do you?? My gust in the kitchen today has been here once before, and I'm so happy to have her back. Please welcome for the second time, Tina from Sugar Bean Bakers~


Hi, my name is Tina from Sugar Bean Bakers
I'm a graphic designer with a passion for photography and I have a huge crush on flour. And sugar. And cocoa. And butter. Oh... butter.
I began blogging last year at the suggestion of a friend. Well, actually her husband suggested that I start a blog. I had been baking and posting the resulting photos and recipes on Facebook until that time. I try to present fun and easily achievable recipes. No Martha Stewart ingredients here! Just regular stuff that regular people like showcased with step by step photography.
Baking and I have a long history. I'm a farm girl, and grew up very involved in 4-H. I took cooking as a project many years. I baked and cooked with my mom growing up, and even after I got married. Once married, I continued to bake until I had my son. At that time, it seemed easier to just reach for those place and bake cookies than to make something from scratch. I still baked, but usually just for holidays and special occasions.


A couple years ago I stumbled upon Bakerella's blog. From there, things changed. I suddenly remembered what I used to love about baking.
Now, I bake two times a week, at least. I bake on Sunday nights to have treats for lunch boxes, and on Wednesdays, when I send the goodies to the Bean's youth group.
Who is the Bean? Oh, I'm glad you asked. Since my son, now 14, was very small, I have called him "Sugar Bean". I told him should I ever open a bakery (very unlikely), I would name it either The Sugar Bean Bakers or The Sugar Bean Bakery. I needed a name for my blog and it just seemed right. However, there's no Bakery to speak of... so... Sugar Bean Bakery was out. Sugar Bean Baker sounded odd... so... that was out. Sugar Bean Bakers it is, even if there is but one baker. Of course there will also only ever be one "Sugar Bean" in my life :)


So, let me tell you about Peanut Butter Blossom cookies.

For years, I had convinced myself that these were called Peanut Butter Kisses.

Incorrect.

Peanut Butter Kisses are those black and orange wrapped peanut butter taffy that old ladies give on Trick or Treat.

And that no one likes.

I remember getting those on Trick or Treat and thinking, “trick, definitely trick.”

That and boxes of raisins. And pennies.

What was with the pennies?

Pennies.. me no likey.
Snickers? Me likey!

Peanut Butter Kisses? Nay.
Peanut Butter Blossoms? Yay!

So, that is what I’m making today.

You’ve probably all made these a time or two. Or a hundred.

You probably even have your own favorite recipe.

I’m showing you mine though. You, of course, can substitute your own if you wish it.
These are updated for Valentine’s Day. I saw the idea on Pinterest, which I tracked back to this site, eighteen25

Sadly, I wasn’t clever enough to come up with this on my own.

Woe is me.

Heart shaped chocolates in place of the kisses. Total brill.
Yeppers.

Now, you’ll see residing there in the middle of these puffy peanut butter cookies lies Dove chocolates.

Confession #1: I don’t like Dove chocolate.

GASP!

I know so many people out there, including the Bean, LOVE Dove. Dove is 2nd on the Bean’s list, only after Godiva.

I, however, prefer Hershey’s. True story.

Confession #2: I love Peanut Butter Kiss Blossom Cookies, but I pop the chocolate off and eat it last!

I never eat the chocolate AND the cookie together.

Is that odd? Please reassure me that I’m not the only weirdo person out there that does this!

My unlike of Dove aside, these are SUPER DE DOOPER cute, yes?

No worries, I’ll just pop the chocolate off and feed it to the Bean. I doubt he’ll object.

You can roll these in pretty sanding sugar, if you like:
to get cookies like this: 

If you want, you could tint the dough with red gel food coloring.

I didn’t take that route today though. Maybe some day I’ll travel it.

I, personally, think they are prettier nekkid.

So stop yapping and get to the recipe, eh?

Alrighty then, the recipe I use is from Pillsbury.

Peanut Butter Blossom Cookies
1 3/4 cups all purpose flour
1/2 cup sugar
1/2 cup firmly packed brown sugar
1 teaspoon baking soda
1/2 teaspoon salt
1/2 cup shortening
1/2 cup peanut butter
2 tablespoons milk
1 teaspoon vanilla
1 egg
Sugar
48 Hershey's® Kisses® Brand milk chocolates, unwrapped (or in this case, heart shaped chocolates)
Heat oven to 375°F. In large bowl, combine flour, 1/2 cup sugar, brown sugar, baking soda, salt, shortening, peanut butter, milk, vanilla and egg; mix with electric mixer on low speed until stiff dough forms. Shape dough into 1-inch balls; roll in sugar. Place 2 inches apart on ungreased cookie sheets.  Bake at 375°F. for 10 to 12 minutes or until golden brown. Immediately top each cookie with 1 milk chocolate candy, pressing down firmly so cookie cracks around edge; remove from cookie sheets.
I made some of mine larger (you can see one in the photo with the colored sugar), and baked for the larger for 12 minutes. The smaller (normal size) I baked for 10. 

The chocolate will keep its form, but will take at least a couple hours to set back up, so be sure not to touch it. 


Make some for your sweeties for Valentine’s Day, you know you wanna!

Oh, and be sure to visit eighteen25 and tell them I sent ya, lots of fun ideas there.
Pin It