Everyday Mom's Meals: 2015
_____

Wednesday, December 30, 2015

Our New Year's Eve Tradition

If you've been reading EMM for any length of time now, you are well aware of how the Marshall family likes to ring in the New Year every December 31st. For those of you who have joined our little blogging family since last NYE, let me explain.

Ever since Little E was about 6, our annual tradition is to stay home, inside where it is warm, and safe off the roads, wear our pjs, watch movies, and eat ALL night long. I put out a huge buffet of appetizers (or nibbly bits as the boy calls them) and we make an entire meal out of them, for hours. And when I say huge, I'm talking enough to feed an entire house full of party guests, but just for the 3 of us. It's become such a special little tradition for us, and we look forward to it so much. It's a terrific way to finish out the holiday season.

So every year I try to come up with at least one new dish to add to the menu, and start testing them out in about mid November. This is the new addition for 2015.

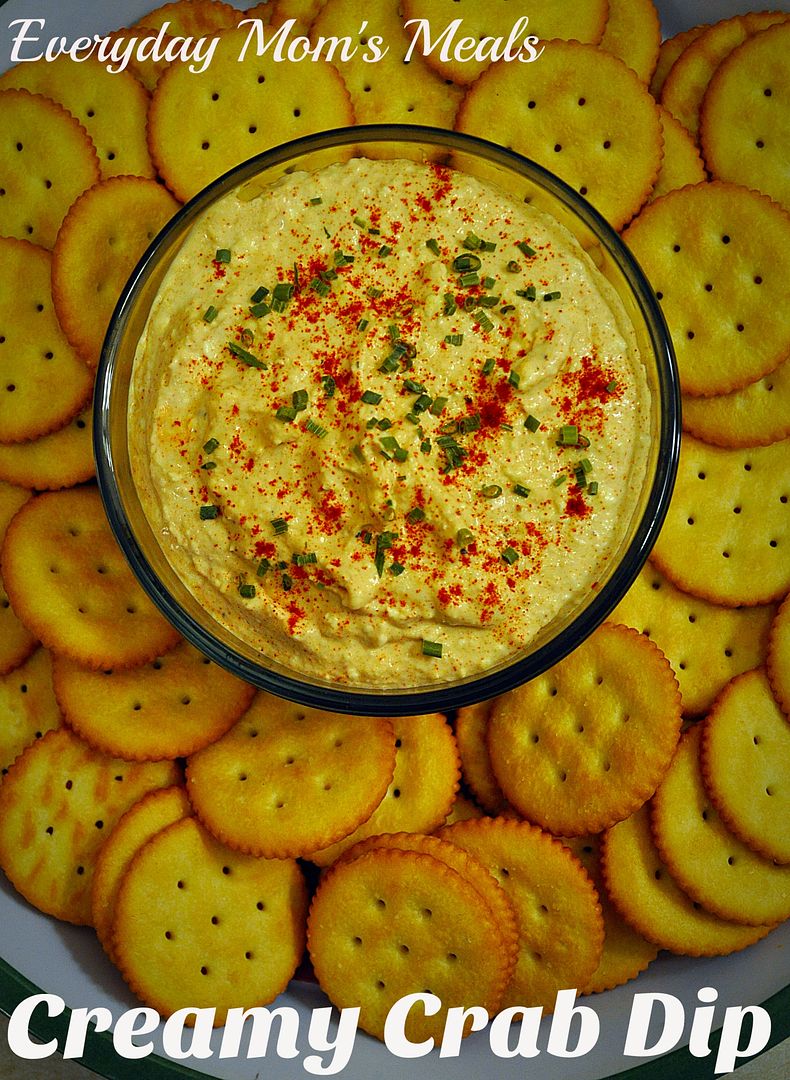
No party is complete without a tasty dip, and this one combines that notion with another favorite of ours, crab! Perfect for a platter of crackers or even some pita chips! Plus you can make it ahead of time and keep it in the fridge until party time.

However you are welcoming in 2016, I hope it's in a fun, safe and of course yummy way! May the New Year bring you all the happiness and joy you can hope for!

Creamy Crab Dip
1 (6 oz.) can crab meat, drained and cartilage removed
8 oz. cream cheese, room temperature
2 TBS mayo
1 tsp. Dijon mustard
1 tsp. lemon pepper seasoning
1/4 tsp. garlic powder
2 tsp. paprika, extra for garnish
1-3 tsp. horseradish, to taste
Salt and pepper, to taste
Dried chives, for garnish

In a medium bowl combine cream cheese, crab, mayo, mustard, lemon pepper seasoning, garlic powder, salt and pepper. Beat with electric mixer on LOW for 1-2 minutes, just until combined. Stir in horseradish. Chill for 1-2 hours. Add paprika and stir to combine. When ready to serve, sprinkle with extra paprika & chives. Serve with crackers or veggies. 


Friday, December 18, 2015

From Our Family to Yours...

I can't believe we only have one week left. That's right, only 7 more days until the most magical day of the year is upon us. Are you caught up in the holiday hustle and bustle? Are you done and able to take a minute and enjoy the sights and the sounds of the season? Either way, this next week will no doubt go by in the blink of an eye. 

Since we begin Christmas vacation from school today, I will be taking next week off to spend with little man and get every last drop out of our holiday as I can. I will be back the week of New Year's to share a great appetizer for your New Year's Eve bash; but until then, I thought it would be best to leave you with a simple, yet totally inspired Christmas dessert. 

Candy canes at Christmas are like jellybeans at Easter. They are truly this season's mascot candy. And now you can have the same flavor, in a super simple, yummy sweet treat you can easily add to your holiday menu! It could easily be made for a few or a lot, and your guests will love it! 

I hope this is your most magical holiday season to date, and you get to spend it with those whom you love most in the world. From our family to yours...

Merry Christmas!!!

Candy Cane Fluff
24 large marshmallows
1/2 c. half and half
1 tsp. vanilla
1/4 tsp. peppermint extract
1 (8 oz.) tub Cool Whip
Red Food Coloring
Crushed Candy Canes

Combine half and half and marshmallows in a medium saucepan over low heat. Cook, stir constantly, until marshmallows melted and mixture is combined and smooth. Remove from heat. Add vanilla, peppermint and food coloring. Chill for 10 minutes. Fold in Cool Whip. Top with crushed candy. Chill until serving.


Shared at Weekend Potluck
 

Wednesday, December 16, 2015

Unique Christmas

I actually tested this recipe few weeks ago, and wasn't even sure when I was going to share it with all of you. During this time of year, we food bloggers try really hard to provide you with terrific, tasty ideas for Christmas, so when we test recipes that don't necessarily fall into the category, they sometimes have to wait to be posted, or at least that's how it works for this food blogger.

But then last night a friend of mine posted on Facebook that her family was looking for something new for their Christmas day feast. They are growing tired of the traditional ham or turkey, and she was looking for ideas to start a new tradition. As I was reading the comments, I was shocked at how many responded with "We do Mexican for Christmas." Some said it's what they have on Christmas Eve after church, others said they've made a big Latin inspired spread on Christmas day, and a few said they too were looking for something new this year, and Mexican is what they had decided on.

Well, I'm not going to lie, my mind was blown a little. Don't get me wrong, we've enjoyed some not so traditional meals as well, I just didn't realize how many out there turned to tacos and enchiladas after opening gifts, that's all. So it was at that moment I decided this recipe did indeed need to be share now, in the holiday spirit, or to be saved until after!

If your gang loves cheese, these will become a new favorite. If your gang loves green chilies, these will become a new favorite. If your gang loves beef burritos, these will become a new favorite. If you love super simple meals that fill them up without too much effort, these will become a new favorite. Yep, they will do all that and so much more!

Seriously though, the cheese sauce? I might make it again, by itself, and just put a straw in the pan! No joke, that's how good it is!

If you are looking to switch up your holiday routine, and are giving into your Mexican cravings, but still want something new, here you go! Or if you're going to be enjoying the standard ham or turkey, but definitely want something new and tasty to ring in 2016, that is what the save button is for!

Cheesy Beef Burritos
1 (12 oz.) can evaporated milk
1 (4 oz.) can diced green chilies, undrained
8 oz. shredded sharp cheddar cheese, divided
1 lb. ground beef
1 (15 oz.) can black beans, rinsed and drained
1 red bell pepper, thinly sliced
1 orange bell pepper, thinly sliced
1 medium yellow onion, thinly sliced
10 8" flour tortillas, slightly warmed
1 tsp. cumin
1/2 tsp. garlic powder
2 TBS butter
Salt and Pepper to taste
Dried Chives

Preheat oven to 350. Heat butter in large skillet over medium high heat. Add peppers and onion. Saute until tender. Add beef. Cook until no longer pink. Season with cumin, garlic powder, salt and pepper. Add black beans. Stir to combine. In a small sauce pan combine evaporated milk, chilies and 1 c. cheese. Heat over medium heat until cheese melted and well combined. Season with salt. Fill each tortilla with beef mixture. Add shredded cheese. Roll up, tucking in sides. Place in a lightly greased 9 x 13 pan. Pour cheese sauce down over burritos. Sprinkle with chives. Bake for 20-30 minutes until set and slightly browned. *NOTE* When you are rolling burritos, don't feel bad if they fall apart a little bit, the cheese sauce will cover it up! 


Monday, December 14, 2015

Red Potato Facelift

Are you potatoed out? Yeah, me either. I can't help it. We love us some taters and we will take them any time any way. Now, that's not to say I don't enjoy finding new ways and switching up our tater routine!

With the holiday season in full swing, (If you haven't looked at the calendar lately, there are only 11 days until Christmas.) you might be desperate for an easy side dish for a weeknight meal. Or maybe you have your own version of Cousin Eddie and already have house guests to feed, who won't be leaving until the New Year! Or maybe you want potatoes on your holiday feast menu, maybe with some ham, and you are looking for something new to try. If any, or all of those apply, you're going to be so happy you logged on today!

The flavors of lemon and rosemary are so classic, I can't believe I never thought to use them on potatoes before. So bright. So unique. They really brighten up an every day dish and bring your taste buds back to life.

These are as pretty as they are tasty and would look terrific on your Christmas table! They might be the one thing your guests all say "hmm...what is that" when they take the first bite! Oh, and if you're feeding a crowd, they would be easy to adapt (This amount would feed 4-6) and still stay on budget, being so economical!

So many of us turn to the classics during the holiday entertaining season, but we can also take those tried and true favorites, give them a little face lift and create something new to become a tasty tradition.

Lemon & Rosemary Roasted Potatoes
12 red potatoes, quartered
5 TBS lemon juice
8 teaspoons olive oil
1 tsp. dried rosemary
1 tsp. garlic salt
1/4 tsp. pepper 
Salt to taste
Dried Parsley

Preheat oven to 450. Spray a large rimmed baking sheet with nonstick spray. Place potatoes in a large bowl. In a medium bowl combine 4 TBS lemon juice, olive oil, rosemary, garlic salt and pepper. Whisk to combine. Pour over potatoes. Stir well to coat. Transfer to baking sheet. Sprinkle with salt and extra pepper, if desired. Add dried parsley. Bake for 45 minutes-1 hour until fork tender and golden, stirring a couple times. Remove to serving bowl and drizzle with 1 TBS lemon juice. 


Friday, December 11, 2015

Christmas Baking

So what do you do when you aren't much of a baker, and the biggest baking season of the year rolls around? Well, you suck it up, find some simple recipes you know even you can't screw up and get into the ho-ho-ho, fa-la-la-la spirit! 

Yes, that's right, even after over 5 years of doing this blog (Hard to believe!) I still do not consider myself much of a baker. Sure, I can do it, but it just isn't "my thing". There are just things I enjoy more in the kitchen. But if you've been following me for a while now, you know the one thing I do enjoy baking, and have become kind of an expert at, are muffins

This time of year I have some favorite flavors and favorite smells. For flavor, I can't get enough peppermint. It just makes my tongue feel Christmas-y. And for smells? Ginger, cinnamon...basically gingerbread. Oh, the house just smells like a holiday when you've got some gingerbread baking in the oven. So when a friend, who knows my love of all things "spicy" this time of year, passed these on, I couldn't wait to make them!

They are so much more simple than old fashion gingerbread, are ready in almost no time, and still give you all those same festive flavors. Oh, and they just happen to be the perfect dessert, breakfast, snack, or even teacher/neighbor gift!

What are your favorite things to bake this time of year? Do you go the easy route or maybe you have some tried and true recipes that are a little more labor intensive? Either way, make sure you are doing things you love, with those whom you love the most, for it truly is the most wonderful time of year.


Gingerbread Muffins
2 c. all purpose flour
1/2 c. molasses
1/4 c. packed brown sugar
1 egg
1/3 c. vegetable oil
1/3 c. milk
1 tsp. ground ginger
1 tsp. baking powder
1/2 tsp. cinnamon
1/2 tsp. baking soda
1/2 tsp. salt
1/4 tsp. allspice
Decorating Sugar Crystals, I like gold

 Preheat oven to 400. Line a muffin tin with papers, or grease bottoms only. In a large bowl using a wooden spoon, beat together molasses, brown sugar, egg, milk and oil until well combined. Add flour, ginger, baking powder, baking soda, cinnamon, salt and allspice. Stir until mixture is combined, but do NOT over stir. Divide mixture among 12 wells evenly. (I used a cookie scoop and it was 2 scoops each.) Sprinkle with sugar crystals. Bake for 18-20 minutes until toothpick comes out clean. Cool completely on wire rack. Makes 1 dozen.


Shared at Weekend Potluck
Recipe from Betty Crocker

Wednesday, December 9, 2015

Exhaustion

For those of you who didn't know, my poor mom has been in the hospital for over a month now. What started as a simple foot surgery back in July ended with her in the ER on November 8th with a serious infection and sepsis. We were very lucky they caught it when they did, and are very thankful to the wonderful doctors, nurses and hospital staff who worked so hard to get her into the healing process.

Needless to say, it's been a long month in our family, and for me, it has meant running back and forth to the hospital at least once per day, sometimes more. Don't get me wrong, I am more than happy to do it. She's my mom. I love her. I adore her. I want her better. But that doesn't take the fact away that between the running around, the extra work, the mental fatigue....I'm exhausted. Again, happy to do it; just sleepy most days.

So when it comes to meals these days, my "it needs to be quick and yummy" mentality is in over drive. We need them now more than ever. I want to be with her as much as I can, but I also have to make sure my family is fed. It has become quite the balancing act, let me tell you. But when I come up with delicious meals like this one, it makes it worth it!

We love cabbage. Can't get enough of the stuff. I probably incorporate it into our menu plan at least once per week, or once every other. This is a new twist on my classic Cabbage Roll Casserole. A lot of the same element, but still different enough to taste like something new.

If you're in the holiday rush, you are probably exhausted too. Or maybe you are already thinking ahead to how you are going to feed those house guests in a couple weeks. This would work perfectly for either of those scenarios.

And if you have an extra minute, and an extra prayer or well wish laying around, please lift my mama up...we are keeping our fingers crossed the progress she has made continues and we will get to have her home by Christmas.

Sausage & Cabbage Bake
1 lb. mild Italian sausage*
2 c. cooked long grain white rice, NOT instant
1 medium head of cabbage, thinly sliced
1 medium yellow onion, chopped
1 (15 oz.) can tomato sauce
1 TBS brown sugar
1 TBS lemon juice
1 tsp. Worcestershire sauce
1/2 tsp. seasoned salt
Salt and Pepper to taste
Dried Parsley

Preheat oven to 350. Grease a 9 x 13 baking dish. In a large skillet brown sausage and onion until no longer pink. Drain if necessary. Add cabbage and cook until slightly wilted. Add rice and stir to combine. Season with salt and pepper. Transfer to baking dish. In a medium bowl whisk together tomato sauce, brown sugar, lemon juice, Worcestershire, seasoned salt and pepper. Pour over casserole. Spread evenly. Sprinkle with parsley. Bake uncovered for 1 hour until cabbage tender. Stir before serving. Garnish with extra parsley. *NOTE* You can add spice by using hot Italian sausage. 


Shared at Weekend Potluck


Monday, December 7, 2015

Smaller Holiday {A Post for Earth Fare}

All of your family members gathered around a huge table of food. House guests filling your home from December 20th until after the New Year. Holidays spent with those whom you love most in the world. For many of us, these are the images that come to mind when we think about Christmas...even if it isn't the reality. Sure, we would all love to be with every single family member at some point over the holiday season, but for most of us, it just isn't practical.

Many of our families are spread all over the country, and getting everyone in the same place to celebrate can't happen. I know many families who will only have a few people at their Christmas table. In fact, mine is kind of like that. We spend Christmas Day with my parents, just the 3 of us. So that makes 5. It is normal for us, and our little group is perfect to us, but so many out there will have that or even less. Now, for us, we still make a huge spread, but if you aren't in the mood to roast a 15 pound turkey for just a few people, I think this would be an incredibly delicious alternative.

There were a few years when it was just my mom, dad and I, and we had a roast chicken on our table. About 4 pounds, just enough for the three of us, but juicy, flavorful and just as festive. If only mom would have had a Crock Pot. She could have done this instead, and totally cut down on the stress of "If the chicken cooks at this temp, but this ____ cooks at that temp, how do I make it work."

This is some of the most tender and moist chicken I've ever made at home. And yes, before you ask it really does taste like those store bought rotisserie chickens we all enjoy so much. With this, some mashed potatoes, a veggie, cranberry sauce, rolls and dessert, and your smaller holiday meal can be complete and just as holly jolly its huge counterpart.

Not having a house full of people might be a little different than what some are accustomed to this time of year, but the smaller, more intimate holidays can be just as fun, special and of course, yummy!

Crock Pot Rotisserie Style Chicken
1 (4-5 lb.) roasting chicken, patted dry
3 tsp. kosher salt
1 tsp. paprika, plus extra for sprinkling
1 tsp. onion powder
1 tsp. garlic powder
1/2 tsp. dried thyme
1 tsp. Italian seasoning
1/2 tsp. black pepper
Dried Parsley

Spray 6 quart crock pot with nonstick spray. In a small bowl combine all ingredients except chicken and parsley. Rub chicken thoroughly with mixture, including inside cavity. Using string or metal prongs, attach legs and wings to body of chicken to ensure it staying together. Place in crock pot. Sprinkle with extra paprika. ADD NO EXTRA LIQUID. Cook on LOW for 6-8 hours. When done, baste with juices and sprinkle with dried parsley. *NOTE* Mine came out perfectly golden brown and crispy, but if yours does not, just transfer to a baking dish and broil for 5-7 minutes.


Shared at Weekend Potluck

Friday, December 4, 2015

Christmas Memories

Growing up, until about the age of 13, we spent every single Christmas in the snowy hills of Pennsylvania. We would pack up the car and spend 2 weeks with our family, enjoying every last festive minute the holiday had to offer. Both sets of my grandparents lived there, and those Christmases were some of the best memories I have. To this day I can't hear "No Place Like Home for the Holidays" and the line "I met a man in Tennessee, and he was looking for Pennsylvania and some homemade pumpkin pie...." without tearing up remembering them.

Both of my grandmas were exceptional cooks and each one had their own special dishes they always made for Christmas. I had my favorites from each of them, and these were always at top of my list from Grammy. She made them every single year, only at Christmas, and I always looked forward to them. In fact, to this day, even at the age of 90, she still makes them and makes sure I have some in my fridge this time of year.

They are one of the easiest holiday treats you can make, but also one of the most festive looking and flavored too. It doesn't get much more Christmas-y than red and cinnamon!

Memories of Christmases gone by are so special to me. Of course we are always making new ones with our little boy, and I'm always looking for ways to share some of what I had with him. Food is one of the easiest way to do that, so of course, these are one of his favorites too!

Cinnamon Apples
As many apples as you want to make, peeled, cored and quartered
1/4- 1/3 cup cinnamon candies (use more or less depending on how "hot" you want them)
1/2 cup sugar
1 1/2 cups water
Mix together candies, sugar and water. Bring to a boil and add apples a few at at time boiling for 1-1 1/2 minutes. When all done cooking apples, pour liquid over apples and add a dash of red food coloring. Store in a air tight container in the fridge.


Shared at Weekend Potluck

Wednesday, December 2, 2015

Christmas at Grandma's Day 2

Did you catch Monday's post? It was a terrific festive veggie salad that would be beautiful on your holiday table. And today I'm sharing what would be a tasty main dish alongside it!

I'm kind of a chicken addict. I love it any and all ways, and if it weren't for husband I wold more than likely cook it multiple times per week. But as it is, he isn't the biggest chicken fan in the world, so I try to limit myself to once every week, or even every other. And when I do make it, I know he will be more likely to enjoy it if it's white meat. While I love the flavor of the dark, he is the exact opposite.

So when I saw this recipe in Christmas at Grandma's, I knew it could be a happy compromise for us both. Now, I will admit I'm not a fan of breaded baked chicken. It's not my first choice because I am always afraid of it coming out mushy or bland or both, but with this recipe neither is a worry!

This comes out with a crispy outside, tender and juicy inside and flavor galore! If you're going to be entertaining holiday guests, this would be a great choice. Simple and quick for the host and delicious for your guests.

We can all use more chicken options, rather it be for the holidays or a weeknight meal. Oh, and you can have a chance to win a copy of this new Gooseberry Patch cookbook too! Just click here to enter!

Zesty Baked Chicken
3-4 boneless chicken breasts, patted dry
1/4 c. butter, melted
1/4 tsp. garlic powder
1/2 c. bread crumbs
1/4 c. grated Parmesan cheese
1 tsp. dried oregano
1/4 tsp. paprika
2 tsp. dried parsley
Salt and Pepper to taste

Preheat oven to 350. Season chicken with salt and pepper. In one shallow dish combine butter and garlic powder. In another mix together bread crumbs, cheese, oregano, paprika, parsley, salt and pepper. Lightly grease a 9 x 13 baking dish. Dip each piece of chicken in butter and then cover in bread crumbs. Shake off excess. Place in baking dish. Cover. Bake for 45-60 minutes. Uncover and bake for 15 more minutes. 


Shared at Weekend Potluck

Tuesday, December 1, 2015

Gift Idea with Fairytale Brownies {A Feature}

Happy December! How did that happen? Wasn't it just Halloween? Regardless, the most wonderful time of year is upon us, in full swing! 

Today I'm sharing with you a terrific idea for anyone with a sweet tooth on your gift list from my friends at Fairytake Brownies.

Fairytale Brownies mail order company has been baking brownies since 1992. Every batch is made by hand using a secret family recipe. The brownies, cookies and bars are all natural, baked with the finest ingredients, individually wrapped and certified kosher dairy. 

For this holiday season the folks at Fairytale have chosen bright, beautiful colors for their festive packaging, with snowflake, holly branches, berries and garland for accents.

I can tell you first hand these boxes are as beautiful as the sweet treats are tasty. There are a ton of various flavors to please every palate, each one more delicious than the last. 

Imagine this gorgeous gift showing up on your loved one's front step this holiday season. What a scrumptious way to brighten their holiday season! I think it would be a perfect "go together" gift if you and siblings, or cousins are looking to treat a special parent or grandparent. 

For more info, and ordering, visit Fairytale Brownies today!


Monday, November 30, 2015

Christmas at Grandma's {A Gooseberry Patch Review & Giveaway}

Oh, Christmas time at grandma's. My childhood is filled with so many memories of such special times in the snowy hills of Pennsylvania at both of my grandmas' houses I can't even begin to tell you how much they mean to me. Waking up on Christmas morning while it was still dark to see what Santa had left under the tree, going to Christmas Eve church, all the smells of my favorite treats, family gathered around...seriously, I tear up just thinking about it. To me, those holidays of years gone by will always be some of my favorite ones.

And now, my good friends at Gooseberry Patch have made an entire book out of the idea of Christmas at Grandma's. For many of us, there are some Christmas time dishes that nobody will ever make as good as grandma. No matter how many times we try, or how close we come, we will never be able to recreate exactly how they taste when grandma made them.


This book is a fantastic collection of all sorts of delicious things to enjoy this holiday season. From main dishes, to sides, to of course the sweets, each page is more delectable than the last.

When I first saw this recipe it reminded me of my Grammy's broccoli salad, which was always on our Christmas Eve menu, so I immediately got a warm fuzzy feeling thinking about it. I love the addition of cauliflower to this one, not to mention it is so pretty on a plate, filled with holiday colors.

Whatever you are planning to serve this holiday, this would be a fantastic side dish alongside it. Plus, if you have to make something and travel with it, this would hold up very nicely. With the dressing not being very "wet", the veggies stay nice and crisp even after sitting for some time.


If you have wonderful memories of Christmases gone by at your grandma's house like me, I hope you feel as blessed as I do. Or maybe now you are the grandma, and you want to make sure you are making those memories for the little ones to hold on to for years to come!

Oh, and you can win a copy of Christmas at Grandma's too! Just scroll down to see how to enter!

Festive Broccoli & Cauliflower Salad
 1 medium head cauliflower, finely chopped
2 medium broccoli crowns, finely chopped
1 red bell pepper, finely chopped
1 (3.5 oz.) bag dried cranberries
1 (2.5 oz.) bag real bacon bits
1/2 c. plus 1 TBS mayo
1/2 c. white sugar
1 TBS ranch dressing mix
Salt and Pepper to taste 

In a large bowl combine broccoli, cauliflower, red pepper, cranberries and bacon bits. Toss to combine. In a separate bowl whisk together mayo, sugar and ranch dressing mix. Add to vegetables. Stir to coat. Season with salt and pepper. Chill 1-2 hours before serving. Stir before serving.


*** GIVEAWAY ***

To Enter: Leave me a comment telling me your favorite Christmas time dish that Grandma made best! Be sure to leave an email address so I can find you!


Open to US Residents 18 and over


Contest Ends: December 10, 2015 


Shared at Weekend Potluck

Wednesday, November 25, 2015

Happy (Almost) Thanksgiving!

You've got 24 hours people! I hope the turkey is almost thawed, the menu is planned and the house is cleaned because they are coming! Your guests and their big appetites will be knocking on your door, ready to make more holiday memories.

Have you got the entire meal planned out? Prepped? Maybe even some of it cooked ahead? If so, high *5* to you! That is how I like to do it too! But maybe a few of you are still looking for one more dish to add to your Thanksgiving feast. Or maybe you aren't hosting, but instead need something to take with you that is both easy and travel friendly. If either of the latter apply to you, your friendly EMM is here to help!

Thanksgivings of my childhood were always spent at my Grammy's in Pennsylvania. These are meals that still live in infamy to this day. We are talking about her cooking and baking for up to two weeks before, and putting out a meal fit for a king. The first time I ever took Mr. E to one of these holidays, while we were still dating, he could not believe the amount of food. It was normal to all of us, impressive yes, but what we had come to expect. But 15 years later, he still tells our son the story about how it was more food than he had ever seen on one table; and how he ate so much he literally could not move after. 

Those holiday meals always included our favorites she knew we loved, plenty of sides, and always at least one "sweet salad" as I like to call it. You know the ones. They are sweet enough for dessert, but you serve them as a side, call them a salad, and then you can still have pie for dessert. 

In that spirit, I knew this would be the perfect recipe to share today. I've been wanting to try it for a while now, but figured Thanksgiving Eve was the most appropriate time. Not only will it look beautiful on your table tomorrow, it includes one of the ambassadors of Thanksgiving foods...the cranberry

You could easily whip this up tonight and just let it chill until it is time to eat tomorrow, or grab it and go before you walk out the door.

Those Thanksgivings I remember with such love, and happy memories will always be the ones I try to emulate now with my family. And while I may not have the Pennsylvania snow, or Grammy's mad baking skills, I can include things like this on my menu, and eat with a smile.

Cranberry Fluff
1 (12 oz.) bag fresh cranberries
1 (12 oz.) tub Cool Whip
1 c. crushed pineapple, drained
1 large Red Delicious Apple, chopped
1 c. sliced red grapes
1 c. chopped pecans, a few for garnish
2 c. mini marshmallows
1 c. white sugar

In a food processor, pulse cranberries until finely chopped. Transfer to a bowl. Add sugar. Stir. Chill for 2-3 hours. Add pineapple, grapes, apple and pecans. Stir to combine. Fold in Cool Whip and marshmallows. Chill for at least 1-2 hours to set. Garnish with extra pecans. *NOTE* I like to leave the skin on my apple because 1. the red color is pretty and 2. it helps to keep it from browning.


Shared at Weekend Potluck
Shared at Meal Plan Monday
Recipe from Six Sisters' Stuff

Monday, November 23, 2015

Slow Cookers and Friends

Oh, how excited am I??!! I have been looking forward to sharing today's post with ya'll for a while now! See, my dear friend Judith aka The Midnight Baker has published her very first cookbook, and it is a winner, with a capital W! Plus, I am so incredibly honored that she not only included a recipe of mine (Chicken and Noodles page ) but also had the nicest things to say about our friendship, and even asked me to include a quote on the back! I feel so important!


The Classic Slow Cooker is filled with recipe after recipe that you are going to love! So many of us are looking for ways to use our slow cookers more and more, and I would bet money many of you will want to try every single dish Judith has included.

When I started flipping through its beautiful pages, I was immediately drawn to this recipe. One because I make nothing in my slow cooker as much as soup. It is definitely my go-to this time of year. And two, because it was a bean soup! Bean soups are incredibly economical, hearty, and are great heated up on day two and three. Mr. E takes leftovers to work most days for lunch, so when I can make a meal stretch throughout the week for him, it's an added bonus! I tweaked it a bit to fit our tastes and what I had on hand, but would eat it the original way just as easily!

This is a terrific meal for those bitter cold days when you just want to come home to something warm that will fill you up without much work. Put it together in the morning and come home to a comforting bowl of deliciousness. Add some crusty bread and supper is served!

Oh, and the other fantastic thing about my friend Judith? She made sure I got 2 copies so I could give one away to a lucky EMM reader! Just scroll down after the recipe to see how you can win!

Slow Cooker 
Hearty Northeast Bean Soup
2 c. northern beans
2 c. smoked sausage, chopped
3 carrots, diced
1 small onion, diced
1/2 tsp. dried basil
3 celery hearts, diced
4 c. vegetable broth
Salt and Pepper to taste
Dried parsley

Cover beans with water and soak overnight. Rinse and drain well. Add to slow cooker. Add all other ingredients. Stir to combine. Cook on HIGH for 2 hours and LOW for 8-10 until beans are tender. Garnish with parsley before serving. 


***GIVEAWAY***

To Enter: Simply leave a comment telling me your favorite slow cooker soup.Include an email address so I can find you!

Bonus Entry: Like The Midnight Baker on Facebook

Open to US Residents ONLY 18 and older

Contest Ends:  November 30, 2015


Wednesday, November 18, 2015

Holiday Nibbly Bits

Appetizers. Who else out there could make an entire meal out of them? Yeah, me too! At parties, I'm usually the one that gets so full on all the pre-meal snacks I'm not even hungry by the time the main dish arrives. In fact, our whole family is that way. Many of you long time readers remember our annual New Year's Eve tradition of a huge appetizer buffet we eat off of all night long.

So, with the holiday entertaining season almost upon us, it is time to start thinking of some new "nibbly bits" (that is what Alex has always called appetizers) to enjoy from Thanksgiving until the ball drops at midnight on Jan. 1st. Sure, we all have our favorites, our go-tos, but I'm always looking for new ideas, or ways to make ones I already rely on even easier.

The latter is the inspiration behind these. I love a good cheese ball. What's not to love? Cheese. Nuts. The end. And one of my all time favorite ones has green olives on the inside. But what happens when time simply gets away from you and the forming of the ball, and covering in nuts, and allowing it to set...just isn't in the cards? You take all the same flavors and do this instead!

These little cracker bites taste just like they are supposed to but can literally be done in about 10 minutes, especially if you utilize your food processor like I do.

The holidays were meant for gathering around those we love most in the world, and enjoying some terrific food. Starting next week with Turkey Day, there will be so much of that, and I for one am incredibly thankful.

Olive Cheese Ball Bites
1 (10 oz.) jar green olives, drained
1 (8 oz.) cream cheese, room temperature
2 TBS dried chives
1 TBS dried parsley
Crackers
Pecan Halves

In a food processor, pulse olives until finely chopped. Add cream cheese pulse until combined. Scrape sides. Remove to bowl. Add chives and parsley. Stir well. Scoop onto crackers. Top each with pecan halve. Chill until ready to serve.


Shared at Weekend Potluck

Monday, November 16, 2015

Leftover Turkey....Hold The Leftover

Nine days people. That's all. Til what? If you're asking that, you might want to look at your calendar...right now! Because we've only got a little over a week before the big Thanksgiving feast we have been looking forward to all year!

While most of you are probably still meal planning, and trying to figure out just what you will be serving when the big day rolls around, it's my job to look past the big meal. To ponder "what about the days after?" In other words, it's my job to help you figure out what you're going to do with all those leftovers!

I don't mind this job. In fact, I take it as a challenge. Here is the one and only problem. I'm testing these leftover recipes in October, and well, let's just say I don't have a 10 pound turkey hanging out in my fridge! So...I have to get creative.

I thought these sandwiches would be a terrific leftover idea because not only do they use up some of that delicious turkey, but if you have that veggie tray still laying around, you can put it to good use too. Obviously, I made mine with some sliced deli turkey, and they were perfectly tasty, but I really think they would be outstanding with some post holiday bird as well!

Sandwiches and the "day after Thanksgiving" seem to go together as much as Thanksgiving and turkey! But this year, switch up the routine beyond the mayo and white bread, using even more leftovers so when that dreaded Monday rolls around, the fridge is empty, ready and waiting for holiday baking!

Turkey & Veggie Bagels
Everything Bagels, toasted
Sliced Turkey, deli or leftover
Thinly Sliced Radishes
Thinly Sliced Cucumber
Boston Lettuce
Green Onion and Chive Cream Cheese

Spread cream cheese on warm bagels. Top with meat & veggies, starting with lettuce to form "barrier". If you're serving a crowd, lay out meat and veggies and let your guests built their own!


Shared at Weekend Potluck

Wednesday, November 11, 2015

New Cookbook

My cookbook collection is becoming a little bit out of control. I barley have enough room to fit anymore into the spot where I keep them. But you know what? That doesn't stop me from buying them! I can't help it. I love a good novel, and to me a terrific cookbook is just as exciting to dive into.

The latest one I brought home, (My $1.99 steal at Ollie's, I might add...) happened to be laying out a couple weeks ago where the boy found it. I came into the room and found him turning the pages, and could see the wheels in his head spinning.

"Mommy, I found a few recipes that sound yummy. Can I mark the pages so you can find them and make them?" Now, how could I refuse that request? "Sure, you pick some out. What one do you want me to start with?"

Well, that was an easy choice. Anything that has the words "pizza" and "burger" in the same title is going to get his attention. But here is the funniest part, he took the original recipe and totally made it his own! "Mommy, we will add this and this, and a little of that..."

Here is his final creation. We served with one of our favorite pizza toppings on top, green olives. But feel free to add your own. Don't groove on mushrooms? That's okay. Maybe add some green peppers instead. Believe me, we did so much adaption, you could too! These would be great for a crowd...maybe those holiday house guests that will be "checking in" before you know it!

What was the last new cookbook you bought? Please share, it might be one I don't have yet!

Crock Pot Pizza Burgers
1 lb. ground beef
 1 (4 oz.) can mushrooms pieces and stems
1 (10 3/4 oz.) can cream of mushroom soup
1 (8 oz.) jar pizza sauce
1 tsp. garlic powder
1 tsp. onion powder
1 tsp. dried basil
1 tsp. dried oregano
1 c. shredded Colby Jack cheese
1/4 c. grated Parmesan cheese, plus more for top
Sliced Green Olives
Buns
Salt and Pepper, to taste

Brown beef  in a large skillet until no pink. Drain if necessary. In bottom of Crock Pot, combine pizza sauce and soup. Add beef. Add seasonings and cheeses. Stir to combine. Cook on LOW for 2 hours. Serve on buns with extra Parmesan and olives.


Shared at Weekend Potluck

Monday, November 9, 2015

Put Some Ease Into Your Holiday

When it comes to the holiday rush, and by rush, I mean every day from now until New Year's, I think all of us are looking for ways to make things just a little easier on ourselves. From the cooking, to the entertaining, to the shopping, and everything in between, any time we can find a shortcut we will take it. Of course, for my purposes as your Everyday Mom, it's my job to try to find you as many of those when it comes to the food, as I can.

If we are going to talk about finding shortcuts in the kitchen, I think we would be remiss not to turn to our slow cookers! We use them any other day of the week to help us get dinner on the table, so why not on the holiday? Those are the days we should be really putting them to the test!

We love sweet potato casserole, and I have a terrific and really quite simple recipe for it. So why try a new one? Easy. This one doesn't involve the oven! Think about it. With a giant turkey basting away for hours, we need to make sure we have side dishes that can be cooked stove top, or in our trusty slow cookers. The more we have cooking outside the oven, the better, in my opinion anyway.

My husband says this is like eating dessert for dinner. I can respect that. It really is quite sweet, but it's a pecan brown sugar topping, it's supposed to be sweet! It really does come together so simply, and would taste perfect next to your Thanksgiving turkey, or even ham too!

Putting some easy into our holiday really should be at the top of our "to do" lists. After all, the less time we spend stressing about the holidays, the more we can enjoy them, spending time with the ones we love most in the world.

Slow Cooker Sweet Potato Casserole
2 (29 oz.) cans sweet potatoes in syrup, drained
1/3 c. butter, melted
3 TBS packed brown sugar
1/2 c. white sugar
2 eggs
1 tsp. vanilla
1/2 tsp. ground cinnamon
1/4 tsp. ground nutmeg
1/3 c. heavy cream

Pecan Topping:
1 c. chopped pecans
1/4 c. flour
2 TBS butter, melted
3/4 c. packed brown sugar

In a large bowl, mash sweet potatoes. Add butter, 3 TBS brown sugar, white sugar, eggs, vanilla, cinnamon and nutmeg. Beat with an electric mixer, on low, until smooth. Stir in cream until combined. Spray slow cooker generously with nonstick spray. Add sweet potato mixture and spread evenly. In a medium bowl combine all topping ingredients and stir until combined. Sprinkle over sweet potatoes. Cook on HIGH for 2-3 hours until browned and set. Serve immediately, or remove slow cooker insert and keep covered until ready.  *NOTE*  I have a 6 quart slow cooker and mine was done in 2 hours. A smaller one might take longer. I always use light brown sugar, but especially in this recipe because it gets dark enough, the darker variety might make it too dark. Watch this carefully because with all the sugar, this can burn easily.


Recipe from Pillsbury
Shared at Weekend Potluck


Saturday, November 7, 2015

Meal Plan November 8-13

*New Recipe
Links to Recipes on Blog

Sunday
Cheese Ball Bites*

Monday
Garlic Bread

Tuesday 
Zesty Baked Chicken*
Festive Broccoli & Cauliflower Salad*
Mandarin Oranges

Wednesday
Eggs
Bacon/Sausage
Toast

Thursday
Mac n Cheese
Green Beans

Friday
Leftovers 


Friday, November 6, 2015

Soup, Decorating and AC

Oh, Indian Summer, how we've been enjoying you! The first entire week of November we were well into the 70's every. single. day. It was bliss. Especially since we know all too well the reality check we are in for.

The only downside to it being that warm this time of year is the fact our beautiful shade tree in our front yard can't really do its job with all the leaves missing. So that means, our house quickly becomes an oven, and well, mama doesn't do oven, unless it has supper in it!

Picture this. It's Sunday afternoon, about 70 degrees outside, and I'm busy doing a ton of housework, plus cooking, plus switching out Halloween decorations for Thanksgiving ones. Oh, and the cooking? It was of course, soup, because it's fall, and no matter how warm, we are eating soup. But between the heat of the Crock Pot, the sun shining, no shade and me running around like a mad women...it was time to turn on the AC. Yep, I'm that girl. (The same girl who raked leaves later in the week wearing flip flops and capris!)

What a combination though. Putting up Thanksgiving decorations, cooking a hearty warm you up kind of soup, all while running around in sandals with the AC on. It was a funny scene, let me tell you.

But the most important part of the tale, is the soup of course! Okay, technically it's a chowder, thicker and more hearty. You are going to L.O.V.E. this one! It's the epitome of set it, forget it, enjoy it! Not to mention, pour, stir, pour some more, stir again and cook. Done. I know this one is going to become a regular in our house when cold weather hits!

Temps will be falling any minute now, and we will be missing this beautiful weather for the next several months. The AC will quickly be changed over to the furnace, and those turkeys I just put out will be traded out for snowmen and Santa. But as the thermometer plummets, at least I know we can ease our pain with a delicious meal.

Crock Pot Corn Chowder
1 (15 oz.) can creamed corn
1 (10 3/4 oz.) can cream of mushroom soup
1 lb. frozen corn
3 c. milk
1 small yellow onion, diced
1 lb. diced ham
1 1/2 c. frozen shredded potatoes
2 tsp. dried parsley, extra for garnish
2 TBS butter
Salt and Pepper to taste

Combine all ingredients in Crock Pot. Stir to combine. Cook on LOW for 6 hours. Garnish with parsley.


Shared at Weekend Potluck

Wednesday, November 4, 2015

Thanksgiving Planning

Have you started yet? If not, don't worry, I'm sure most haven't, but as we've already established, I'm a planner. With a capital P. Not to mention, I have to plan ahead so I can share yummy ideas with all of you , in time so that you can plan!

I have to admit, the family isn't complaining about all the planning and recipe testing. It kinda makes November one month long feast. Which is actually kinda funny since I don't cook on the actual holiday! Well, okay, that's not completely true. I usually do have to take something with us to our family gathering(s), but I'm not in charge of the huge meal. I have been before. I have been the one prepping food for the whole week, while the turkey defrosts in the fridge, but it just isn't normally how it works out. So really, the fact that I try to come up with a few things that might work for your holiday, is a big advantage to my boys!

My favorite thing on Thanksgiving is pumpkin pie. The end. No contest. But...it has to be my mom's pumpkin pie. Sure, I like others, but I will never enjoy any of them as much as hers. Hence why even though she makes it on Turkey Day, we demand she make it again on Christmas Day as well. We can't get enough of it. In fact, both myself and my child have been known to request it instead of cake on our birthdays. Yes, it is that good.

So you can understand why I don't have a recipe for it on the blog, nor will I ever. I won't make it. She does. That's all I need. But I still want pumpkin desserts in my life, so I find other ways. These came out of my recipe for pumpkin fluff, taken to the next level. Add some easy mini pie shells, and you have a party on a plate. Plus, you could easily make a ton of these if your Thanksgiving crowd is a big one. They truly are the perfect little holiday bite.

If you have began to plan your menu for the big day, I applaud you. If you are more the "wait until the last possible minute" that's okay too...we will get through it together!

Mini Pumpkin Tarts
1 box (2 count) refrigerated pie crusts
1 (15 oz.) pumpkin puree
1 (3.5 oz.) box instant vanilla pudding
1 c. Cool Whip, extra for garnish
1/2 tsp. ground cinnamon
1/4 tsp. ground ginger
1/8 tsp. ground nutmeg
1/8 tsp. ground cloves
Cooking Spray

Preheat oven to 450. Allow pie crusts to come to room temperature. Using a 2 inch cutter (cookie cutter, glass, etc.) cut out circles from dough. (You should get between 12-18) Spray muffin tin with cooking spray. Place a dough circle in each one. Spray again with nonstick spray. Bake for 8 minutes until golden brown. Cool on wire rack. In a medium bowl combine pumpkin, pudding mix (powder only), and 1 cup Cool Whip. In a small bowl combine cinnamon, ginger, cloves and nutmeg. Add 1/2 tsp. of mixture to pumpkin. Stir well. Scoop about 1 TBS of mixture into cooled pie shells. (I use a cookie scoop) and sprinkle with extra spice mixture. Chill until serving. *NOTE* When baking shells, they might bubble up in the middle a bit. When you remove them from the oven, carefully press down in the middle with the backside of a spoon to reshape. Don't worry if they break a little, the filling will cover it up, just make sure you don't break through the bottom.  You will also have to do more than one batch of shells to use all filling.


Shared at Weekend Potluck

Monday, November 2, 2015

After the Turkey

Happy November! We are officially two days in...are you dreaming about turkey, stuffing, and gravy yet? If not, you're missing out because I'm drooling just typing that!

I can't help it. As soon as the costumes and candy are put away for another year, I move right into Thanksgiving mode. Okay, I can't lie, in my heart, I'm already singing Christmas Carols, but I do try to enjoy each holiday as they come. And with this food blogging gig, it's important I plan ahead so I can share as many ideas with all of you as I can before the big day.

This one isn't actually for your holiday feast, I created it thinking more about those days after Turkey Day. Sure, for the first couple leftovers are the name of the game. From sandwiches to soups to any other way we can find to use all that turkey, it is a tradition. But on about day  four, I know many of you will be craving something else, vowing not to eat another bite of turkey until November 2016...or at least until Christmas!

I am sharing this super simple, one pot meal, in the spirit of 1. leftover holiday guests you have to feed 2. the need for something other than bird and 3. a meal that will come together quickly on those upcoming days when you're out holiday shopping and completely exhausted come dinner time. It will work for any or all of them!

We are chili lovers, but my boys can not eat a bowl of it without adding some macaroni to it. Me? Not so much. But I always make sure I have some for them, and this is based on the same idea. Chili. Macaroni. Meat. Beans. Cheese. All the same flavors in a hearty, goulash with a kick, type of dinner.

Plan that Thanksgiving menu, but remember to include some ideas for the aftermath when the family is begging for something other than turkey!

One Skillet Chili Mac
1 lb. ground beef
1 small yellow onion, chopped
1 (14 oz.) can diced tomatoes, undrained
1 (8 oz.) can tomato sauce
1 c. extra large elbow macaroni
1 (4 oz.) can diced green chilies
1 (15 oz.) can light red kidney beans, rinsed and drained
2 tsp. chili powder
1/2 tsp. garlic salt
1/2 c. shredded Mexican style cheese
Salt and Pepper to taste
Dried chives

In a large skillet brown beef and onion over medium heat. Drain if necessary. Add tomatoes, beans, chilies, tomato sauce, chili powder and garlic salt. Stir to combine. Add macaroni. Stir. Bring to a boil. Reduce heat, cover and simmer for 15-20 minutes until macaroni tender. Turn off heat. Sprinkle with cheese. Replace lid until cheese melts. Garnish with chives.


Shared at Weekend Potluck