Everyday Mom's Meals: Sugar
_____
Showing posts with label Sugar. Show all posts

Sunday, September 1, 2019

Welcome September

Yes, it's hard to believe, but September is upon us. My son looked at me Saturday night and said "Mom, can you believe the 4th of July was almost two months ago?"

Seriously, when you think of it like that the time flies bye even faster than normal. Let's face it, summer lasts about 38 days and the cold months drag on for 904 days, if we are lucky!

I've said it before, but let me reiterate it once more. I actually don't mind autumn. I enjoy the colors, the fun activities, the decor (yes, my pumpkins and scarecrows are already displayed!) and of course, the flavors. And I don't even shun the weather. Here in Indiana, we will still have some truly warm and sunny days through October. But it's what comes after fall I dread. The cold. The snow. The ice. The gray. The blah. But hey, it's not here yet, so let's not dwell on it.

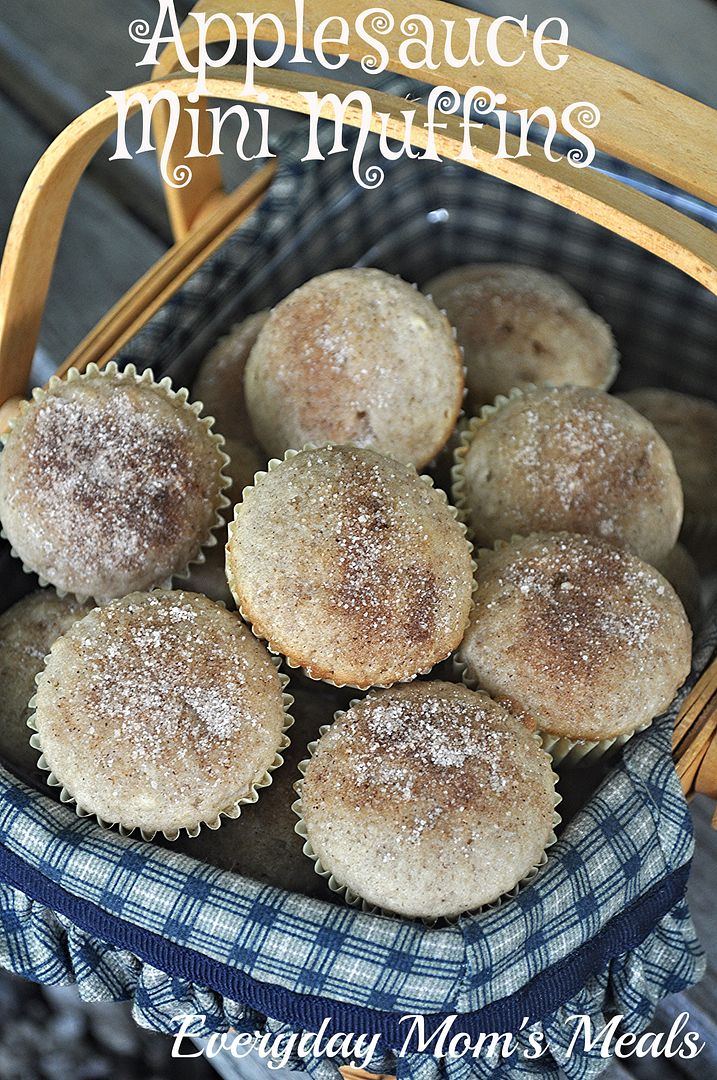
I figured with the beginning of September, and a new season, we would celebrate with a classic fall flavor. Cinnamon. Sure, we can't get enough of apple and pumpkin too, but if you think about it, what is paired with both of those in many, many dishes? Yep, cinnamon.

These are my way of bringing a little of summer with me to fall. See, they are inspired by a summertime country fair staple. The elephant ear. Fried dough sprinkled with cinnamon sugar is something so popular the lines will wind around any junk food alley.

So who says we can't have some of that yumminess as the leaves begin to turn? These are great for a quick breakfast, lunchbox treat or sweet treat after a favorite fall meal. Super easy, moist and oh so good!

I might not be able to stop summer from eventually fading away, but I can make sure to enjoy all the warm days we have left and dream of them once they are gone with some delicious muffins!

Cinnamon Sugar Muffins
1 c. flour
1/2 c. + 1 TBS sugar, divided use
2 tsp. baking powder
1/2 TBS + 1 tsp. cinnamon, divided use
1/4 tsp. salt
1/2 c. milk
1/4 c. vegetable oil
1 egg

Preheat oven to 375. Line 8 muffin tin wells with papers or grease well. In a large bowl combine flour, 1/2 c. sugar, baking powder, 1/2 TBS cinnamon, and salt. In a medium bowl whisk together milk, oil, and egg. Add to dry ingredients and stir, just until combined. Divide mixture evenly in muffin tin wells. In a small bowl combine 1 TBS sugar and 1 tsp. cinnamon. Sprinkle over top of batter. Bake for 15 minutes or until a toothpick comes out clean. Cool on a wire rack. Store covered.


Shared at Weekend Potluck
Shared at Meal Plan Monday

Friday, September 25, 2015

A Sweet Treat For Mom

My poor mom, she can barely eat anything. Not because she doesn't want to, but between health conditions and allergies, her "okay" list is pretty short. Think I'm exaggerating? The lady has to check the ingredients on bread because most of them she can't have. No joke. So, when I find something she can eat, and it would be a treat for her, you bet I'm going to! 

Okay, so technically these began as her idea. She emailed me a recipe for pound cake she found that she could actually eat. Well, it sounded just a bit too complicated for this busy food blogger, so I decided to find something with similar ingredients that could be made in "mini" form. More fun anyway, right??!! Plus, with only her eating them, they are portioned perfectly!

Oh, and the other part of this story is the poor lady that can't eat, is now recovering from her 6th operation, in 5 years, on the same foot. Yep, we are holding our breath, and crossing our fingers and our toes (No pun intended) this is the last one! So, you can see why I was totally up for giving her a sweet treat she could really enjoy!

Love pound cake? Then you're going to adore these! Same flavors. Same density. Just individualized for easy snacking! They would make a great breakfast on the go too! 

I love my sweet mom. She is a special lady. Ask anyone who knows her, and they will tell you how lucky they are to know her. But I'm the luckiest. I get to call her mom, and make her special treats that make her smile.

Mini Pound Cakes
1 1/2 c. flour
1 c. sugar
1 1/2 tsp. baking powder
1/4 tsp. salt
3 eggs
2 sticks butter, softened
1/4 c. milk
1 tsp. vanilla

Preheat oven to 350. Line 2 muffin trays with papers. In a large bowl combine flour, sugar, baking powder and salt. Add butter, milk and vanilla. Mix until just combined. Using an electric mixer, mix at medium speed for about 4 minutes. Scrape the sides of the bowl. Add eggs one at a time, mixing for 30 seconds after each. After all eggs are added, mix at medium speed for another minute. Batter will be thick and fluffy. (It will resemble frosting!) Spoon into muffin in, filling each well 1/2 way. Smooth out with back of spoon or spatula. Bake for 20 minutes or until toothpick comes out clean. Cool on wire rack.  *NOTE* If you have extra wells in your tin, put some water in them before baking for more even cooking.  


Recipe from Cupcake Recipes
Shared at Weekend Potluck

Friday, August 14, 2015

Busy School Days { A Post For Earth Fare}

Well, summer is over. Okay, not really, but this was our first week back to school; and let me tell you, I am stinkin' exhausted! Oh my gosh. Who knew starting 35 minutes earlier every day could mean mommy needs coffee...lots of coffee. Stat. From an IV drip!

When school is back in session, it seems like our already super busy lives get busier and busier by the day. So many things to do, running here and there, homework, after school activities, sports...you name it, our plates are F.U.L.L.

So when the craziness sets in, that's when I really start to rely on recipes that can be used for more than one thing, more than one meal. And one of my favorite things that fall into the category are muffins!

I love having something for little man to nibble on when he comes home starving. (They all do, right??) But I don't want it to be junk. Something he can enjoy and I can feel good about. Plus, if I can then use it the next morning for breakfast, or pack it in his lunch, or even have as an after supper sweet treat, even better! One recipe, and already I've found 4 times I can serve them. That's what I'm talking about.

A friend gave me this recipe and I was so thrilled to see the reduction of sugar and addition of applesauce. I've baked with it before, and it keeps things moist while adding to the sweetness too!

If you need something quick and easy for the school day rush, look no further. Heck, the kids could even eat these in the car if you're running late! Not that any of us ever do that....right??!!

Applesauce Mini Muffins
1 stick butter, room temp
1/2 c. sugar
1 3/4 c. flour
2 eggs
3/4 c. applesauce
1 tsp. baking soda
1/2 tsp. vanilla
1/2 tsp. salt
1/2 tsp. cinnamon

Topping:
4 TBS butter, melted
1/4 c. sugar
1/2 TBS. cinnamon

Preheat oven to 350. In a large bowl cream together sugar and butter until smooth. In a medium bowl combine flour, baking soda, salt and cinnamon. Stir. Add eggs, applesauce and vanilla to butter mixture. Mix well. Slowly add flour mixture in batches, stirring in between each. When batter is combine, scoop into paper lined mini muffin tray. Bake for 15 minutes until toothpick comes out clean. Remove to wire rack to cool. Allow to cool 10-15 minutes. Mix sugar and cinnamon together for topping. Brush tops of muffins with melted butter and sprinkle with cinnamon sugar. 


Shared at Weekend Potluck

Saturday, September 20, 2014

Soul Food Saturday


Sometimes no matter what you do, you have a huge craving for something that you just can’t get rid of until you have that first bite; okay sometimes you really need the whole plate full. Am I right? This happened to be one of those days. And wouldn’t you know it; the first ingredient was still on my shopping list. So in comes another Internet search. Yep, you guessed it. I loved it enough to make a mountain of pancakes and then share the recipe with you. This baking mix is a good as the boxed stuff, maybe even better dare I say? I’ll let you decide! Grab a fork and your favorite pancake toppers, because this plate is nearly ready!
 
Homemade Baking Mix
 9 c.all purpose flour
1 c. dry buttermilk
5 tbs. baking powder
¼ c. sugar
1 tbs. salt
1 c. shortening

In a large bowl add flour, buttermilk, baking powder, sugar and salt. Stir to thoroughly combine. Add half of shortening add a time, and use pastry blender (or 2 forks) to cut into the dry ingredients. Add second half of shortening and continue until the mixture resembles corn meal. Store mix in air tight container, for up to 3 months.
 
Pancakes
  2 c. mix
1 c. water
 2 eggs

All your family favorite toppings- syrup, fruit, jellies, butter, or all the above!
 
In a medium bowl add mix, water, and eggs. Whisk to combine, and continue until smooth. Add ¼ c. amount to a greased pan or griddle. Flip when edges are dry. Cook until golden. Repeat with remaining batter.
 
Whether you love them topped with just butter, pieces of fruit on the side, or doused with your favorite syrup; these will definitely be a winner at your table as well. Enjoy!


Saturday, February 1, 2014

Soul Food Saturday #41


What about cinnamon rolls for breakfast? Ones that remind you of that fast food place where you can grab them and hit the road, and quick enough that you can make on a weekday if you wanted? That's right, quick and healthier than fast food. Also can be made gluten free with just a little adjustment. Bringing back the use of crescent roll dough. Sugar and spice makes these very nice! Grab your little ones for this because Cinnamon Roll minis are what's for breakfast!

Cinnamon Roll Minis
1 can Grands big buttery crescents
4 tsp. cinnamon
3 tbs, sugar

Glaze
3 tbs. powdered sugar
1 tbs. Maple syrup
1tsp. Half and half


For the glaze:
In a small bowl add powdered sugar and whisk lightly to break up any lumps. Add maple syrup and whisk to combine. Then add half and half, and whisk until completely smooth. Set aside

For cinnamon roll minis

In a small bowl add sugar and cinnamon and stir to combine. Set aside. Remove crescent dough from the can gently. Only separate at large perforations. (There will be 2 triangles together) Pinch perforated lines together, and  press lightly down to seal. Repeat on other side. With a small rolling pin or round glass; roll dough to be sure its sealed. Repeat on second side. Dough will stretch about 2 inches in length, and will be a more uniform thickness. Sprinkle 1 tbs. cinnamon sugar on dough and spread gently to cover it entirely. Roll up as snugly as possible being careful to keep edges in line. Pinch edge gently to seal roll. Cut into 6 pieces, with a  serrated knife using a sawing motion so as not to squish the dough. Please in an un-greased pie pan touching each other slightly. Repeat with remaining dough. 1 can will fill 2 pie pans.
Follow crescent dough instructions for baking time and temp. Typical time is 12-14 minutes at 400*
Remove from oven and add glaze. Serve hot! Whether you love to glaze them right after or dip each bite, your family will fall in love one more time with a fast treat that just got a bit healthier! Enjoy!

Note: For gluten free option, just use Pillsbury's gluten free pastry/pie dough. Found with other Pillsbury's products in most grocery stores.


**When using this dough, remove from fridge 5 minutes before opening to take the chill off. Then take the dough ball and cut into 2 pieces. Cover second piece and set aside. Roll dough out to approx 4 1/2 inches wide by  8 1/2 inches long rectangle. Sprinkle cinnamon sugar and spread to cover completely. Roll up as snugly as possible, keeping sides as straight as you can. Pinch edges gently to seal. Cut into 12 pieces. with a serrated knife, using a sawing motion so as not to squish dough. Repeat with remaining dough.  Follow baking instructions for time and temp.


Friday, April 19, 2013

It's Almost Time

Berry season is just around the corner for most of us; and for some of you, maybe it's even closer than it is for me. We usually kick off our Memorial Day weekend with strawberry picking, and then the berry love continues right on through summer. Raspberries, red and black, blueberries....oh we love our berries!

I've told you before how raspberry crazy Mr. and Little Everyday are, so during the warm months, I try really hard to find as many recipes as I can using them. But during the colder months, they aren't something I'm really on the lookout for. However, I was always taught to never look a gift horse in the mouth. See, back in February my father in law was given an obscene amount of frozen black raspberries and he generously offered to share with us. So I filled a few bags, brought them home and popped them in the freezer, knowing at some point I would find the perfect use for them.

Then all of a sudden it was Easter weekend, and we were going to be celebrating with my parents on Good Friday evening, mom making a huge meal (it was actually the "re-do" from my birthday supper she was to ill to make), and I offered to take dessert. I knew I wanted something spring inspired, maybe with berries...and that's when I remembered those beauties just hanging out in the chest freezer.

These are so incredibly pretty! The layers of berries and cream create these perfect colored bars. Oh, and not to mention they are super easy and scrumptious too. Plus, with warmer weather coming, they would make a great dessert for a hot summer day when only a frozen treat will do!

Berry season is coming, and will be here before we know it' I'm so glad I'm prepared with this great new recipe, and I hope you are too!

Frozen Raspberry Cream Bars  
Adapted from Taste of Home
2 c. crushed vanilla wafers (about 65 wafers)
1/4 c. butter, melted
2 c. frozen unsweetened black raspberries, do NOT thaw
3/4 c. sour cream
1 c. half and half
1/2 c. sugar

In a bowl, combine the wafer crumbs and butter. Grease a 8 x 8 baking dish. Press half of the crumb mixture into dish. Set remaining crumb mixture aside. Sprinkle berries over crust. In a bowl, combine sour cream and sugar; gradually stir in half-and-half until smooth, whisking to combine. Pour over berries. Sprinkle with remaining crumb mixture. Cover and freeze for 3 hours or until firm. You can allow these to sit for about 10 minutes to make for easier cutting, but I actually prefer to serve them frozen.


Shared on The Country Cook Apr. 19, 2013
Shared on Make Ahead Meals Apr. 22, 2013
Shared on Mandy's Recipe Box Apr. 23, 2013
Shared on Lady Behind The Curtain Apr. 24, 2013
Shared on Miz Helen's Country Cottage Apr. 25, 2013

Wednesday, February 6, 2013

Summer Dreamin'

It doesn't matter how mild or extreme winter we have, I am always dreaming of summer! Hot days, mild nights, sunshine, daylight until almost 10pm, laying by the pool, picking fresh berries...okay I have to stop now or I'm doing to depress myself. And of the things we look forward to most about the summer months is having fun and memory filled days at local street, county and state fairs! And one of our favorite treats at all of those? Elephant Ears!

So when my mom gave me an extra pie crust from her freezer (she was leaving for vacation and knew she wouldn't use it) who knew it would be destined for such a treat in the dead of winter! Sure I could have made a pie with it, but I started to experiment in my mind and thought "Hey, why not try it? What have you got to lose?"

I am so glad that pie crust didn't involve pie! These are such a fun treat for any time, because they are super simple. In fact, the kids could even help! Plus, unlike the ones at the fair, these are NOT fried, but instead baked, so you can eat twice as many and not feel any guilt. (That's such foodie math! Something is prepared in a more healthy way, so you can eat more! Lol)

If you are day dreaming of lazy summer days too, let your oven take you there tonight with this easy, tasty and nostalgic dessert!


Mini Elephant Ears
1 box refrigerated pie crusts (2 crusts), left at room temperature per box directions
1 egg white, slightly beaten
2 TBS sugar
1 tsp cinnamon

Preheat oven to 375. Line a baking sheet with parchment paper or silpat. Unroll crust and using a rolling pin, roll out to 1/4" thick. Using a large drinking glass, or cookie cutter, cut out large circles. You should get about 6 per crust. If you run out of room, gather extra dough and roll out again. (I did this twice) In a small bowl combine sugar and cinnamon. Mix well. Brush dough circles with egg white. Sprinkle with cinnamon/sugar. Bake 12-15 minutes until browned and slightly puffed.
*NOTE* I had a few that remained flatter, and a little crispier than the others. No worries. They all taste the same!


Shared on Lady Behind The Curtain Feb. 6, 2013
Shared on Miz Helen's Country Cottage Feb. 7, 2013
Shared on The Country Cook Feb. 8, 2013
Dessert at Very Good Recipes
Pin It

Monday, September 17, 2012

Year Round Fruit

A couple weeks ago when I shared my homemade Tartar Sauce with you, I said I had taken it to our family's annual fish fry celebration. Well, at that same party I discovered a new fruit salad that I am now totally addicted to. My sister-in-law's best friend brought it and while I didn't know what it was at first, I could see pecans and brown sugar on top, and let's face it, anything with those 2 things topping it has to taste good. Seriously, there could be mud underneath, and with brown sugar and pecans, it would be super yummy! After tasting it I knew I needed the recipe and she was kind enough to share. I couldn't believe how easy it was, and she said anytime she takes it to parties it is a big hit, and I can understand why. Now I realize when most people make something like this, they gear it towards the summer months because that is when we as a society eat the most fruit, and fruit salad. And I understand that because I too try to eat produce that is in season for optimal flavor and price. But grapes seem to be the one fruit I can find year round and they always have good flavor and are economical. So if you want to make this in warm months, I recommend you do it quickly (Unless you live in a tropical climate. In that case, you can wait!) or follow my lead, and now you have another fruit salad you can make 12 months out of the year; and enjoy a sweet treat summer, fall or winter!

Sweet Grape Salad
1 lb. seedless green grapes
1 lb. seedless red grapes
8 oz. cream cheese, softened
8 oz. sour cream
1/2 c. white sugar
1 tsp. vanilla
1/2 c. brown sugar
1/2 c. pecan chips

In a large bowl mix grapes. In a medium bowl, using an electric mixer, beat cream cheese, sour cream, white sugar and vanilla until smooth and creamy. Pour over grapes and mix well. Sprinkle brown sugar over grape mixture. Do not mix. Top with pecans. Do not mix. Chill overnight. Mix just before serving, if desired. Personally, I like serving it as is and let each person mix it on their plate. Serve very cold.


Shared on Make Ahead Meals Sept. 17, 2012
Shared on Mandy's Recipe Box Sept. 18, 2012
Shared on Lady Behind The Curtain Sept. 19, 2012
Shared on Miz Helen's Country Cottage Sept. 20, 2012
Shared on The Country Cook Sept. 21, 2012


Friday, September 14, 2012

Chicago Treat

Back in July Adam and I had enjoyed a couple's day in Chicago, just us and his aunt and uncle. Oh my gosh, we had so much fun, I can't even begin to tell you. It was the weekend of Adam's birthday, and also the 1 year anniversary of his grandpa's passing; and since he was the biggest Cubs fan in the world, we started our day in Chi-town with a tour of Wrigley Field. The boys had been to the ballpark before, but we girls hadn't. It was so interesting and I learned so many things about the park and his beloved Cubbies. Then after a delicious lunch at Hard Rock Cafe, it was time for the female portion of the trip...shopping! And I'm not just talking about any shopping. A full afternoon on the Magnificent Mile! While I had heard of it, and knew some of my favorite stores were there, I had never had the chance to enjoy it. We browsed from store to store, finding more and more treats as the day went on. Our husbands' wallets sure did feel the effects, but what can be better than finding fun things in stores such as Crate & Barrel and Bloomingdales? At the top of my list were kitchen items. I love new kitchen gadgets, decor, etc and these 2 stores were full of them! I came home with so many new fun things to try, but the one I was most excited about was a doughnut pan. I had been wanting one for a while, but just never took the money to buy it until that day. Plus, I got a great deal on it...only $12 :) I couldn't wait to try baking my own doughnuts at home.

So many fun new "toys". 
But then when we got home, a tragic thing happened. Life got in the way! We were so busy in August with the last of summer vacation and beginning of school I never had the chance. I kept seeing it every time I was in my cupboard pulling out other baking dishes and wishing I could just find the time. Then one Friday night over Labor Day weekend, I found it! The "boys" were at Taekwondo and I had some extra time on my hands. So I figured what a better breakfast treat over the holiday weekend than homemade doughnuts. They were super easy, and came out perfectly! I can't wait to play with different flavor combos over the fall and winter months. There is just something so "autumn" about fresh doughnuts and apple cider! Especially if you are having a party with kids! I'm so thankful for such a happy, memory filled day in Chicago with some of the people I love most in this world; and I'm extremely grateful I came home with a such a great item for my kitchen that each time I use it we get something yummy and I get to remember such a fantastic trip!

Baked Cinnamon Sugar Doughnuts From Bake Me Something Good
2 c. all purpose flour
3/4 c sugar
2 tsp baking powder
1/4 tsp cinnamon
1/4 tsp nutmeg
1 tsp salt
3/4 c milk
2 eggs
2 tsp vanilla extract
1 TBS butter, melted

Topping:
1/2 c. butter, melted
1/4 c. brown sugar
1/4 c. white sugar
1 tsp cinnamon

Preheat oven to 325. In a large mixing bowl combine flour, sugar, baking powder, cinnamon, nutmeg and salt. In a medium bowl combine eggs, milk, vanilla and butter. Pour wet ingredients into dry and mix to combine. Spray doughnut pan with cooking spray. Fill each vessel 3/4 full with batter. Smooth tops with spoon. Bake for 10-12 minutes until no longer shiny and doughnuts "spring back" when touched. Allow to cool slightly and remove from pan. Dip each doughnut into melted butter and then sugar mixture. Place on cooling rack to set.


Shared on The Country Cook Sept. 14, 2012
Shared on Make Ahead Meals Sept. 17, 2012
Shared on Mandy's Recipe Box Sept. 18, 2012


Featured On

Breakfast at Very Good Recipes
Pin It

Friday, June 1, 2012

Summer Skin

Today's post is still a recipe, but it's more for your skin than your stomach. June is here, and we all know that means swimsuit season is in full swing! Not to mention shorts, flip flops, cute skirts~ all those things we are able to avoid during the cold winter months. No more hiding under comfy sweaters that hide all those little spots we don't want to share with the world. My skin gets so dry during the winter months, it takes a lot of "prep work" before I'm ready to debut it again every spring & summer. Pedicures, body scrubs, exfoliates, they are all things I turn to for making sure my skin looks the best all summer long. But I'm not made of money either. I can't be running to the spa every week getting pampered. Well I guess I could, but we would never eat, the house would be filthy and my family would be in dirty clothes while the laundry piled up :-) So instead, I find ways of making salon quality product at home. A DIY spa, if you will. I've already shared my Sea Salt Hand Scrub, which continues to be a huge hit with all of you. So this time around I figured a sugar based one you can use in the shower to soften and moisturize your skin would be just as appreciated. Not to mention the citrus scent can wake you up and invigorate your morning. Feed your skin, treat it well, enjoy it while you can. It will be time to bust out those baggy sweaters before you know it!

Lemon Sugar Body Scrub Adapted from Self Magazine
1 1/2 c. raw sugar (I used Turbinado Sugar in the Raw- hence the brown color)
3/4 c. grapeseed oil
2 lemons, zested and juiced

Place sugar in a large bowl. Slowly pour in oil until it forms a thick paste. You want the sugar and oil to combine, but not totally dissolve. Add zest and juice from lemons. Stir well. If juice makes it a little too watery, add a bit more sugar. Store in an airtight container. Stir before each use.


Shared on Chef in Training June 5, 2012
Pin It