Everyday Mom's Meals: Garlic
_____
Showing posts with label Garlic. Show all posts

Sunday, December 10, 2017

Skyline At Home

The first time Alex tasted Skyline Chili it was love at first bite. His dad and him were actually driving back from a field trip in Indianapolis and from that moment on he was obsessed. There was only one problem. We didn't have one here in Fort Wayne. He knew any time that craving hit, the nearest one was 2 hours away. (Yes, he did try the freezer version, and while he liked it, it just wasn't the same.)

Well, that all changed back at the end of this summer. They finally opened one here. Only about 10 minutes from our house. So, in September when he turned 13 and I gave him the choice of any place to out to eat, you know exactly what he chose!!
Just look how happy it makes him! 

But let's face it, with a teenager and a toddler, it really isn't economical to be going out to eat as much as we would like, so once again it was up to me to find a way for him to enjoy it at home. I started researching exactly what made Cincinnati Chili what it is, looked at a ton of different recipes and came up with one that I thought would perfect for us.

If you love this style of chili as much as we do, I think you will be pleased just how close it is to the famous one. If you've never had it, be prepared for a little different style of chili, but still oh so tasty. And yes, to make sure you get the full effect, be sure to serve it over spaghetti...insert drool here!

Crock Pot Cincinnati Chili
2 lbs. ground beef
2 cloves garlic, minced
1 (28 oz.) can crushed tomatoes
2 tsp. apple cider vinegar
2 TBS chili powder
1-2 tsp. hot sauce
2 TBS Worcestershire sauce
1 tsp. ground allspice
1 tsp. cinnamon
1 tsp. cumin
2 TBS brown sugar
1 c. beef broth
2 dried bay leaves
Salt and Pepper to taste
Cooked Spaghetti
Diced Onion
Shredded Cheese
Oyster Crackers

In a large skillet brown beef with garlic. Drain if necessary. Add to Crock Pot. Add tomatoes, vinegar, Worcestershire,  seasonings, brown sugar, beef broth. Stir well. Add bay leaves. Cook on LOW 4-5 hours. Remove bay leaves. Serve over pasta with toppings. 


Shared at Weekend Potluck
Shared at Meal Plan Monday

Monday, May 16, 2016

BEST Potatoes EVER

Yeah, so that's a pretty big claim, huh?! How can I be so bold? Well, it's because I can honestly say of all the roasted potatoes I've made over the years, and trust me, there have have been a lot, these are hands down the best tasting, most tender, perfectly what I was looking for version.

How did these magical potatoes come to pass? It's simple. The same way most new recipes are coming out of my kitchen these days. Baby cravings!!

For those keeping track, I am now 6 1/2 months pregnant, and yeah, pretty much hungry all the time. When my tongue sets it's sights on something I can't let it go. I obsess about it until the craving is satisfied. Just like with Alex, my cravings aren't really strange or made up of weird combos, they are just foods I love, and when I want them, I want them NOW.

Such was the case with this recipe. I was having Mr. E barbecue a roast on the grill, had our first batch of sweet corn of the summer, and wanted some tasty taters to go with it. I'm not joking when I say I planned this meal on a Wednesday, before my weekly grocery trip, and literally could not stop thinking about it until Sunday when it was finally time to execute.

These come out of the oven with just the right about of crispy outside, but tender, buttery inside. They have such a robust flavor, with only a few ingredients, making them super easy too. Serve them with whatever you've got coming off the grill, from steak to chicken!

I'm sure everyone has that one potato recipe they consider to be the best ever, and right now, for me these are it!

Garlic Roasted Potatoes
3 lbs. honey gold potatoes, or any small yellow potato, quartered
1/4 c. olive oil
6 cloves garlic, minced
Salt and Pepper, to taste
Dried Parsley 

Preheat oven to 400. In a large bowl whisk together oil, garlic, salt and pepper. Leave at room temp for about 5 minutes. Add potatoes and toss to coat. Allow to marinate at room temp for 20 minutes. Transfer to a large baking sheet. Add extra salt and pepper.  Bake for 1 hour, stirring a couple times, until browned and fork tender. Garnish with parsley before serving.


Monday, February 15, 2016

Mommy, You Can't Eat That!

When you are pregnant, there are so many things to remember about food. It's so funny to me because the list of okay things to eat and the STAY AWAY FROM AT ALL COSTS list is constantly changing. It can be a little overwhelming if you are a foodie, and love food as much as we do. And when you have a little man living in your house, it can produce some pretty interesting conversations.

In the almost 14 weeks I've been expecting, the words "Because Mommy can't eat that" have come out of my mouth more times than I count. One, because I'm one of those women who don't just get morning sickness. I get all day, every day, can't get out of bed, need to be on medicine sickness, and the simple though of eating some foods isn't even possible. And two, because there are certain foods that are big no-nos, that he knows I would normally be gobbling down. (Oh, spicy tuna rolls, how I miss you.) 

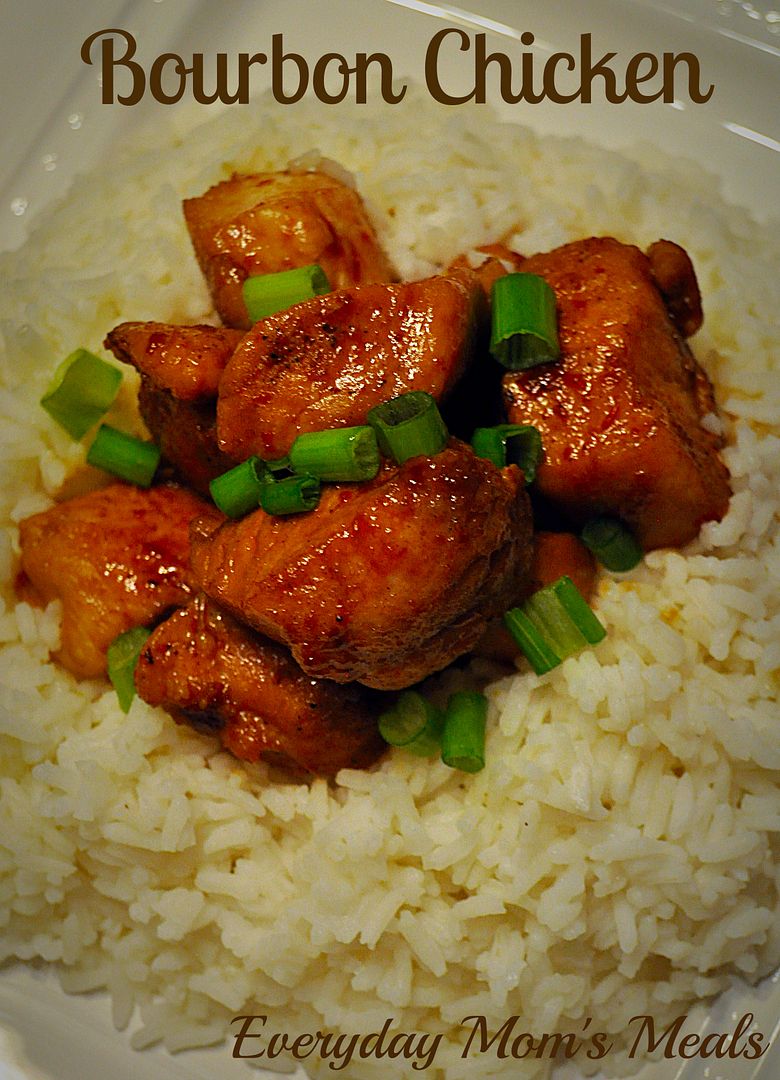
But he's learning; and now even becoming like a little watch dog about it. So a couple weeks ago when he asked me what we were having for supper, and I answered "bourbon chicken", it only took a few minutes for it to register in his brain and for him to almost tackle me in the kitchen exclaiming "But Mommy, you can't eat that!"  (Yes, he thought the chicken was gonna be drunk.)

Well, lucky for him, and our little peanut, I could. See, it gets the name from the chef who legend has it created the recipe while working on Bourbon street, not the alcohol. Whew...was he relieved! 

If you want to switch up your mundane chicken routine, this is the recipe to do it! Super simple for any weeknight too. Plus, I bet you have most of the ingredients in the kitchen right now! 

I'm glad my little man is watching out for me....even if he cares with a mouth full of sushi! 

Bourbon Chicken
3 boneless chicken breasts, cut into 1 inch pieces
2 TBS olive oil
1/4 tsp. ground ginger
1/4 tsp. garlic powder
1/4-3/4 tsp. red pepper flakes
1/4 c. apple juice
1/3. packed brown sugar
2 TBS ketchup
1 TBS cider vinegar
1/2 c. water
1/3 c. soy sauce
Salt and Pepper to taste
Chopped Green Onions
Cooked Rice

Heat oil in a large skillet over medium high heat.  Season chicken with salt and pepper. Cook in oil until browned on all sides. In a medium bowl, combine remaining ingredients, whisk well. Pour over chicken. Bring a boil. Reduce heat and simmer for 20 minutes until chicken is cooked through and sauce is slightly thickened. Serve over rice, spooning extra sauce over the top and garnish with green onions.


Shared at Weekend Potluck

Monday, January 11, 2016

He Eats THAT?? {A Post for Earth Fare}

So, we've talked before about how lucky we are that our 11 year old boy loves food. All food. Seriously, he is probably one of the least picky eaters on the face of the planet. He has always been that way. This is the kid who was eating sushi and fried calamari at the age of 5.

How did we do this? Did we put some spell on him? Brain wash him? Nope. We just never allowed him to be a picky eater. Now, I'm not here to judge or tell others how to parent their children. But I do think that many times when children turn their noses up at foods, it is a learned behavior, or one that is condoned so much, it's normal. So, in a way, I think sometimes parents inadvertently create their own picky eaters, without realizing it.

However, I also believe that every person, including kids, are allowed to have certain foods they simply don't care for. We all do, and as long as the boy tries it once, if he determines it is truly something that doesn't agree with his palate, I'm okay with that. But those things are few and far between in our house. But when he does discover one, I will respect that.

When I made this pasta dish and was telling it to a friend her first response was "And Alex will eat that? With mushrooms and spinach in it?" You can imagine her shock when I explained it was actually he who requested me to make a new pasta with spinach in it. He loves the stuff! She of course was bewildered because she happens to have a picky eater on her hands, and it is getting to be quite frustrating for her.

I feel for her. It must be a daily struggle when it comes to meal time, and kids like hers are missing out on so many yummy food experiences. I encouraged her to keep trying. Maybe give her child new things in a different way. Doesn't like cooked broccoli? Try it raw. Maybe find ways to sneak more veggies into the dishes she will eat. And of course, try to stay strong. Don't become a short order cook. As my mama always said "You don't like it? It's a long time until breakfast."

This pasta supper is hearty and filled with so many fresh ingredients you can actually feel good about it! Plus, it's super hearty and filling, perfect after a long, cold day! And if you can trick your picky eaters into liking it, think what a victory it will be!

Sausage & Spinach Rigatoni Bake
1 lb. mild Italian sausage
1 lg. rigatoni pasta
2 TBS olive oil
2 garlic cloves, minced
 3 c. fresh spinach
8 oz. baby bella mushrooms, sliced
2 c. shredded mozzarella cheese, divided
1/4 c. grated Parmesan cheese
2 (14 oz.) cans diced tomatoes, drained with a little juice left behind
1 tsp. Italian seasoning
Salt and Pepper to taste

Preheat oven to 375. Grease a 9 x 13 baking dish. Cook rigatoni to package directions for al dente. In a large skillet heat oil over medium heat. Add garlic and stir for two minutes. Add sausage. Cook until no longer pink. Add mushrooms and cook until browned. Add tomatoes, seasonings and spinach. Stir to combine. Cover and reduce heat to low. Cook until spinach is wilted, about 10 minutes. Check for salt and pepper, and season again if necessary. When pasta is cooked, drain well. Add to sauce mixture and mix well. Add half sausage mixture to baking dish. Sprinkle with 1 cup mozzarella. Add other half of sauce mixture. Top with 1 cup mozzarella and Parmesan. Bake uncovered 20-25 minutes until slightly browned.


Recipe from Wine & Glue

Monday, December 14, 2015

Red Potato Facelift

Are you potatoed out? Yeah, me either. I can't help it. We love us some taters and we will take them any time any way. Now, that's not to say I don't enjoy finding new ways and switching up our tater routine!

With the holiday season in full swing, (If you haven't looked at the calendar lately, there are only 11 days until Christmas.) you might be desperate for an easy side dish for a weeknight meal. Or maybe you have your own version of Cousin Eddie and already have house guests to feed, who won't be leaving until the New Year! Or maybe you want potatoes on your holiday feast menu, maybe with some ham, and you are looking for something new to try. If any, or all of those apply, you're going to be so happy you logged on today!

The flavors of lemon and rosemary are so classic, I can't believe I never thought to use them on potatoes before. So bright. So unique. They really brighten up an every day dish and bring your taste buds back to life.

These are as pretty as they are tasty and would look terrific on your Christmas table! They might be the one thing your guests all say "hmm...what is that" when they take the first bite! Oh, and if you're feeding a crowd, they would be easy to adapt (This amount would feed 4-6) and still stay on budget, being so economical!

So many of us turn to the classics during the holiday entertaining season, but we can also take those tried and true favorites, give them a little face lift and create something new to become a tasty tradition.

Lemon & Rosemary Roasted Potatoes
12 red potatoes, quartered
5 TBS lemon juice
8 teaspoons olive oil
1 tsp. dried rosemary
1 tsp. garlic salt
1/4 tsp. pepper 
Salt to taste
Dried Parsley

Preheat oven to 450. Spray a large rimmed baking sheet with nonstick spray. Place potatoes in a large bowl. In a medium bowl combine 4 TBS lemon juice, olive oil, rosemary, garlic salt and pepper. Whisk to combine. Pour over potatoes. Stir well to coat. Transfer to baking sheet. Sprinkle with salt and extra pepper, if desired. Add dried parsley. Bake for 45 minutes-1 hour until fork tender and golden, stirring a couple times. Remove to serving bowl and drizzle with 1 TBS lemon juice. 


Friday, September 18, 2015

Gnocchi... "Gnot" So Hard

Ha! Did you like that play on words there? I couldn't help myself. I guess a good place to start with this post is to ask "Have you had gnocchi before?" And for those of you shaking your heads "no" right now, I will explain.

Gnocchi (pronounced NO-KEY), are soft dough dumplings, usually made from potato, from Italy. Now, you know I am a sucker for all Italian food, so it shouldn't come as a shock that the first time I tried gnocchi I was instantly hooked.

Yes, you can make gnocchi from scratch, at home, but like so many other things in today's world there are time saving options in your regular grocery store. Something you used to have to go to a specialty store for, is on the shelf, next to the other dry pastas. (A side note though--if you have leftover mashed potatoes, especially at the holiday times, this is a great use for them!)

I even found my packages at Aldi, so if they have them, I would think most other stores would too! The ones I used were pre-cooked, so all I had to do was cook them until they were tender. But don't expect them to by hard like a dry pasta. Even though they are already cooked, they are still soft and dumpling like.

I love the flavor combo of white beans and spinach; and they make this an extra hearty dish. This is rustic food perfect to come home too after a long, maybe chilly, fall day when all you want is a meal that will satisfy you without a lot of prep work.

If you've never tried gnocchi at home, I encourage you to. After all, this was my first time making them in my kitchen, and look how fantastic they turned out!

Gnocchi with Spinach & Beans
 2 (16 oz.) packages potato gnocchi, cooked according to package directions
2 (14 oz.) cans Italian diced tomatoes, with juice
2 (14 oz.) cans cannellini beans, rinsed and drained
1 (6oz.) bag fresh spinach
3 TBS butter
1 small white onion, chopped
2 cloves garlic, minced
1/2 c. shredded mozzarella cheese
3 TBS grated Parmesan cheese
Salt and Pepper to taste

In a large skillet heat 2 TBS butter over medium high heat. Add butter, onion and garlic. Stir and cook until tender, about 5-7 minutes. Add 1 TBS butter and gnocchi. Saute until browned on all sides, another 5 minutes, stirring constantly. Add tomatoes, beans and spinach. Stir to combine. (You might have to add the spinach in batches) Cook until spinach is tender and cooked down. Season with salt and pepper. Add cheeses, cover and remove from heat, sitting for about 5 minutes until cheese has melted. 


Recipe Inspired by Taste of Home

Shared at Weekend Potluck


Disclaimer: As a Field Editor for Taste of Home, I share this recipe as a volunteer, not a paid employee. 

Wednesday, August 12, 2015

One Extra Pot

So, I wish I could "advertise" this as a one pot wonder, but I can't tell a lie. It would be false advertising and I just can't do that. However, it only takes one extra pot, so it's like a very close cousin! That's all. Just one more, and it is barely going to get dirty, so it only half counts. 

I think one of the reason why when searching for recipes we all seem to stop at the ones labeled "one pot" or "one skillet" is because life demands meals be quick, both for cooking time, and clean up. Let's face it, those huge meals taste great and are so satisfying, but the after math? I for one always wish for the dish fairy to show up...and she never does....lazy witch. You know the ones I'm talking about. Where it seems like every single dish/pan/pot/utensil in the kitchen is dirty and piled up in the sink. Even with the added blessing of a dishwasher, the amount of work can seem daunting. So when I can give my family, and all of you, a dish this delicious, and make the promise of only two pans...it's a successful food blogger day. 

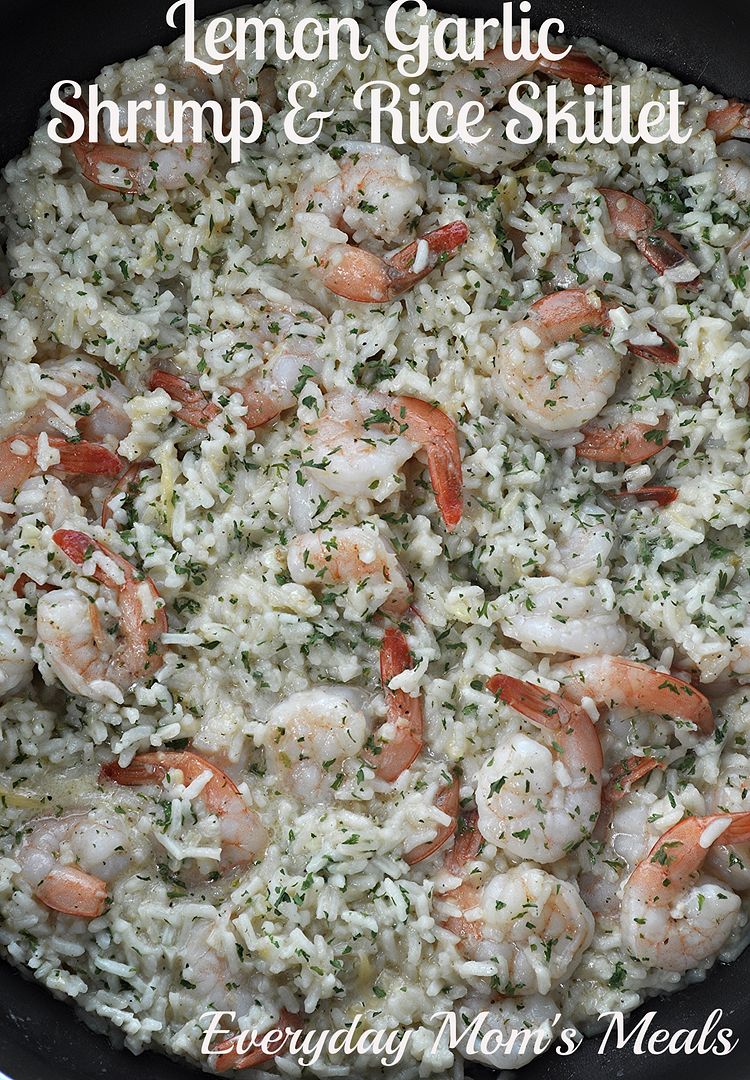
This is another way to really stretch the budget when it comes to seafood. If you haven't seen me sing the praises of the frozen options in the stores today, you are now. The 12 oz. bag I used in this recipe cost me about $5, and easily fed our family of three. Oh, and if you're wondering if you have to buy the ones with tail left on per the recipe, it's a personal choice. I like to use them in dishes like this because they shrink less. But if you don't mind that, and don't want to mess with the tails when chowing down, feel free to use tail off. 

Between the garlic and lemon, this is bursting with flavor, and even with the cheese and milk, I think it's still super light. Add a veggie and maybe some bread on the side and supper is on the table in under 30 minutes! And your clean up will be even less than that!

Lemon Garlic Shrimp and Rice Skillet
Inspired by Diethood
2 c. instant white rice
2 c. water
2 chicken bouillon cubes 
6 TBS butter
5 large garlic cloves, finely chopped
12 oz. frozen medium shrimp, tail on, thawed
6 TBS milk
1/2 c. shredded Parmesan cheese
1 1/2 TBS dried parsley, extra for garnish
Juice of 1/2 lemon
Salt and Pepper to taste 

In a medium pot, bring water and bouillon cubes to boil. Add rice. Stir. Cover. Remove from heat. Let stand 5 minutes. Fluff with fork. Set aside. (These were my directions. Check your box!) In a large skillet, heat butter over low heat. Add garlic and cook for 2-3 minutes until fragrant, stirring constantly. Add shrimp, salt and pepper. Cook and stir, until shrimp are pink, about 5 minutes. Move shrimp to sides of pan, add rice. Stir well. Add milk, cheese and parsley. Stir to combine and cook for 1-2 minutes more until thickened. Remove from heat. Squeeze lemon over. Sprinkle with extra parsley. 


Shared at Weekend Potluck

Monday, July 27, 2015

Whole Grain Challenge with Nature's Harvest® {A Feature and Giveaway}

"Whole Grains." Everybody is talking about them, and you can't go down the aisles of your grocery store without seeing them around every turn. That's because they are an important part of a nutritious diet! The U.S. Dietary Guidelines recommends that adults eat 48 grams or more of whole grains daily and children ages 4-13 years old eat a minimum of 40-48 grams per day. However, studies have shown that the majority of children and adults are not consuming the recommended amount of whole grains.


This is why Nature's Harvest® Bread is so excited to launch the Whole Grain Challenge to encourage families to include 48 grams of whole grains into their diets every single day.  From July 13 to August 10, participants can take the whole grain pledge on the Nature’s Harvest® Facebook page and they will automatically be entered into a weekly sweepstakes.

If you've never tried Nature's Harvest®, let me tell you why you should! 

Each variety of Nature’s Harvest® bread is baked with:
At least 8 grams of whole grains per serving
No artificial flavors or colors
No high fructose corn syrup 
Since ALL Nature’s Harvest® breads are baked with at least 8 grams of whole grains per serving, it’s an easy way for moms to provide her family the whole grains they need… no matter the variety.
Nature’s Harvest® bread is now available to consumers nationwide and come in delicious varieties including:
100% Stone Ground Whole Wheat Bread
Honey Wheat Made with Whole Grain Bread
Butter Top Made With Whole Grain White Bread
Butter Top Made with Whole Grain Wheat Bread
Now you can have bread that is soft, flavorful and perfect for every day use that your family will love that you can feel absolutely great about giving them. With back to school time just around the corner, and all those pb&j sandwiches going with the little ones, it's the perfect time to make the switch!

I was super excited when my friends at Nature's Harvest® asked me to try their bread and come up with a fun recipe to share with all of you.
One of our favorite supper time combos inspired me. Soup and Grilled Cheese. It's an American classic, and while 99% of the time, it's the standard tomato soup and American cheese, this time I decided to switch it up. I took that grilled cheese sandwich to the next level! I basically took one of my favorite appetizer dips and stuffed it between two slices of bread. Genius, I know. 
With busy school days almost here, simple, tasty, fast meals we can get on the table and still feel good about are a must, and using Nature's Harvest® for a soup and sammy meal gives us just that. Oh, and the great folks at Nature's Harvest have also provided me with a fun giveaway for you too. Just scroll down under the recipe to see how to enter! 
Spinach and Artichoke Grilled Cheese
1 loaf Nature's Harvest® Butter Top Made with Whole Grain White Bread
Margarine or Butter, softened
1 (14 oz.) can artichokes, chopped
6 oz. fresh spinach
3 TBS olive oil
5 cloves garlic, minced
6 TBS sour cream
1/2 c. shredded Parmesan cheese
3 c. finely shredded mozzarella cheese
Salt and Pepper to taste
In a large skillet over medium heat, cook garlic in oil for 30 seconds just until fragrant. Add spinach and cook until wilted, about 5 minutes, stirring often. Add artichokes and cook for 2 minutes. Remove from heat and stir in sour cream and Parmesan, stirring to combine. Season with salt and pepper to taste. Spread margarine on one side of slices of bread. Lay margarine side down in large skillet. Add about 2-3 TBS mozzarella cheese, and 2-3 TBS of spinach mixture to bread. Top with another slice of bread, margarine side up. Cook until browned on all sides. Serve with a cup of your favorite soup.


***GIVEAWAY***
Leave a comment telling me your favorite sandwich! Include an email address so I can find you easy. 
(1) Winner Will Receive:
(1) $5 off coupon for Nature's Harvest® Bread
(1) $25 Visa Gift Card

Contest Ends: August 7, 2015
Disclaimer:  The information and coupons have been provided by Nature’s Harvest® so that I could try the product and share my thoughts and information about Nature’s Harvest® bread. The opinions expressed in this post are my own and do not reflect the opinions of Nature’s Harvest®. They also provided me with the prize package for the giveaway, but I am in charge of running it and choosing a winner.

Friday, June 12, 2015

Bring A Little Piece of China Home

As some of you know, last month, I debuted as a new Blog Ambassador for the Children's Museum of Indianapolis. This is such a honor for me, and I'm so incredibly excited to be associated with a place I've enjoyed since, literally, I was a kid; and now share with my son!

For my first post, I wanted to visit the museum, and then find a way to bring the fun home, and of course, in true EMM fashion, into my kitchen. Plus, it gave us a chance for a mini road trip and a family day FULL of fun!


One of Alex's favorite exhibits this time around was Take Me to China. I'm not kidding when I say we felt like we stepped onto a plane and entered a new land. There were so many things to learn, interact with and do, it truly was like visiting the Orient right at home.


Inside the exhibit, his hands down most favorite thing to experience was the restaurant. Yep, an entire area where kids can pretend to run a traditional Chinese restaurant. He took our orders, "cooked" the food, and served it to us! Well, that certainly got me brainstorming as to how we could have some of the same kind of fun at home!


That's easy! We'll make some Chinese food! I'm talking take-out quality, but simply made in your own kitchen! You know how much I love recreating favorites from the take out menu with fresher ingredients and without all the preservatives!

If your family loves Chinese food, they are going to flip for this, and you're going to love how easy it is. Perfect for a busy weeknight. And if you live within driving distance to Indianapolis, be sure to take a trip to China soon! Oh, and be on the look out for all of my posts for the TCM blog coming soon!

Cashew Chicken with Fried Rice
Originally Posted on the Children's Museum of Indianapolis Blog
2 1/4 lbs. boneless chicken tenders, cubed
3 large garlic cloves, minced
1/2 c. soy sauce
1/4 c. corn starch
1/4 c. vegetable oil
1 bunch green onions, chopped
8 oz. button mushrooms, thickly sliced
1/3 c. sweet chili sauce
1 c. cashews, reserve a few for top
Black Pepper to taste

Fried Rice
4 c. leftover brown rice*
1 (12 oz.) bag frozen peas and carrots, thawed
2-4 TBS soy sauce, to taste
3 eggs, beaten
2 TBS vegetable oil

In a large skillet, heat 1 TBS oil over medium heat. Add egg, and stir to scramble. When cooked, remove with slotted spoon to paper towel lined plate.  Wipe out pan, and add 1 TBS oil. Place rice in skillet and let fry until you can hear it sizzle. Then start stirring. Add peas and carrots and soy sauce. Stir and saute' until flavors combined, about 10 minutes. *NOTE* I make my rice in the morning and let it sit in the fridge all day. You can even make it the night before!

 In a small bowl whisk together soy sauce and cornstarch until smooth. Place chicken in a large bowl, season with black pepper. Add garlic. Pour soy mixture over. Mix well. Allow to sit at room temperature for about 10 minutes. In a large skillet, heat oil over medium-high heat. Add chicken. Saute', stirring frequently, until no longer pink, about 7 minutes. About half way through, add mushrooms. When chicken is done and mushrooms are brown, add onions, chili sauce and cashews. Stir to combine. Serve with fried rice. Sprinkle with extra cashews.


Shared at Weekend Potluck

Wednesday, April 29, 2015

Steak Season

At last, grilling season as returned! Well, for us, it never truly leaves, but you know what I mean. For many one of the first signs of spring is to return to cooking outdoors. You can smell it now, can't you?

During the hot summer months, I try really hard not to heat up the house with the oven or stove as much as I can. The grill usually takes care of the meat portion of the meal, but then I'm responsible for sides, and that's when I usually have to break my own rule. Sure, I can do cold potato or pasta salads, but sometimes we want more...that's where this recipe comes in. And I promise it's worth the little bit of heat it might put into the house.

I love mushrooms with steak, but not on top. We are kind of steak purists. We don't like anything taking away from the flavor of the meat itself, so instead we like them on the side. Just like we can get at our favorite steakhouse.

This is a totally new take on the traditional sauteed mushrooms I've made a thousand times. These are creamy! Just a hint of cream cheese gives them an unique flavor and texture that takes them to the next level!

If you have some steaks going on the grill this week, think about adding these to the menu too. You won't be sorry! 


Garlic Creamy Mushrooms
24 oz. large button mushrooms
3 large garlic cloves, minced
2 TBS beef broth
2-3 oz. cream cheese
1/2 tsp. dried oregano
1/2 tsp. dried rosemary
1 tsp. dried parsley, extra for garnish
3 tsp. grated Parmesan cheese
Salt and Pepper to taste
3 TBS butter
1 TBS olive oil

Preheat oven to broil. In a large skillet  melt butter over medium heat. Add oil. Mix. Add mushrooms. Don't move for about a minute, to allow to brown. Gently toss to brown on all sides. Add garlic and herbs. Keep tossing. When browned on all sides. move to outside of pan, as much as possible. Add broth. Remove from heat, stir in cream cheese until smooth. Stir to coat. Transfer to a baking dish and sprinkle with Parmesan cheese. Broil for about 5 minutes until cheese golden. 


Shared on The Country Cook May 1, 2015

Friday, April 24, 2015

#Plate Proud with Green Bean Delivery

I love entering recipe contests, but when they are also sponsored by a favorite company, that's even better. And that's the exact scenario I got when I was approached by my buddies at Green BEAN Delivery about their Plate Proud recipe contest.

Each participant is asked to submit their favorite original recipe in one—or all—of five categories for a chance to win impressive culinary prizes, including a grill set, planters, placemats, a Mandoline slicer and much more. Categories include everything from recipes on the grill to packed lunches to meals using only local ingredients. All winning recipes will be highlighted on the contest website.

Well, sign me up! I couldn't wait to come up with something delicious to submit, and of course share with all of you. I chose to develop something for the Veggie Side category, since summer time, fresh garden veggies are something I love to cook with in the warm months. Rather they be from our own backyard, or a favorite Farmer's Market, or in this case Green BEAN themselves, I can't get enough. 

This is sure to be a hit at your next cookout, potluck or family get together. Anything you have coming off the grill, from steaks, to burgers, to some delicious barbecue is going to taste even better with this crisp, cool, refreshing side. Fresh corn, tomatoes, avocado and a refreshing dressing make it like a bite full of sunshine in your mouth. Honestly, it's filling enough, it would make a terrific lunch or light supper when it's too hot to cook too! 

I've entered the Plate Proud contest and you can too. Just visit the entry page and share a recipe in one, or all five, categories! 

Summer Corn Salad
5 ears corn
2 medium tomatoes, seeded and chopped
1 small red onion, finely chopped
1 avocado, chopped
1 tsp. dried basil
2 tsp. dried parsley
Salt and Pepper to taste

Dijon Vinaigrette
1 TBS lemon juice
1 TBS white wine vinegar
2 tsp. Dijon mustard
1 garlic clove, minced
1/2 c. vegetable oil
Salt and Pepper to taste

Combine all ingredients for dressing in a jar and shake well. Chill until ready. 

For salad, bring a large pot of water to boil. Cook corn for about 3 minutes. Remove and immediately rinse with cold water. When cool, remove kernels from cobs. In a large bowl combine all ingredients for salad. Toss well to coat. Pour about 1/2 of the dressing over salad. Mix well to combine. Chill until ready to serve. Serve salad with rest of dressing on side for people to add if needed. 


Shared on The Country Cook April 24, 2015

Disclaimer: I was given a complimentary bin from Green BEAN Delivery in exchange for this feature and entering the contest. All thoughts and opinions are my own. 

Wednesday, April 8, 2015

A Sandwich By Any Other Name

So, I was reading an article in one of my favorite cooking magazines and I stumbled upon a reader asking for a recipe for something her grandma used to make when she was a kid. "Does anyone have the recipe for Handy Pankys?"

Um, yeah, that got my attention. You want a recipe for what? And what exactly was grandma making? I was a little disturbed for a moment. So I did what I do every time I have a question these days, I turned to my trusty friend Google.

I began researching and found indeed, there are sandwiches with this unique and colorful name. They are actually quite popular and there are a million recipes out there for them. Usually served as an appetizer or party offering, they are commonly made on cocktail bread, and people rave them about!

Well, I took what I liked about many of those recipes, added in a little me, and came up with these delicious open faced sammies, perfect alongside a bowl of soup. The first big change is I made mine on a larger piece of bread since they were making a meal. Plus I added in some seasonings and a secret ingredient that gave them extra flavor.

And of course, the biggest change is the name. I'm sorry, but when your blog has the word "Mom" right in it, I just didn't feel comfortable using the original title. There is nothing wrong with it. It's definitely catchy and cute, I just wanted something a tiny more wholesome for my recipe collection.

If you have enjoyed the originals, I think you'll love my twist on them. But if you haven't, they can be as new to you as they were to me...just a little less awkward to stumble upon! 

Hot Cheesy Beef Sandwiches
10-12 slices French bread (from bakery)
1 lb. ground beef
8 oz. Velveeta, cubed
1/2 tsp. garlic powder
1 tsp. steak seasoning
1 small yellow onion, finely chopped
3 tsp. steak sauce
Salt and Pepper to taste
1/2 c. shredded Colby Jack cheese
Dried Parsley

Preheat oven to 350. In a large skillet brown ground beef and onion until cooked. Drain if necessary. Add garlic powder, steak seasoning, steak sauce, salt and pepper. Stir well. Add Velveeta and stir constantly until cheese melts. Remove from heat and allow to cool 10-15 minutes. Carefully spoon meat mixture onto bread and place on baking sheet. Sprinkle with shredded cheese  and parsley. Bake for 15 minutes until brown and bubbly. 


Shared on The Country Cook April 10, 2015

Friday, April 3, 2015

It's Greek!

Apparently, I have a lemon theme going on this week, without even trying. If you didn't catch my recipe for Creamy Lemon Linguine on Monday, it's a keeper! You can see it here.

So we started the week with a lemon pasta and we are ending it with a lemon soup. It's quite appropriate for this week though, seeing how it's Spring Break! Nothing says spring to your tongue more than the bright, wake up your taste buds flavor of lemon!

This recipe came about because of a lunch I had with my mama and her friend a few weeks back. We were at my favorite diner here in Fort Wayne, and for the first time I decided to have lunch instead of breakfast. No joke. Every time I've been there in the past (And it's been a lot) I've had breakfast. No matter what time of day it was. They make the absolute best omelets in this city, hands down. Plus, since I always think of it as a place for great eggs, pancakes and all things breakfast, I sometimes forget it's actually a Greek restaurant!

The family who owns it is Greek and they feature traditional Greek dishes on their menu. But when I tasted this soup for the first time, I wasn't even thinking about that. All I knew was it was delicious, with a capital D, and I needed to recreate its lemony goodness at home.

Well, after I researched it a bit, I quickly discovered, it is indeed a Greek specialty that most traditional Greek restaurants serve their version of. (Okay, I have to be honest here. In my head I was saying "It's Greek!!" like the dad in My Big Fat Greek Wedding, who is convinced everything either comes from Greece, or was derived from something that came from Greece.)

If you have a springtime cold, or allergies that are in over drive, this will heal what ails you! In fact, the night I made it Monkey was down with strep throat and tonsillitis and it was the only thing all day he said tasted good and sucked down two bowls! 

It's bursting with verdant lemon flavor, but has a silky texture from the egg. Plus, between the egg and the rice, it's thick and hearty without being heavy.

If you have a great Greek restaurant in your hometown, I bet you they serve a version of this. If  you have ever had it and didn't know how to recreate it at home, now you do! Either way, it's a delicious soup, perfect for spring time! 

Greek Lemon and Rice Soup
7 c. chicken broth
3/4 c. long grain rice
4 garlic cloves, minced
1/2 c. fresh lemon juice
2 eggs
1 TBS dried parsley
Salt to taste

In a large stock pot, bring broth to a boil. Add rice and garlic. Bring back up to temp. Reduce heat to medium. Cover and cook for 20 minutes until rice is tender. While cooking, in a medium bowl whisk together lemon juice and eggs until frothy. When rice is cooked, ladle out some hot broth into egg mixture and mix well. Slowly pour back into soup, stirring constantly. Reduce heat to low and cook for 10 minutes. Stir in parsley and salt to taste. *NOTE* Be sure to add enough hot liquid to egg mixture to temper- this will prevent the eggs from scrambling when you add it back in. 


Friday, March 6, 2015

Mystery Ingredient

As some of you know already I am lucky enough to be part of the Yum Squad for Peanut Butter & Co., the makers of the best peanut butter I've ever tasted! We squad members had a challenge put to us a couple months ago, and I for one was up for the task! 

It was simple. We were sent some of their delicious peanut butter and a mystery ingredient, and we were to create a recipe using those. Easy right??!!! Well, if I'm being completely honest I was a bit nervous when my box got here, because it could have had anything in it. What the heck was I going to do if I was supposed to mix peanut butter with anchovies? Or pigs feed? Or chocolate covered grasshoppers? Okay...so my imagination kind of got carried away. 

So, can you imagine my pure relief and joy when I opened it up, and there was a bottle of sriaracha? Yep, something I already cook with. Something I have in my cupboard at all times. Something my boys will pretty much put on anything. Whew....how lucky was I? 


The second I thought of the hot of sriaracha and the sweet of peanut butter, my tongue immediately called out for something Asian! It's a flavor combo we have all the time in Asian dishes I make at home, and ones we have at our favorite restaurants. They meld so well together, and taste so great, it's one of those things you would never guess go together, but truly do. 

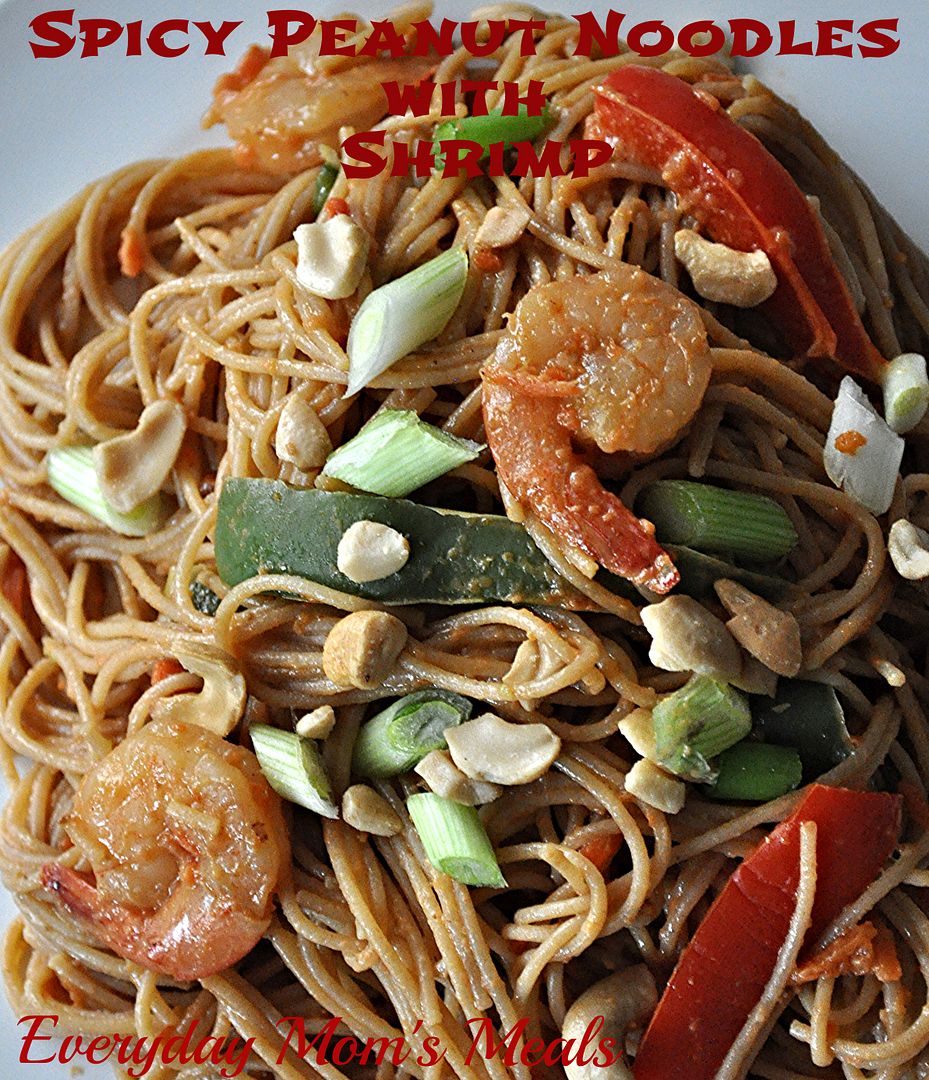
Need a seafood dish for your Lent meal tonight? This would certainly put a little spice in your step! I love this recipe because it's a great base that you can build from. Take the noodles, add whatever veggies you like, and swap out the shrimp for chicken or pork. You'll still get a tasty, simple meal! 

I'm not always a fan of surprises. I think sometimes life can throw you some doozies, but in this case, it was a fun, and even more importantly, absolutely delicious surprise. Oh, and my friends at Peanut Butter & Co. have some peanut butter they want to give you too! Just scroll down below the recipe to see how to enter to win! 

Spicy Peanut Noodles with Shrimp
2 TBS vegetable oil
1 (13.25 oz.) box whole grain thin spaghetti
1 (12 oz.) back frozen shrimp, thawed 
1 green bell pepper, thinly sliced
1 red bell pepper, thinly sliced
1 1/4 c. matchstick carrots
1 garlic clove, minced
1/4 c. soy sauce
1/4 c. creamy peanut butter
1/4 c. lemon juice
1/2 c. chicken broth
1-3 tsp. sriracha sauce, to taste
4 green onions, sliced on bias
1/3 c. chopped cashews

Cook pasta according to package directions. In a medium bowl whisk together soy sauce, lemon juice, peanut butter, chicken broth and sriracha until smooth. Set aside. In a large skillet, heat oil over high heat. Add shrimp and garlic. Saute' until shrimp are almost completely pink. Add peppers and carrots. Saute' stirring often until peppers are crisp-tender, about 5 minutes. Pour peanut butter sauce into skillet. Bring to a boil. Reduce heat to low and simmer, about 5 minutes until sauce is slightly thickened. When pasta is cooked, drain well. Add to a large bowl. Pour shrimp sauce down over. Mix well to coat evenly. Toss until completely combined. Garnish with chopped green onions and cashews. *NOTE* I like to use shrimp with the tail on to decrease shrinking. 


Shared on The Country Cook Mar. 6, 2015


To Enter: Leave a comment telling me what savory dish you love to make with peanut butter! 

(1) Winner Will Receive:


(1) Jar Smooth Operator (creamy) Peanut Butter
(1) Jar of His/Her Choice Peanut Butter 
(See flavors here.)

Disclaimer: I received free product as part of The Yum Squad. All thoughts and opinions are my own. 

Friday, February 6, 2015

Eight Dollars??!!!

Woo hoo! Gas prices are way down lately around us. How about you? Now, they actually have gone back up a tad compared to a few weeks ago, but it's still cheaper than it has been in a long time, so I won't complain. However, I have noticed something interesting. Even though the cost of fuel has gone down, grocery prices, at least on some items, have continued to go up.

Now, to me, if the fuel it takes to haul them from Point A to Point B, is cheaper, than the price should reflect that. I'm not talking about things that are out of season that have to come across the country. I know to get a good tomato or orange in Indiana in the winter I'm going to pay a premium. These items are ones that don't really have a season per say, and just continue to go up.

One in particular? Chicken. It's not cheap. And it just keeps getting more not cheap. In fact, in our house, with the budget I set for myself, if chicken isn't on sale, I don't buy it. Thankfully at least one store around us usually has a sale about once per week, or every other, so I am lucky.

But a couple weeks ago I wanted a whole roasting chicken. Nothing fancy, just one I could slap some garlic and lemon on and throw in the oven. I couldn't find any in the sales ad, but I figured I would look in store since sometimes there are unadvertised specials. Well guess what! There weren't. In fact, the cheapest roasting chicken I could find was over $8!! And there are only three of us, so it's not like I was trying to buy some huge bird to feed an army. I'm talking about a 4.5-5 pound one...so you can see why $8+ was a little crazy to me.

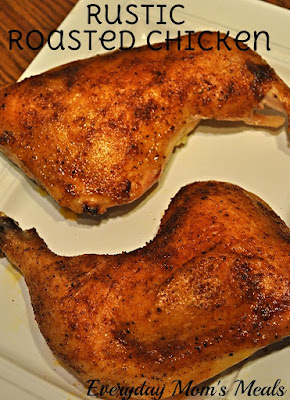
So, there I stood, looking around in the poultry case trying to figure out what I could do instead. I'm sorry, I just refused to spend that kind of money. While what I wanted wasn't on special, they did have leg quarters at a great price, so they went in the cart instead...and this yummy recipe came to be.

If you aren't a skin lover, I'm sure this would be just as delicious on boneless skinless too, just with less of a crispy result. For me, I am a skin fanatic, from way back. In fact, others in the family, including my husband will relinquish their skin to me without even asking because they know it's a sure bet I want it.

The combination of seasonings lead to a rich flavor, with a crispy outside and tender and juicy on the inside.  A terrific oven chicken dinner perfect for any weeknight! Plus, with only a handful of ingredients, it's very budget friendly too...rather you can find the chicken on sale or not!

Rustic Roasted Chicken
4 chicken leg quarters, trimmed
3 TBS vegetable oil
1 tsp. paprika
1 tsp. seasoning salt
1/4 tsp. dried thyme
1/4 tsp. garlic powder
Salt and Pepper to taste

Preheat oven 400. Pat chicken dry with paper towels. Season with salt and pepper. In a small bowl whisk together oil, paprika, seasoning salt, thyme and garlic powder. Lay chicken on a rack in a large roasting pan. Baste liberally with marinade. Bake for 60-75 minutes, until juices run clear. Half way during cooking time, spoon some pan drippings over the chicken, and then again right before serving.
*NOTE* If your chicken doesn't give off much liquid, simply whisk together the same marinate ingredients in HALF quantities and baste during cooking. And if you do choose to use boneless skinless, I would mix up the marinade and let the chicken sit in it in the fridge for a few hours before cooking. Then mix up a second batch to baste while cooking. 


Shared on The Country Cook Feb. 6, 2015

Monday, February 2, 2015

I'm Krista and I Love Carbs

If you are an avid reader of EMM you know my one food addiction is pasta. Lots. And. Lots. Of. Pasta. Seriously, I could eat it every meal, every day...forever. If I was stranded on a deserted island and could only have one food in my picnic pasta, eh, basket, it would be pasta. See, I can't even get through a sentence without my mind wandering. (Oh and my keyboard is a little damp from the drool too!) But there are only so many pasta recipes out there, and while I haven't made them all, sometimes it starts to feel that way.

So, when my craving once again set in, I thought what if I take a dish I already make, use the same ingredients, but switch up the way it's prepared?? Like, taking my Mushroom Fettuccine Alfredo and transforming it into casserole form? Genius, I know!

Now, if you started 2015 with the resolution to eat lighter, this is not the recipe for you. I'm not even trying to hide the fact this is rich with a capital R. But just as I said in my original post, we all have to indulge once in awhile. And our family's philosophy when it comes to food, is all things in moderation. We don't deny ourselves any one food or dish. I think if you deprive your body of one food group, you end up compensating with others, and the balance of things is thrown off. It's a personal philosophy, and I respect others have their own. But for us, this is best.

This is layer after layer of YUMMY. If you aren't a mushroom fan, simply substitute with another veggie you do love. Broccoli would be good. Oh, I might have to try that myself! Oh, and spinach too. See, I just can't concentrate this is so good.

Pasta. It's a love. It's an addiction...so if there is a Carb Lovers Support Group...that's where you'll find me!

Mushroom Alfredo Pasta Bake
1 1/2 lbs. penne pasta, cooked until just al dente
1 lb. button mushrooms, sliced
1 stick plus 2 TBS butter, room temperature
2 c. heavy cream
1/2 c. grated Parmesan cheese, plus more for layers
8 oz. mozzarella cheese, divided
3 cloves garlic, minced and divided
Salt and Pepper to taste
Dried Parsley 

Preheat oven to 350. While pasta is cooking, melt 2 TBS butter in large skillet. Add mushrooms and 1 clove minced garlic. Saute until browned. Season with salt and pepper. Remove and drain off extra liquid. Set aside. Wipe out skillet. Melt 1 stick butter over medium low heat. Add cream and remaining garlic. Bring to a simmer, stirring constantly. Add 1/2 c.  Parmesan cheese and continue simmering for 8-10 minutes, stirring often, until thickened. Add 3/4 c. mozzarella cheese and stir until combined and smooth. Season with salt and pepper.  Keep warm. When pasta is done, grease a 
9 x 13 baking dish. Ladle enough Alfredo in bottom of dish, just to cover. Then do the following layers: pasta, mushrooms, Parmesan, mozzarella, Alfredo. Repeat layers three times. Sprinkle with dried parsley. Cook for 15-20 minutes until heated through and browned on top. Remove from oven and cover with foil. Let stand for 10 minutes before serving. 


Shared on The Country Cook Feb. 6, 2015