Everyday Mom's Meals: Pizza
_____
Showing posts with label Pizza. Show all posts

Sunday, August 1, 2021

Beep Beep Buses Coming Through


 Happy August! I can't believe I'm saying that. In fact, I do so with a little choke. See, in this house August means a couple things. One, it's officially back to school time (10 days to be exact) AND int he same time, my baby will celebrate his 5th birthday! ("Mommy, I'm going to be a WHOLE hand this year!") 

Neither of these things are events this mama's heart handles well. I love having my kids home with me, and I am never ready for them to be another year older. Sure, I can be excited for them; and be ready to celebrate, but that doesn't mean I don't fight back tears along the way! 

I developed this recipe for an easy "summer lunch for kids" and then realized it was almost time for school before I was posting it. That's okay though. Many kids won't be boarding the bus for a few more weeks, some not until after Labor Day! Others are still learning from home, and could still use a fun, yummy lunch. Also, they work so well for a kid's party or sleepover. Or, as my boys pointed out after eating them for lunch, I could double the recipe, add a salad on the side and have a simple supper for a busy night. Oh, and let's not forget Game Day! Football Sundays are coming soon too, and these would be perfect! So...my easy kids lunch really has so many more possibilities! 

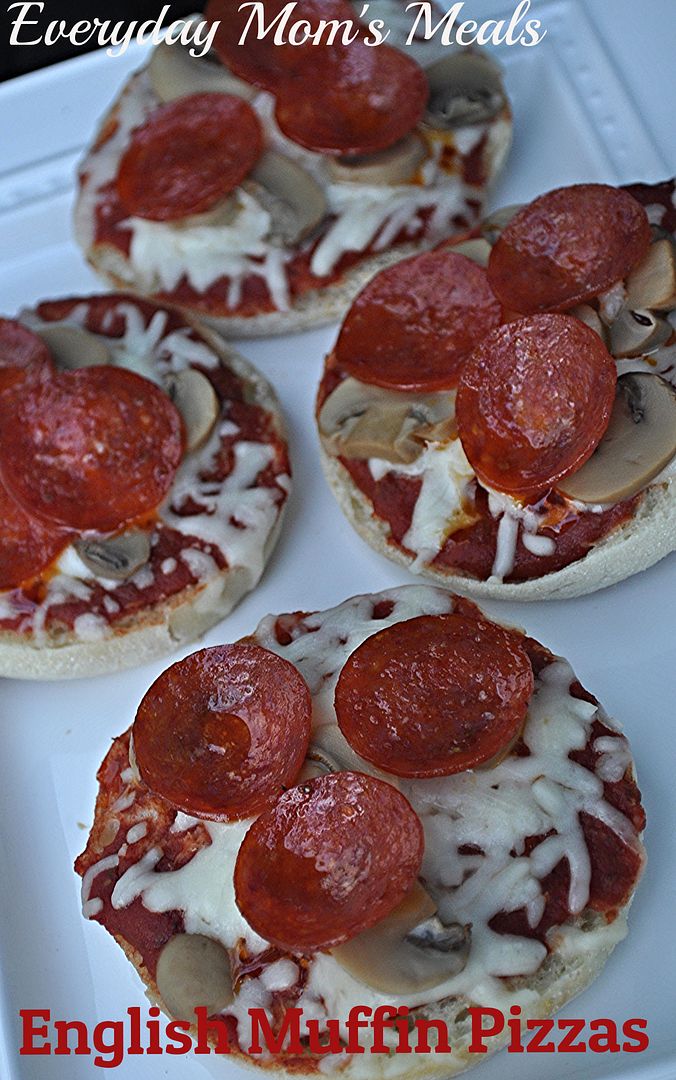
These mini pizzas used a frozen Texas Toast garlic bread for the crust and can be customized by little hands for fun in the kitchen! Any of your favorite toppings work, just make sure if you're using fresh veggies they aren't wet...nobody wants a soggy pizza! Oh, and it's best if you use the garlic bread without cheese. Sounds weird I know, but using "fresh" gets a better melt factor and allows the toppings to stick better! 

Summer lunch time will be winding down soon, but lucky for me you have so many more options with these yummy personal pizzas. But hey, there is still some time! Plan a pizza party lunch this week before those littles are grabbing their backpacks and lunch boxes as they run out the door!

Garlic Bread Pizza

1 (8 count) box Texas toast garlic bread

1/2 cup shredded mozzarella cheese

1/4 cup shredded Parmesan cheese

1 cup pizza sauce

2 tsp. Italian Seasoning

Sliced Pepperoni

Sliced Black Olives

Preheat oven to 425. Place garlic bread on a large rimmed baking sheet. Bake for 5 minutes. Top with pizza sauce and both cheeses. Sprinkle with Italian seasoning. Top with pepperoni, black olives and other desired toppings. Bake for 5-10 minutes more until browned and cheese is melted. Serve with extra pizza sauce for dipping if desired.


 Shared at Weekend Potluck


Sunday, February 7, 2021

When My Boy Asks

 My kids are so used to me planning diverse menus with many of their favorites every week, it isn't often they feel the need to request something, unless I ask them for input. But every once in a awhile, Alex will ask for me to make something he is craving, rather it be a beloved favorite or he wants me to try a new recipe. Such was the case when it comes to the new pasta bake I'm sharing today and boy am I glad he asked because it lead to something delicious and a recipe I am quite proud of! 

We are going on month 302 of this pandemic...or so it seems...and while I do think our family has adjusted to the things are the best we can, there are still moments I find us whining about things we miss. And that's okay. We all deserve to have a little whine now and again after what we have endured over the past year! Even my kids have truly stepped up to the challenge of "the new normal" better than I could have ever expected. 

My 4 year old will gladly wear his mask if I allow him to go into a store with me (which isn't often, and it helps the mask has either a panda or Baby Yoda on it!). My teenager goes to school every single day, in a mask, for 7-8 hours, without much complaint. He only gets to take it off when he eats lunch, which by the way is no longer with his friends, but in an assigned classroom where the food is brought to them and they eat at their desks. (I'm not complaining, our school has done an outstanding job at protocols this year and I'm so pleased we've been in-person with only a couple weeks of preventative remote since August!) But everyone is human, and sometimes a "oh I miss ___" will come out of one of our mouths. 

Alex's most recent lamenting was about buffets. Yes, we were a buffet loving family. We enjoyed a tasty Asian buffet, seafood buffet and the dinner buffet at our local Pizza Hut. In this case, it was the last one Alex was missing. No, not because of the all you can eat pizza, but instead the pasta they always served on it. He could eat plate after plate of their cavatini. I don't blame him, the other one they always had, a spaghetti with a white, cream cheese sauce makes me drool just thinking of it. (In case you're wondering, no it wasn't Alfredo. It was completely different, and it will be the next one I master!)

So when my oldest baby was sad because he had a hankering for this cavatini, and asked if I thought I might be able to come up with something similar, this mama had to try! Well, I don't want to pat myself on the back too much, but even I have to admit I hit it out of the park! 

This copycat is spot on! Both Alex and his dad couldn't get over just how close to the original it tasted. The boys was thrilled and I scored major mom points! 

This pasta casserole is sort of like a pizza, pasta combo so your kids will probably love it as much as mine! Maybe they have been asking you to try something new, and now you have your answer!

 Copycat Pizza Hut Cavatini

1 lb. rotini pasta, cooked to al dente

1 lb. mild Italian sausage

4 oz. pepperoni, chopped

1 medium white onion, finely chopped

1 red bell pepper, finely chopped

1 clove garlic, minced

1 TBS olive oil

2 (24 oz.) jars tomato and basil spaghetti sauce

1 1/2 c. shredded pizza blend cheese

2 TBS grated Parmesan/Romano cheese

1/4 tsp. dried red pepper

1 tsp. Italian seasoning

Salt and Pepper

Dried Parsley

Preheat oven to 350. While pasta cooks, brown sausage in large skillet. Drain well. Set aside. Wipe out skillet and add olive oil over medium high heat. Saute onion, bell pepper and garlic in oil until tender, about 5 minutes. When pasta is cooked, drain well. In a large bowl combine sauce, sausage, onion mixture, pasta, dried red pepper, Italian seasoning, salt and pepper. Stir well. Transfer half pasta mixture to a greased 9x13 baking dish. Sprinkle with Parmesan cheese, half pizza blend cheese and half pepperoni. Add other half pasta mixture, rest of pepperoni and top with pizza blend cheese. Bake for 45 minutes until brown and bubbly. Sprinkle with dried parsley before serving. 


Shared at Weekend Potluck


Monday, February 4, 2019

Dollar Store Delight

A couple weeks back there was a convo on Facebook about buying food at Dollar Tree and how 99% of what they sell is pre-packaged, processed junk. Now, I will no dispute that much of it is exactly that, but I also know there are some things I can find at me that not only are exactly what I would find at my major super market, but a whole lot cheaper, helping me stay on budget.

One of the things I mentioned in the thread was gnocchi. I discovered my local Dollar Trees (yes, we have 4 within just minutes of our house) carry 1 lb. packages of gnocchi. They are a fine quality, and taste the same as the $4 packs I can find elsewhere. I can honestly say every single gnocchi recipe you can find on this blog was made with $1 gnocchi.

So the next time I was in there I decided to create a new recipe around those; and see what else I could find too. In this recipe alone, the gnocchi, Italian seasoning, and pepperoni came from DT. I would have been able to get the marinara sauce there too, they just happened to be out of it the day I went. But...and here is the funny part...I got the sauce at Kroger...for $1 and the 2 cans of mushrooms at Aldi for $1 total. The only thing in the recipe that cost me more than a buck was the bag of mozzarella cheese, and I actually had a coupon for that too!

I guess this is my point. Do I want my family eating cheap, processed food every night of the week? Absolutely not. But there are some things to be found at the dollar store that you can turn into something delicious, yummy and stay on a pretty strict budget. This casserole fed our family of 4 (and I've got big eaters) plus enough for a lunch the next day, for around $7. That is less than $2 per person!

In my opinion, there just needs to be less judgment all around when it comes to where we buy our food, and what we are buying. We all do what we can, in the way we can, and I refuse to turn my nose up at something just because it came from a discount store! After all, look what you can do with it!

Pizza Gnocchi Bake
2 (1 lb.) packages potato gnocchi, cooked to directions
1 (24 oz.) jar marinara sauce
2 (4 oz.) cans mushrooms
1 (4 oz.) package pepperoni, chopped, reserve a few whole for top
2 c. shredded mozzarella cheese
Italian Seasoning

Preheat oven to 400. Grease a 9x13 baking dish. When gnocchi are cooked, drain and return to warm pan. Add chopped pepperoni, mushrooms, sauce and 1 cup cheese. Stir well to combine. Transfer to baking dish. Cover with foil and bake for 15 minutes. Remove foil, sprinkle with remaining cheese, top with pepperoni slices, sprinkle with Italian seasoning. Bake for 10 minutes more until cheese melted and bubbly. Rest for 5 minutes before serving. 


Thursday, April 5, 2018

Upping Your Frozen Food Game

I am so blessed to have so many connections because of what I do here. One of my favorite communities I've been working with lately is MyMagazine Sharing Network through the Kroger family of stores. 

I receive free samples or coupons for free items and get to try them and let the powers that be know what I think of them. Plus, share my thoughts on social media too! 

My latest campaign came at a perfect time. They sent me coupons for various items from the frozen food section of my local Kroger store, and asked I try to elevate one or more of them to something new. 

Mission accomplished! I knew exactly which one I was going to play around with first too. The oldest was home for Spring Break and it was time to come up with a fun, tasty lunch for him using Farm Rich Mozzarella Cheese Sticks.


I looked in the pantry to see what I had on hand, and about 30 minutes later I had a dish he loved and I knew would be a big hit with your kids too! Rather it be lunch, after school snack or a kids' party these will be the star! I can just see a bunch of littles around the pool, soaking up the sun, scarfing these down!

Oh, and if you wonder why there is no sauce on this pizza? I was afraid it would make it too wet, but some on the side to dip might be good. I just didn't have any on hand! 

If you want to learn more about MyMagazine Sharing Network, click here & maybe you can start to receive yummy free samples too!

Cheese Stick Pizza 
15 frozen mozzarella sticks*
Sliced Pepperoni
3/4 cup shredded mozzarella cheese
Sliced Black Olives
Canned Mushrooms
Dried Oregano

Cook cheese sticks according to package directions. When finished, allow to cool for just a couple minutes. Reduce oven temp to 350. Transfer to a 9 inch pie plate. Top with cheese, pepperoni, olives and mushrooms.  Bake for 5-7 minutes until cheese is melted. Sprinkle with oregano. *NOTES* 15 cheese sticks fit in my pie plate perfectly, be sure to check yours. Some marinara on the side for dipping would be fun too, I just didn't have any on hand. 


Disclaimer: I received a free sample I used in this recipe. The blog post and recipe were all my ideas.

Wednesday, November 11, 2015

New Cookbook

My cookbook collection is becoming a little bit out of control. I barley have enough room to fit anymore into the spot where I keep them. But you know what? That doesn't stop me from buying them! I can't help it. I love a good novel, and to me a terrific cookbook is just as exciting to dive into.

The latest one I brought home, (My $1.99 steal at Ollie's, I might add...) happened to be laying out a couple weeks ago where the boy found it. I came into the room and found him turning the pages, and could see the wheels in his head spinning.

"Mommy, I found a few recipes that sound yummy. Can I mark the pages so you can find them and make them?" Now, how could I refuse that request? "Sure, you pick some out. What one do you want me to start with?"

Well, that was an easy choice. Anything that has the words "pizza" and "burger" in the same title is going to get his attention. But here is the funniest part, he took the original recipe and totally made it his own! "Mommy, we will add this and this, and a little of that..."

Here is his final creation. We served with one of our favorite pizza toppings on top, green olives. But feel free to add your own. Don't groove on mushrooms? That's okay. Maybe add some green peppers instead. Believe me, we did so much adaption, you could too! These would be great for a crowd...maybe those holiday house guests that will be "checking in" before you know it!

What was the last new cookbook you bought? Please share, it might be one I don't have yet!

Crock Pot Pizza Burgers
1 lb. ground beef
 1 (4 oz.) can mushrooms pieces and stems
1 (10 3/4 oz.) can cream of mushroom soup
1 (8 oz.) jar pizza sauce
1 tsp. garlic powder
1 tsp. onion powder
1 tsp. dried basil
1 tsp. dried oregano
1 c. shredded Colby Jack cheese
1/4 c. grated Parmesan cheese, plus more for top
Sliced Green Olives
Buns
Salt and Pepper, to taste

Brown beef  in a large skillet until no pink. Drain if necessary. In bottom of Crock Pot, combine pizza sauce and soup. Add beef. Add seasonings and cheeses. Stir to combine. Cook on LOW for 2 hours. Serve on buns with extra Parmesan and olives.


Shared at Weekend Potluck

Monday, September 21, 2015

The Turtles Are Coming


We are coming to the end of September so quickly, sad I know, but we have actually been looking forward to this time of year for a while now. Why? Because one of our favorite places to visit for a fun filled day, The Indianapolis Children's Museum, is getting a brand new exhibit on September 26th. 

The Teenage Mutant Ninja Turtles are coming!! That's right, these Heroes in the Half Shell are descending upon our great state with all their ninja skills and teamwork! Now, ya'll know how much a good ninja is near and dear to this Tae Kwon Do Family's heart, hence why we are super stoked!

And there is nothing in the world Leonardo, Michelangelo, Raphael, and Donatello love to eat more than pizza! So I took some inspiration from them, and one of my little ninja's favorites, pasta, and came up with a meal that is sure to please any Ninja Turtle fan, from young to old!

A perfect weeknight meal, you can easily add your most loved pizza toppings! Or maybe a twist on Friday movie/pizza night! Any way you serve it, it's a meal the whole family will devour! 

If you are planning a trip to the Children's Museum any time soon, be sure to stop by the Turtles exhibit, you might just find your EMM ninja loving family there too! 

Pizza Pasta Skillet
1 lb. Italian sausage
1 green bell pepper, chopped
1 (4 oz.) can sliced mushrooms
1 (14 oz.) jar pizza sauce
1 (10 ¾ oz.) can cream of mushroom soup
½ c. pepperoni, chopped, reserve a few whole for top
¼ tsp. Italian seasoning, extra for top
¼ tsp. garlic powder
¼ tsp. onion powder
1 lb. elbow macaroni
½ c. grated Parmesan cheese
½ c. shredded mozzarella cheese
 Cook macaroni according to package directions. Meanwhile, in a large skillet, brown sausage, chopped pepperoni and pepper. Drain off extra grease. In a large bowl whisk together sauce, soup, garlic powder, onion powder, Italian seasoning and Parmesan cheese.  When macaroni cooked, drain well. Add to sausage mixture. Stir well. Pour sauce over mixture. Gently stir until incorporated. Reduce heat to low. Sprinkle with mozzarella and Italian seasoning. Top with extra pepperoni. Cover and keep on warm until cheese has melted.


Recipe Originally Developed for The Children's Museum
Shared at Weekend Potluck

Monday, October 20, 2014

2 for 1 Special

Yep, that's right. If you are a bargain hunter like me, you're going to be so happy you dropped by today. Why? Because I'm running a 2 for 1 special on EMM today. You will walk away with two recipes for the price of 1. (That's just a saying. Don't worry, I'm not charging you for either.) 

I guess to be accurate, one part isn't really a recipe, but more of an idea that you can take and run with...customizing them to fit your family tastes. But they are definitely a great idea for a simple supper, when life is too busy to chew, let alone cook. Or for a kid's birthday party...both to eat, and for an activity to keep them busy! 

But the second part is definitely a recipe, that I think could easily become a go-to for you like it is for me. I don't know about you, but the variety of canned/jarred pizza sauce in the stores is kind of underwhelming to me. I've tried several, and each one seems to be missing a little something, and doesn't quite taste "right." So, I decided it was time to attempt to make my own, but in true EMM style, it couldn't be complicated or fussy! Easy is the name of the game, and if I'm making something fun for dinner, I don't need any part of it ruining it by being too time consuming.

So here is the answer. A simple, ready in about 5 minutes, homemade pizza sauce that has the exact flavor I've been looking for; which can then be used to make some adorable mini pizzas the kids (And who are we kidding? The adults too!) will love. Toss a salad together, and dinner is done! Heck, take a few minutes in the morning and mix together the sauce, put it in the fridge, and that's one less step you have when you come home.

I'm happy to give you easy recipes, but I get really excited when I can double up and give you more "bang for your buck!" Since it's Monday, and I know you were swearing at the alarm clock this morning, why not treat yourself to knowing supper could be as easy as this! 

English Muffin Pizzas
English muffins, halved
Pepperoni
Canned Mushrooms
Mozzarella Cheese
 Pizza Sauce

Sauce:
1 (15 oz.) can tomato sauce
1 ( 6 oz.) can tomato paste
1 TBS dried oregano
1 1/2 tsp. garlic powder
1 tsp. paprika

For sauce, combine all ingredients and stir well, until smooth. Preheat oven to 375. Lay opened English muffins on large baking sheet. Spread with sauce. Sprinkle with cheese and top with pepperoni and mushrooms. Bake for 15 minutes until cheese melts and edges are crispy. *NOTE* This was enough sauce to make 12 halves, and freeze the rest. 


Shared on The Country Cook Oct. 24, 2014

Saturday, October 18, 2014

Soul Food Saturday


Anyone interested in family movie night? Well in this house we love evenings like these! Is the best part that you don’t have to cook, but take out? Or is it the one evening you plan on cooking together? For us we really enjoy cooking together, so this recipe fits these types of nights perfectly. How about home made pizza dough? Yes, one you made at home, together with all your favorite topping combinations.
Grab your favorite movie, its pizza night!
 
Homemade Pizza Dough 
Adapted from Center Cut Cook
 1 packet rapid rise yeast
1 c. warm water
2 ½ c. all purpose flour
2 tsp. honey
1 tsp. salt
2 tbs. olive oil
Pizza Sauce
Mozzarella/ cheddar cheese blend
Turkey pepperoni
Thin sliced onion, green bell pepper, tomato 
 
In a large bowl, add water and yeast. Stir until the yeast is dissolved. Then add flour, honey, salt, and olive oil. Stir to thoroughly combine. After all ingredients have combined then use your hands to knead the dough for several minutes. Shape the dough into a ball, and allow it to rest for 10 minutes.
Pre-heat your oven to 375 degrees
This is where you decide if you want one large pizza or 2 small ones. If you’d like 2 small, divide the dough ball in half and set one aside covered. Roll the second half into an 8 inch circle. Spray your 9 inch pie plate and place rolled dough in the pie plate. Repeat with the second. If you’d prefer one large spray your pizza pan, and roll out dough to 16 inch circle. Place onto the pizza pan.
Add sauce, cheese, and toppings. Place the pizza into the oven for 12-15 minutes, or until the crust is crispy and the cheese is melted. Cut into slices and enjoy!


Friday, May 9, 2014

#EasyAioli With #RedGoldRecipes

Okay mayonnaise lovers, when I say the word "aioli" there is a good chance you already know what I'm talking about. But I'm guessing a few of you, rather you are a mayo fan or not, have no idea what aioli is. Some of you might have heard it on some of your favorite cooking shows, or maybe on the menu at a favorite restaurant. Heck, maybe if you've even had it, and know you love the flavor, but have no idea how to make it at home or use it in your favorite recipes. Now Red Gold Tomatoes wants to change all of that!

For those of you who don't know what aioli is, I bet a few of you have had it and not even realized it! Have you had a great sandwich with a flavorful mayo-like spread on top, or maybe a crab cake with a creamy dipping sauce? Well, that is aioli!!

Aioli is a wonderful, flavorful mayo-like spread that can be smeared on a sandwich, used as a dip or as a topping on fish tacos. It is so versatile and delicious, that regardless of how it s used, you will always be adding more depth of flavor!

The great folks at Red Gold are hoping to introduce more home cooks to aioli spreads using tomatoes for sandwiches, dips, toppings and other recipes. As part of this fun summer cooking idea, Red Gold is hosting a Facebook campaign, "How do you Aioli?"  from May 7-27 where you can win aprons or even a $250 prize pack that includes a Cuisinart Panini Grill and other great prizes. Simply visit their Facebook page and choose which aioli you are most like! 


The fine folks at Red Gold were kind enough to send me a sample pack of their tomatoes, including Petite Diced with Garlic and Olive Oil, Lime and Cilantro, and Green Chilies, plus some recipes to try. The minute I saw this recipe I knew it was going to be the first I wanted to treat my family to. We love at home pizza parties, and I'm always looking for new recipes to jazz up our routine! This makes a fantastic appetizer, light lunch or even simple summer supper. I served it with a simple salad on the side and it made a fun, easy and yummy meal we all loved! 


Be sure to check out Red Gold online, on Facebook and Twitter too. Drop by and enter the "How do you Aioli" contest today! And remember to try some new #EasyAioli with #RedGoldRecipes! 


Flatbread Veggie Pizza with Garlic Aioli From Red Gold
4 flatbreads
1 green pepper, finely chopped
1 (14 oz.) can Red Gold Petite Diced Tomatoes with Garlic and Olive Oil
2 c. shredded mozzarella cheese
1/2 c. mayo
Sliced button mushrooms (my addition)

Preheat oven to 425. In a medium bowl combine the diced tomatoes and mayo. This makes Garlic Aioli! Spread a thin layer of aioli on each flatbread. Sprinkle with green pepper and mushrooms. Top with cheese. Bake for 12-15 minutes or until cheese is melted and golden brown. Slice before serving.


Pizza at Very Good Recipes


Disclaimer: I received free samples in exchange for this feature. All thoughts and opinions are my own. 

Saturday, March 15, 2014

Soul Food Saturday #47


I saw this recipe for the first time on Facebook, and had to give it a try. The perfect combination of garlic bread and pizza. How could that be wrong? Now that I have your full attention. This would be perfect for movie night, or a quick after school snack. This combinations are endless. Grab the kids because pizza bread is what's for dinner!

Pull Apart Pepperoni and Extra Cheese Pizza Bread 
1 Can Grands buttery Biscuits
½ c. Mozzarella /cheddar cheese blend
2 tsp. dried parsley flakes
1/4 c. olive oil
4 oz pepperoni
½ c. Parmesan cheese
½ tsp. granulated garlic powder

Preheat the oven to 350 degrees. Cut biscuits into quarters. Cut the pepperoni into smaller pieces. Mix all the ingredients in a bowl and toss so that the oil is spread evenly on each piece of dough. In a 9 inch pie plate, bake for about 20 minutes (or until the top is brown and the center is thoroughly cooked)
TIP: Be sure to check it in the middle before you pull it out. If the middle is still not cooked through allow another 5 minutes at a time until center is done. 


Friday, February 28, 2014

Not Just For Muffins

When I was a working girl one of my favorite places to "go to lunch with the girls" was Uno's Pizzeria.  One, because they were close to the office, and offered a 15 minute lunch. From the time you ordered, to the time they brought you the food, it was 15 minutes, or it was FREE! When you only have an hour to spare, that's a pretty great deal. And two, because they had, hands down, two things on their menu that to me, they did better than anyone else.

The first favorite I had was their fish n chips. Oh my word. It was this huge piece of beer battered cod, served with a huge helping of their yummy fries. Just thinking about it makes my mouth water. But the other was an in-house specialty...their deep dish pizza. I'm not really a deep dish fan, but theirs? I could not get enough! They did it better than anyone. After all, they originated in Chicago, and nobody does deep dish like Chi-town! The crust was the absolute best I have ever eaten, and it was the perfect indulgence during a busy work day.

Well, Uno's closed here in Fort Wayne quite a few years back, and I have not had a deep dish pizza since. No joke! But when a friend told me about these cute little appetizer pizzas she had a party, I figured they might just be a great way to get me out of the rut. Not because they would even come close to the one I loved so much, but they were easy, and I love something that can play multiple rolls. Sure, they make a great appetizer, but make enough, add a salad and you've got a meal the kids will love! Oh, and any time I can find a new use for my muffin tin...I'm in!

Add your favorite toppings and make these a fun new pizza party treat! Get the little ones in the kitchen and let them help! If you've got extra tortillas left over from tacos earlier in the week, turn them into something completely new! There are so many reasons these would be a star in your kitchen, and you will be a total rock star for making them!

I miss those deep dish pizzas a lot, and don't know if I'll ever find another I enjoy as much, but until then, I'll munch on these to ease my pain!

Mini Deep Dish Pizzas
4 large flour tortillas
Cooking Spray
1 c. mozzarella cheese
12 turkey pepperoni, cut into 4 pieces each
1 (15 oz.) can pizza sauce
1/2 c. grated Parmesan cheese
1 TBS Italian seasoning

Preheat oven to 400. Spray muffin tin with cooking spray. In a small bowl combine pizza sauce, Italian seasoning and Parmesan cheese. Stir well. Using a glass or the empty pizza can, cut 3 rounds from each tortilla. (You want to make sure the rounds are just a little bigger then the wells in your muffin tin.) Place tortilla rounds in muffin tin, so each well is covered on the bottom and up the sides a little. Fill each with about 2 TBS of pizza sauce. Sprinkle with cheese. Top with 4 pieces of pepperoni each. Bake for 10-15 minutes until golden and crispy. Let stand 2 minutes and remove with fork.


Shared on The Country Cook Feb. 28, 2014
 

Friday, October 25, 2013

Bonfire Bundles

This time of year I always try to provide you with a great idea for your upcoming Halloween party, or if your family is like ours and the evening is a simple one of neighborhood trick-or-treating, and supper needs to be quick and simple, something that would work for that too. Well, today is the day!

If your house is the place to be Halloween night, with friends and family dropping by, or a huge kids party, these would be a huge hit! I guarantee! Have a big platter of these sitting next to your cauldron of apple cider, and all the little ghoulish guests will flip! Rather it is held indoors, our out next to the biggest bonfire of the season, they are the perfect party food!

Our Halloween does indeed include a party, but I am not the host. We actually go back to my hometown (about 15 minutes from our house) so Alex can trick-or-treat in the neighborhood I grew up in, and then head to the local volunteer Fire Department for the fun filled party, with games, costume contests, door prizes and candy galore! It's a great tradition I'm so excited to be continuing with him. It allows his grandma to always be part of the festivities and it's kinda nice to see something I enjoyed so much as a child still going strong, and a community still enjoying it.

But all of this going on between the hours of 6pm and 8pm means supper needs to be quick, simple, but most of all FUN! I like treating him to something "party inspired" on Halloween, and it's usually something he can eat with his hands. Plus, it needs to be on the light side. Between the excitement of the night, and the sheer rush, supper really isn't high on his priority list.

These take the fun and yumminess of pizza and turns them into something new, adorable, and 100% kid friendly! Three things that all food should be on Halloween!

However you are spending next Thursday night, I hope it's full of smiles, more treats than tricks and some delicious food, not just Snickers and Butterfingers!

Mini Pizza Bundles Inspired by The Gunny Sack
20 refrigerated buttermilk biscuits
20 pieces pepperoni
2-3 String Cheese, cut into 20 small chunks
1 egg, beaten
Parmesan Cheese
Italian Seasoning
Garlic Powder
Pizza Sauce

Preheat oven to 425. Grease a 9x13 baking dish. Flatten each biscuit out. Lay a piece
of pepperoni on each, then a piece of string cheese. Gather sides of biscuit up, forming a bundle. Lay, seam side down in baking dish. Brush all with egg. Sprinkle with Parmesan, Garlic Powder and Italian Seasoning. Bake 18-20 minutes until browned. Serve with warm pizza sauce for dipping.


Shared on The Country Cook Oct. 25, 2013

Saturday, September 14, 2013

Soul Food Saturday #22

It's a special weekend at our house. Monkey will be turning 9 on Monday, and we are celebrating all weekend long! So of course Bekki couldn't have Soul Food Saturday without a little party for her favorite little guy!


Right here on Soul Food Saturday we are celebrating our favorite Monkey’s birthday! Yep, its here again! Can you believe it? It feels like we just celebrated him turning 8. Where has the time gone? It seems like just as fast as these pizzas bake, our Monkey is growing up before our eyes. I want to thank his sweet Mama for sharing him with us all, and giving me this opportunity to celebrate and create this party food for him.

Big love to you from California Alex! May God continue to bless you in every area of your life, keep your heart full of His everlasting love, and show you every moment that you are his beautiful child.
1 can Pillsbury pizza dough
Jar of pizza sauce of your choice
1 c. pizza cheese blend
1 c. Mexican cheese blend
1 package mini pepperoni
1 c. thickly sliced pepperoni
1 c. precooked sausage crumbles
1 jalapeno, chopped
4 sweet mini peppers, sliced
½ c. red onion, sliced
1 tbs. olive oil

Preheat oven to 425°F. Spray cookie sheet with cooking spray; sprinkle with cornmeal. Set aside. Cut roll of dough into 2 equal pieces; shape each piece into a ball. Roll out ball of dough into a 10-inch round. Place the rounds on the prepared cookie sheet; brush each with oil. Bake 6 to 8 minutes.

The Perfect Monkey Combo
Spread round with 4 tablespoons pizza sauce. In a small bowl mix cheese together; sprinkle ½ c. over pizza sauce. Top with 2/3 of pepperoni, half of crumbled sausage, ½ of sweet peppers, ½ of jalapeno and ½ of onions. Then top with ½ c. of blended cheeses. Bake 10 to 13 minutes longer or until crust is golden brown and cheese is melted and bubbly.


Meat Loving Monkey Super Supreme
Spread round with 4 tablespoons pizza sauce. Sprinkle ½ c. cheese over pizza sauce. Top with remaining pepperoni. Add thick sliced pepperoni, remaining half of crumbled sausage, sweet peppers, jalapeno and onions. Finally top with ½ c. cheese. Spread round with 2 tablespoons pizza sauce. Mix 1/2 cup Pizza blend cheese and 1/2 cup Mexican blend cheese; sprinkle half over pizza sauce.


Turbo Booster Punch
You can’t have a party without a great drink, so for this party I chose punch! Because Monkey loves it and so do I.
1 64 oz. can of pineapple juice
1 full cap of presweetened cherry Kool aid
64 oz. water
1 2 liter of 7up
Maraschino cherries
In a large pitcher or punch bowl add water, and kool aide mix. Stir to combine. Add pineapple juice and 7 up and mix to combine. Serve with ice, and garnish with maraschino cherries.

04b746e4bf8d10a6f444e1b911272d19f33bec4cfbf860be27

Wednesday, August 7, 2013

Dairy At The State Fair {Dairy Ambassador #WinnersDrinkMilk}

The Indiana State Fair is in full swing, and Indiana Dairy wants to make sure you enjoy what they have to offer at the fair grounds.

Anyone who has ever visited the State Fair can't help but notice the Dairy Barn, which happens to be a must on our fair agenda every single year. From the gooey grilled cheese to the thick and delicious milkshakes, we also treat ourselves to a yummy stop at the Dairy Barn.

I am especially looking forward to it this year because I've heard they have a new milkshake flavor...lemon! Ya'll know how much of a lemon freak I am...and I have to believe that will taste so refreshing during a sunny, warm day at the fair!

Plus another thing I love about the Dairy Barn is the reasonable prices! They really allow a family to enjoy some fair staples without emptying the wallet. Just take a look at this year's menu:

Open weekdays from 7 am-9 pm and weekends from 7 am- 10 pm, they also serve breakfast daily until 10 am. This year their featured sandwich is the Blue Moo- slices of blue and American cheese on sourdough bread. (I love that name! Too cute!) If you're looking for something a little healthier for the little ones at the fair, the Dairy Barn also offers the Fuel Up to Play 60 Kid's Meal-a great choice inspired by the Dairy Council's school health and wellness program. Plus, parents with babies with bottles can stop by the Dairy Barn anytime and they will fill them with milk for free!!

In addition, Indiana Dairy also sponsors the Cheese Sculpture, which will be unveiled August 7th, in the Dupont Food Pavilion. The sculpture this year will highlight the importance of childhood nutrition and starting your day with an energizing breakfast. And every day at 2 pm, also in the Dupont Food Pavilion, let Indiana Dairy's master chef show you how to prepare some delicious recipes. Plus, during one of the highlights of our visit every year, the daily parade at 6:30 pm, you can catch the dairy float rolling through the fairgrounds. 

To celebrate our upcoming trip to the fair, I decided to highlight dairy by combining two favorites in our family. I've already told you how much we love the dairy barn and all of it's yummy offerings, but at the top of the list is definitely their grilled cheese sandwiches. Seriously, they are the best ones I've ever had in my life! And the other one is pizza at the fair. While they don't offer it at the Dairy Barn, we always seem to find more than one vendor offering huge slices of pizza, perfect for a certain little boy! Actually last year, he had a Dairy Barn meal, complete with grilled cheese and milk, for lunch and pizza for supper. So I figured why not take both of Alex's favorites and turn them into one tasty, easy sandwich, perfect for a simple summer supper. 

If you are heading down to the State Fair, please include the Dairy Barn in your visit. You won't regret it! And be sure to have a grilled cheese and lemon milkshake for me!!

Pizza Grilled Cheese
Sliced mozzarella cheese
Sliced Pepperoni
Sliced White Button Mushrooms
Garlic and Herb Italian Bread, sliced medium
Pizza Sauce for dipping

Spread bread slices on one side each with butter or margarine. On bottom piece of bread layer cheese, pepperoni, mushrooms, and another slice of cheese. Top with another slice of bread, butter side up. Cook in a large skillet over medium heat until both sides are golden brown. Serve with pizza sauce on side. *NOTE* I found my bread in the bakery section at Walmart. If you can't find it, regular Italian or French bread would also work. Or even some sliced garlic bread!


Shared on Lady Behind The Curtain Aug. 7, 2013
Shared on The Country Cook Aug. 9, 2013


Saturday, June 15, 2013

Soul Food Saturday #9

Welcome to another weekend! I hope your week treated you well, and you have some fun or relaxation, or both, on tap for the weekend.

Bekki is sharing a simple, yet scrumptious recipe today that I know Alex would love for a simple summer lunch or snack before Taekwondo. If you have kids, you're going to love this one!


Summer vacation is in full swing now and what does that mean? For a lot of us the oven is on vacation and the least we heat up the house when making a meal the better. Plus, it’s even more appreciated if it’s quick and portable. Don’t forget something good! With all that needed, what on earth would satisfy all those requests? A recipe my husband came up with on our “fend for yourself, leftovers night” I call bagel mini pizzas fit just perfectly! This is a great way to use up the left over bits of stuff you have hanging out in the fridge taking up space.

Bagel Mini Pizzas
1 Parmesan oregano bagel cut in half
¼ c. shredded mozzarella cheese
¼ c. shredded cheddar cheese
2 tbs. pepper jack cheese dip (see picture below)
½ c. sliced mushrooms
½ c. pepperoni slices
¼ c. sliced onion
¼ c. crumbled bacon
Cut bagel in half. Spread cheese dip on both sides. Top both sides with sliced mushrooms, onions, pepperoni, cheese and bacon. Place on foil liner broiler pan. Place in 375degree preheated toaster oven, for 7-10 minutes. Or until edges are crisp and cheese has melted.
Whether it’s for a quick dinner on the run, or a movie night at home the combinations are endless. Recreate your favorite pizza at home and let your little ones create new favorites. Enjoy!

The cheese dip. Can be found in Mexican aisle at the grocery store.


Pin It

Wednesday, May 15, 2013

He Loves The Box

The blue one. That says Kraft on it. With the mac and cheese inside of it. And to be honest, I can't say I blame him. Sometimes, I need transported back in time to my childhood and enjoy a classic. No, it's not as good as homemade. No, it's not that great for me. But I can't help myself, sometimes I just gotta have it. 

Most of the time when I satisfy his craving, or indulge myself, it's as a side dish...easy and quick...exactly what I need sometimes. But a few years ago when a friend shared this with me, I was pleasantly surprised that with just a few ingredients I could make that classic into something new, and a filling main dish, perfect for a busy weeknight when I'm rushing around trying to get supper on the table, along with about a hundred other things.

Now, if you prefer a homemade version, and stay away from the pre-packaged version all together, kudos to you! Seriously, you have much more will power than I do. This could easily be made with a creamy "from scratch" version, just be sure your end product results in about a pound of pasta. Then simply add the rest of the ingredients. Either way you make it, your kids are going to love it! Mac n Cheese and Pizza in one delicious dish...they will think you are a genius!!

Every once in awhile it's okay to treat ourselves to one of life's simple pleasure. For our family that means mac and cheese out of a certain blue box. But at least this way I get to "jazz" it up a little and give my little guy two things he loves in one simple dish.

Pizza Style Mac n Cheese
2 (7.5 oz) boxes mac n cheese
1/2 stick butter (NOTE this is a different amount than listed on box)
1/2 cup milk
1 (15 oz.) jar pizza sauce
3/4 c. pepperoni, chopped
1 (6.5 oz) can sliced mushrooms, drained
1 (3.5 oz) can sliced black olives, drained, a few reserved for garnish
2 TBS Italian Seasoning, extra for garnish

Bring a large pot of water to a boil. Cook macaroni until done. Put back on hot pan over low heat. Add milk, butter and cheese packet. Stir until well combined. Add pizza sauce. Stir and cook on low until some liquid evaporates. Add pepperoni, mushrooms, olives and seasoning. Stir well to combine. Cook on low for 10-15 minutes to allow flavors to combine, stirring often. Garnish with extra black olives and seasoning. 


Shared on Lady Behind The Curtain May 15, 2013
Shared on The Country Cook May 17, 2013

Saturday, August 18, 2012

Weekend Company {Guest Blogger Colleen}

Good Saturday Morning! Hopefully this past week was kind to you and you've entered the weekend ready to relax and enjoy some downtime. Today's guest is yet another EMM fan so kind to step into my kitchen and share something yummy with all of you. I love having fans guest blog because it brings our foodie family all the more closer. But not only am I excited to have her show you yer delicious creation, I can't wait for you to read the story that comes with it. When she sent it to me, I told her it was perfect because it sounded like something I would do and then share with you! I love when food comes with such a great story! So grab a cup of coffee, or tall glass of lemonade and join us~

Hi everyone! I'm Colleen.  I'm a 50 year old Mom and Grammy who believes one of the best ways to show someone you care about them is through food. I've had a love affair with food and cooking for many years now. I've collected recipes and cookbooks for a long time but my favorite recipes are the ones handed down from my family of wonderful cooks and bakers. This is one of those recipes.

I've been interested in guest blogging for Krista for quite a while now but never knew just what I'd talk about or what recipe I would share. Then something happened today that triggered a blog post in my head and here I am. My mom and I were out enjoying some yard sales when I came across 3 small metal mixing bowls in a stack. I reached for them laughing and when I showed my mom, she broke out in a big grin. I knew they had to go home with me. You'll see why in just a bit.

My love of food began at family tables where everyone was great cooks. One of the best was my Grandma Z.  Everything was homemade with love in her tiny little galley kitchen. Sunday fried chicken dinners at her and my grandfather's house are something of a legend in my family and one of my fondest memories is all of us gathered there to share a meal together. Her pies were amazing! This recipe is not quite a pie, but has that wonderful pie taste.  I'm sharing her recipe with you below and as you read through it, you will understand the significance of the little metal bowls. I'm sharing it just as she wrote it down many years ago. I've made it a few times through the years (never with as much success as she did) but never in the proper equipment. Maybe now mine will come out better! Somewhere, I think she is smiling. :)

Apple Pizza

Preheat oven to 350 degrees.

Use 3 different sized metal mixing bowls

In the large bowl combine:
1-1/3 c. all-purpose flour
1/2 tsp. salt
1/2 c. shortening
4 tbsp. cold water (about 1/3 cup)

Mix well together and roll dough out in a circle big enough to fill a pizza pan. Gently lift dough into the pan getting it as close to the edge as possible.

In the smallest bowl combine:
1/2 c. sugar
1/2 tsp. nutmeg
1 tsp. cinnamon

Sprinkle 1/2 the spice mixture onto the raw pizza dough, reserving half for later.

Peel and very thinly slice 4 cooking apples (I used Fuji) and place onto the dough and spice mixture. Sprinkle the rest of the spice mixture on top of the apples.

In the medium bowl combine:
1/2 c. sugar
3/4 c. all-purpose flour
1/2 c. (1 stick) softened butter or margarine

Mix together with fork or pastry cutter until crumbly. Sprinkle evenly over the apples. Bake for 30-35 minutes, until topping is light golden brown.

Clean up messy kitchen while pizza bakes.

Cool slightly and cut into pizza size pieces. Enjoy!

*Note* I don't know that it actually makes a big difference if you use the metal bowls or not. Until today, I always just used plastic bowls. However you make it, I'm sure you and those you love will enjoy it. :) 

Thanks Krista for having me today and letting me share my recipe and my memories with everyone. Ya'll take care! :)


Pin It