Everyday Mom's Meals: Maple
_____
Showing posts with label Maple. Show all posts

Wednesday, February 11, 2015

A Snow Day With No Snow

Yep, that's right. Here in Indiana, we are so lucky (She says...dripping with sarcasm!) to get snow days with no snow! Unfortunately, that means there is ice instead, and that can be even more treacherous! That's exactly what happened a couple weeks ago. Not a flake of snow was on the ground, but we had gotten soaked with freezing rain/ice, and the morning commute wasn't safe for man or beast, so no school for us! 

As you know by now, when school gets cancelled, I am just as happy as little man is. I don't know which of us gets a bigger thrill when we hear our school system announced with all the others, me or him! I love having an unexpected day with him at home with me. Plus, it usually means we are going to get in the kitchen and make something extra yummy. Baking is one of those things a snow day was made for. 

This particular snow ice day we didn't know what we were in the mood for, but we knew it had to be something sweet, and we didn't have a lot to work with. See, it was towards the end of the week, and the grocery store trip was just around the corner, so we were going to work with what I had. Thankfully, I do keep basic baking things on hand at all times, so we weren't at a total loss. In fact, I bet if you go to your pantry right now, you probably have everything to make these. Okay, the maple extract might not be something you have laying around, but if that's all you need, you're doing pretty good! 

We ate these as a snack...later on that same evening for dessert...and then for a few days after for breakfast. Honestly though, Mr. E is lucky there were any left when he came home because Alex and I could have eaten the entire dozen in a blink of an eye. (And probably not felt that bad about it!)

These are super sweet, so beware! If you want to cut down on the sweetness a little bit, omit the maple flavoring. With Valentines Day being this Saturday, they would be a perfect treat for the sweet hearts in your life. 

Snow days are a simple pleasure in life that I for one, am so thankful for. My favorite little guy, at home, in the kitchen, safe and sound...pure bliss. 

Maple Frosted Spice Doughnuts
Makes 1 dozen
2 c. flour
1 tsp. baking soda
1/4 tsp. ground nutmeg
1/2 tsp. salt
1/2 tsp. cinnamon
2 eggs
3/4 c. white sugar
1 tsp. vanilla
1/2 c. milk
2 TBS butter, melted

Maple Frosting:
1 c. powdered sugar
2 TBS butter, melted
1-2 TBS water
1/2-1 tsp. maple extract

Preheat oven to 325. Grease a doughnut pan and set aside. In a large bowl combine flour, baking soda, nutmeg, cinnamon and salt. Mix well. In a small bowl whisk together eggs, white sugar, vanilla and melted butter. Add liquid mixture to dry mixture 1/3 at a time, stirring after each, until combined. Spoon mixture into doughnut pan, about 2/3 full for each well. Smooth tops with back of spoon. Bake for 10-15 minutes until firm to touch, and toothpick comes out clean. Rest on wire rack for a few minutes in pan. Using a silicone spatula, remove doughnuts to wire rack to completely cool. 

To make frosting, add water to powdered sugar a little at a time until desired consistency. I like it a little thick. Add butter and maple extract. Mix well. 

To frost doughnuts, dip each into frosting and let set on wire rack. 


Monday, June 2, 2014

Saturday Morning Cartoons and Breakfast

When my little man was a even smaller little man, Saturday mornings were for two things. Hanging out with Daddy and watching cartoons. Yep, they would let Mommy sleep in late, and fend for themselves for a few glorious hours every weekend. And Daddy's go-to breakfast for his favorite buddy was instant oatmeal; and for Alex it had to be maple and brown sugar.

I can't say I blame him, when I was growing up, it was the only flavor of oatmeal my mom could get me to eat too. There is just something about those flavors that scream comfort breakfast to me. To this day, if I eat oatmeal it is more than likely flavored with those two things.

As I've mentioned before, lately I am just a little obsessed with muffins. I'm not sure why the joy of making homemade muffins found me so late in life, but it has, and I find myself busting out the muffin tins more and more. Plus, now I have this nifty carrying case for them that is airtight and super convenient, so they last even longer. And when I get a new kitchen gadget I am inclined to use it as much as possible!

These little bites of goodness are perfect for breakfast, brunch or even a light dessert. Pack them in a school lunch (for those of you like us who are, yes indeed, wrapping up the school year...only 4 more days!!) or keep them on hand this summer for a great, quick, or even on-the-go snack for the little ones. They are just their size and they will love the flavor!

Now that he's older, Saturday mornings are for many different things, depending on our schedule, but every once in a while you can still catch my little man in front of the television, watching a favorite cartoon and enjoying a bowl of oatmeal; or now some of these instead!

                 Maple and Brown Sugar Oatmeal Mini Muffins Inspired by Crepes of Wrath
1 3/4 c. all purpose flour
3/4 c. old fashioned oats, plus extra for garnish
1 c. packed homemade brown sugar, see recipe below
1 egg
1 c. milk
1 stick butter, melted and slightly cooled
1 tsp. vanilla
2 TBS maple syrup
1 tsp. cinnamon
1/2 tsp. salt
1 tsp. baking soda
1 TBS turbinado sugar

Homemade Brown Sugar
1 c. white sugar
1 1/2 TBS molasses

Combine sugar and molasses and stir well until completely combined.

Preheat oven to 375. Grease a mini muffin tin. In a medium bowl whisk together flour, oats, baking soda, cinnamon and salt. In another bowl (I used my stand mixer) beat together butter and brown sugar until smooth. Add egg and beat on low. Add milk, vanilla, and maple syrup. Beat on low until well combined. Add half of flour mixture. Beat on low. Scrape down sides. Add other half. Beat on low until mixed. Increase speed to medium, scrape sides again, and beat until well incorporated. Spoon mixture into muffin tin, filling each about 2/3 of the way. (I use a cookie scoop for this and it takes 1 scoop to fill each vessel.) Sprinkle each with turbinado sugar and a few extra oats. Bake 20-25 minutes until browned and toothpick comes out clean. Allow to cool in pan, on a wire rack for 5 minutes. Remove from pan to wire rack to cool rest of way.


Monday, March 3, 2014

Good- for- You Everyday Meals Day 1 {A Review and Giveaway}


Welcome to Gooseberry Patch week on EMM! I'm so excited to share this latest cookbook with you from my good friends at GP, and can't wait to show you just a few yummy recipes you can find in their newest cookbook gem.

Good-for-You Everyday Meals...you know when I read that title, it was like kismet! What better title for your Everyday Mom to dive into and cook my way through!

So, every day this week I will be featuring recipes from this newest title in my collection, each one more delicious than the next!

With everything from starters and main dishes, to sides, salads, snacks and desserts, it has something for everyone!

Each section has so many yummy things to choose from, it was hard to pick only a few to share with ya'll. Believe me, there are enough pages "dog-earred" in my copy, I could share a different one each day, and not finish for months! But I decided the best one to begin with would be something for breakfast!

When I saw this recipe I knew it would be perfect for a busy weekend when we had a lot going on. Why? because it would cook itself while I slept, and breakfast would be waiting on us when we got up Sunday morning. But think about how great that would be on a busy weekday morning when you're rushing around for work and school too! In fact, I think this would also be wonderful to cook on Sunday, cool it down, and keep in the fridge to reheat for breakfast all week long!

I had never tried the steel cut oats before, but had heard they were perfect for the Crock Pot. They hold up really well to slow cooking, and make for a hearty, comforting way to start your day. Oh, and let me just tell you...the house is going to smell amazing when you cook these, which makes crawling out of bed just a little bit easier!

If your mornings are super crazy, but you still want something warm to send your family on its way, this would be absolutely perfect! Oh, and the great folks at Gooseberry Patch have included a copy of Good-for-You Everyday Meals for one lucky EMM fan too! Just scroll down to find the giveaway! And be sure to come back Wednesday and Friday to see what other scrumptious things I made!

Overnight Apple-Cinnamon Oats
Found on page 25, Contributed by Dana Rowan Spokane, WA
2 apples, peeled, cored and chopped
2 c. milk
1 1/2 c. water
1/2 c. unsweetened applesauce
1 c. steel-cut oats, uncooked
1/4 c. brown sugar, packed
1 TBS butter, diced
1 tsp. cinnamon
1/4 tsp. salt
Garnish: maple syrup, milk, applesauce, chopped walnuts, raisins, dried cranberries, etc.

Spray a Crock Pot with non stick spray. Add all ingredients except garnish. Stir. Cover and cook on LOW for about 7 hours. If desired, stir in a little more milk or water for desired consistency. Spoon into bowl, garnish as wanted. Makes 6 servings
*NOTE* After 7 hours, mine had scorched just a bit on the sides, so I probably would do 6 hours next time. If you have a programmable slow cooker, I'm sure it wouldn't do this. Also included with this recipe is this great tip, which I just had to share: Fill a muffin tin with yummy oatmeal toppings...making it easy for everyone to help themselves!


Shown here garnished with maple syrup and dried cranberries

Shared on The Country Cook Mar. 7, 2014


CLOSED

********Giveaway********
Rules:
1. This contest is open to US Residents 18 and older ONLY.

2. The winner will be chosen by Random.org 

3. The winner will be notified by email and Facebook. He/she will have 48 hours to respond or another winner will be chosen. 

4. When leaving comments for entries, they MUST BE SEPARATE ones AND include an email address so it's easy for me to find the winner. If entries are together, it will only count as (1) and if no email, entry will not be considered.

5. If any of the extra entries are items you are already doing, please just remind me!


6. Contest Ends: Friday March 14, 2014


(1) Lucky Winner will receive:
(1) copy of
Mandatory Entry:
1. Leave a comment telling me your favorite good-for-you dish!

Extra Entry:
1. Become a Gooseberry Patch fan on Facebook. Leave me a comment when you have. 

2.  Follow Gooseberry Patch on Twitter. Leave a comment saying you've done so.


3. Follow Gooseberry Patch on Pinterest. Leave me a comment when you have. 

GOOD LUCK!


Disclaimer: I was given a free cookbook and one to give away to a fan for this review. All thoughts and opinions are my own.


Saturday, January 18, 2014

Soul Food Saturday #39

Welcome to another winter weekend. Hopefully it's not too cold where you are, or if it is, maybe you can take some time this weekend and snuggle up under a blanket with a good book, or favorite movie and watch the world go by!

Bekki has a great sweet treat for us today. Everyone young and old will get a real kick out of these!


With the ideas of dessert dancing through my head all I can seem to think about these days are apples. Crisps, and pies! And no matter where I looked I didn't find a recipe I was in LOVE with. So I set off to make one that sang, with the flavor I craved! Not only is this better for you than McDonald's but it can be gluten free too! Just substitute gluten free crescent dough and voila your set. Grab your kids because fried pies just turned good for you!

Fried Apple Pies with Maple Glaze
8 medium apples ( Fuji was my choice) peeled, cored and diced
1 tbs. lemon juice
3 tsp. Brown sugar
1 tbs. cinnamon
2 tbs. butter
1 can grands butter crescents
Oil for frying

Maple  Glaze
4 tbs powdered sugar
4 tbs. maple syrup
1 tsp. Half and half

In a medium sized heat safe bowl add apples and lemon juice. Toss to coat thoroughly.   Add cinnamon and sugar. Toss to coat. In a medium skillet add butter and allow to melt. Add apples and stir to coat with butter. Cook until apples are just tender, about 5-7 minutes. Stirring often. Transfer apples back to heatproof bowl to cool. Open crescent dough and unroll one section at a time. (2triangles) Pinch perforated seems together, then press to seal them together. On both side. With a rolling pin or round glass roll dough to ensure pastry is one piece. Try not to stretch dough. Place the cooled apples along the length of the dough. Will take about 4 tbs. Then fold dough over and seal by pushing down seams. Crimp with fork if desired.

In a large skillet, add oil and heat to 375*

For the glaze :
In a small bowl add powdered sugar. Whisk slightly to break up any lumps. Add maple syrup and half and half. Whisk until smooth, then set aside.

With oil at 375* add one pie at a time. Cook until golden on each side.
Drain on paper towel and drizzle with glaze.


Saturday, November 23, 2013

Soul Food Saturday #32

Happy (early) Thanksgiving! Since this is the last weekend before we all gather around our huge tables, surrounded by those who we love most, eating until we can't move, Bekki and I wanted to make sure to share something that might just be the perfect last minute addition to your menu!


I found a new favorite salad in my grocery store deli not too long ago, that I call quinoa made AMAZING! It has dried fruits and walnuts with a sweet almost glaze type of dressing. With no recipe, just an idea that I wanted this more often, than having to drive over and hope they have some left for me. I decided to reconstruct it and dress it up for the holiday table. Yes! It has cranberries! Perfect for any dressed up occasion or time you want a beautiful simple salad. Hope you enjoy this as much as I did.
 
Quinoa Cranberry Salad
1 c. dried quinoa
4 tbs. Maple syrup
½ c. dried cranberries
½ c. dried apricots
1 tbs. orange juice
½ c. cashews, chopped
 
Cook quinoa according to package directions. In small bowl mix syrup, juice and set aside. Fluff cooked quinoa with a fork and add to a large bowl with fruit and nuts. Stir to combine. Pour dressing over and mix well. Chill in fridge until ready to serve.


Friday, November 15, 2013

Make Ahead Holiday

Sweet Potatoes. It seems folks either love 'em or hate 'em. There doesn't seem to be much wiggle room, or gray area. For our family, they are definitely a love. Any way we can get them! Mashed, baked, roasted, fries, it doesn't matter, we gobble them up.

But one thing we can't stand? The traditional addition of marshmallows to the top! Yep, what most Americans consider the norm, is not allowed on ours. And I when I say I don't enjoy the marshmallows, it's minor to the hatred my husband feels for them. Any time he sees those white clouds sitting atop, he says "Great, now they are ruined." Yeah, he's not really one to mince words. But we realize for many, they are a must, and we respect that, we just can't join in.

So I'm always on the lookout for new ways to serve sweet potatoes, especially around the holidays, and when I can also ease the stress of holiday cooking, it's an added bonus. See, these can actually be made a day or two ahead, refrigerated and then reheated in the oven, right alongside the bird! If you can check a few items off the list before the big day, why not make it a little easier on yourself?

Sweet, buttery and full of flavor, these sweet potatoes are sure to be a star at any holiday table. And if your family digs the marshmallows, by all means, add some on top. Just don't offer them to my husband.

Maple Mashed Sweet Potatoes
6 lbs. sweet potatoes, peeled
1/2 c. maple syrup
1/2 c. brown sugar
1/2 c. butter, diced
1/2 tsp. cinnamon, extra for garnish
1/2 c. chopped pecans

Preheat oven to 375. Lay potatoes on baking sheet, or 2 depending on size. Spray lightly with cooking spray. Roast for 1 hour, stirring occasionally, until tender. Remove to a large bowl. In a small sauce pan combine syrup, sugar, butter and cinnamon. Bring to a boil, stirring constantly. Allow to slightly thicken. Add syrup mixture to potatoes. Mash with potato masher, or whip with electric mixer until desired consistency. (We likes our to have a few small chunks.) Transfer to serving bowl. Top with pecans and extra cinnamon.

*NOTE* To make ahead, prepare through mashing. Put in an air tight container with lid and store in fridge for up to 2 days. When ready, preheat oven to 325. Put potatoes in casserole dish. Bake uncovered for 1 hour until warmed through. Remove and garnish as recipe states.


Shared on The Country Cook Nov. 15, 2013

Sweet Potatoes at Very Good Recipes

Friday, November 8, 2013

Another One For Holiday Planning

So, I might have a new addiction. I can't seem to walk past the acorn squash at the grocery store without bringing a couple home. Now, to be fair, I have always been a squash fan, and so has every one else in my house.

In fact, when Alex was a baby, his favorite baby food, hands down, was the squash. Not the sweet bananas, like so many other kids. Sure, he liked those too, but if you really wanted to bring a smile to his face, a jar of squash was a guarantee. I can remember holding him while getting the jars out of the cupboard when lunch or dinner time rolled around, and he would stretch his little neck to see if there was any squash.

Anyway, I'm a squash fan from way back. My dad used to grow them in his garden, roast them and freeze it for the winter. But his favorite variety was buttercup, and to this today that is still what I associate with "winter squash" in my head. And if you've ever bought the frozen boxed squash in the grocery store, it was more than likely buttercup, with that bright orange color. And many times, that is exactly what I do when I want squash on my table. A couple boxes of it, some butter, salt and pepper...it's quick, easy and yummy.

But every since I made the stuffed squash recipe last month, I've been on this acorn squash kick. I can't get enough. And since making it fresh isn't something I've done a lot of, it's always a treat to my "boys" too.

These would make a beautiful, simple, and tasty side dish for your Thanksgiving meal. And depending on how many people you are serving, you have a couple options to make sure you get the most "bang for your buck". (Just see the note below for serving options.) Sweet and savory, the glaze only enhances the flavor of the squash, not over powering it. It really allows the squash to shine, not to mention makes it gorgeous on a plate.

If you are a squash lover too, you are going to want to make this asap. And if you are in the midst of holiday meal planning, I think this would make the perfect addition!

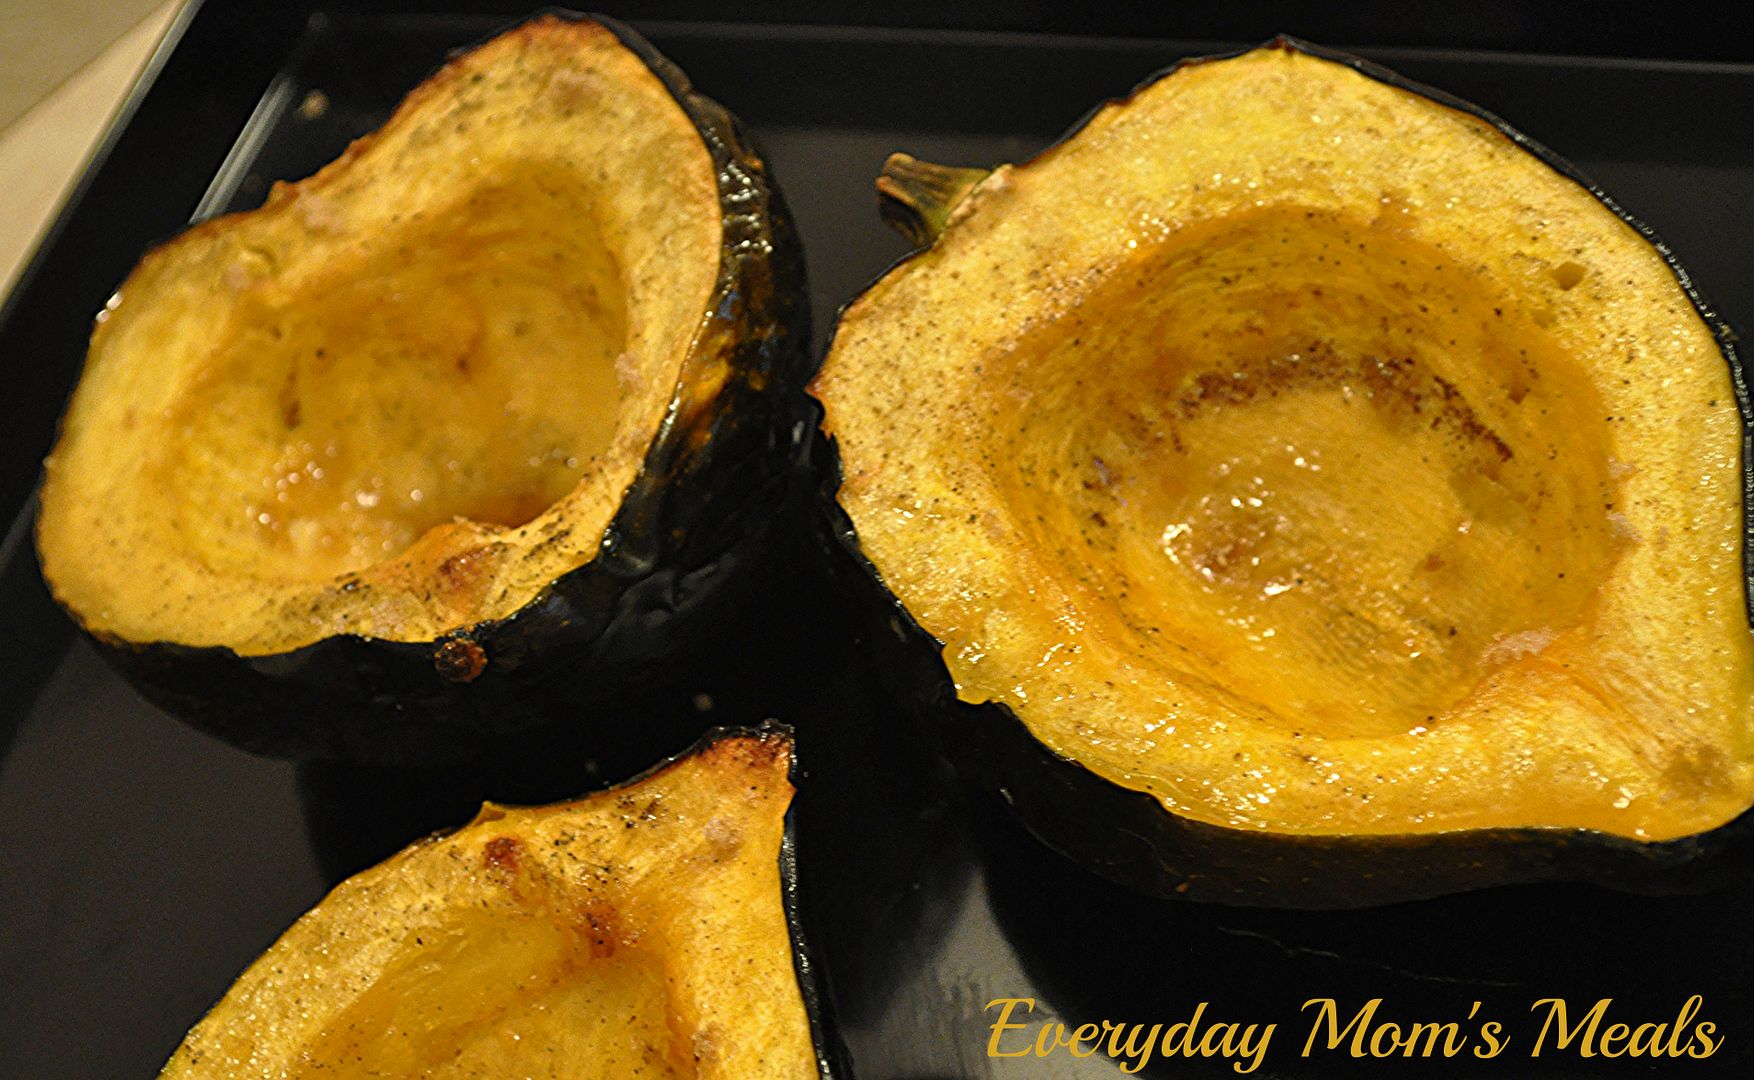
Maple and Brown Sugar Roasted Acorn Squash
2 medium acorn squash, cut in half and seeded
4 TBS butter, melted
4 TBS brown sugar
4 TBS maple syrup
Salt and Pepper to taste

Preheat oven to 400. Line a rimmed baking sheet with foil. In a small bowl combine melted butter, sugar and syrup. Whisk well to combine. It will be thick and resemble caramel! Brush cavity of squash liberally with butter mixture. Leave a little extra in each "hole". Sprinkle with salt and pepper. Roast for 1 hour or until squash is fork tender. Sprinkle with extra brown sugar before serving.

*NOTE* To serve you have a couple options. If you're feeding a big crowd, scrape the squash from the skin into a casserole dish. Adjust seasoning and cover. If need be, you can put back in the oven to reheat. If there are only a few people, I think these are very pretty to serve on individual plates, as is, letting each person season their own.


Shared on The Country Cook Nov. 8, 2013

Squash at Very Good Recipes

Friday, November 1, 2013

They Are Coming

In case you've been living under a rock, today is the first day of November. Put those jack-o-lanterns away and grab the turkeys and pilgrims, kids. Thanksgiving is exactly 27 days from today. In this house once the fun of Halloween is behind is, it's pretty much a downward coast to the holiday season. Thanksgiving, Christmas and even New Year's are approaching quicker than some of you might realize, or even want. But don't fret, don't freak out, I am here to help with at least one aspect of the holiday rush. Over the next several weeks, I will be offering up some ideas for your meal plans, from breakfast to mains, to sides, that could all be great additions to your holiday planning. 

First up, something I made for supper a few weeks ago, that will definitely be appearing on our table again, and if you are planning on a house full of family for Thanksgiving or Christmas, could be the answer to your breakfast prayers!

I am SO excited to share this one because I know ya'll are going to go as nuts for it as we did. Sure, I used it as "breakfast for supper", and it was just as yummy at 6pm as I know it would be for breakfast or brunch. Oh, and a side note: this reheats beautifully! We had some leftover and Alex ate it for breakfast for the next 3 days. Just pop it in the microwave for about 30 seconds! Which is also a great idea if you're having house guests because maybe you cook it once, and they eat it for a couple days, saving you time and money!

If you love cinnamon rolls, French Toast and bread pudding, then let me introduce you to your new favorite dish. With a little help from refrigerated cinnamon rolls, and a custard filling filled with flavor, oh and of course nuts, syrup and icing, this is hands down the easiest and most delicious breakfast casserole I've ever made. Yes it's rich. I'm not gonna lie. But it's the holidays. We are all supposed to indulge a little!! Serve it with some fresh fruit on the side, that will make you feel better. 

The holidays are coming, like it or not. But we can prepare, and organize and get ready so maybe just a little of the stress is taken away so we can enjoy the time with our families a little more. Or, we can totally stress, and eat plates of this and not care because it tastes so darn good!

Cinnamon Roll French Toast Casserole
From Pillsbury
1/4 c. butter, melted
2 (12.4 oz.) tubes refrigerated cinnamon rolls, icing removed
6 eggs, beaten
1/2 c. heavy cream
2 tsp. cinnamon
2 tsp. vanilla
1 c. chopped pecans
1 c. maple syrup

Preheat oven to 375. Pour melted butter into the bottom of a 9x13 baking dish. Separate each tube into individual rolls. Cut each roll into small bite sized pieces, about 6-8 per roll. Lay cinnamon roll pieces in butter in dish. In a medium bowl, combine eggs, cream, cinnamon and vanilla. Mix well. Pour over cinnamon roll pieces. Sprinkle with pecans. Drizzle with maple syrup. Bake about 25 minutes, until golden brown. While baking, transfer icing to microwavable safe bowl. Heat for about 15 seconds, until thin enough to pour. When casserole is finished, drizzle top with icing. 


Shared on The Country Cook November 1, 2013

Wednesday, October 30, 2013

Sugar Coma

Are you ready for the big fright night tomorrow? Less than 24 hours until it's finally Halloween, when children everywhere will be hopped up on sugary treats; and parents will be counting the minutes until bed time so they can raid the candy bags. (Don't deny it. You know you do it!! We all do!) But in case you're worried there won't be enough sugar in your house, I've got a great sweet treat for you today.

My blogging buddy Stacey over at Southern Bite posted these a few weeks back when I was desperately trying to find ways to use up the rest of the apples we picked at the orchard. (If you didn't see our adventure, you can read all about it here.) I only had a few left in the bushel basket, and I knew I wanted to bake something. These were just what I was looking for. But then my sweet tooth (teeth) got the best of me, and I decided to take them to the next level with a maple glaze.

Why? Because I could. Because it's fall, and apples, pecans and maple scream autumn to me. Because I'm an icing/frosting/glaze freak. Because I had 2 boxes of powdered sugar in the pantry calling my name. The reason doesn't matter. What matters is these are absolutely decadent, rich and delicious. Plan on only eating one, because after a few bites, you will be in a sugar induced coma, with a big smile on your face.

Now, to be fair, I did leave a couple "bare" when I made them so my family could enjoy them with or without the glaze, and they were delicious as is. But the glaze just put them over the top for me.

Need a dessert full of fall flavors (try saying that 3 times fast) tonight? Craving a little extra sugar? Have some apples to use? Looking for any excuse to make these you can find? Go ahead. The kids are going to get their candy. You can have these!

Apple Pecan Blondies with Maple Glaze Inspired by Southern Bite
1 c. packed brown sugar
1 stick butter, at room temp
1 egg
1 c. flour
1/2 tsp. baking powder
1/2 tsp. cinnamon
1/2 tsp. salt
2 apples, cored, peeled and finely chopped
1/2 c. pecans, chopped

Glaze:
1 c. powdered sugar
2 TBS milk
1 1/2 tsp. maple extract

Preheat oven to 350. In a large bowl cream butter and sugar. Add egg and mix well. (I used my electric mixer.) In another bowl combine flour, baking powder, cinnamon and salt. Whisk well. Slowly add the dry ingredients to the butter mixture. Mix well. Fold in apples and pecans. Batter will be thick and sticky. Scoop batter into a greased 8x8 baking pan. Spread evenly with a spatula. Bake for 45 minutes until golden, and a toothpick comes out clean. Transfer to a wire rack to cool. In a small bowl combine ingredients for glaze. Mix well. When blondies are cool, cut into 9 bars. Dip each into glaze, covering top. Transfer to wire rack (I set mine was wax paper for easy clean up) to set. When set, sprinkle with powdered sugar. I like to refrigerate any leftovers so the glaze continues and stays hardened.


Shared on The Country Cook November 1, 2013

Maple at Very Good Recipes

Thursday, November 1, 2012

Let's Begin The Countdown

Three weeks people. Let me say that again. THREE weeks!! That's right just 21 days from now we will all be sitting down with our loved ones around a big table of delectable holiday dishes, giving thanks for all this year has brought to us. Kinda hard to believe, huh??!! So for all of you uber planners, like me, it's time to start narrowing down the menu and deciding exactly what will be served at your Thanksgiving spread. So I thought for this first day of November, it would be a great time to give you some side dish inspiration! I actually tested this recipe back in October when I hosted my in-laws for dinner to celebrate their birthdays. We love glazed carrots, and these are a new twist on those. They were a huge hit for everyone, including Alex. Both my mother and father in law took seconds, and he described them best when he said "These taste a little bit like Thanksgiving. Kind of like pumpkin pie, but in carrots." And he was exactly right! They are sweet with a hint of spice that would be perfect alongside your turkey and cranberry sauce. All of us can always use some new side dishes, especially veggies, for holiday meals to mix in with the traditional ones that are loved so much. So if you are looking for something new for your Turkey Day gathering, I hope you try these! Let the countdown begin!

Maple Glazed Carrots From Food Network
1 lb. baby carrots
1/4 c. maple syrup
1/4 c. orange juice
1/4 c. water
4 TBS butter
1/2 tsp. cinnamon
1/4 tsp. allspice
Salt to taste
Parsley for garnish

Place all ingredients except parsley in medium saucepan. Bring to a boil over medium high heat, stirring occasionally. Cook for approximately 15 minutes until carrots are tender and glaze is slightly thickened. Stir often Garnish with parsley.


Shared on Miz Helen's Country Cottage Nov. 1, 2012
Shared on The Country Cook Nov. 2, 2012
Shared on Make Ahead Meals Nov. 5, 2012

Saturday, October 27, 2012

Weekend Company {Guest Blogger Amber}

Good Morning and welcome to the last weekend of October. Yes, you read that correctly. Hard to believe, right??!! But to celebrate, my guest is sharing an awesome autumn recipe that I could absolutely see on your Thanksgiving table. So beautiful and festive.

Today's guest blogger has such an interesting story to tell. I have known Amber since high school, but we've really reconnected over the last year through Facebook...and FOOD! She too is a mama and a blogger; and I have so much respect for how she has totally revamped her family's eating habits. But I will let her tell you more about that. Please welcome Amber to EMM~


Hi, I’m Amber from Whole Foods for Whole Families, and I’m excited to be doing my first-ever guest blogging post here for Krista. Like most of you on here, I LOVE food. But our family eats a little differently. My husband and I follow a Paleo lifestyle – grain-free, dairy-free and legume-free. Since I started eating this way about 6 months ago, I have cured my Chronic Fatigue and GERD, lost 8 lbs (I’m a size 2), and have enjoyed more energy, clearer thought processes (no more brain fog!) among other things. My husband has also had noticeable changes to his health; he’s lost 25 lbs (and counting), his cholesterol levels have come into a healthy range, his skin has cleared up all over his body (his back used to be red and bumpy, now it’s super soft and smooth) and he has much more energy, just to name a few.

But the biggest change has been with my youngest daughter, Little A, now 4-and-a-half-years-old. When she just turned three, she became very sick after having a routine surgery to remove her adenoids and insert a new set of ear tubes. She was diagnosed with Chronic Benign Neutropenia of Childhood which is a fancy way of saying that her neutrophils, the white blood cells that fight bacteria, are chronically low. After taking her to one of the best pediatric hospitals in the country, we were left with no treatment options, just a wait-and-see approach. This wasn’t good enough for us. I didn’t want to sit around, waiting to see if my child was going to fall seriously ill again, so my husband and I researched and researched… and then we researched some more. Our research led us to how our diets can affect our health so we completely changed the way we eat. After being gluten- and dairy-free for a year, Little A’s health has completely transformed. She used to be sick nearly all the time with constant fevers, colds, runny noses and ear infections (even after having ear tubes). Winter time meant endless trips to the pediatrician, but the first winter after we became gluten-free, neither Little A nor my oldest, Big C, had to go to the doctor. Not even once. For us, that was a huge deal! In fact, Little A has not had one fever since going gluten-free. She also put on weight, her skin no longer looks pale and pasty, the dark circles under her eyes have diminished and she is full of much more energy while requiring less sleep. The transformation of Little A’s health has inspired me to blog about our journey on my site in the hopes of helping other families find their path to health as well.

But enough about me; let’s get down to some food. I promised Krista I would come up with a recipe that was gluten-free but without any of the “weird” ingredients we gluten-free people tend to use. I didn’t want to post a recipe that required ingredients most people don’t have, like almond flour or coconut flour, staples in a Paleo diet. And I also wanted to come up with a good fall recipe, something you can make as a special treat for Halloween or even the upcoming holidays. This recipe for Baked Apples is easy, but the results look impressive. And it tastes unbelievable. I’ve been making this for years, long before we became gluten-free, and I’m happy that one of my old favorites still has a home in my new dietary repertoire. I hope you enjoy, and if any of you have any questions about eating and living a gluten-free lifestyle, please stop by my site or my Facebook page and drop me a message.

Baked Apples
4 apples, cut in half across the equator
¼ cup pure maple syrup
1 tsp cinnamon
1/3 cup chopped walnuts
½ tsp vanilla extract
4TBSP butter, divided

Preheat oven to 350 degrees.
Scoop the seeds and core out of the apple halves, creating an opening inside the apple to hold the syrup. Place in an 8x8 square baking dish.
In a small saucepan, gently heat syrup and cinnamon over low heat. Cook, stirring constantly, until syrup has slightly thickened, about 2-3 minutes. Off the heat, stir in walnuts and vanilla extract. Pour syrup over apples, filling the openings created from the cores. Divide the butter into 4 equal parts and place pats of butter on top of the apples.
Bake for 30-40 minutes until apples are tender. Ladle syrup drippings over the apples. Serve warm.


Pin It