Everyday Mom's Meals: Kid Friendly
_____
Showing posts with label Kid Friendly. Show all posts

Sunday, April 2, 2023

Spring Break 2023

 Yes, the time we've been looking forward to since Christmas vacation ended is finally here. Spring Break, baby! With as excited as I am you might think we are jetting off to some warm, sunny, tropical beach, but alas no. We will be spending this time off at home, hanging out, the teenager working, fun things with the little guy, and of course celebrating Easter next week. But we are just looking forward to mornings without alarm clocks, extra time together and a relaxing week. 

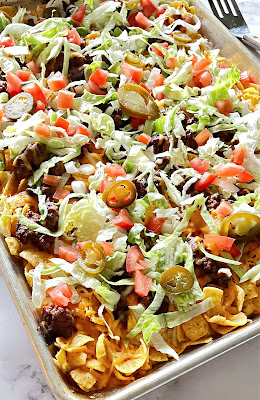
Of course I have some yummy things on the menu this week too, and even though we just had them a couple weeks ago, I think these Walking Taco Nachos might need to happen again! They were a huge hit with the boys, super easy and would be great for one of the movie nights we have planned. 

Based off the walking tacos you probably had in the school cafeteria or county fair, instead of all the taco bits being in a bag of corn chips, I've transformed the same idea to a big sheet pan of nachos.

This is one of those recipes where you can start with my version and then go from there making it totally your own. You can cook the base, put out a big toppings bar and let everyone build their perfect plate. Great for a hungry crowd, especially if the crowd includes kids! A simple supper for Taco Tuesday, fun meal for Cinco de Mayo, or tasty game day food. 

If you get to enjoy spring break in the sun, watching the waves crash on the shore, lucky you. But if you're like us and trying to make the most of a stay-cation, make sure your week includes some delicious, and maybe even fun, food! 
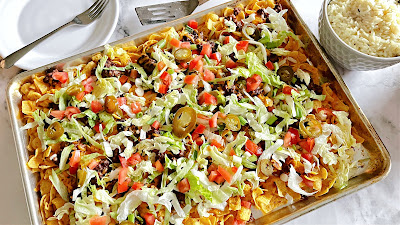
Walking Taco Nachos

What Is A Walking Taco

Named for how easily you can walk around while eating it, walking tacos have been popular fair food for years. A small bag of corn chips is opened and then topped with taco meat, lettuce, tomatoes, cheese, etc. Over the years they have also become a school cafeteria staple.  

What Kind Of Chips To Use

For these nachos I used corn chips instead of tortilla chips to keep with walking taco tradition. I used regular ones, but the big "scoop" style would be great too. 

What Toppings Are Best For Walking Taco Nachos

When it comes time to add toppings to these nachos, the sky is the limit! Use whatever you love on tacos or nachos and pile them high!

Why Less Water For The Taco Meat

For this recipe I cut back on the amount of water normally called for with taco seasoning. I wanted to make sure it wasn't extra wet to keep the chips from getting soggy.
Walking Taco Nachos

Walking Taco Nachos

2 bags corn chips

1 lb. ground beef

1 envelope taco seasoning

1/2 cup water

2 cups Mexican style shredded cheese

Lettuce

Diced Tomatoes

Pickled JalapeƱos

 Preheat oven to 350. In a large skillet brown beef until no longer pink. Add water and taco seasoning. Bring to a boil and reduce heat to simmer. Cook until thickened, about 5 minutes. Keep warm. Add chips to large rimmed baking sheet. Top with taco meat. Sprinkle with cheese. Bake in oven for 10 minutes until cheese has melted. Remove and top with lettuce, tomatoes, jalapeƱos etc. 

Walking Taco Nachos
Shared at Weekend Potluck

Best Tips

Regular or large corn chips both work for this recipe.

Remember to cut back on the water a little to avoid extra moisture.

Other cheeses to try:  pepper jack, queso blanco, sharp cheddar, triple cheddar

Other topping ideas: diced avocado, sliced black olives. taco sauce, salsa. pico de gallo, sour cream


Other Mexican Recipes To Try

Queso Chili Mac 

Creamy Taco Soup 

Fiesta Taco Rice Bake 

Taco Rice Skillet 

Crock Pot Taco Soup

Taco Spaghetti 

Smothered Burritos 


Sunday, March 26, 2023

Easter Must-Have From The Dairy

 Since I began blogging, almost 12 years ago, I have been blessed to work with countless companies and organizations. One on that list that brings me the most pride is most definitely Indiana Dairy Farmers. 

Years ago I did a monthly post for them and through that I got to know one very special local dairy farm run by the Kuehnert family. 

Kuehnert Dairy Farm


The Kuehnert Dairy Farm is celebrating 125 years of "bottling memories" (their words, not mine) and I am so incredibly proud to know this family and the work they do on the farm is amazing. The 5th generation is carrying on the family tradition and there are some big things happening on the farm!

Kuehnert Dairy Farm

Every fall the Kuehnerts open their 1200-acre farm up to the public for their annual Fall Festival, and I can tell you it is some of the best fun you will have in a corn maze, plus so much more! Both of my boys have enjoyed it and our little guy can NOT wait to go back this year! It will run from September 15-October 29, 2023 and I can tell you it is already on our calendar!

Kuehnert Dairy Farm Fall Festival

In 2023 the Kuehnert Milk House will be opening! This on-farm store will be offering the freshest milk and dairy products around; and I can NOT wait!

Kuehnert Milk House
So when my friend Sarah posted the Kuehnert family macaroni and cheese recipe, I asked her if I could share it with my readers. It was an extra cheesy, custard style old fashioned mac and cheese, unlike any other I've ever made, and I told her it would be perfect for an Easter side dish! 

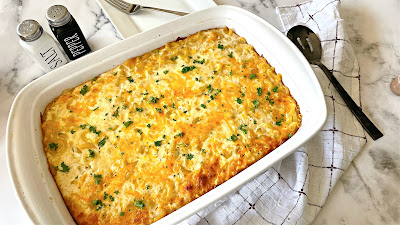
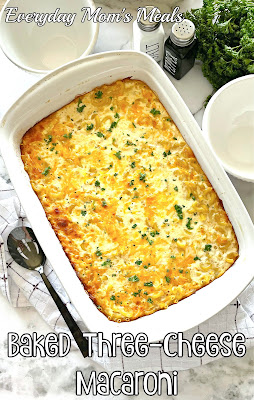
This macaroni and cheese has not one, not two, but THREE cheeses for extra ooey gooey factor. My boys gobbled this down and asked for more.
 
I know so many families include a great mac and cheese on their Easter menu, and this one would be so tasty with that big glazed ham. But honestly, it's easy enough for any night of the week too! 
 
If you are in my area, I hope you will check out the Kuehnert Dairy site, maybe schedule a tour with a school class, plan a trip to the fall festival and visit the milk house when it opens. This is a great family doing great things for our community. We *heart* our dairy farmers!
 
What Kind Of Cheese To Use 
This recipe calls for three different cheeses, and it is a great way to use up whatever you have in the fridge. I used cheddar, cheddar jack and mozzarella for an extra smooth flavor. 

Do I Have To Boil The Macaroni First
Yes, for this recipe the elbows have to be cooked to just al dente before baked. If you're looking for a no-boil recipe, I have one of those too, just scroll down to the end of the page!

Should I Shred My Own Cheese
When it comes to shredded cheese in a bag, people have strong opinions. If I am making a homemade cheese sauce I always shred my own, but for a recipe like this, I don't have any issues using pre-shredded.

Can I Use Milk In Place Of Evaporated Milk

The simple answer is no. Evaporated milk has a thicker texture than regular and therefore can't be swapped same for same. If you need to substitute it, try 3/4 cup whole milk mixed with 1/4 cup half-and-half. This recipe actually uses both evaporated and regular, and both are needed for the best texture.


Baked Three-Cheese Macaroni

Best Tips

Make sure to not overcook the macaroni. You want a little bite left (al dente) so it can finish cooking in the oven.

Don't try to use all regular milk. The evaporated milk really helps to make this extra creamy.

Use any combo of cheeses you like, that add up to 6 cups total. 

This is great frozen too. Bake, cool and cut into individual portions to reheat later.  

You can also prepare this in the Crock Pot. Mix all ingredients except 1/2 cup cheese and paprika in a greased Crock Pot. Add cheese and paprika. Cook on low for 3 hours.

Baked Three-Cheese Macaroni

 Baked Three-Cheese Macaroni

8 oz. elbow macaroni

2 cups shredded cheddar cheese

2 cups shredded cheddar-jack cheese

2 cups shredded mozzarella cheese

1 (12 oz.) can evaporate milk

1 1/2 cups milk

1/4 cup butter, melted

2 eggs, beaten

Salt and Pepper

Dash of paprika

Fresh parsley, for garnish

Preheat oven to 350. Cook macaroni to al dente and drain well. In a large bowl combine pasta with all other ingredients. Stir well. Transfer to a greased 9x13 baking dish. Cook for 50 minutes until set. Garnish with fresh parsley if desired. Allow to cool for 5 minutes before serving.

Baked Three-Cheese Macaroni
Shared at Weekend Potluck


More Mac and Cheese Recipes To Try

Sheet Pan Macaroni and Cheese

No-Boil Baked Macaroni and Cheese

Copycat Cracker Barrel Macaroni and Cheese

Pub Macaroni and Cheese

Stove-Top Creamy Macaroni and Cheese 

Mac and Cheese Cupcakes 

Queso Chili Mac 

Creamy Baked Mac and Cheese


Sunday, March 5, 2023

Not Really A Recipe

 If your schedule is as out of control busy as ours, a meal you can truly assemble more than actually cook might just save your week! 

Sure each component of this copycat recipe has to be cooked, steamed or heated up, but they all be done at the same time and in almost no time at all. 

Copycat KFC Famous Bowls are comfort food perfect for a hectic weeknight. Plus, the kids can help with them, they are great if everyone is eating at different times and everyone can customize theirs. 

The famous bowl at KFC has been a huge hit for years, but they aren't always available in every area. So now you can make them at home whenever that craving hits! 

A complete meal in one bowl, every bite has some protein, veg, starch and of course gravy. Quick, simple and on the table in about the time it takes to bake some frozen popcorn chicken! 

Don't let supper time stress you out! Assemble some KFC bowls and dinner is done! 

What Is In A KFC Famous Bowl

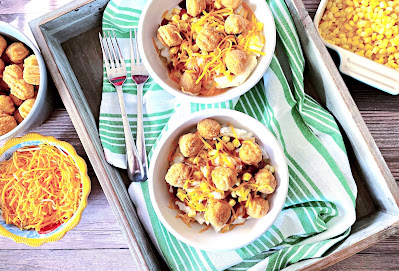
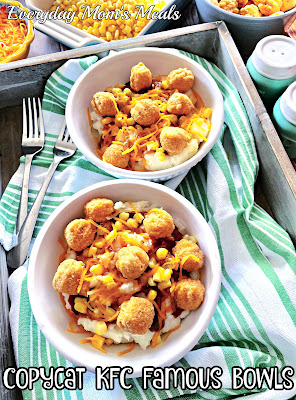
These bowls are filled with individual portions of their famous mashed potatoes, crispy chicken, gravy, corn gravy and cheese. 

Can I Get A KFC Famous Bowl Without Corn

I am pretty sure most KFC locations will leave the corn off if you wish, but if you're making them at home, you can make them any way you want!

What Kind Of Chicken For Copycat KFC Bowls

I used frozen popcorn chicken for the size and convenience factor. Chicken nuggets and tenders would work too, just chop them up. You could even use some leftover fried chicken, or lighten it up with shredded rotisserie chicken.

Why Beef Gravy

Simple. It is what KFC serves. They don't have chicken gravy, but I think it would be great in this. Or even some white country gravy could be swapped. 

Instant Potatoes vs Homemade

No, I am not a fan of instant potatoes either, so if you want to make some homemade and use those, go for it. Or if you have some leftover, this would be a great way to keep from throwing them out. But KFC does use instant ones, so this is authentic. And, the quality of them have come a long way since I was a kid, and adding the butter, salt and pepper really does help.


Copycat KFC Famous Bowls

Best Tips

Have all the ingredients warming/cooking at the same time so you can assemble everything when done.

Popcorn chicken, nuggets or tenders can all be used.

Chicken or white gravy can be used in place of beef.

Shredded triple cheddar would be delicious too.

Serve with a salad on the side for a complete meal.


Copycat KFC Famous Bowls 

3 (4 oz.) pouches butter instant mashed potatoes

1 (12 oz.) bag frozen steamable corn

2 lbs. frozen popcorn chicken

1 (18 oz.) jar beef gravy

1 cup shredded sharp cheddar cheese

2 TBS butter

4-6 cups water

Salt and Pepper

Preheat oven to 400. Place chicken on a baking sheet. Only make the amount you need for each bowl, about 7 pieces each. Bake 10 minutes, or according to package directions. Prepare potatoes according to directions, add butter and season with salt and pepper. In a small saucepan, warm gravy on stove over medium-low heat. Steam corn in microwave according to directions. When chicken is done, gather all ingredients and build each bowl: potatoes, gravy, corn, chicken and sprinkle with cheese.

Copycat KFC Famous Bowls

More Copycat Recipes To Try

Copycat Bob Evans Chicken and Noodles

Copycat Olive Garden Fettuccine Alfredo

Copycat Applebee's Oriental Chicken Salad

Copycat Pizza Hut Cavatini

Copycat Panera Broccoli Cheese Soup

Copycat Texas Roadhouse Green Beans

Copycat Dole Whip

Copycat Olive Garden Chicken Gnocchi Soup

Copycat Wendy's Chili


 Shared at Weekend Potluck


Sunday, August 7, 2022

Back To School

As much as I have tried to ignore it for weeks, the joy that is summer vacation is coming to an end and back to school time is officially here. For our family, it's actually a two week process, and mommy is not handling any of it well.

This week my first baby embarks on his Senior year of high school. I'm pretty sure we just went to freshman orientation last week, so it's not quite clear how that happened.

The next day my little baby turns 6! Again, we just brought him home from the hospital, so that went quickly. Then the following week, he is off to Kindergarten, which is going to be a huge adjustment for both of us. 

We are so happy with our school choice, his teacher is amazing, and I get the joy of being classroom mom. All of these things make sending him off a little easier, but the fact that my sidekick won't be here every day is a bit hard to swallow. For him too. During his check up at the doctor last week, when asked if he was excited about school, he replied with "Not really. I don't want to leave mommy." 

That sums it up for Max. He has spent the last 6 years with me, all day, every day, for the most part. We can tell him how much fun he's going to have, how much he is going to learn, and how awesome Kindergarten will be; but right now he can't see past having to leave my side. 

Like all hard things, this too shall past. We will get him through the anxiety of the first few days, or even weeks, but for now, I'm going to keep snuggling, hugging and enjoying these last few moments of just us time. 

And don't think for one minute by going on and on about the little one, seeing the 17 year old leave for his last year of high school is any easier on this mommy's heart. Oh, and did I mention he turns 18 next month? Seriously, it is a lot, all at once. I burst with pride for the man he is becoming, but melt inside knowing he is getting closer and closer to leaving the nest. 

Anyway, enough blubbering on, the whole point of me diving into the back to school saga was to share this super simple, 3 ingredient, Crock Pot recipe that is perfect for those busy school nights filled with sports, meetings, activities and more. 

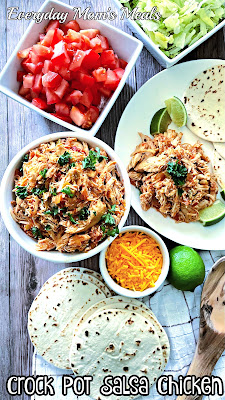
Crock Pot Salsa Chicken is filled with flavor and can be used for tacos, enchiladas, burritos, nachos or just served over some cooked rice! On those evenings when everyone has to eat at different times, it is as good for the last person as the first. 

If you are dreading sending your kids back to school like me, I send you love and hugs. We can get through this...one day at a time...and count the days until fall break! 


Crock Pot Salsa Chicken

4 boneless chicken breasts

2 cups mild, chunky salsa, divided use

2 1/2 tsp. taco seasoning

Fresh parsley, if desired, for garnish

Grease Crock Pot insert with nonstick spray. Lay chicken inside and sprinkle with seasoning. Pour 1 cup of salsa over top. Cook on LOW 6-8 hours. Shred chicken and mix with remaining cup of salsa. Cook 10 minutes until heated through. Serve or keep on warm. Garnish with parsley if desired.


Sunday, June 26, 2022

Storms, Casseroles and Gratitude

 If your Summer 2022 is anything like mine, it is flying by, the days are busier than ever and when it is time for bed you wonder where all the minutes and hours went. 

The last two weeks in our house have been especially busy, and might I say, stressful. On the night of June 13th, a massive thunderstorm went through our area wreaking havoc in it's path. We now know it was actually a "derecho" with sustained winds of 98mph, the same as a Cat 2 hurricane. 

We were some of the unlucky ones who sustained damage in the storm. Our huge maple tree in the front yard, the one that was there long before we moved in almost 20 years ago, couldn't withstand the strong winds. It crashed down onto our house, right above where the 5 year old was sleeping. I wish I had the words to describe the level of fear, and then instant gratitude we felt because it could have been so much worse.

The next morning the tree was removed and we could assess the damage. Let's just say we have some major repairs that have to be done to both the exterior and interior of our house. It has been a stressful two weeks and we continue to pray we have success with the insurance and repair process.

As you can imagine, this situation only added to an already busy summer schedule. Between days of fun, and now days of planning and scheduling, you know I need some easy suppers to satisfy these hungry boys of mine. 

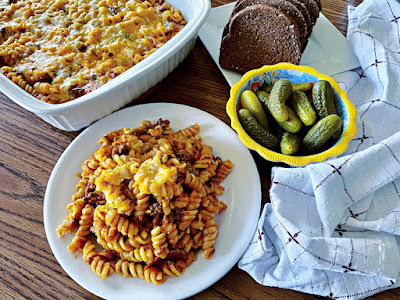
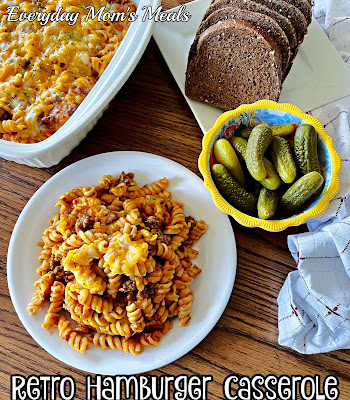
What could be more perfect than a hearty casserole filled with meat, cheese and noodles? A retro one our grandmas and moms probably made because it is pretty budget friendly too! 

Hamburger Casserole is one of those meals you might just have everything on hand for and will feed a crowd. It is also a great "take to" meal for those new babies, loss of a loved one, or your neighbors who have storm damage! 

Summer time doesn't mean the calendar opens up at all. More things to do and a shorter amount of time to do them in. Fun in the sun is the goal as much as possible, with some stress-free suppers to end the day with!


Retro Hamburger Casserole

1 lb. ground beef

2 cans tomato soup

1 lb. rotini pasta

1 small yellow onion, diced

1/2 cup beef broth

1 cup shredded mozzarella cheese

2 cups shredded cheddar cheese

1 tsp. garlic powder

Salt and Pepper

Dried Parsley

Preheat oven to 375. Grease a 9x13 baking dish. Boil pasta according to package directions. In a large skillet over medium high heat, brown beef with onion until no longer pink. Drain if needed. Season with garlic powder, salt and pepper. Drain pasta well. Add pasta, beef broth, soup and half of both cheeses to skillet. Stir well to combine. Transfer to baking dish. Top with remaining cheeses. Cover tightly with foil and bake for 20 minutes. Uncover and sprinkle with a little dried parsley. Bake for 10 additional minutes until bubbly and brown. 


Sunday, April 10, 2022

50 Cent Inspiration


 I have never been one of those people who complain about grocery shopping. It's actually something I've always enjoyed. Sure, part of it is the fact that since 2004 when I became a full time SAHM, the weekly trip to the grocery store was a little bit of "me" time and many times included a drive-thru sandwich or Starbucks stop! 

But I truly do find happiness in meal planning and making my grocery list every week. New recipes, old recipes, finding the best price on things we need, saving money...all of these things make me smile.

 Lately though, my joy has been taken from me. With all the empty shelves, and every single thing on my list being more expensive, I tend to get a little grumpy while shopping. I grumble under my breath and get annoyed because I have to replan meals or my budget is blown. 

I know we are all in the same boat when it comes to the state of the world today, so I'm not looking for sympathy...just typing it allows me to vent a little! But this story also comes with a silver lining and a moment of joy!

A couple weeks ago as I was walking through Walmart, a sign reading "2 for $1" caught my eye. A deal like that I had to check out and was so glad I did. Pepperidge Farm bagged stuffing mix!? Seriously? Those are usually almost $3! I guess they had gobs of them leftover from Thanksgiving, but the expiration date wasn't until June, so score! 

I immediately knew what I was going to do with this 50 cent bargain. I have been wanting to make chicken and stuffing casserole for eons, but just never got around to it. No more. Now was the time! 

So, the stuffing was dirt cheap, but the chicken, not so much. But in today's world it's a give and take. Since the rest of the ingredients for this are mostly inexpensive pantry items, it ended up being rather budget friendly. 

We DEVOURED this! Seriously, one of the Top 5 casseroles I have ever made. Simple flavors but so, so delicious. Comfort food at its very best. Perfect for a simple weeknight meal! (Especially since you can make the chicken ahead of time!)

I know many, many families are like ours and will be enjoying a big glazed ham on Easter, but if you are making chicken or turkey...remember this for the leftovers. Or, if by the middle of the next week when you've eaten as many ham leftovers as you can stand, this would be a great way to mix it up. 

Oh, and if you can't find the awesome deal on stuffing like I did- any brand will do- just make sure you have the correct amount. I think a box is 6 ounces, so this is how I would handle it. I would buy 2 boxes and use a full and half for 9 ounces or if you don't want to waste, only use the 6 ounce box and I bet you won't miss the other 2 ounces. But still use the entire stick of butter! 

Grocery shopping is very interesting these days. I hope having a meal with simple ingredients, that you might even find on sale, helps to take just a little stress out of your weekly trip and meal planning!


Chicken and Stuffing Casserole

2 lbs. boneless chicken breasts, about 3-4

8 oz. dry stuffing mix 

2 celery stalks

1 small yellow onion, quartered

4 chicken bouillon cubes

1 cup milk

1 stick butter, melted

1 can cream of mushroom soup

1 can cream of chicken soup

Salt and Pepper

Fresh Parsley

Place chicken in a large pot with celery, onion, salt and pepper. Cover with water. Bring to a boil. Reduce heat to medium for a gentle boil and cook about 20 minutes until cooked through. Remove chicken and celery. Discard onion. Save broth for another use, if desired. 

Allow chicken to cool to handle. Shred with hands, two forks or mixer with paddle attachment. Chop cooked celery. 

Preheat oven to 350. Lightly grease a 9x13 baking dish. In a large bowl whisk together both soups and milk. Add shredded chicken and celery. Season with salt and pepper. Stir to combine. Transfer to baking dish. 

In another bowl mix dry stuffing mix with melted butter until moist. Top chicken mixture with stuffing mix. Cover and bake for 20 minutes. Uncover and cook for additional 15 minutes, or browned on top. Garnish with fresh parsley and serve.

Shared at Weekend Potluck
 

Sunday, January 23, 2022

I Didn't Love Them As A Kid

When I was growing up I did not enjoy some "kid friendly" foods other children my age craved. For example, I was not a fan of tacos or corn dogs. How did this occur? Well, my dad was a meat and potatoes kind of guy, and some of those "fun" foods weren't ones my mom made. But she also raised me right, and every time I was at a friend's house for supper and it was taco night, I ate with a smile and didn't utter a word! 

It wasn't until I was a teenager I learned to enjoy Mexican food and Chinese food, and they quickly became favorites. Ironically, my dad loves Mexican food now too! Once he got a taste for it, he couldn't get enough, and he would be happy to see tacos on his supper table these days. 

I was actually an adult before I tasted a corn dog I truly enjoyed. It was at a local street fair and Alex wanted one, so we shared. Oh my gosh! I ended up getting another one. I had to know why this one tasted different from any other I had every tried. Have you guessed it yet? Honey. The extra bite of sweetness put the flavor over the top for me and since that day, I have loved them as much as my kids, as long as they contain that magic ingredient. 

Imagine my delight when I found boxed, frozen corn dogs at Aldi that declared right on the box "made with honey in the batter!" They have become a staple in our house, so when I saw this new internet craze, I knew they would be perfect for this brilliant idea.

Take frozen corn dogs, take the stick out, add some chili, cheese and onions and ta-da...Chili Cheese Corn Dogs! How genius! 

Looking for a simple supper this week that the kids will love? Done! Trying to plan the menu for your Super Bowl party in a few weeks? Done! 

I wasn't a picky eater as a kid, Lord knows mom wouldn't have allowed that; but how funny is it the few things I didn't enjoy were ones other kids begged for? Thank goodness I grew to love them all so my kids could too! 


Chili Cheese Corn Dogs

2 (6 count) boxes frozen corn dogs

2 (15 oz.) cans chili without beans

2 cups shredded sharp cheddar cheese

1 medium white onion, diced

1/4 cup yellow mustard

Preheat oven to 375. Bake corn dogs for 13-15 minutes, or according to package directions. While corn dogs bake, warm chili on stove top. Once corn dogs are cooked through, carefully remove stick. Using a sharp knife, cut down the center of each corn dog. Squeeze or spoon a small amount of mustard into each. Spoon chili into each. Top with shredded cheese. Bake for 10 minutes more until cheese is melted. Top with diced onion.


Sunday, October 11, 2020

Home School Halloween

Since deciding to home school Max for preschool, I have found myself constantly on the hunt for activities to have him learn in fun and hands on ways. He actually enjoys sitting and doing worksheets probably more than most kids his age, says he is "doing homework like Bubbie" but when I tell him we have something extra fun to do, his little eyes light up.

Some days it's a fun craft, others he gets time to play with his Play-do sets or paint. And then there are the times I find ways to incorporate life skills like math into a recipe so we can spend some time together in the kitchen. Today's recipe is a perfect example. 

First off, let's be very clear. This isn't a recipe at all. There are 3 ingredients and you assemble. That's it. Max and I literally spent 10 minutes start to finish on this batch. But hey, that was the perfect amount of time for a 4 year old's attention span. 

I used these for a couple different lessons. We talked about what shape the cookies were, what shape we piped the frosting on, and the dollop of jelly on top. "Mommy, we painted squares onto rectangles and then added a tiny circle of jelly." We counted out the number we made and made rows of them in equal amounts. 

It is moments like these I don't even think he realizes we are "doing school" or that he is learning. He's having fun and loves to show me what he knows. Who wouldn't love a math lesson you can eat at the end? 

Max will also tell you these are "spooky but yummy", the perfect Halloween treat. If you're finding ways to celebrate at home this year, they definitely need to be on the menu. Maybe you are letting the kids have a few friends over instead of a big trick or treating group, you could easily have little cookie making kits pre-made for them to create their own. 

I never thought I was cut out to home-school, I realize that preschool is easy in the scheme of things, and know I could never do it full time until college. But for these years when he is still home with me, and I can watch him learn, have fun and enjoy discovering the world around him, I feel very blessed and am thankful to be his favorite teacher! 


Bloody Band-Aid Cookies
 
 Vanilla Sugar Wafer Cookies

Vanilla Frosting

Strawberry Preserves

Quart Size Plastic Storage Bags

Toothpick

Carefully scoop some of the frosting into a plastic bag. Do the same with the preserves. Close tightly and squeeze air out. Cut the tip of each bag. Pipe the frosting into a square in the center of the cookies. Smooth out with toothpick if necessary. Add a small dot of preserves. Serve immediately. 


Shared at Weekend Potluck

Shared at Meal Plan Monday