Everyday Mom's Meals: Kids
_____
Showing posts with label Kids. Show all posts

Sunday, February 25, 2024

Pasta For Lent

No matter if you celebrate Lent or not, are looking for meat-free dinners or not, this pasta bake is going to end up on your menu plant ASAP. How do I know? Because I am a busy mom who loves to be able to make dishes with short ingredient lists too, and if I have everything on hand already, even better. 

First let's talk about the inspo for this recipe. Those meat-free Friday meals so many of us have to plan during Lent. Let's face it, there is only so much fish and cheese pizza you can eat.  

Pasta bakes seem like a great alternative, but guess what I realized when I went back through my archives to share some on my Facebook page. Most of them, at least mine, contain meat of some sort. Ground beef, sausage, chicken, meatballs...our favorites seem to always have meat in them. Which during most of the year is no big deal, but if there are EMM loyalists out there looking for something meatless, they aren't going to much help. 

So why create a new dish and not just omit the meat from another? Well, for one, that's my job lol and two, because sometimes if you omit meat from a pasta bake, it isn't going to set up right because the liquid to protein ratio will be off. Nobody wants a soggy pasta supper. 

This is basically a grown up version of a dish my husband has been making for a quick weekend for our entire almost 21 year marriage; and also makes for our boys, whom love it. He literally boils a box of elbow macaroni, mixes it with a jar of pasta sauce (usually the cheapest kind he can find) and done. That's it. Maybe sprinkle with a little Parmesan at the table. 

I took that concept, made it a little more bougie with a nice flavored pasta sauce, penne pasta and added a ton of cheese. Why so much cheese? Because your kids will gobble this down when they see how ooey gooey it is. Oh, and talking about kids- if you have picky eaters who don't groove on the meat so much, how happy are they going to be to find out this is just noodles, sauce and cheese? 

Cheesy Baked Penne is super easy, super affordable and 100% delicious. It also happens to be one of those pastas that tastes great (almost better) the next day for lunch. 

If you are celebrating Lent, I hope this is helpful for you, but if you aren't, still give it a try on a night when you just can't handle complicated!
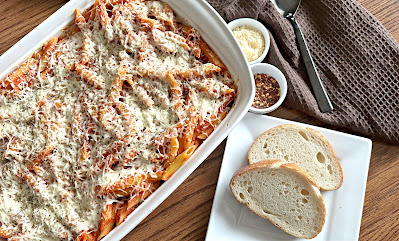
Cheesy Baked Penne

Can I use a different kind of pasta? 

Sure! Whatever you have on hand will work: elbows, rotini, ziti, shells, etc. 

Can I use a different kind of pasta sauce? 

Yep! I like the flavor of tomato & basil, but traditional or marinara would also work. Obviously if you're trying to go meat free, a meat flavored one not so much.

  Why 3-4 cups of cheese?

 I wanted to use all 4 cups I had, but decided 2 cups was a little too much for the top. But you can use whatever amount your family will like.

Cheesy Baked Penne

Best Tips

Look for a jarred sauce that says "thick" so it bakes up nicely. 

You could add veggies this as well: mushrooms, zucchini, eggplant, spinach. Be sure to precook them and drain off any extra liquid. 

An Italian blend cheese would work too. 

Add some dried red pepper flakes for a little spice. 

Store leftovers in an airtight container in the fridge for 2-3 days. Cover to reheat in microwave. 


Cheesy Baked Penne

2 (16 oz.) boxes penne

2 (24 oz.) jars tomato basil pasta sauce

1/2 tsp. garlic powder

1 tsp. Italian seasoning, extra for top

1/2 tsp. salt

1/4 tsp. pepper

3-4 cups shredded mozzarella cheese 

Preheat oven to 350. Grease a deep 9x13 baking dish. Boil pasta until al dente. In a large bowl combine pasta sauce and seasonings. When pasta is cooked, drain well. Add to sauce. Mix well. Add half pasta to bottom of baking dish. Sprinkle with 2 cups cheese. Add rest of pasta. Top with remaining cheese, either 1-2 cups. Sprinkle with extra Italian seasoning. Bake for 20-25 minutes until cheese is melted. Let stand 5 minutes before serving. 
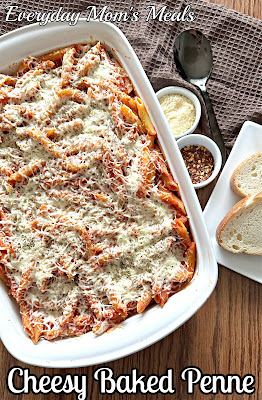
Cheesy Baked Penne

More Pasta Bake Recipes To Try 

Baked Goulash

Lasagna Casserole

Cheesy Baked Tortellini 

Easy Baked Ziti  

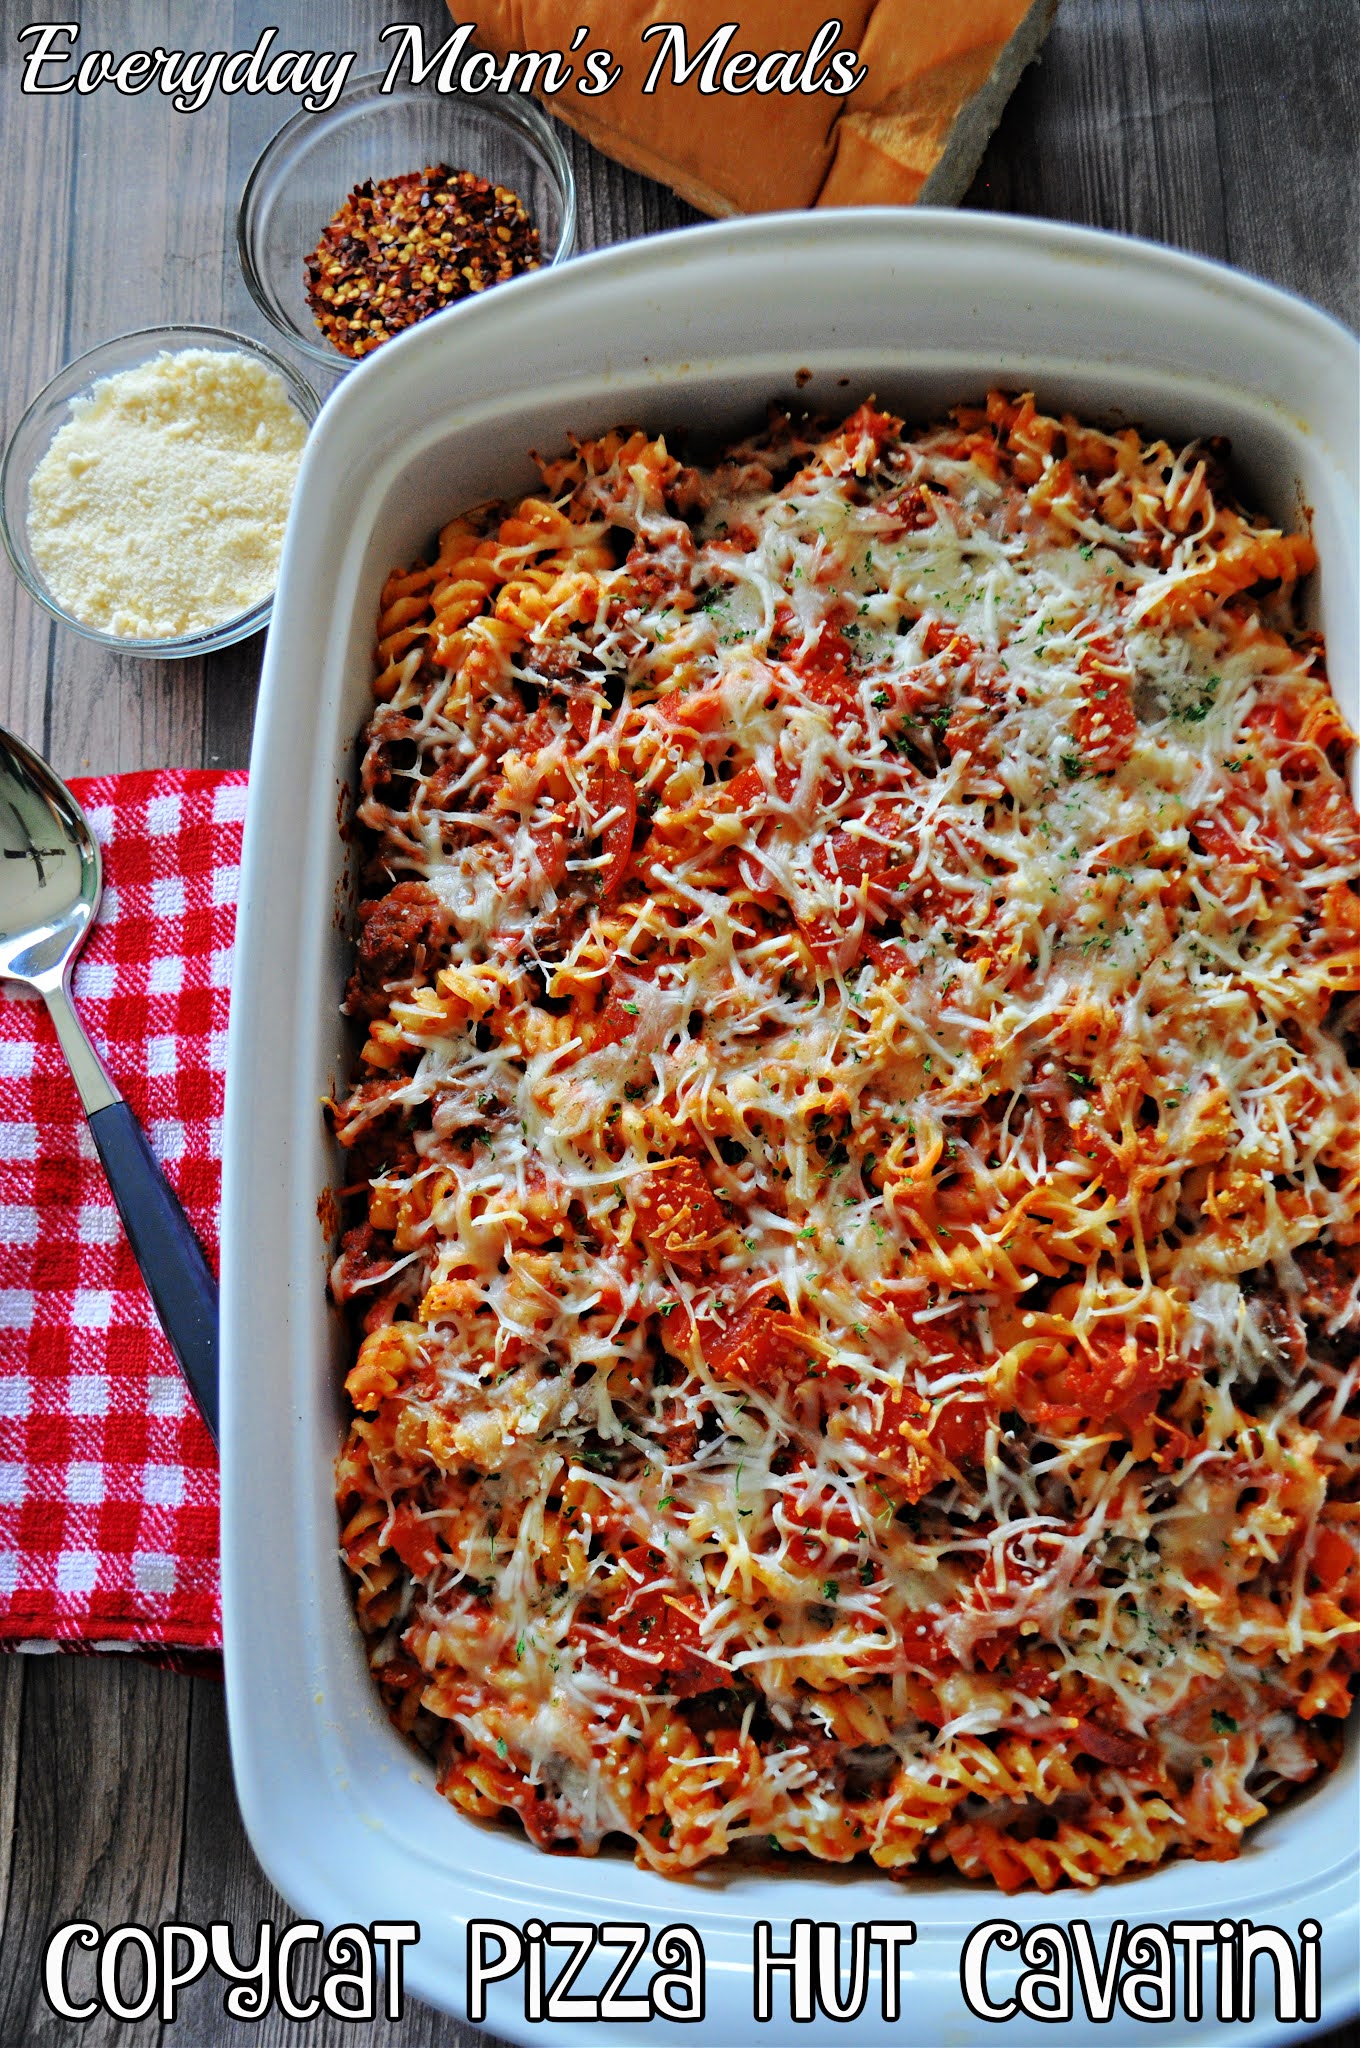
Copycat Pizza Hut Cavatini 

Baked Spaghetti


Sunday, January 1, 2023

Happy New Year

 Welcome to 2023! I hope your holiday season was magical, filled with love, laughter and some yummy food! 

It's hard to believe it is all over. All the planning, decorating, wrapping, baking, and anticipation were 100% worth it though. Our family has been very blessed. 

When I was deciding what the first recipe I wanted to share with you this year would be, it really was no contest. 

Maybe you've seen this all over your social media feeds lately. I know the Pioneer Woman has a version, so you know if Ree is making it, its gonna be good! 

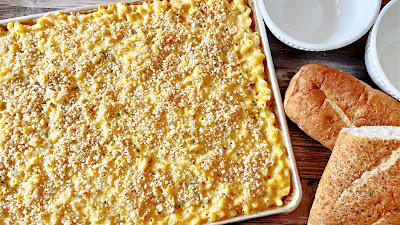
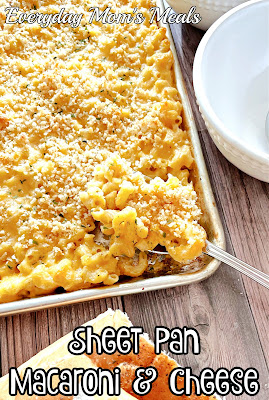
If you're feeding a crowd, this is the mac and cheese recipe you need to be using! It's only a pound of pasta, but it makes enough to feed an army!

Let's stop here for a minute and talk baking/cookie sheets. I only use large, rimmed baking sheets in my kitchen. You might have heard them called "jellyroll pans." Mine are commercial grade,  half sheet 13x18. No matter if I'm baking cookies, roasting veggies or now mac and cheese, this size can do it all. 

This macaroni and cheese comes with a thick, homemade cheese sauce and a crunchy panko topping too. In our house we have both creamy and baked mac lovers, and this one satisfies both!  

I hope nothing but wonderful things for you and your family in 2023. And if this happens to be the first new recipe you try this year, that makes me smile so big!


Sheet Pan Macaroni & Cheese


Sheet Pan Macaroni & Cheese

1 lb. elbow macaroni, with ridges

4 cups shredded extra sharp cheddar cheese

2 cups shredded mozzarella cheese

1 stick butter

2 TBS olive oil

1/4/ cup flour

1/4 cup grated Parmesan/Romano cheese

1/2 cup Panko breadcrumbs

4 cups milk

2 tsp. dried parsley

Salt and Pepper to taste

Preheat oven to 375. Combine breadcrumbs, Parmesan and olive oil in a small bowl. Season with a little salt and pepper and set aside. Cook pasta according to directions for al dente. When pasta is cooked, drain well. In the same pot, melt butter over medium heat. Add flour and whisk constantly until smooth. Cook for 2-3 minutes until golden. Slowly add milk and whisk until smooth. Bring to a simmer and cook 5 minutes until thickened. Season with salt and pepper. Remove from heat. Add both shredded cheeses in batches, whisking constantly until smooth and thick. Add drained pasta to cheese sauce and stir to combine. Transfer to a large rimmed baking sheet. Sprinkle with breadcrumb mixture. Bake 25 minutes until set and golden brown. Let sit 5 minutes. Garnish with parsley and serve.  

Sheet Pan Macaroni & Cheese


Sunday, March 13, 2022

Easy As The Can

Two. Years. Some days it feels like March 2020 was yesterday. Other days it feels like it was sooooooo long ago. This pandemic has messed with so many things, my sense of time included. 

There will be times I mention something about school and my oldest has to remind me "Mom, that was Freshman year!" He's a Junior now- and the school year is more than half over. In that way time has flown. 

But in other ways the past two years feel like they have dragged on far too long, and I think we are all ready to breathe again and find what normal looks like now.

How many time in the last 24 months have we heard the words "supply chain issues"? I can honestly say before March 2020, I don't know if I ever heard them before, let alone uttered them.

From the beginning days when there was no toilet paper or hand sanitizer to be found, to fast forward to present day and grocery store shelves are still empty in some areas and you never know week to week what you will be able to find. 

What things are still hard to find in your area? Here in northern Indiana, as of late they include jarred gravy, fresh chicken tenderloins, frozen french fries and potatoes, some frozen vegetables, juice boxes, and canned sloppy joe sauce...leading us to this recipe!

Ironically, I just saw the canned sloppy joe sauce yesterday at the store, but last month when I needed it, there was none to be found- name brand or generic!

No biggie. Believe me I know what a small problem it was; and let me say this too. I realize the supply chain issues we've been dealing with over the last 2 years are very minor to what others face around the world daily. I do. But that doesn't mean we aren't allowed to be frustrated when we are standing in the grocery store trying to re-do our menu plans because we can't find an ingredient we needed. For someone like me, those situations can be stressful and bring anxiety- and when it happens almost weekly it can become exhausting. 

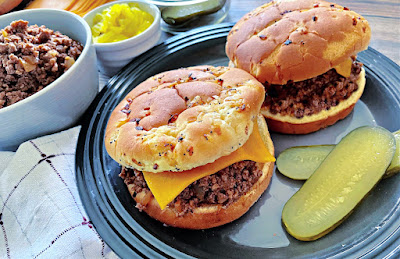
 Anyway, not being able to find the canned mix forced me to make some sloppy joes from scratch. I used to do it a lot when Alex was little, but over the years I got lazy. Yep, I admit it! 

If you've never made them like this, it's super easy, and having control over the ingredients is always an added bonus! 

These sammies are great for a weeknight supper, game day food or even camping take along! They are made stove-top, but could easily be kept warm in the Crock Pot. You could even make the meat mixture, freeze it and reheat it when it was time to serve! Very versatile!

Supply chain issues are now part of our every day vernacular. One way to lessen the stress when they arise is to have some simple recipes ready to go when those convenience ingredients are no where to be found!

If you are serving a crowd, set everything out and let everyone build their perfect Joe. You could always prepare the recipe as is, and then put it in a slow cooker on warm to last the whole party. That tip is also great for when the kids are coming and going from sports and after school activities and everyone is eating at different times!

Homemade Sloppy Joes. Everyday Mom's Meals

Homemade Sloppy Joes

1 1/2 lbs ground beef

1 medium yellow onion, finely chopped 

2 garlic cloves, minced

1 cup ketchup

2 TBS brown sugar

1 tsp. Dijon mustard

2 cups beef broth

2 tsp. Worcestershire sauce

 Whisk ketchup, brown sugar, mustard and Worcestershire sauce together in a bowl. Set aside. Brown ground beef and onion in a large skillet or Dutch oven until no longer pink. Drain if needed Add garlic and mix well. Add one cup beef broth, scraping the bottom of pan. Add ketchup mixture and remaining cup of beef broth. Stir well. Season with salt and pepper. Bring to a boil. Reduce heat and simmer, uncovered, for about 40 minutes until most of the liquid has been absorbed and the mixture is slightly thick. Be sure to stir a few times during cooking to avoid scorching. Serve on buns with cheese, pickles, peppers, etc.


Shared at Weekend Potluck

Sunday, March 6, 2022

Easter Planning

Have you started to brainstorm your Easter menu yet? I am well on my way to being done with mine, but I realize not everyone is totally OCD  when it comes to planning like me. Regardless if you've begun, or just groaned at the thought, I have a terrific recipe that could easily be added to your menu...or be a tasty side dish this week for supper! 

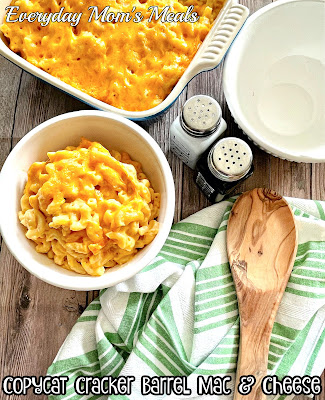
I have mentioned before my boys are mac and cheese connoisseurs. They like it any way they can get it, from the blue box to my homemade no-boil baked version passed down from my grandma. But when it comes to restaurants, the #1 choice for my oldest has always been Cracker Barrel's. Since he was little, he has proclaimed it to be his favorite and the best one he can find when we go out to eat...and believe me he has tried many! 

He loves the thick, creamy texture, but hands down, his favorite part is the little bits of browned edges that you get with every portion. While others might think these crispy pieces are burnt or a mistake, he has always coveted them like they were gold! "Mom! I got extra brown pieces!" 

I don't know why it took me so long to make a version at home, but I was a rock star with this one! The funniest part is I had never had it myself, so I had to wait for the teenager to taste it to tell me if it was right. According to him I nailed it!

I use extra sharp cheddar in my baked mac and cheese recipe, but this one calls for Colby, giving it a milder flavor. Cooking it both on the stove top and then baking it produces that creamy texture plus the browned edges he loves. I scored some major mom points the night I made this! 

I know so many families who love to have macaroni and cheese on their Easter table, specifically if ham is served,  and this Copycat Cracker Barrel version would be perfect! This recipe is perfect for 4, but could easily be doubled or even tripled! Honestly, if it was me, I would make 2 or 3 batches, but in separate 8x8 pans for even cooking. 

I can taste the cheesy goodness next to a slice of sweet and savory glazed ham right now. I *might* be starting to drool at just the thought of it!

I would be honored if you add this to your Easter menu, making it a new tradition. Or if you just need another idea for a simple weeknight supper, I'm totally here for that too! 

Oh, and if you really want to get a big jump on that Easter menu, I've got a great collection of 100 side dishes perfect with ham over on Parade you should check out! 


Copycat Cracker Barrel Mac & Cheese

1 lb. elbow macaroni

3 cups shredded Colby cheese, divided use

2 cups milk

5 TBS butter

1/3 cup flour

1/2 tsp salt

1/4 tsp pepper

Preheat oven to 350. Lightly grease 8x8 baking dish. Cook macaroni to al dente. In a large skillet melt butter over medium heat. Whisk in flour until smooth and cook for 2-3 minutes until a light roux forms. Slowly add milk, whisking constantly. Cook for 3-5 minutes until thickened. Add 2 cups cheese in small batches, stirring constantly until smooth cheese sauce forms. Season with salt and pepper. When macaroni is cooked, drain well. Add to skillet and stir well. Transfer to baking dish, sprinkle with remaining cheese and bake for 15 minutes until bubbly and slightly browned.  


Shared at Weekend Potluck

Monday, February 14, 2022

Mom's Version Will Always Be Our Favorite

 Do you have a recipe, or maybe a few, that no matter how many times you make it, it will never taste as good or "just right" the way mom did? Hers will forever and always taste better and you've just accepted it? 

For me, mom's meatloaf and beef and noodles are at the time of that list. The meatloaf I have come to terms with and mine is SOOOO close I can live with it. The beef and noodles? I don't even try. If we are craving them, mom is inviting us over for the real deal.

Another one that used to be on that list, but over the years I've done a pretty good job at perfecting it, is her goulash. For many years mine was missing something, although I could never put my finger on it. I always used the same recipe as she did, so who knows. Maybe I've just gotten used to mine enough that I don't notice it anymore.

The really funny thing about this recipe is a story from when I was first married, almost 19 years ago. Mr. E asked me if I knew how to make goulash. I told him yes and would do so. He explained that his grandma's was his favorite but he hadn't had it in years. A few nights later I made him mine, learned from my mom (and her mom before her) and before I could say a word he exclaimed "You got Grandma's recipe from her!! This is perfect." 

I just stared at him in astonishment, and then finally revealed it was my family's version, not his. He was gobsmacked because it was exactly how he remembered. I asked his grandma and yep...it was the exact way she had made it when he was growing up. How cool is it that two grandmas, one in Indiana and another in Pennsylvania, made a classic dish the same way, and their grandkids would meet, marry and then carry on that tradition, from both sides of the family?! 

This easy goulash is by far one of my go-to meals. It is quick cooking, budget friendly and always a hit. It feeds a few or a crowd since it can easily be doubled. 

If there is a recipe from your mom you just can't seem to get right, keep trying...one day your kids will thank you and hopefully learn to make it too!


 Easy Goulash

1 lb. ground beef

1 medium yellow onion, finely chopped

2 garlic cloves minced

1 lb. elbow macaroni

1 (26 oz.) jar spaghetti sauce

1 TBS olive oil

Salt and Pepper

Cook macaroni according to package directions. In a large skillet or Dutch oven over medium high heat, sauté onion in oil until soft, about 3 minutes. Add beef and garlic. Continue to cook until no longer pink, about 10 minutes. Season wit salt and pepper. Reduce heat to low. When pasta is cooked, drain well. Add sauce and elbows to beef mixture. Mix well. Allow to cook on low about 10 minutes to let flavors develop. Serve with Parmesan cheese if desired.

Shared at Weekend Potluck


Sunday, January 23, 2022

I Didn't Love Them As A Kid

When I was growing up I did not enjoy some "kid friendly" foods other children my age craved. For example, I was not a fan of tacos or corn dogs. How did this occur? Well, my dad was a meat and potatoes kind of guy, and some of those "fun" foods weren't ones my mom made. But she also raised me right, and every time I was at a friend's house for supper and it was taco night, I ate with a smile and didn't utter a word! 

It wasn't until I was a teenager I learned to enjoy Mexican food and Chinese food, and they quickly became favorites. Ironically, my dad loves Mexican food now too! Once he got a taste for it, he couldn't get enough, and he would be happy to see tacos on his supper table these days. 

I was actually an adult before I tasted a corn dog I truly enjoyed. It was at a local street fair and Alex wanted one, so we shared. Oh my gosh! I ended up getting another one. I had to know why this one tasted different from any other I had every tried. Have you guessed it yet? Honey. The extra bite of sweetness put the flavor over the top for me and since that day, I have loved them as much as my kids, as long as they contain that magic ingredient. 

Imagine my delight when I found boxed, frozen corn dogs at Aldi that declared right on the box "made with honey in the batter!" They have become a staple in our house, so when I saw this new internet craze, I knew they would be perfect for this brilliant idea.

Take frozen corn dogs, take the stick out, add some chili, cheese and onions and ta-da...Chili Cheese Corn Dogs! How genius! 

Looking for a simple supper this week that the kids will love? Done! Trying to plan the menu for your Super Bowl party in a few weeks? Done! 

I wasn't a picky eater as a kid, Lord knows mom wouldn't have allowed that; but how funny is it the few things I didn't enjoy were ones other kids begged for? Thank goodness I grew to love them all so my kids could too! 


Chili Cheese Corn Dogs

2 (6 count) boxes frozen corn dogs

2 (15 oz.) cans chili without beans

2 cups shredded sharp cheddar cheese

1 medium white onion, diced

1/4 cup yellow mustard

Preheat oven to 375. Bake corn dogs for 13-15 minutes, or according to package directions. While corn dogs bake, warm chili on stove top. Once corn dogs are cooked through, carefully remove stick. Using a sharp knife, cut down the center of each corn dog. Squeeze or spoon a small amount of mustard into each. Spoon chili into each. Top with shredded cheese. Bake for 10 minutes more until cheese is melted. Top with diced onion.


Sunday, August 8, 2021

Hello School Lunch Boxes

When does the school year begin for you? I know so many that have already stepped back into the classroom and for us, this week is our time. As of Tuesday my first baby will be a JUNIOR in high school, and quite frankly, I am not that comfortable with it. I'm pretty sure we were buying his Kindergarten backpack yesterday. But here we are, another school year upon us. 

Oh, and let's not forget, the little guy also turns FIVE this week....on the second day of school actually, so it's going to be an emotional one for Mommy. Luckily, since he doesn't make the age cutoff, he is going to have another year of homeschool/preschool with Mommy. 

Alex's high school is once again in person this year (they were last year too) and he is ready to get back to more of a normal school day routine. They have been able to go back to a few pre-Covid things while still maintaining safety too. One thing will never change though, yummy lunches are a must! 

This copycat recipe is one I was super excited to share for an easy summer lunch for kids....but time got away from me. That's okay though! Many kids are still remote learning, or like my little guy, home schooled, so lunch time still needs to be easy and kid friendly. Or, maybe you are always looking for ways to jazz up that packed lunch! 

Do you remember when McDonald's value menu included the Chicken Snack Wrap? When Alex was little, it was one of our favorites! For a light lunch or a snack in the car they were absolutely perfect for him and I both! I actually had forgotten all about them, but am so happy to have them back! Made in my own kitchen, super easily with a little help from frozen chicken tenders. 

These would work so well in a packed lunch too since they are just as tasty cold. We actually prefer to let the chicken tenders cool down before assembling the wrap, so added to a lunchbox sounds good to me! 

If you still have some summer left, you're probably running out of fun ideas for the kids' lunch. Copycat McDonald's Chicken Snack Wraps to the rescue! Or grab the lunch box, add some fruit and yogurt on the side and know they are getting a treat in the middle of their school day!

 Copycat McDonald's Chicken Snack Wrap

6 fajita size flour tortillas

1 medium head leaf lettuce, chopped

1 cup finely shredded cheddar Jack cheese

 6 frozen extra crispy chicken tenders

Ranch Dressing

Cook chicken tenders on a baking sheet, according to package directions. Add a few minutes for extra crispiness. Once cooked, allow to cool until you can handle them. On each tortilla, add some lettuce, cheese, and one chicken tender. Drizzle with ranch dressing, wrap and serve!


Shared at Weekend Potluck


Sunday, August 1, 2021

Beep Beep Buses Coming Through


 Happy August! I can't believe I'm saying that. In fact, I do so with a little choke. See, in this house August means a couple things. One, it's officially back to school time (10 days to be exact) AND int he same time, my baby will celebrate his 5th birthday! ("Mommy, I'm going to be a WHOLE hand this year!") 

Neither of these things are events this mama's heart handles well. I love having my kids home with me, and I am never ready for them to be another year older. Sure, I can be excited for them; and be ready to celebrate, but that doesn't mean I don't fight back tears along the way! 

I developed this recipe for an easy "summer lunch for kids" and then realized it was almost time for school before I was posting it. That's okay though. Many kids won't be boarding the bus for a few more weeks, some not until after Labor Day! Others are still learning from home, and could still use a fun, yummy lunch. Also, they work so well for a kid's party or sleepover. Or, as my boys pointed out after eating them for lunch, I could double the recipe, add a salad on the side and have a simple supper for a busy night. Oh, and let's not forget Game Day! Football Sundays are coming soon too, and these would be perfect! So...my easy kids lunch really has so many more possibilities! 

These mini pizzas used a frozen Texas Toast garlic bread for the crust and can be customized by little hands for fun in the kitchen! Any of your favorite toppings work, just make sure if you're using fresh veggies they aren't wet...nobody wants a soggy pizza! Oh, and it's best if you use the garlic bread without cheese. Sounds weird I know, but using "fresh" gets a better melt factor and allows the toppings to stick better! 

Summer lunch time will be winding down soon, but lucky for me you have so many more options with these yummy personal pizzas. But hey, there is still some time! Plan a pizza party lunch this week before those littles are grabbing their backpacks and lunch boxes as they run out the door!

Garlic Bread Pizza

1 (8 count) box Texas toast garlic bread

1/2 cup shredded mozzarella cheese

1/4 cup shredded Parmesan cheese

1 cup pizza sauce

2 tsp. Italian Seasoning

Sliced Pepperoni

Sliced Black Olives

Preheat oven to 425. Place garlic bread on a large rimmed baking sheet. Bake for 5 minutes. Top with pizza sauce and both cheeses. Sprinkle with Italian seasoning. Top with pepperoni, black olives and other desired toppings. Bake for 5-10 minutes more until browned and cheese is melted. Serve with extra pizza sauce for dipping if desired.


 Shared at Weekend Potluck


Tuesday, July 13, 2021

Skip The Drive-Thru

For most of us, we have a good month before school begins again, maybe more! And before I go on, let me just state, I'm not ready. The kid isn't ready. His baby brother isn't ready. Summer vacation needs to be longer, summer itself needs to be longer. Okay- rant over. 

How many times have the kids asked to hit the drive-thru for lunch since being home? No shame in that! But you know I also love finding ways to make restaurant favorites at home, and I think today's is going to be a big hit...especially for all you Chick-fil-A fans! 

Did you hear anything about the Chick-fil-A sauce shortage back in the spring? There was a good week where this apocalyptic like event filled my newsfeed.  People were losing their minds because they were limiting the number of sauces you could get with an order. Now, I haven't hear about it lately, so apparently the supply shortage corrected itself. But with this simple recipe you can have as much sauce as you want, anytime you want! 

This is one of those sauces that I swear you could put on a flip flop and it would taste good! I know true Chick-fil-A fans put it on everything from their chicken to waffle fries, onion rings and more. Plus, I've heard it is a huge hit with kids too, which is a true compliment since most littles stick to ketchup or ranch! 

Just think- you can be a total lunch time rock star when they sit down to some nuggets and homemade sauce! For the adults, I think this would be amazing on a chicken sandwich too! 

Summer needs to slow down! We've got so much to do, so much to enjoy, and so much to eat!

 Copycat Chick-fil-A Sauce

1/2 c. mayonnaise

1/4 c. honey

1/4 c. barbecue sauce

1 TBS lemon juice

1 TBS Dijon mustard

2 TBS yellow mustard

Combine all ingredients in a medium bowl. Whisk well. Chill until serving. Keep covered in fridge for 2-3 days. Serve with chicken tenders, nuggets, popcorn chicken, fries, onion rings, etc.


Shared at Weekend Potluck
 

Sunday, July 11, 2021

The Day After The BBQ

 I am not a huge left over lover. There are a few things I will definitely enjoy if sitting in the fridge the next day- pasta, meatloaf, Chinese take out, pizza...but my list isn't nearly as long as my boys'. Seriously, they will eat pretty much anything left over, and my husband will eat them far after I think they should be thrown out! 

It is a good thing I live with people who will eat thing the next day, or for a few days, because I don't cook small. I cook for a crowd, no matter if it's just the 4 of us, or guests too. So you know if I'm throwing a backyard bash, there will be left overs in the fridge that I need to find something to do with.

This recipe actually came to be because of the teen. He loves pulled pork nachos and one night he said "Mom, I think you could do the same thing but with tater tots!" Um.....YES!!

It just so happened when he had this tasty brainstorm I hadn't made pulled pork from scratch, but I did have a couple tubs of the store bought. We have found the ones found in the meat section actually very tasty, and great to have on hand for a quick sandwich supper. I usually just have to add some extra barbecue sauce since we like ours dripping wet. 

The really great news? I also had a big bag of tots sitting in the freezer! I made his brainstorm a reality from ingredients I already had on hand! Mom win! But if you are making a big batch of pulled pork for a crowd, you know there will probably be some left the next day, and now you have a simple weeknight supper to put it to good use! 

You can top these with any or all of your favorite nacho toppings! Again, I was going for what I had available, but I think avocado or even some pico de gallo would be delicious too! 

Pulled Pork Totchos are simple, tasty and another left over dish I am adding to my approved to eat list!

 Pulled Pork Totchos

1 (32 oz.) bag tater tots

2 lbs. barbecue pulled pork, store bought or left over 

2 cups shredded sharp cheddar cheese

Assorted toppings

Extra barbecue sauce

Bake tater tots according to package directions, adding an additional 5-10 minutes for extra crispiness. While tots bake, heat pulled pork in a large skillet on medium heat, breaking it up. Add extra barbecue sauce if needed. Once tots are baked, top with pulled pork, cheese and toppings- sour cream, pickled jalapenos, chives, avocado, etc. 

Shared at Weekend Potluck
 

Sunday, April 4, 2021

The Teenager Had A Brainstorm


 Have you seen the tortilla boats they have now? I realize I am probably late to the party, but they are a recent discovery in our house and they have been life changing! Seriously. Whoever came up with the idea deserves a big high five!

If you're like me and have been living under a rock, let me explain. Right there in the aisle next to the hard taco shells there are now these soft tortilla "boats" or bowls. They come in regular size (used in this recipe) and mini ones too. They also come in different flavors- corn, flour, or a mix of both. 

I don't know about you but tacos, hard or soft, are my little guy's nemesis. He loves them, but gets so frustrated when all the yummy insides fall out onto the plate, or mommy's favorite, his lap. These solve that problem completely. The meat, cheese, lettuce, and tomato all stay put while his little hands hold it. 

So, you're probably wondering where this story is going if you've looked at the picture and saw breakfast foods. It's actually brilliant. I had made tacos one night, and had mini boats leftover the next day. (For regular beef tacos, I like the mini size. For these breakfast boats I used the bigger ones.) Big brother was home doing school remotely, so I took the mini boats, filled them with scrambled eggs and cheese and he was thrilled. And that's when it happened. "Hey, mom! I bet these would be good if you made them into a breakfast burrito boat. Eggs, potatoes, gravy, cheese, bacon. Do you think you could do that?"

Challenge accepted! These might look like a lot of steps, but don't worry, they are super easy. While the potatoes cook you can whip up the gravy and scrambled eggs. Then it's just assembly. I like the flat tater tots for this because they line the bottom of each boat and act like a barrier. But diced or shredded hash browns would work too. I also used real bacon bits because I also have those on hand, but crumbed crispy bacon would be delicious. Anything you love in a breakfast burrito can easily be a passenger in your tortilla boat!

 I love that my kids are such foodies they can look at one dish and brainstorm what else we could do with it and use it in whole new creative way. If you've never tried to let your kids help you plan new meals, try it! It's a fantastic way to get them to try new things and become more adventurous eaters!

 Breakfast Burrito Boats

1 (8 count) package tortilla bowls/boats

7 eggs

2 1/2 c. milk, divided use

1 lb. pork sausage

1/4 c. flour

8 oz. shredded sharp cheddar cheese

2 packages real bacon bits

1 (30 oz.) bag frozen tater rounds, baked per bag directions

Salt and Pepper

Dried Chives 

Begin by baking tater rounds according to package directions. To make the sausage gravy. In a large skillet brown the pork sausage. Do not drain. Sprinkle with flour and cook for 1 minute. Slowly add 2 cups milk, stirring constantly. Bring to a boil. Reduce heat and simmer 10-15 minutes until thickened. Keep on warm burner. Whisk together eggs and 1/2 c. milk with salt and pepper. In a another skillet, sprayed with non stick spray, scramble eggs until cooked through. In each boat, layer tater rounds, top with scrambled eggs, bacon bits, sausage gravy and cheese. Garnish with chives. 


Shared at Weekend Potluck
 

Sunday, March 28, 2021

One Skillet Brings Chilhood Memories

 Did your mom make Hamburger Helper when you were a kid? Mine definitely did! I remember helping her choose which kind we would get at the store. It was a quick, simple meal for a working mom and she never got any complaints from my dad and I. 

Funny story though- she was forbidden from making Tuna Helper because when they were first married and still learning to cook...she made that one a lot...according to dad A LOT...so yeah he got a little burned out on it. To this day, and they have been married for almost 43 years...it's never showed up in the house again. 

I will admit, when the boxes of this convenience meal go on salt for $1 or less, I will grab a couple to keep in the pantry. No shaming! There are great to have on hand when I'm testing new recipes for all of you...and it turns into a disaster! When the experiment ends up in the trash...it's so nice to know I can reach into the back of the cupboard and still feed the family. 

If you enjoyed the boxed variety growing up, but want to stay away from the processed foods, this homemade version will knock your socks off! This was one of those meals I made that immediately got rave reviews and I was promptly told to make again. 

The best part? Just like the boxed mix, this is a one pan supper! Everything cooks in one large skillet, can be on the table in about 30 minutes, and you have less clean up! I love pairing it with a fresh garden salad or a steamed veggie on the side for a complete meal. 

You just might have everything you need to make this in the kitchen right now! Simple ingredients lead to the flavors you will remember from when you were a kid. Be sure to read my note about the pasta to meat ratio too. This is how we like it, but I have some tips if you feel like your family would enjoy it with more/less pasta or meat. 

I am not one to shame anyone for taking some help from the store and convenience foods. You want to use something from a box or the frozen food aisle? Go for it. We all need to make dinner time a little less stressful, and using those things once in a while isn't an issue in my kitchen. But I also love finding ways to make the ones we enjoy with fresh ingredients that I control so I can feel just a little bit better about my big bowl of creamy pasta in front of me! 

Homemade Hamburger Helper

1 lb. ground beef

1 lb. elbow macaroni

1 (32 oz.) box beef broth

1 TBS ketchup

1 tsp. yellow mustard

1 tsp. garlic powder

1 tsp. onion powder

1/2 tsp. seasoning salt

1 c. sour cream

1 c. shredded sharp cheddar cheese

Dried Parsley

Salt and Pepper

 In a large skillet, over medium high heat, brown beef and drain if necessary. In a small bowl whisk together ketchup, mustard, garlic powder, onion powder, seasoning salt, salt and pepper. Add to beef and stir well. Add beef broth, scraping bottom of skillet. Add macaroni and stir well. Cover and bring to a boil. Reduce heat and simmer for 10-12 minutes until macaroni is cooked. Remove from heat and stir in sour cream until smooth and creamy. Put skillet back over low heat. Stir in cheese until melted. Garnish with dried parsley. *NOTE* We like this ratio of beef to pasta. If you want less macaroni, only use half the box. Or if you want more beef, use 1 1/2 lb. with the whole box of pasta. If it's too thick when finished, or sits a while, add a little extra beef broth to make it creamier. 


Shared at Weekend Potluck


Sunday, February 7, 2021

When My Boy Asks

 My kids are so used to me planning diverse menus with many of their favorites every week, it isn't often they feel the need to request something, unless I ask them for input. But every once in a awhile, Alex will ask for me to make something he is craving, rather it be a beloved favorite or he wants me to try a new recipe. Such was the case when it comes to the new pasta bake I'm sharing today and boy am I glad he asked because it lead to something delicious and a recipe I am quite proud of! 

We are going on month 302 of this pandemic...or so it seems...and while I do think our family has adjusted to the things are the best we can, there are still moments I find us whining about things we miss. And that's okay. We all deserve to have a little whine now and again after what we have endured over the past year! Even my kids have truly stepped up to the challenge of "the new normal" better than I could have ever expected. 

My 4 year old will gladly wear his mask if I allow him to go into a store with me (which isn't often, and it helps the mask has either a panda or Baby Yoda on it!). My teenager goes to school every single day, in a mask, for 7-8 hours, without much complaint. He only gets to take it off when he eats lunch, which by the way is no longer with his friends, but in an assigned classroom where the food is brought to them and they eat at their desks. (I'm not complaining, our school has done an outstanding job at protocols this year and I'm so pleased we've been in-person with only a couple weeks of preventative remote since August!) But everyone is human, and sometimes a "oh I miss ___" will come out of one of our mouths. 

Alex's most recent lamenting was about buffets. Yes, we were a buffet loving family. We enjoyed a tasty Asian buffet, seafood buffet and the dinner buffet at our local Pizza Hut. In this case, it was the last one Alex was missing. No, not because of the all you can eat pizza, but instead the pasta they always served on it. He could eat plate after plate of their cavatini. I don't blame him, the other one they always had, a spaghetti with a white, cream cheese sauce makes me drool just thinking of it. (In case you're wondering, no it wasn't Alfredo. It was completely different, and it will be the next one I master!)

So when my oldest baby was sad because he had a hankering for this cavatini, and asked if I thought I might be able to come up with something similar, this mama had to try! Well, I don't want to pat myself on the back too much, but even I have to admit I hit it out of the park! 

This copycat is spot on! Both Alex and his dad couldn't get over just how close to the original it tasted. The boys was thrilled and I scored major mom points! 

This pasta casserole is sort of like a pizza, pasta combo so your kids will probably love it as much as mine! Maybe they have been asking you to try something new, and now you have your answer!

 Copycat Pizza Hut Cavatini

1 lb. rotini pasta, cooked to al dente

1 lb. mild Italian sausage

4 oz. pepperoni, chopped

1 medium white onion, finely chopped

1 red bell pepper, finely chopped

1 clove garlic, minced

1 TBS olive oil

2 (24 oz.) jars tomato and basil spaghetti sauce

1 1/2 c. shredded pizza blend cheese

2 TBS grated Parmesan/Romano cheese

1/4 tsp. dried red pepper

1 tsp. Italian seasoning

Salt and Pepper

Dried Parsley

Preheat oven to 350. While pasta cooks, brown sausage in large skillet. Drain well. Set aside. Wipe out skillet and add olive oil over medium high heat. Saute onion, bell pepper and garlic in oil until tender, about 5 minutes. When pasta is cooked, drain well. In a large bowl combine sauce, sausage, onion mixture, pasta, dried red pepper, Italian seasoning, salt and pepper. Stir well. Transfer half pasta mixture to a greased 9x13 baking dish. Sprinkle with Parmesan cheese, half pizza blend cheese and half pepperoni. Add other half pasta mixture, rest of pepperoni and top with pizza blend cheese. Bake for 45 minutes until brown and bubbly. Sprinkle with dried parsley before serving. 


Shared at Weekend Potluck


Sunday, October 11, 2020

Home School Halloween

Since deciding to home school Max for preschool, I have found myself constantly on the hunt for activities to have him learn in fun and hands on ways. He actually enjoys sitting and doing worksheets probably more than most kids his age, says he is "doing homework like Bubbie" but when I tell him we have something extra fun to do, his little eyes light up.

Some days it's a fun craft, others he gets time to play with his Play-do sets or paint. And then there are the times I find ways to incorporate life skills like math into a recipe so we can spend some time together in the kitchen. Today's recipe is a perfect example. 

First off, let's be very clear. This isn't a recipe at all. There are 3 ingredients and you assemble. That's it. Max and I literally spent 10 minutes start to finish on this batch. But hey, that was the perfect amount of time for a 4 year old's attention span. 

I used these for a couple different lessons. We talked about what shape the cookies were, what shape we piped the frosting on, and the dollop of jelly on top. "Mommy, we painted squares onto rectangles and then added a tiny circle of jelly." We counted out the number we made and made rows of them in equal amounts. 

It is moments like these I don't even think he realizes we are "doing school" or that he is learning. He's having fun and loves to show me what he knows. Who wouldn't love a math lesson you can eat at the end? 

Max will also tell you these are "spooky but yummy", the perfect Halloween treat. If you're finding ways to celebrate at home this year, they definitely need to be on the menu. Maybe you are letting the kids have a few friends over instead of a big trick or treating group, you could easily have little cookie making kits pre-made for them to create their own. 

I never thought I was cut out to home-school, I realize that preschool is easy in the scheme of things, and know I could never do it full time until college. But for these years when he is still home with me, and I can watch him learn, have fun and enjoy discovering the world around him, I feel very blessed and am thankful to be his favorite teacher! 


Bloody Band-Aid Cookies
 
 Vanilla Sugar Wafer Cookies

Vanilla Frosting

Strawberry Preserves

Quart Size Plastic Storage Bags

Toothpick

Carefully scoop some of the frosting into a plastic bag. Do the same with the preserves. Close tightly and squeeze air out. Cut the tip of each bag. Pipe the frosting into a square in the center of the cookies. Smooth out with toothpick if necessary. Add a small dot of preserves. Serve immediately. 


Shared at Weekend Potluck

Shared at Meal Plan Monday


Sunday, April 26, 2020

Quarantine Carbs


I don't know about you, but the one thing I've noticed while we've been sheltering in place is I'm basically thinking about food ALL.THE.TIME. I wake up in the morning thinking about what I will make the boys for lunch that day, or what I need to prep for supper. Other times I am wondering where I can run and get some drive thru or carry out easily and safely. I even went as far as to order Panera delivery this week because I was so tired of eating what we had in the house.

It's pretty much been five weeks of counting the minutes until my next meal. I am sure it is totally psychosomatic. I love going out to dinner once a week with my boys, usually after Saturday evening church service. That's now cancelled. (Although we have been getting carry out from local restaurants to help them in this dire time.) Those first couple weeks when the shelves were bare...yeah for someone who cooks and develops recipes for a living, it freaked me out. So I think some of the wanting to eat all the time comes from the fact I want to know I can.

There are things I've been craving more of during lock down too. At the top of the list? Carbs! I want the pasta. All the pasta. Don't get me wrong, we are big pasta eaters during "normal" life too, but for some reason sitting here day after day has me drooling at the sight of a plate of spaghetti and meatballs.

So, you will see a few new pastas coming to EMM over the next few weeks, and this Baked Ravioli Casserole is the first. I was able to make this because of a handful ingredients the store actually had on hand, so it's a great place to start if you are still having issues finding staples every week, or maybe you're cooking from the freezer and pantry, and might just have everything you need.

I threw in the can of mushrooms because I had them on hand, but you could easily add any veggies you like. You can even swap out the meat sauce for another to have a completely meatless meal.

April has lasted what seems like 398 days...all of them at home...and all of them pretty much centered around our next meal. I pray whatever you're craving, your family is staying healthy and safe. So...what's for dinner?

Baked Ravioli Casserole
1 (25 oz.) bag frozen cheese ravioli
1 (26 oz.) jar spaghetti sauce with meat
1 (6 oz.) can sliced mushrooms, drained
2 c. shredded mozzarella cheese
1/4 c. grated Parmesan cheese
2 tsp. Italian seasoning

Preheat oven to 400. Lightly grease 9x13 baking dish. Spread 1/3 cup sauce evenly on bottom of dish. Layer ravioli in dish. Add half of remaining sauce. Sprinkle with 1 cup mozzarella. Top with another layer of ravioli. (This should use remaining) Add mushrooms in an even layer. Sprinkle with remaining mozzarella, Parmesan and Italian seasoning. Cover with foil and bake for 20 minutes. Remove foil and bake 25 minutes or until bubbly and cooked through. Let stand 10 minutes before serving.


Shared at Weekend Potluck

Sunday, April 19, 2020

Check Your Bananas

Do you have fresh bananas on the counter? Are they starting to look like a science experiment? If they are brown, even blackish, and starting to get squishy...they are PERFECT for this recipe!

How is grocery shopping for you these days? I haven't stepped foot in a grocery store in over a month. See, since Mr. E works in healthcare, he is already exposed to Covid 19 daily, so we decided it was smart for him to venture into the stores weekly.

And oh what an adventure it is! I don't just hand him a list and say see you in a couple hours. Oh no. See, when I was pregnant, both times, I was extremely sick. More so with Alex, but Max too. So for weeks he did the grocery shopping and I learned letting him loose with a list is not a good idea. Therefore, to avoid that disaster again, we virtual shop. Yep, he Facetimes me and I instruct him on what to get.

But here is the ironic part. Something happened to me when this whole quarantine started. Those first few shopping trips were a nightmare of empty shelves, revamping meal plans and substituting products. So now that stores are better stocked, I still find myself having him get things simply because they have them, and didn't at one point.

Case in point? Bananas. We already had some. But he found more. So I had him get a few. Now, my boys eat fresh fruit daily, and we go through a lot of it, but bananas go from green to black in about 35 minutes! So I found myself needed to use some up, and fast.

Banana bread came to mind instantly, but I only had 2 bananas. So muffins it was, and a small batch at that. But it was the perfect amount for us, and can easily be doubled for more.

They are perfect for a quick breakfast before your Zoom meetings, or a snack in the afternoon, since I know the kids are asking for those every 10 minutes!

I hope you're staying healthy and safe. Sheltering in place with as much ease as possible. We can all get through this quicker if we do what is asked. No doubt, some yummy muffins will make it a bit easier too!

Banana Bread Muffins
2 over ripe bananas, divided
1/2 c. white sugar
1 c. flour
1/2 tsp. vanilla
1/4 tsp. salt
1 tsp. baking soda
6 TBS butter, melted and cooled
1 egg

Preheat oven to 350. Grease muffin tin, or use papers. In a large bowl mash one banana with a fork. Add sugar. Whisk until well incorporated. Add butter, vanilla and egg. Whisk well. Add flour, sugar, baking soda and salt. Using a spatula, fold together until just mixed. Mash remaining banana and fold into batter. Fill wells 3/4 full. Bake for 20-25 minutes until toothpick comes out clean. Makes 6-9 muffins. 


Shared at Weekend Potluck

Sunday, March 15, 2020

My Boy Is Home


Like so many of you, we are facing a month off school. Welcome to the world of Covid19. I am NOT dedicating an entire post to this scary time, the cause, the hysteria, the fear. We are all getting inundated with that 24/7. But I am offering what I do best (at least in the blogosphere)...food!

For those of you who follow me on Facebook, I announced yesterday that for the next few weeks (Monday-Friday) every day at 9am EST, I will be sharing a kid friendly recipe to help get your kids into the kitchen and engaged. I love using food to teach things like math, and kids get such a great sense of accomplishment when their little hands help make something they get to eat.

My son's high school is actually doing remote learning every day from 8:30-1, which is different from e learning. Many are utilizing that method, and our biggest school corp in the city is unable to do any of that (too many kids without devices or access to internet). So while many of our kids are still learning during this mass shut down, others won't. So I thought maybe cooking would be a fun way to get them learning, and they might not even notice.

I've actually been waiting to share this recipe until closer to spring and warm weather, but I decided it would be a fantastic one to post now. Only 3 ingredients, it's a great one for the kids to help with. Don't worry about making them as pretty as mine! Let them measure, mix, assemble. If they are too little for any that, they love to watch and taste test!

I am very blessed to be in the position to be home with my kids; and having the oldest home for the next month makes me smile (not the circumstances, of course, but getting to hug his neck more) My heart goes out to all of you scrambling to figure out childcare.

There isn't much I can do to help, but I thought maybe a simple, fun and yummy activity to fill some of the day might put a smile on faces when we need it most.

Easy Strawberry Mousse
12.5 oz. frozen sliced strawberries, thawed or fresh
1/2 c. white sugar
1 (8 oz.) tub Cool Whip, 1/4 cup reserved

Place berries and sugar in food processor. Pulse into a puree, with small pieces remaining. Pour into large bowl. Reserve 1/2 cup. Fold in Cool Whip. Divide 1/2 cup puree evenly among 4 dessert cups. Divide mousse mixture into cups. Chill several hours to set. Top with extra Cool Whip.


Sunday, February 23, 2020

Classic Never Goes Out Of Style

There are many classic dishes we've eaten for years in our family, and to us, no matter how retro they might be, they never get old. My mom's goulash, Grammy's chicken on rice, and slow cooker pot roast to name a few. 

These comfort foods are like a big hug at the end of a long day, and this casserole is one of our favorites we've been eating for years. It was one of the recipes I made as a newlywed, and once our boys came along, it shows up on my meal plan monthly.

It has the classic ingredients, plus a couple you might be surprised at. I have always made mine with peas, for a splash of green. Plus, I have added a panko topping for a little crunch. It's so good...I'm drooling just thinking about it.

Oh, and even better? It can go from stove to oven to table in about an hour! A simple supper for those nights you just can't handle complicated. Add a little side salad, or fresh fruit and dinner is done.

Lent begins this week, and I know many of you will be looking for seafood dishes for those meat-free Fridays. This should definitely be on your must make list!

Classic recipes are loved for a reason. No matter what food trends come and go, they stand the test of time and are loved by generations now and those to come!

Classic Tuna Noodle Casserole
1 lb. egg noodles
4 (5 oz) cans tuna, drained well
1 (10 oz.) bag frozen peas
2 cans cream of mushroom soup
1 c. milk
1/2 c. Panko breadcrumbs
2 TBS butter, melted
1 tsp. dried parsley
Salt and Pepper

Preheat oven to 400. Grease 9x13 baking dish. Cook noodles according to package directions. Drain well. Combine noodles, tuna, soup, milk, peas, salt and pepper. Mix well. Transfer to baking dish. In a small dish combine melted butter and breadcrumbs. Sprinkle over top. Sprinkle with parsley. Bake for 25-30 minutes until slightly browned and heated through. 


Shared at Weekend Potluck
Shared at Meal Plan Monday

Sunday, September 22, 2019

Hello Fall

If you aren't paying attention, we have arrived at the first day of fall. Sure, some of us have had our autumn decor out since the calendar still said August (*cough cough*...I might resemble that remark) but it's official. Now our husbands can't make fun of our pumpkins and scarecrows anymore.

Autumn brings so many reasons to "party". Between bonfires, those last few warm evening cookouts, Halloween parties, Game Day...the list goes on and on! And if you don't have a reason to party, make one! There are days when we are outside raking or doing jobs around the house, and I have a big pot of chili or soup cooking, plus some snacks for motivation too! So you can't make it to the stadium to tailgate for your favorite team. Have a football day at home in your living room!

My point is a delicious party mix can be appreciated for so many reasons this time of year. This would be great for an after school snack, kids' Halloween party or classroom party (if home made is allowed).

We love Chex Mix, or more specifically Adam's late grandma's Chex Mix recipe. I make it a lot. It's the perfect salty snack. But this time I wanted something a little sweet, and of course autumn inspired.

Oh. My. Gosh. As Alex said, "This stuff is dangerous!" Talk about addicting! We couldn't stay out of it! Sweet, salty...mmmmm. We have a couple days trips planned for this fall, and I think I will make sure we have a bag of this for the car too!

Fall might not be my favorite season, but I do enjoy it and all the fun activities it brings. Add in some yummy snacks and it's a party any day of the week!

Harvest Party Mix
1 (12 oz.) box rice cereal, like Chex
4 c. pretzel twists
1 (7 oz.) bag original Bugles
2 ( 4 oz.) boxes Reece's pieces
2 ( 9 oz.) bags autumn candy mix
3/4 c. margarine, melted
3/4 c. brown sugar, packed
2 TBS vanilla extract

Preheat oven to 275. In a medium bowl whisk together margarine, brown sugar and vanilla until combined. In a very large bowl combine cereal, pretzels and Bugles. Pour sauce over mix. Stir gently, but well. Spread evenly on a baking sheet* and bake for 45 minutes, stirring every 15 until crisp and brown. Remove and allow to cool. Add candy and stir well. Store in airtight container.  
*NOTE* You will either need to do this in batches, or use 2 cookie sheets at a time. 


Inspired by One Little Project

Sunday, August 11, 2019

That Moment


As many of you know, not only do I run the EMM world, I am also a contributor for Parade Magazine's online food site. I have been writing for them for about five years now, and it has opened up a whole new world to me and the blog. Plus, it's another way I am able to help support my family and maintain the blog with free recipes for all of you!

Recipes that I blog here, I then share to Parade for them to publish as well. Or, that is how it normally works. But this month, there was a little hitch in that plan and this recipe was actually shared on their site before I had a chance to blog it here. Now, I will admit, I'm a little OCD and that bothered me a little because I like for my stuff to debut on my site first before I share it elsewhere, but then something happened that made it 100% okay!

Last Monday I woke up and logged onto Parade to find MY recipe was the featured recipe and cover photo of their entire food section. Woo hoo! I was excited, and apparently people were loving it because they left it there for the ENTIRE day!


So, even though this wasn't going to be published on EMM until later in the month, I decided it needed to be moved up pronto! I had to calm those OCD nerves somehow!

Taco Spaghetti is great for your Taco Tuesday, or your pasta supper tonight! Two classic favorites come together in one amazing dish that will be gobbled down! We couldn't stay out of it! Even the leftovers were fought over the next day!

With school starting back up this week for many of us (I HAVE A FRESHMAN!!! HOW DID THAT HAPPEN????) Simple casserole suppers are going to be in high demand. Tell the kids you're taking two of their absolute favorite meals and making them into one...and then watch them run to the table!

Taco Spaghetti
1 lb. thin spaghetti, broke in half
1 lb. ground beef
1 (15 oz.) can black beans, rinsed and drained
1 (10 oz.) can Rotel
1 packet taco seasoning
2/3 c. chunky salsa
2/3 c. water
1 1/2 c. shredded Mexican blend cheese
Salt and Pepper 

Preheat oven to 350. Grease a 9x13 baking dish. Cook pasta to al dente. In a large skillet brown beef until no pink. Add taco seasoning and water. Bring to a boil. Reduce heat. Add black beans, Rotel and salsa. Stir well. Add 1 c. cheese and combine until melted. When pasta is cooked, drain well and add to skillet. Mix well. Transfer to baking dish. Cover and bake for 20 minutes. Uncover, add 1/2 c. cheese and bake for 5 additional minutes until melted.


Shared at Weekend Potluck
Shared at Meal Plan Monday