Everyday Mom's Meals: Cream Cheese
_____
Showing posts with label Cream Cheese. Show all posts

Sunday, May 3, 2020

Welcome May

Well kids, we made it. I know, it's hard to believe after 739 days in April, but yes we have arrived! May is the gateway to summer! Sure, I live in Indiana so one day it will be 70, gorgeous and sunny, and the next will be 50 and rain, but we know summer is knocking on the door!

This month also brings many reasons to celebrate. Mother's Day, end of school, graduation, Memorial Day...just to name a few. And while many of those will look different this year in the world we are living in, they still have one major thing in common. Such special occasions call for extra special sweet treats!

This was actually our dessert on Easter, and I purposely saved it for my first post in May because I think it is going to be a go-to summer cookout, pool party, backyard barbecue sweet treat for many of you! Lemon is almost the mascot flavor of summer, and this not only super easy, it bursts with bright lemon flavor!

Oh, and it just happens to be no bake, so no need to heat up the house when those 90 degree days finally do arrive.

Now, let's talk lemon extract. No, it is NOT the same as lemon juice. You will find small bottles of lemon extract in the baking aisle next to the other extracts like vanilla, almond, coconut, etc. It has a much higher concentrated flavor, and really packs a punch. Hence why the recipe calls for 1-2 tsp depending on how strong a lemon flavor you wish. For us, I used 1 1/2 and it was the perfect combo of sweet and tart.

Mom would love this next Sunday for a sweet treat made from the heart. It will be a star at that first neighborhood cookout  you can hopefully have before summer is over. Or, if you're hunkered down and are just eating your way through shelter in place, it would be delicious just because too!

However you are celebrating the beginning of another month, one that gets us closer to summer, I pray you are safe, healthy and snacking on something yummy!


Lemon Icebox Lush
2 (8 oz.) blocks cream cheese, softened
1 (3.4 oz.) box instant lemon pudding mix
1 c. milk
1-2 tsp. lemon extract
1 lemon, zest grated
1 (8 oz.) tub Cool Whip
1 box honey graham crackers

In a large bowl beat together cream cheese, milk, pudding mix and lemon extract until smooth. (Begin with 1 tsp and add more for how much lemon flavor you want.) In the bottom of 8x8 baking dish, layer graham crackers, breaking to fit if necessary. Spoon layer of cream cheese mixture and spread evenly. Spoon Cool Whip and spread evenly. Grate some lemon zest on. Repeat layers 2-3 more times depending on size of your dish, ending with Cool Whip. Cover with plastic wrap and chill overnight. Before serving use garnish with lemon slices and extra zest. 


Shared at Weekend Potluck
Shared at Meal Plan Monday

Sunday, December 22, 2019

EMM Christmas Greetings


Whew. I can't believe we've only got 3 more days to wait. I hope the hustle and bustle of the season is starting to slow down and you are able to enjoy this festive week.

Are you hosting a big Christmas feast? What is your family's traditional Christmas Eve or Christmas Day meal? There are so many yummy choices, and this side dish would go perfectly with most!

When I planned this post I had two things in mind. One, it would be an incredibly tasty side with ham, which I find a majority of people make this time of year. And two, it cooks itself in your slow cooker, so easy on the host and saves some oven/stove space too!

If you have to travel with a dish, this would work great too! You can simply prepare at home, and then plug back in when you get there. It's really a can't fail dish everyone will love!

Don't think this is the creamed corn our parents heated up out of a can! It is so much more! In fact, if you've tried my Skillet Creamed Corn, this is similar, but making it in the slow cooker is so handy when you're doing a huge meal.

No matter what you're cooking over the holiday, we hope it's yummy and shared with those you love most in this world.

We want to thank you for supporting our EMM family for another year, and letting us come into your homes and share our lives with you.

May the peace, love and joy that came to earth all those years ago, in a tiny baby boy, surround you this week and fill your hearts in the year to come.

From our family to yours....

Merry Christmas!!!

Crock Pot Creamed Corn
1 (32 oz.) bag frozen corn
8 oz. cream cheese, softened, cut into chunks
1/4 c. butter, softened, cut into chunks
1 (4 oz.) can evaporated milk
1 TBS sugar
Salt and Pepper
Dried Parsley

Combine all ingredients except salt, pepper and parsley in slow cooker. Cook on LOW for 6 hours, stirring a few times. Season with salt and pepper in middle of cooking. Garnish with parsley. 


Sunday, March 17, 2019

Last One....Hopefully

So, it snowed this weekend. Blah. I seriously have no other words for it.

I am over it. I am done. I am in no mood for Mother Nature's sick jokes. I know it's March in Indiana, and even though the calendar will say it's spring this week, a switch doesn't flip to automatically make it warm. But seriously. Can't we at least get rid of the snow and maybe, just maybe climb our way out of the 30s?

I have done my best this winter to make sure we've had plenty of yummy, warm soups to make those dreary days better. We've enjoyed all of them, and I hope you have too.

But now I'm ready to move on. I want backyard barbecue foods. I want summer picnic foods. I want sitting by the pool foods...after this, of course.

Yep, I had one more soup up my sleeve. And if we're being honest, we still have plenty of chilly, wet days left this spring that soup is going to taste pretty darn good! Those spring showers can bring some downright miserable weather before they bring those spring flowers!

This takes the deliciousness of Cream of Broccoli Soup and ramps up the flavor and veggies. It's hearty but still light. Add some crusty bread on the side and dinner is done.

Spring and summer are knocking on the door, but they need to knock a little louder because I can't hear them quite yet!

Creamy Broccoli & Rice Soup
7 c. water
1 (4.3 oz) box wild rice mix
3 c. broccoli, finely chopped, about 3 crowns
2 large carrots, peeled and diced
2 cubes chicken bouillon
1 tsp. onion powder
1 can cream of chicken soup
8 oz. cream cheese, at room temp and cubed
Salt and Pepper to taste

In a large pot over medium heat combine water, bouillon, rice mix (with seasoning packet), broccoli and carrots. Bring to a boil. Cover, reduce heat to low and simmer about 15-20 minutes Add remaining ingredients, stir well until cream cheese is melted and combined. Cover and cook for 20 minutes until rice is tender. Turn heat off and let stand about 10 minutes before serving. 


Shared at Weekend Potluck
Shared at Meal Plan Monday

Sunday, February 17, 2019

Holiday Inspired

Back at Christmas, we celebrated with our aunt and uncle, also Max's godparents, with a delicious meal. Alex had actually went through her recipe box a few months before and found this chicken recipe he asked her to make; and we are all so happy he did!

That same night, I learned something new. This breaded chicken was served with a fantastic creamy, mushroom gravy.  I asked how she went about making it. She told me "I just use mushroom gravy mix." Immediately in my head I started to think about all the packets of gravy mix I had seen, and didn't recall a mushroom one. Do you know what she meant? Yep. A can of cream of mushroom soup! Sure, I know how much it's used in cooking, especially casseroles, but I had never heard it referred to as a gravy mix. I kind of felt sheepish, but was happy to heave learned something new.

Fast forward a month or so later, and while figuring out meals for the week, I wanted to try to work with what I had. Chicken tenders. Egg noodles. A can of mushroom soup. Bingo. I knew I wanted to play with the same flavors we had that night, in a new way.

If you like Beef Stroganoff, this will seem familiar to you. Think chicken instead of beef, but the mushrooms and creamy sauce are still there. It's hearty, delicious and great comfort food on a cold night.

Remember, even if you know a lot about cooking and consider yourself a "pro" (I use that term very lightly for myself, believe me) there are always new things to learn!


Chicken with Mushroom Gravy
1.5 lbs. boneless chicken tenders (my package had 12)
1 lb. white mushrooms, sliced
5 TBS butter, divided use
1 small white onion, diced
3 garlic cloves, minced
2 TBS flour
1 c. milk
1/2 c. whipped cream cheese
1 can cream mushroom soup
 4 TBS vegetable oil, divided use
1 TBS dried parsley, plus extra for garnish 
1 lb. egg noodles, cooked to package directions
Salt and Pepper to taste 
Garlic Powder to taste

Preheat oven to 350. Brush chicken with 2 TBS oil. Season with salt, pepper and garlic powder. Roast for 25-30 minutes. Let cool and cut into bite size pieces. In a large skillet, heat oil over medium high heat. Saute mushrooms, onion and garlic until soft, about 10 minutes. Transfer to a plate. In same skillet, melt 4 TBS butter. Add 2 TBS flour and whisk until well combined. Slowly pour in milk while whisking. Bring to a bubble, and cook until thickened. Add soup, cream cheese and continue whisking until smooth. Add chicken and mushroom mixture back in and cook for 15 minuets for flavors to combine. Drain egg noodles, add 1 TBS butter and 1 TBS parsley. Mix well. Serve chicken mixture over noodles.


Shared at Weekend Potluck

Saturday, November 10, 2018

Think Outside The Pie Box

I realize the dessert of choice on Thanksgiving is pie. I am not even going to argue that point. Pumpkin, Apple, Mincemeat, Pecan, Sweet Potato... we all have our favorite. And I am not complaining. My mom's pumpkin pie is something I look forward to each and every year.

But maybe you want to include another option. Maybe you want a different option other than pie. Or maybe you are having a smaller holiday and don't need a big pie for only a few people. Or maybe you're going to have house guests for an extended time that week, and you want an idea for dessert other than the big meal. If any of these are true, have I got a treat for you!

A super simple cake, that starts with a little help from the store, that smells and tastes like autumn, and has two of fall's favorite flavors...apple and cinnamon!

This makes the perfect amount for 4-6 people, depending on the size of the pieces, and I'm guessing if you need to feed more, you could easily double the recipe, use a 9x13 pan and have it be just as yummy.

Pies are as much a part of Thanksgiving as turkey and dressing. But that doesn't mean we can't make a little room on our table for another sweet treat!

Apple Cinnamon Cake
1 (7 oz) package apple cinnamon muffin mix
1/4 c. milk
1 egg, beaten
1 1/2 TBS apple butter
1 TBS brown sugar, packed

Icing
4 oz. cream cheese, softened
1 1/2 tsp. apple butter
2 tsp. brown sugar, packed

Preheat oven to 350. Grease 8x8 baking pan. In a large bowl combine first 5 ingredients. Stir well. Pour into pan. Bake for 25-30 minutes until toothpick comes out clean. In a small bowl combine last three ingredients. Mix until smooth. When cake is done, cool on wire rack. Frost with cream cheese icing. 


Shared at Weekend Potluck

Friday, September 30, 2016

Game Day Food

If you've been logging onto the blog lately, you know new recipes are few and far between right now. I can't help it. Max is keeping me pretty busy, and just getting supper on the table is sometimes a chore, let alone making something new, and then having the camera handy to snap a photo.

I mean, how can you worry about food photo lighting when you've got this face looking at you?


But there was a night last week that Max was napping, and knew it was time to try a recipe a friend had given me back during the summer that I hadn't had the chance to make yet.

She had shared it thinking it would be a perfect idea for summer time cookouts or barbecues, but obviously the time has passed for those. That's okay though, because I don't think anything goes with football better than a great dip. This would be perfect on Game Day! Rather you've got a big crowd coming over to watch, or it's just your family. Maybe you are tailgaters, that's even better. It doesn't matter where you serve it, as long as you've got plenty of chips for dipping!

As we get more of a schedule, I hope to get back to posting new recipes on a more regular basis, but if you follow me on Facebook, I am always sharing photos of Max (and his Big Brudder Alex too) and old recipes too. I haven't disappeared. I promise. In the meantime, enjoy this dip and think of me!

Warm Corn and Bacon Dip
2 (15 oz.) cans NO salt added corn, drained
6 slices bacon, cooked crisp
4 oz. cream cheese, softened
1/4 c. sour cream
2 c. finely shredded sharp cheddar cheese
2 TBS dried chives, extra for garnish
Salt and Pepper to taste

Preheat oven to 350. In a large bowl combine corn, bacon, cheeses and sour cream. Gently stir until well combined. Add salt, pepper and chives. Stir again. Transfer to a baking dish. Bake for 30 minutes until cheese is bubbly and golden on top. Garnish with extra chives. Serve warm with tortilla chips. 


Wednesday, December 30, 2015

Our New Year's Eve Tradition

If you've been reading EMM for any length of time now, you are well aware of how the Marshall family likes to ring in the New Year every December 31st. For those of you who have joined our little blogging family since last NYE, let me explain.

Ever since Little E was about 6, our annual tradition is to stay home, inside where it is warm, and safe off the roads, wear our pjs, watch movies, and eat ALL night long. I put out a huge buffet of appetizers (or nibbly bits as the boy calls them) and we make an entire meal out of them, for hours. And when I say huge, I'm talking enough to feed an entire house full of party guests, but just for the 3 of us. It's become such a special little tradition for us, and we look forward to it so much. It's a terrific way to finish out the holiday season.

So every year I try to come up with at least one new dish to add to the menu, and start testing them out in about mid November. This is the new addition for 2015.

No party is complete without a tasty dip, and this one combines that notion with another favorite of ours, crab! Perfect for a platter of crackers or even some pita chips! Plus you can make it ahead of time and keep it in the fridge until party time.

However you are welcoming in 2016, I hope it's in a fun, safe and of course yummy way! May the New Year bring you all the happiness and joy you can hope for!

Creamy Crab Dip
1 (6 oz.) can crab meat, drained and cartilage removed
8 oz. cream cheese, room temperature
2 TBS mayo
1 tsp. Dijon mustard
1 tsp. lemon pepper seasoning
1/4 tsp. garlic powder
2 tsp. paprika, extra for garnish
1-3 tsp. horseradish, to taste
Salt and pepper, to taste
Dried chives, for garnish

In a medium bowl combine cream cheese, crab, mayo, mustard, lemon pepper seasoning, garlic powder, salt and pepper. Beat with electric mixer on LOW for 1-2 minutes, just until combined. Stir in horseradish. Chill for 1-2 hours. Add paprika and stir to combine. When ready to serve, sprinkle with extra paprika & chives. Serve with crackers or veggies. 


Wednesday, November 18, 2015

Holiday Nibbly Bits

Appetizers. Who else out there could make an entire meal out of them? Yeah, me too! At parties, I'm usually the one that gets so full on all the pre-meal snacks I'm not even hungry by the time the main dish arrives. In fact, our whole family is that way. Many of you long time readers remember our annual New Year's Eve tradition of a huge appetizer buffet we eat off of all night long.

So, with the holiday entertaining season almost upon us, it is time to start thinking of some new "nibbly bits" (that is what Alex has always called appetizers) to enjoy from Thanksgiving until the ball drops at midnight on Jan. 1st. Sure, we all have our favorites, our go-tos, but I'm always looking for new ideas, or ways to make ones I already rely on even easier.

The latter is the inspiration behind these. I love a good cheese ball. What's not to love? Cheese. Nuts. The end. And one of my all time favorite ones has green olives on the inside. But what happens when time simply gets away from you and the forming of the ball, and covering in nuts, and allowing it to set...just isn't in the cards? You take all the same flavors and do this instead!

These little cracker bites taste just like they are supposed to but can literally be done in about 10 minutes, especially if you utilize your food processor like I do.

The holidays were meant for gathering around those we love most in the world, and enjoying some terrific food. Starting next week with Turkey Day, there will be so much of that, and I for one am incredibly thankful.

Olive Cheese Ball Bites
1 (10 oz.) jar green olives, drained
1 (8 oz.) cream cheese, room temperature
2 TBS dried chives
1 TBS dried parsley
Crackers
Pecan Halves

In a food processor, pulse olives until finely chopped. Add cream cheese pulse until combined. Scrape sides. Remove to bowl. Add chives and parsley. Stir well. Scoop onto crackers. Top each with pecan halve. Chill until ready to serve.


Shared at Weekend Potluck

Monday, November 16, 2015

Leftover Turkey....Hold The Leftover

Nine days people. That's all. Til what? If you're asking that, you might want to look at your calendar...right now! Because we've only got a little over a week before the big Thanksgiving feast we have been looking forward to all year!

While most of you are probably still meal planning, and trying to figure out just what you will be serving when the big day rolls around, it's my job to look past the big meal. To ponder "what about the days after?" In other words, it's my job to help you figure out what you're going to do with all those leftovers!

I don't mind this job. In fact, I take it as a challenge. Here is the one and only problem. I'm testing these leftover recipes in October, and well, let's just say I don't have a 10 pound turkey hanging out in my fridge! So...I have to get creative.

I thought these sandwiches would be a terrific leftover idea because not only do they use up some of that delicious turkey, but if you have that veggie tray still laying around, you can put it to good use too. Obviously, I made mine with some sliced deli turkey, and they were perfectly tasty, but I really think they would be outstanding with some post holiday bird as well!

Sandwiches and the "day after Thanksgiving" seem to go together as much as Thanksgiving and turkey! But this year, switch up the routine beyond the mayo and white bread, using even more leftovers so when that dreaded Monday rolls around, the fridge is empty, ready and waiting for holiday baking!

Turkey & Veggie Bagels
Everything Bagels, toasted
Sliced Turkey, deli or leftover
Thinly Sliced Radishes
Thinly Sliced Cucumber
Boston Lettuce
Green Onion and Chive Cream Cheese

Spread cream cheese on warm bagels. Top with meat & veggies, starting with lettuce to form "barrier". If you're serving a crowd, lay out meat and veggies and let your guests built their own!


Shared at Weekend Potluck

Friday, October 2, 2015

Cincinnati, Here We Come

Last weekend was a whirlwind of activity in our house...kind of like the rest of September was. We had yet another Tae Kwon Do tournament, and since this one was in Cincinnati, we decided to make a weekend getaway out of it!!

So, Friday around noon I retrieved little man from school, Mr. E got off work early, we loaded up the car and we started making our way south about 3 hours. I love road trips. I love family time. I love getting away and making memories. What I don't love? All the work that happens when you return!!

We had an amazing couple days finding fun things to do, yummy places to eat, winning trophies (Yep, my little ninja warrior brought home a 1st and 2nd place trophy!) and just being together.

But when I awoke Sunday morning, after getting home at 1:45 a.m., I truly felt like I had been run over by a semi! I was exhausted, with a capital E. The boys were the same way; and when we all looked around at the bags to unpack, the mess to clean up, the laundry to do, the dishes, etc, we really considered moving and starting from scratch, just to avoid it!!

Okay, not really, but when I looked at all that, and remembered I was still on the hook for supper, I was so glad I had planned ahead and new it would be the perfect day for a crock pot full of soup that I barely had to put any energy into.

Talk about the best way to warm up on a chilly fall day, or some of those bitter cold winter ones that aren't too far off. Creamy potato soup with bites of ham...it is sure to make you smile and fill you up at the same time.

I am so thankful we have the opportunities we do to have family time and make memories to last a lifetime. And when those are over, I'm also thankful for simple recipes for when I'm dog tired and starving! 

Crock Pot Ham and Potato Soup
1 (30 oz.) bag frozen shredded hash browns
1 lb. diced ham
1 medium white onion, chopped
1 (32 oz.) box chicken broth
1 (5 oz.) can evaporated milk
4 oz. cream cheese
Salt and Pepper to taste
Chopped Chives

Allow frozen potatoes and ham to come to room temp for about an hour, so they are partially thawed. Combine potatoes, ham, chicken broth and onion in Crock Pot. Season with salt and pepper. Stir well. Cook on HIGH for 2 hours. Reduce heat to LOW and cook 4-5 hours more. Mash potatoes to desired thickness. Add milk and cream cheese. Cook 30 minutes extra. Garnish with chives (I like dried). 


Monday, July 13, 2015

Another Sweet Side Dish

So...I need a vacation from my vacation. You know how it is. You come home after being gone, and you hit the ground running, trying to get back into the swing of things, you blink and a week has gone by and the laundry still isn't caught up, you still aren't 100% unpacked, and you feel like you've been going nonstop--totally cancelling out the two weeks of rest and relaxation you just had. Yep, that's where I'm at.

Plus, we had some added stress to our return. We had a death in our family, and we had to break to the news to our son that his teacher from this past school year had also passed away after a battle with cancer. It was a very sad week in our house. Alex loved Mr. Thorn, and when he became ill back in April, and had to leave the classroom for the rest of they year, he was crushed. But nothing could have prepared him for when we had to tell him back in June just how sick Mr. Thorn was, and then when we had to tell him his suffering and battle was over because God had called him home. Having to share with a 10 year old such devastating news (plus the added death of my husband's great uncle) was not how I wanted to spend the first few days post-vacation. But such is life, and we are now entering into a new, hopefully better week.

But you can see why I might feel like I've been going 100 mph since we got back, in every direction, with a million things to do. So cooking and blogging has kind of had to take a back seat. However, I did manage to make this new treat and just had to share.

I was making breakfast sandwiches and wanted something light to go with them. I wasn't in the mood for any of the "normal" things I serve with them, and then I remembered this recipe I had seen. Ya'll know how much I love these sweet salads I can call a side dish and be done with it. Plus, a little creamy fruit salad seemed appropriate as a breakfast for supper thing.

I am slowly but surely returning to normalcy around here. Or at least trying. In the meantime, I'm so thankful for quick and easy dishes I can whip up, we can enjoy, and then I can share with all of you.


Pineapple Fluff
Inspired by Southern Bite
 2 (20 oz.) cans crushed pineapple, drained well
8 oz. block cream cheese, room temperature
1/2 c. powdered sugar
1 tsp. vanilla
1 (8 oz.) tub Cool Whip
1 1/2 c. chopped walnuts, reserve a few for garnish

In a large bowl combine drained pineapple, cream cheese and vanilla. Stir until mixed well. Fold in Cool Whip until combined. Add powdered sugar and walnuts and stir again. Scoop into parfait glasses or dishes. Garnish with extra walnuts. Chill several hours before serving. 


 Shared at Weekend Potluck

Friday, May 15, 2015

Simple As 1-2-3

Do you have a preference for which type of rice you use? I guess I should word that differently. Do you prefer to use "regular" rice or instant when you cook? For me, it really depends on the recipe. I will use whichever makes the dish the best it can be.

It might shock you to learn just how many questions I get on the subject. When I write a recipe I am always sure to list the specific kind of rice I used when I tested it. Now, that doesn't mean folks aren't welcome to use whichever they are most comfortable with, or happen to have on hand, but I can't guarantee results if substituted. But the #1 question I get asked when I post a dish using rice is "How do I cook non-instant rice?" It's such a convenient item, many have never bought a bag of "real" rice and simply don't know how to prepare it. So, I'm here today with an easy trick to remember how, and a tasty recipe to go with it.

Cooking rice is as simple as 1-2-3. And not, I'm not just being cute. It's a simple way to remember the method in which you use. 1 Cup of Rice Boiled in 2 Cups of Liquid= 3 Cups Cooked Rice. See how easy that is. Oh, and that liquid? It can be water, broth, stock, a combo of both...it doesn't matter, as long as it is 2 cups. Now even if you have always used the instant, you can easily remember how to work with the other stuff too.

Some of you might be asking why even bother? Well, bagged rice is one of the best economical options at your grocery store. A bag of long grain rice will run you about the same as a box of instant (or at least it does at my store) and last forever! Okay, maybe not that long, but you certainly get more product for your money.

To demonstrate my little trick, I needed a recipe to go along with it. This casserole is sure to become a favorite in your house, just like mine. Rice, meat, veggies, a Tex-Mex flavor...it's got a little bit of everything to satisfy everyone!

When it comes to rice, if you haven't cooked with the real stuff, I encourage you to try. And if you run into a pickle, think 1-2-3...and I'm sure it will be a huge success!

Tex Mex Rice Casserole
1 lb. ground beef
1 c. long grain white rice
2 c. water
2 beef bouillon cubes
1 (15 oz.) black beans, rinsed and drained
1/2 c. frozen corn, thawed
1 (14 1/2 oz.) can diced tomatoes
1 packet taco seasoning
8 oz. cream cheese, softened
1 c. shredded Monterrey Jack cheese
1 small white onion, chopped
5 green onions, chopped, whites and light green only
Salt and Pepper to taste

Preheat oven to 350. Grease a 9 x 13 baking dish. In a small pot, bring water and bouillon cubes to a boil. Add rice. Bring back to a boil. Reduce heat to low, cover and cook 15 minutes, stirring often, until liquid is absorbed. In a large skillet, brown ground beef and white onion, seasoned with salt and pepper, until no longer pink. Drain if necessary. In a small bowl combine cream cheese and taco seasoning. Add tomatoes, black beans, corn and cream cheese mixture to beef. Stir and cook until cheese melts and mixture is slightly thickened. In bottom of prepared dish, mix cooked rice and 1/2 c. shredded cheese. Top with meat mixture and sprinkle with other 1/2 c. cheese. Bake for 30 minutes until bubbly and heated through. Garnish with green onions. 


Shared on The Country Cook May 15, 2015

Wednesday, April 29, 2015

Steak Season

At last, grilling season as returned! Well, for us, it never truly leaves, but you know what I mean. For many one of the first signs of spring is to return to cooking outdoors. You can smell it now, can't you?

During the hot summer months, I try really hard not to heat up the house with the oven or stove as much as I can. The grill usually takes care of the meat portion of the meal, but then I'm responsible for sides, and that's when I usually have to break my own rule. Sure, I can do cold potato or pasta salads, but sometimes we want more...that's where this recipe comes in. And I promise it's worth the little bit of heat it might put into the house.

I love mushrooms with steak, but not on top. We are kind of steak purists. We don't like anything taking away from the flavor of the meat itself, so instead we like them on the side. Just like we can get at our favorite steakhouse.

This is a totally new take on the traditional sauteed mushrooms I've made a thousand times. These are creamy! Just a hint of cream cheese gives them an unique flavor and texture that takes them to the next level!

If you have some steaks going on the grill this week, think about adding these to the menu too. You won't be sorry! 


Garlic Creamy Mushrooms
24 oz. large button mushrooms
3 large garlic cloves, minced
2 TBS beef broth
2-3 oz. cream cheese
1/2 tsp. dried oregano
1/2 tsp. dried rosemary
1 tsp. dried parsley, extra for garnish
3 tsp. grated Parmesan cheese
Salt and Pepper to taste
3 TBS butter
1 TBS olive oil

Preheat oven to broil. In a large skillet  melt butter over medium heat. Add oil. Mix. Add mushrooms. Don't move for about a minute, to allow to brown. Gently toss to brown on all sides. Add garlic and herbs. Keep tossing. When browned on all sides. move to outside of pan, as much as possible. Add broth. Remove from heat, stir in cream cheese until smooth. Stir to coat. Transfer to a baking dish and sprinkle with Parmesan cheese. Broil for about 5 minutes until cheese golden. 


Shared on The Country Cook May 1, 2015

Saturday, April 25, 2015

Soul Food Saturday


Some days you want something lighter as a snack. Whether it be after the kids get out of school or you need a snack for a party. Double or even triple this recipe to serve as much or as little as you need. This recipe came from a want for a different flavored spread and dip. I wanted something raspberry flavored and couldn't find it in the store anywhere. So I came home and tried to fill this craving. This one hit the spot, right away. Grab your favorite cracker, or fruit and share with ones you hold dear. Enjoy!

Raspberry Cream cheese Dip
1 8 oz. package cream cheese, room temperature
2 tbs. natural raspberry jam

In a bowl add cream cheese and jam. Mix until combined. 
Serve with your favorite crackers, or fruit


Friday, March 27, 2015

He's Coming...

With only a week left until Easter, the above title could mean a couple things. For most of us in the Christian world, it means we once again get to celebrate the Resurrection of our Lord Jesus, and we can shout from the mountain tops, "He is Risen. Risen Indeed! Hallelujah." 

At the same time, those of us with kids know they are anxiously awaiting the return of their favorite bunny, Mr. Peter Cottontail himself, bringing with him their favorite sweet treats of the season. 

For our family, both of these are true. We try really hard to find a happy medium between our faith and the fun of Easter. I'm proud to say yes my 10 year old loves his Easter Basket of candy, toys and books, he also knows the true reason why we celebrate renewed life this time of year. 

In the spirit of the all things yummy, I wanted to share a super easy sweet bite perfect for your Easter table! How can you resist something with only 4 ingredients that looks like a fluffy bunny tail? Not to mention, being filled with one of my favorite spring time flavors...coconut

I was so excited when I saw these because they didn't contain any chocolate. I know. Weird for a woman to say. But for me, I like chocolate, but there is so much of it everywhere this time of year, satisfying my sweet tooth cravings with something else is nice too. Plus, I love easy things the boy can help me with. 

If you are looking for something cute, yummy and simple to add to your Easter menu, these should definitely be it. Make a few, make a lot, and watch them disappear quicker than the Easter Bunny's footprints! 

Coconut Truffles
4 oz. cream cheese
2 1/2 c. powdered sugar
1/2 tsp. coconut extract
1 1/4 c. sweetened shredded coconut, divided

Combine cream cheese and coconut extract. Beat well until smooth. Add powdered sugar, 1/2 c. at a time and beat until combined. Add 1/4 c. coconut and beat once more. Form into balls (I used my cookie scoop to make it easier.) and roll into coconut. Place on a cookie sheet lined with parchment paper and chill for 15-20 minutes until set. Store in an airtight container in the fridge. 


Shared on The Country Cook Mar. 27, 2015


Wednesday, January 28, 2015

Just A Little Extra Effort

Welcome to day two of what appears to be Super Bowl week on EMM. I didn't plan it that way, but after I shared the Mini Enchilada Cups Monday, it only seemed natural to share the side dish I served with them, and then I realized both would be perfect for any Super Bowl party, so a theme was created.

If you serve refried beans at home, let me ask you this. Do you enhance them in any way, or do you simple take out of the can and heat up? Don't feel bad if you fall into the second category. That's where I usually hang out too. You can buy so many varieties that come pre-seasoned, why not! Well, this recipe is why not!

A friend gave me this a while back, and I'm so happy she did! Seriously, these take maybe an extra 10 minutes of prep time and taste oh so yummy!! Truly like something you find at your favorite Mexican restaurant.

If you saw the recipe on Monday, and are planning on making them, I just gave you a great side dish. Or, if you are looking for something else for your game day menu, grab a bag of tortilla chips, put them next to this, and watch them disappear! See, what you we can do with just a little extra effort? 

Baked Refried Beans
1 (16 oz.) can refried beans
4 oz. cream cheese
1/4 c. finely chopped white onion
3 garlic cloves, minced
2 TBS butter
1/2 c. shredded Colby jack cheese
Chopped green onions for garnish

Preheat oven to 350. In a medium sauce pan, melt better over medium heat. Saute onions and garlic until translucent, about 5-7 minutes. Add beans. Stir well to combine and cook until heated through. Remove from heat. Add cream cheese and stir until melted. Spread into 9 inch pie plate. Top with cheese. Bake for 20 minutes until hot and bubbly. *NOTE* If you like spice, get the spicy variety!


Shared on The Country Cook Jan.30, 2015

Friday, November 14, 2014

Stocking Up

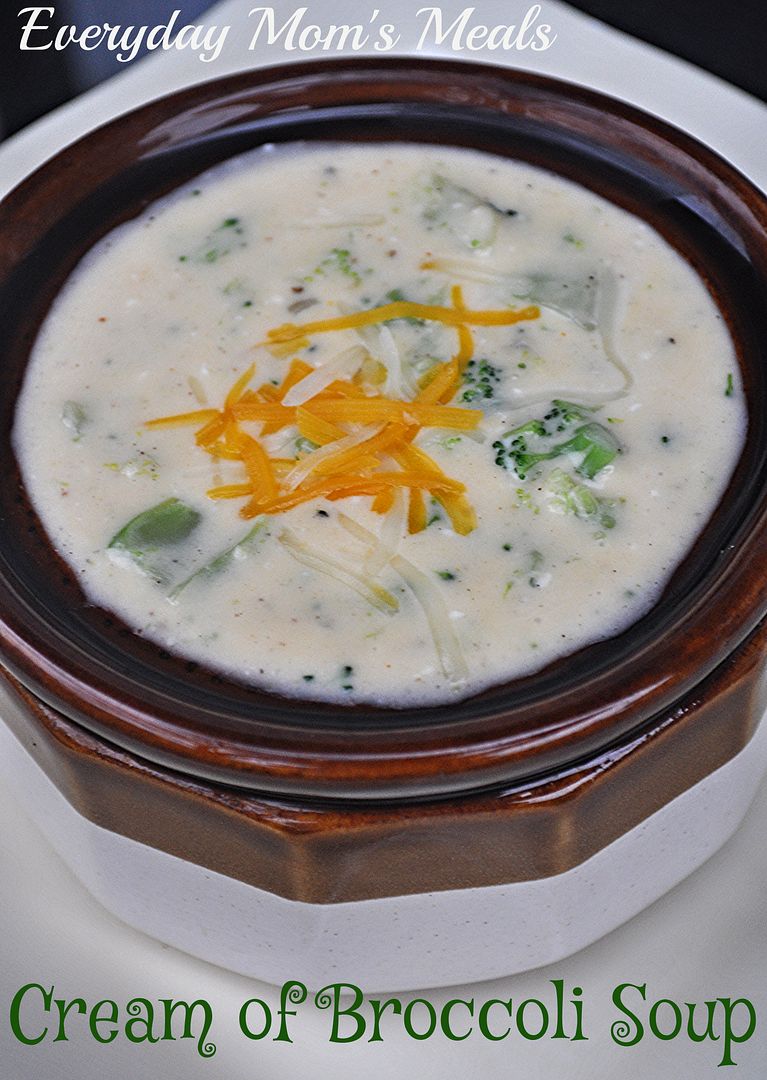
If you live in a part of the country where temps did not plummet in the last 72 hours, lucky you! Here in Indiana, we went from sunny and 63 on Monday to down right FREEZING the past few days. I guess old man winter decided to come a little early this year, and for me that means it is time to stock up! On what you might ask? Soup recipes, of course! 

Around here, during the cold months, I make soup at least once per week, sometimes more. And I don't want to be eating the same thing over and over, so I try to find new ones to try. Sure, we have our favorites, and my go-to's; but I really do try not to rely those on so much we tire of them. 

I can guarantee this one is going to quickly be added to that list because it's not only super delicious, but so easy to make! When I think soup, I want comfort, and to me that means not a lot of effort. Now usually, that means I bust out the trusty slow cooker, and let it do all the work for me, but not this time! This is cooked completely stove top and can be on the table in about 30 minutes! Exactly what you want after a long, cold day when you just want to eat and warm up!

Now, let me tell you this up front. You are going to read there is cheese in this and wonder why I didn't call it broccoli and cheese soup. Well, I will explain. Yes, there is cheese, but it's what I like to call a back ground flavor. It almost acts more like a thickener than a main flavor. Sure, you can taste it, but not as strong as "real" versions. This is more creamy than cheesy, so I went with it.

If you are in a deep freeze like we are, brace yourselves, because I'm afraid it's here to stay, and I have a suspicion, starting this early, we're in for a llloooonnnnggggg winter. So, let's soothe our pain with some yummy soups all season long!

Cream of Broccoli Soup From Kraft
1 small white onion, finely chopped
2 TBS butter
2 TBS flour
4 c. milk
8 oz. cream cheese, room temperature, cubed
32 oz. Velveeta, cubed
2 (10 oz.) packages frozen chopped broccoli, thawed
1/2 tsp. ground nutmeg
Salt and Pepper to taste

In a large pot or dutch oven, saute' onions in butter over medium high heat until crisp tender, about 3-5 minutes. Whisk in flour until well blended. Add milk. Cook and stir on medium heat about 2 minutes. Add cream cheese. Cook and stir until melted, about 3 minutes. Stir in remaining ingredients. Cook 5 minutes, or until heated through, stirring occasionally. Garnish with shredded cheese if desired. 


Shared on The Country Cook Nov. 14, 2014
Broccoli at Very Good Recipes

Monday, August 25, 2014

Back To School

One week down. 5 days done. Only 175 more to go. That's right, we are heading into our second week of the school year. Is it wrong that I'm glad at the end of it we have a three-day weekend? I think it's time. We deserve a little break. 

With the new school year, comes the need for new lunch box ideas, and ways to keep things fresh and fun for my little man. He loves his new Angry Bird lunch kit his Maa Ma bought him, and it's my job to make sure it's filled with yummy things he loves all year long. 

I actually had these at a party years ago, and immediately asked for the recipe. I love pinwheel sandwiches, for many reasons, one being because they are so versatile. They make a terrific packed lunch idea for school or the office. See, I also happen to have a husband who takes his lunch to work every day, so I'm on the hook for double the ideas, every. single. day. 

But they are also a hit at parties, barbecues or potlucks. You can whip up a huge batch of them in almost no time at all, and your guests can just keep going back for more, and believe me they will. I also love them for a simple supper. Add a tossed salad, or maybe some marinated cucumbers and fresh fruit on the side, and you've got a meal that is fresh, light and tasty after a long day.

Back to school time is so stressful in so many ways. Lunch box ideas shouldn't have to be one of them. Make sure they go to school with a great tasting, fun to eat meal for them...and super easy for you!

Salami & Spinach Pinwheels
Hard salami, sliced thin
1 (9 oz.) bag fresh spinach
1 (2.25 oz.) can chopped black olives
1 container garden vegetable cream cheese
Flour tortillas

Spread cream cheese on each tortilla, all the way to the edges. Lay 5 pieces of salami on each, overlapping a little. Sprinkle with olives. Layer spinach on time. Roll tortilla up, as tightly as possible. Slice into 1 inch pieces. Cover and chill until ready to serve.


Shared on The Country Cook Aug. 29, 2014


Wednesday, April 9, 2014

Childhood Lunchbox Treat

When I was a kid, I preferred a packed school lunch to a cafeteria one. I wasn't a picky eater, and some days I would eat what they were serving, I simply enjoyed things my mom would send for me more. And one of the things she would treat me with, which to this day I still love, were Twinkies.

The spongy cake, the sweet creamy center. Oh, I can taste them now. Yes, we were those people when they stopped making them last year. A phone call of desperation went out to my husband, he stopped at the store, and when he came home that night he had 7 boxes in tow to last us until the crisis was over.

I love these snack cakes so much my brother even got me a Twinkie baking set for Christmas so I can make my own any time I want! So, I might be a little obsessed...no judging!

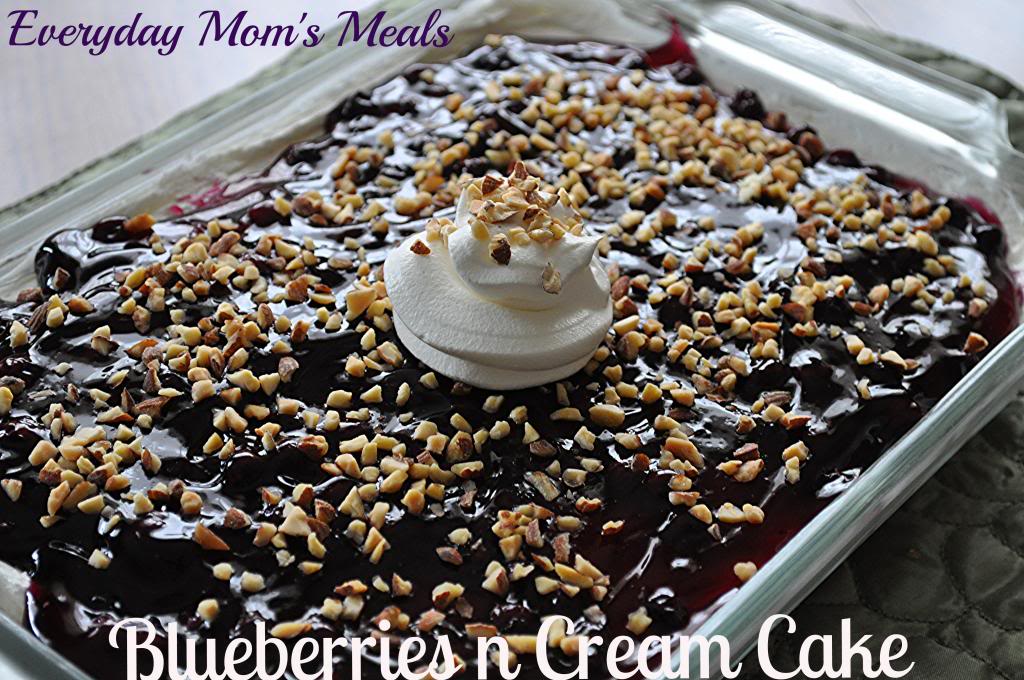
So when I came across this cake I knew it would be one we would gobble up! Sure, the base is made with a pre-made cake, but don't let that fool you into thinking it's not pretty enough for guests. In fact, if you are looking for something for Easter dessert, I think this would be perfect. It's rich, so it can really stretch to feed a crowd because every one will only want a small piece! But on a holiday when the sweet tooth is taking over, it will certainly satisfy!

Who knew a lunchbox treat from my child hood could be transformed into a decadent dessert my whole family would love. And since there is fruit on the top, that means I can feel less guilty about eating a whole box, right??!!

Blueberries n Cream Cake  Inspired by Mr. Food
1 box Twinkies (see note below), sliced lengthwise
1 (21 oz.) can blueberry pie filling
8 oz. cream cheese, softened
2 cups powdered sugar, sifted
2 (8 oz.) containers Cool Whip
1/4 c. almonds, finely diced

In the bottom of a 9x11 baking dish, place enough sliced Twinkies to cover and fit. Cut to fill entire bottom if necessary. Combine cream cheese and powdered sugar in a large bowl. Beat with an electric mixer, on low speed, until creamy. Fold in 1 container Cool Whip. Spread over Twinkies. Pour pie filling over cream cheese layer. Spread evenly. Sprinkle with almond chips. Chill 2 hours. When serving, garnish with extra Cool Whip and more almond chips. *NOTE* You will more than likely not use the entire box of Twinkies, so slice as you go. I used 6 total.


Shared on The Country Cook April 11, 2014

Monday, March 31, 2014

Easter Dessert with 3 Musketeers® {#EatMoreBites #shop}


I am a member of the Collective Bias®  Social Fabric® Community. This shop has been compensated as part of a social shopper amplification for Collective Bias and its advertiser.

It's the end of March, and for those who haven't been paying attention to your calendars, Easter is right around the corner! So, if you've started to plan your menu and are looking for a little inspiration, I am here to share a fantastic, simple dessert recipe that everyone from young to old will love. Oh, and it just happens to include chocolate too...the ambassador of Easter fun! 


I think every one's sweet tooth goes into over drive around Easter. So many yummy treats to be enjoyed. Every where you look it's another chocolate indulgence. But I got to thinking why not incorporate that indulgence into an actual dessert course for a big Easter meal that is easy, delicious and fun for everyone of all ages. 

And when I heard about the new MARS bites  I knew they would be the perfect way to get my chocolate fix this Easter holiday, with ease and satisfaction! So, when I was at Walmart on my weekly grocery run, I was super excited to find them in the bagged candy aisle, just waiting for me to snatch them up! 


At the end of a that big holiday meal filled with the traditional fare, why not surprise your family with something whimsical, hands friendly and scrumptious for dessert? Something they can dip perhaps? Let's face it. Any time you can dip something, it is 10 times more fun! Plus, this way the adults can have their candy too, without having to rummage through the kids' Easter baskets! 

3 Musketeers Dip
8 oz. cream cheese, softened
1 stick butter, softened
3/4 c. powdered sugar
2 TBS brown sugar
1 tsp. vanilla
1 (6 oz.) bag 3 Musketeers Bites, coarsely chopped, a few reserved for garnish
Vanilla Wafers
Graham Sticks

Combine cream cheese, butter, powdered sugar, brown sugar and vanilla in the bowl of a stand mixer with the paddle attachment. Mix on low speed until creamy. 


Increase speed to medium and mix for 1 additional minute until well incorporated. Add chopped chocolate and mix on medium speed for 2 minutes. 


Scrape sides of bowl with rubber spatula. Transfer to serving dish. Garnish with extra chocolate. Serve with vanilla wafers and graham sticks. 


Shared on The Country Cook April 4, 2014

Oh, and now you can try MARS Bites and save a little money too! Be sure to grab your coupon for when you make this! You can save $0.75 off (2) 2.83 oz. bags or $3 off (2) 6 oz. bags or larger. And remember to #EatMoreBites with #CollectiveBias! 

#shop