Everyday Mom's Meals: Blueberries
_____
Showing posts with label Blueberries. Show all posts

Sunday, April 29, 2018

A Spring Saturday at Home

Are Saturdays a day of relaxing in your house? Lucky you! At our house, they don't turn out that way very often. Saturdays are sometimes grocery day. Others we have plans with family. And most of the time, we have church in the evening, followed my dinner out. 

I'm not complaining. I love getting out and about on the weekends since I'm home a lot during the week. I feel blessed we have the option of a Saturday casual church service so Sunday mornings aren't rushed and hectic. But sometimes, once in a blue moon, we find ourselves with a Saturday with no plans, and that is a nice change of pace. 

This past weekend was one of those. We had taken a mini road trip on Friday, headed to Indianapolis and The Children's Museum (a post sharing our adventure will be coming soon) and didn't get home until after 9pm Friday night. (That's late for us!) We had a super fun day, soaking up family time. In preparation for this, I had gotten groceries on Thursday, and purposely made sure our Saturday was open on the calendar. I knew we would be tired from our big day, and I would need a day to catch up on all the chores I had left behind. 

So, Saturday rolled around, and yes, we were all a little tired, and very thankful we didn't have to be anywhere. I caught up on laundry, worked on a couple other projects around the house, and we grilled out. Hog dogs, potato salad, sliced veggies and I wanted one more thing. Fruit. More specifically, fruit salad. 

A friend had just told me about this amazing fruit salad she had made with a really easy dressing, that included lime...one of my boys' favorite flavors. I had plenty of fruit on hand (thanks to Aldi's great prices) and I decided to throw it together for our simple supper.

So fresh. So tasty. So easy! You can easily switch out whatever fruits you have on hand, or whatever is in season. I can't wait to make it again once we go strawberry picking, and maybe add in some blackberries or raspberries, another of my boys' favorites. 

We are all so busy days at home have become a welcomed treat. I hope we get more of them this summer, so I can make this over and over!

Honey Lime Fruit Salad
1 lb. strawberries, sliced
1 pint blueberries
1 cup green grapes, halved
1 (11 oz.) can mandarin oranges, drained
1 banana, sliced
3 TBS honey
1 lime, juiced and zested

In a large bowl, combine all fruit. In a separate small bowl whisk together honey, lime juice and zest. Pour over fruit. Chill for 2 hours before serving. Stir before serving. *NOTE* To measure honey easily, spray measuring spoon with cooking spray or dip in warm water. Honey will slide right off!


Shared at Weekend Potluck

Monday, June 29, 2015

Happy 4th of July!!

Okay, so technically I'm a few days early, but this is my only post this week, so I thought it best to say Happy Birthday America today, and share something you could easily whip up in no time this weekend of your holiday celebration.

Do you love parfaits as much as I do? I'm kinda addicted. Anytime I can find a way to simply layer things into a pretty dish and call it dessert, I'm happy. They are truly one of the easiest things you can make, and really budget friendly for feeding a crowd too. You can make ingredients stretch a lot farther because you are using less in each one, therefore making more. 

Not to mention, this time of year, any sweet treat that doesn't involve baking is like icing on the cake to me! No bake desserts were invented for the summer months. And who doesn't love going to a party and having an individual dish, hands-friendly for walking, talking and eating all at the same time. 

I hope however you're spending the upcoming holiday weekend, you will be with those whom you love most, celebrating this terrific nation of ours, and everything the founding fathers had in mind all those years ago when they declared our independence, and created one nation under God for liberty and justice for all! 

Patriotic Parfaits
1 small box instant vanilla pudding
1 1/2 c. cold milk
Cool Whip
16 oz. container strawberries, chopped
1 pint blueberries
Vanilla Wafer Cookies

In a medium bowl whisk together milk and pudding mix until combined. Set in fridge for 5 minutes until soft set. In bottom of parfait cups or bowls, layer whole cookies, overlapping if necessary. Layer in pudding, strawberries, Cool whip, and blueberries. Repeat layers. Chill for at an hour to set before serving. *NOTE* For easy layering, place Cool Whip and pudding into plastic bags and cut off tip to pipe. The amounts of each you will need will depend on how big your parfaits are. I made 6 of this size.


Monday, June 2, 2014

Saturday Morning Cartoons and Breakfast

When my little man was a even smaller little man, Saturday mornings were for two things. Hanging out with Daddy and watching cartoons. Yep, they would let Mommy sleep in late, and fend for themselves for a few glorious hours every weekend. And Daddy's go-to breakfast for his favorite buddy was instant oatmeal; and for Alex it had to be maple and brown sugar.

I can't say I blame him, when I was growing up, it was the only flavor of oatmeal my mom could get me to eat too. There is just something about those flavors that scream comfort breakfast to me. To this day, if I eat oatmeal it is more than likely flavored with those two things.

As I've mentioned before, lately I am just a little obsessed with muffins. I'm not sure why the joy of making homemade muffins found me so late in life, but it has, and I find myself busting out the muffin tins more and more. Plus, now I have this nifty carrying case for them that is airtight and super convenient, so they last even longer. And when I get a new kitchen gadget I am inclined to use it as much as possible!

These little bites of goodness are perfect for breakfast, brunch or even a light dessert. Pack them in a school lunch (for those of you like us who are, yes indeed, wrapping up the school year...only 4 more days!!) or keep them on hand this summer for a great, quick, or even on-the-go snack for the little ones. They are just their size and they will love the flavor!

Now that he's older, Saturday mornings are for many different things, depending on our schedule, but every once in a while you can still catch my little man in front of the television, watching a favorite cartoon and enjoying a bowl of oatmeal; or now some of these instead!

                 Maple and Brown Sugar Oatmeal Mini Muffins Inspired by Crepes of Wrath
1 3/4 c. all purpose flour
3/4 c. old fashioned oats, plus extra for garnish
1 c. packed homemade brown sugar, see recipe below
1 egg
1 c. milk
1 stick butter, melted and slightly cooled
1 tsp. vanilla
2 TBS maple syrup
1 tsp. cinnamon
1/2 tsp. salt
1 tsp. baking soda
1 TBS turbinado sugar

Homemade Brown Sugar
1 c. white sugar
1 1/2 TBS molasses

Combine sugar and molasses and stir well until completely combined.

Preheat oven to 375. Grease a mini muffin tin. In a medium bowl whisk together flour, oats, baking soda, cinnamon and salt. In another bowl (I used my stand mixer) beat together butter and brown sugar until smooth. Add egg and beat on low. Add milk, vanilla, and maple syrup. Beat on low until well combined. Add half of flour mixture. Beat on low. Scrape down sides. Add other half. Beat on low until mixed. Increase speed to medium, scrape sides again, and beat until well incorporated. Spoon mixture into muffin tin, filling each about 2/3 of the way. (I use a cookie scoop for this and it takes 1 scoop to fill each vessel.) Sprinkle each with turbinado sugar and a few extra oats. Bake 20-25 minutes until browned and toothpick comes out clean. Allow to cool in pan, on a wire rack for 5 minutes. Remove from pan to wire rack to cool rest of way.


Wednesday, April 9, 2014

Childhood Lunchbox Treat

When I was a kid, I preferred a packed school lunch to a cafeteria one. I wasn't a picky eater, and some days I would eat what they were serving, I simply enjoyed things my mom would send for me more. And one of the things she would treat me with, which to this day I still love, were Twinkies.

The spongy cake, the sweet creamy center. Oh, I can taste them now. Yes, we were those people when they stopped making them last year. A phone call of desperation went out to my husband, he stopped at the store, and when he came home that night he had 7 boxes in tow to last us until the crisis was over.

I love these snack cakes so much my brother even got me a Twinkie baking set for Christmas so I can make my own any time I want! So, I might be a little obsessed...no judging!

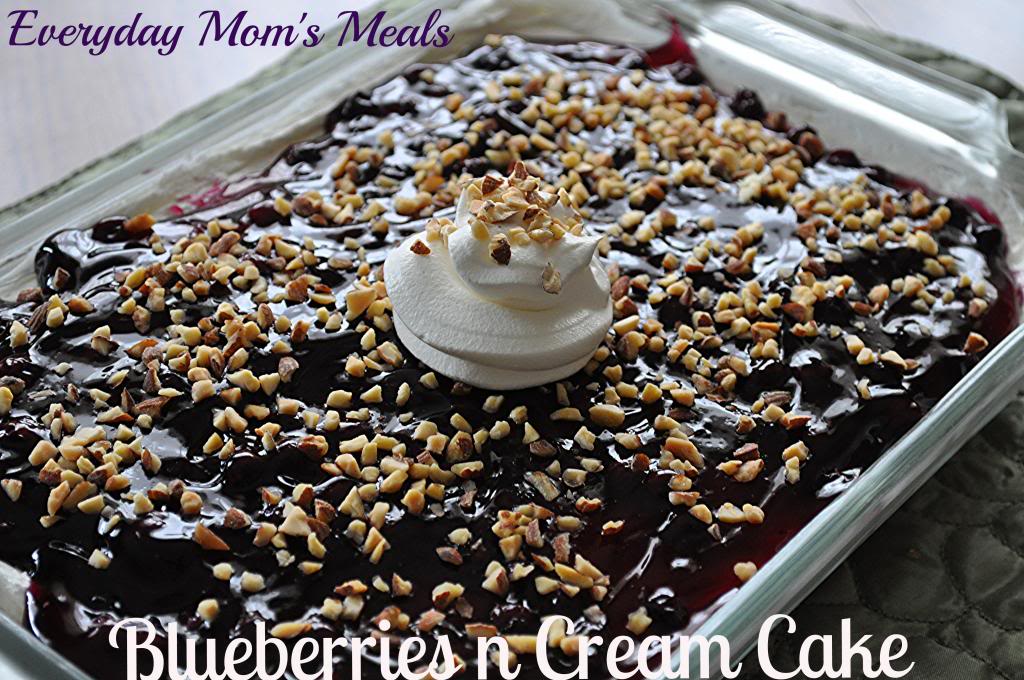
So when I came across this cake I knew it would be one we would gobble up! Sure, the base is made with a pre-made cake, but don't let that fool you into thinking it's not pretty enough for guests. In fact, if you are looking for something for Easter dessert, I think this would be perfect. It's rich, so it can really stretch to feed a crowd because every one will only want a small piece! But on a holiday when the sweet tooth is taking over, it will certainly satisfy!

Who knew a lunchbox treat from my child hood could be transformed into a decadent dessert my whole family would love. And since there is fruit on the top, that means I can feel less guilty about eating a whole box, right??!!

Blueberries n Cream Cake  Inspired by Mr. Food
1 box Twinkies (see note below), sliced lengthwise
1 (21 oz.) can blueberry pie filling
8 oz. cream cheese, softened
2 cups powdered sugar, sifted
2 (8 oz.) containers Cool Whip
1/4 c. almonds, finely diced

In the bottom of a 9x11 baking dish, place enough sliced Twinkies to cover and fit. Cut to fill entire bottom if necessary. Combine cream cheese and powdered sugar in a large bowl. Beat with an electric mixer, on low speed, until creamy. Fold in 1 container Cool Whip. Spread over Twinkies. Pour pie filling over cream cheese layer. Spread evenly. Sprinkle with almond chips. Chill 2 hours. When serving, garnish with extra Cool Whip and more almond chips. *NOTE* You will more than likely not use the entire box of Twinkies, so slice as you go. I used 6 total.


Shared on The Country Cook April 11, 2014

Wednesday, August 14, 2013

Alex In The Kitchen Once Again

Two years ago we started a tradition here on EMM, my favorite little monkey stopping by to guest blog something simple and yummy that your kids can enjoy making, and of course eating, too. And two of those posts, one at the beginning of his 1st grade year, and one at the end, had something in common. Lemon Fruit Salad and Key Lime Fruit Salad  were both creations he and I worked on together, and were perfect for little hands and little tummies.

So, in that same tradition, and since the school year is once again quickly approaching, we thought ti was a great time for Alex (now a 3rd grader!) to share yet another easy but tasty fruit salad perfect for an after school snack or even a light dessert. Or if you are like us and you are filling these last few days of summer vacation with as much fun as possible, it would be great for a picnic in the park too!

Please welcome the best little sous chef around back to the EMM kitchen!

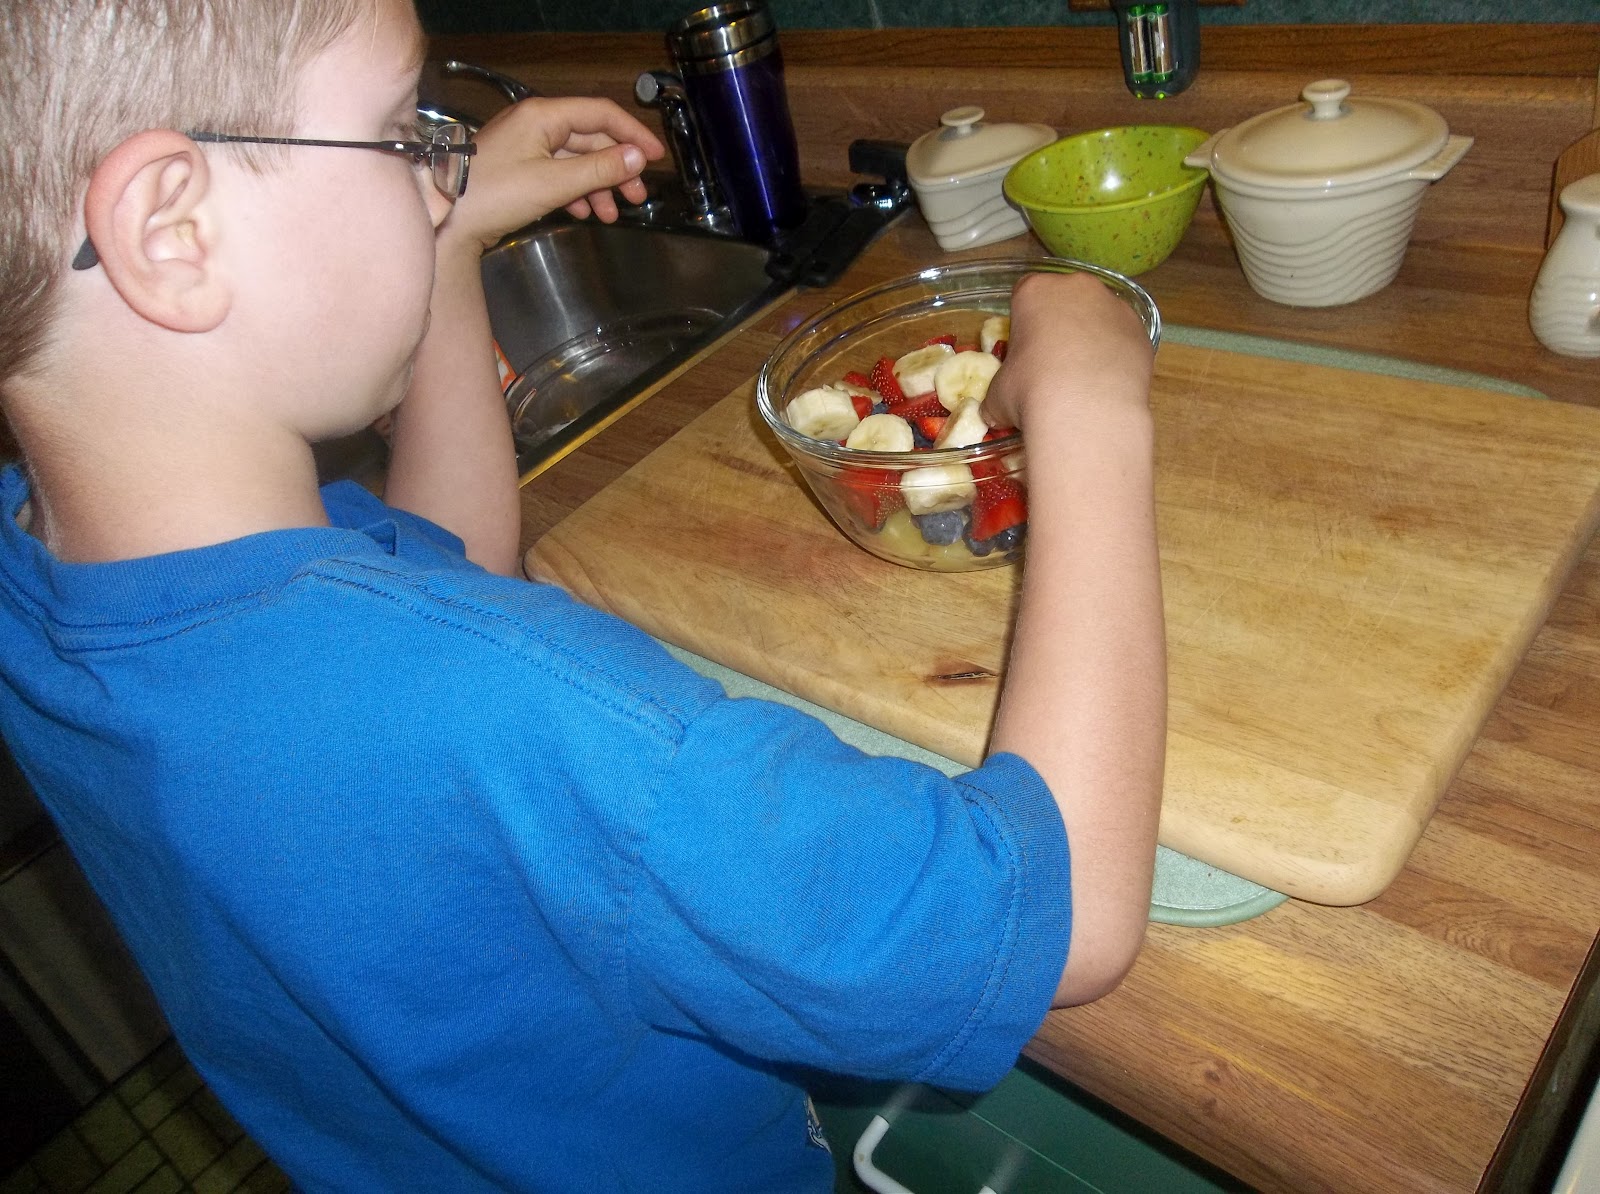
Hi everyone! I'm so excited Mommy asked me to cook for you again! Well, I guess this isn't really something you actually cook, but you know what I mean! For those of you who don't know, I am going into the 3rd grade, and am really looking forward to it! I am sad to see summer end, but I love school, and seeing my friends, so I'm okay with going back too. (But that 7:30 am wake up Monday morning will NOT be easy!!) 

Mommy and I love finding simple sweet treats I can help her make, and this is another one of those. Using mostly canned fruit, it's nice for little kids because there isn't a lot of chopping. (Mommy did slice the bananas though) Plus, it's really neat to watch how the pudding mix and fruit juice turn into a "sauce" while you stir...which was my job! This makes a perfect snack, now or once school is in, or a dessert too. Oh, and I actually like eating it for breakfast too, especially on a hot day! 


I hope you enjoy my newest fruit salad creation. Be sure to make it with your kids too! I've been helping Mommy in the kitchen since I was a tiny baby, and we always have so much fun! I bet your kids would too!

Vanilla Fruit Salad Adapted from Taste of Home
1 (29 oz.) can fruit cocktail, with juice
1 (11 oz.) can mandarin oranges, drained
1 (20 oz.) can pineapple chunks, drained
3/4 c. fresh blueberries
1 TBS lemon juice
2 bananas, sliced
1 (3.4 oz) box instant vanilla pudding
Whipped Cream
Pecan Halves

In a large bowl combine all fruit except bananas. Add lemon juice. Stir. Sprinkle with pudding mix. Gently stir for about a minute until slightly thickened. Fold in bananas. Refrigerate until serving, at least an hour. When ready to serve, top with whipped cream and sprinkle with pecans.


Pin It

Friday, July 19, 2013

Fresh From The Patch

Are blueberries fresh for the picking in your area? Well, they are here in Indiana and oh, they taste so good fresh from the patch! We are lucky enough to live close to quite a few U-pick patches where I can take the boy and let him loose gathering in pound after pound. But this year, well, we did thinks a little differently.

I actually got notice that the berries were ready at one of our favorite places the day we were driving home from our vacation. I was literally sitting in the car in Jacksonville, Florida wondering "Okay, how am I going to get to the berries...and quick?" Luckily they also had some pre-picked ones available and my mother-in-law was nice enough to snag us a couple pounds so they were waiting on us when we got home.

Now I will be very honest, after being gone for 3 weeks, our cupboards and fridge were a little sad those first few days we were home. I had stock piled a few things before we left, but still, every time I went to make lunch for Alex I kind of felt like Old Mother Hubbard. So needless to say, most of that two pounds were simply eaten as is with lunch and snacks. But there was no way I wasn't going to find something to make with some of them too. And when I thought of my brand new ice cream maker...I knew exactly what it would be!

So if you have a berry patch near you, and are looking for a fun summer time activity for the kids, take them to pick their own. Then bring them home and have them help you make this great tasting, perfect cool down, summer time treat!

Blueberry Ice Cream
1/2 c. white sugar
1/4 c. water
1/2 tsp. vanilla extract
2 c. fresh blueberries, plus extra for garnish
2 c. heavy cream
1 TBS lemon juice
Pinch Salt

In a small saucepan over low heat combine sugar and water. Cook until sugar dissolves. Add berries, lemon juice, salt and vanilla. Stir and cook just until berries burst, about 5-7 minutes. Remove to bowl. Bring to room temperature. Place in refrigerator until cooled, about an hour. Add cream to blueberry mixture. Mix well. Add to ice cream machine and follow directions. For mine, after about 20 minutes of mixing it was a "soft serve" consistency. If you prefer a more frozen version, transfer to a bowl, cover and freeze until solid.


Shared on The Country Cook July 19, 2013
Shared on Make Ahead Meals July 22, 2013

Friday, May 31, 2013

No Bake Solution

This time of year I think we are all looking for more dessert options that don't involve our oven. The dreaded "I don't want to heat up the house" season is upon us, and I for one am looking forward to the challenge.

See, before I began this blog, I truly wasn't that much of a baker. I didn't enjoy, and tried to avoid it at all costs. But after getting more and more comfortable in the kitchen and using EMM has an outlet, I have become more of a seasoned baker, and my boys are very thankful for that. But there is still something inside of me that gets excited when I can find a no-bake alternative. They are so fun, so easy and perfect for the warm months. Sure, when it's the middle of October, the crisp autumn air moving in, it's comforting to pull a big pan of hot cobbler out of the oven. But when it's the middle of July, the sun is shining and eggs are being fried on the sidewalk, not so much.

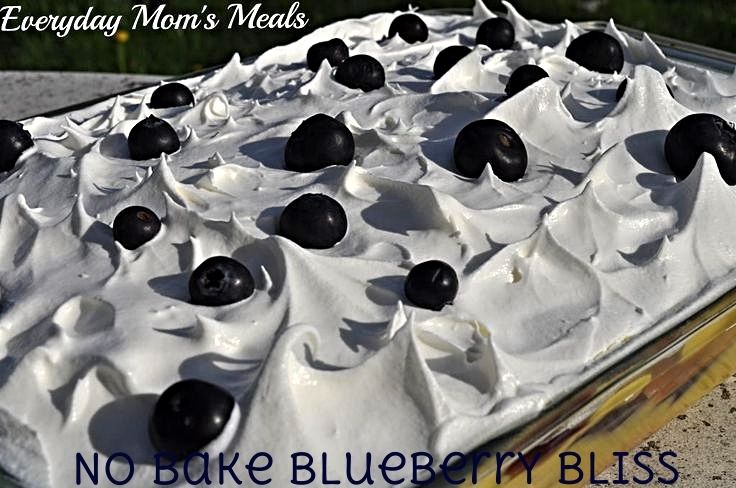
This would be perfect for you next backyard barbecue or pool party. Cool and refreshing on a hot day, the flavors easily adaptable to fit your favorites. Not to mention, if your little ones are out of school for the next couple months (We have one more week, thank goodness!) this is a fun one to have them help with. Little hands could stir the pudding, put the blueberries on top...and of course taste test!

If you want to bake a pie when it's sweltering outside, my hat is off to you. But if you are like me and truly enjoy a no-bake sweet option this time of the year, this is just for you!

No Bake Blueberry Bliss
1 (10 oz.) store bought angel food cake "loaf"
1 (21 oz.) can blueberry pie filling
1 (3.4 oz.) box instant French vanilla pudding
1 3/4 c. milk
1 (12 oz.) tub Cool Whip
1/2 c. fresh blueberries

In a medium bowl combine pudding mix and milk. Whisk for 2 minutes. Refrigerate for 5-7 minutes until "soft set". Slice angel food cake in 1/2 inch slices. In a 8 x 11 baking dish, layer angel food cake slices (You might have to cut them to make them fit. Mine took 6 regular slices, 1 cut in half and 1 cut into thirds.) Pour half the pudding over angel food cake and spread evenly. Layer with half the pie filling and spread. Repeat layers once more, ending with pie filling. Top with Cool Whip. Spread evenly using a soft spatula. To form "peaks" like mine, lightly tap Cool Whip with flat side of spatula and lift up quickly. Sprinkle with fresh berries. Chill at least an hour before serving.


Shared on The Country Cook May 31, 2013
Shared on Make Ahead Meals June 3, 2013
Shared on Mandy's Recipe Box June 4, 2013

Wednesday, March 27, 2013

Any Day Brunch {Eggland's Best Eggs}

The word brunch can conger up countless images in a person's head. Long buffets filled with all the favorites: eggs, bacon, sausage, French Toast, potatoes, etc. Holiday meals surrounded by family and friends. Lazy Sunday mornings drinking coffee and enjoying the morning paper. But for most of us, all the images are connected by one thing, happy people enjoying delicious food; and I'm here to say brunch doesn't have to be saved for a special occasion. Brunch can be a meal your family enjoys any "not so special" day, any time of the year. And with help from my friends at Eggland's Best, my family did exactly that a couple weeks ago.

It was a Sunday like most other Sundays at our house. It was the 3 of us at home, sleeping in, and catching up on things around the house. But I had a little surprise up my sleeve that neither of my "boys" knew about~ I was going to treat them to a yummy brunch, filled with recipes from Eggland's Best. Their site has entire section dedicated to delicious recipes using their fantastic eggs, including a Breakfast Burrito and Sunny Side Breakfast Pizza, just to name a couple; but there are so many more to choose from.

Have you ever tried Eggland's Best eggs in your home? Well, if you haven't, let me give you just a few reasons why you should! Compared to ordinary eggs, Eggland's Best contain:

10 times more Vitamin E
Double the amount of Omega-3's
Twice the amount of Vitamin D
3 times more Vitamin B12
25% less Saturated Fat
38% more Lutein

As parents, we understand the importance of feeding our families nutritious food that provides them with power and energy to go through the day. With March being National Nutrition Month, it's a great time to reevaluate the foods we are all using in our kitchen every day, so we can feel confident we are giving our loved ones healthy foods to help them grow. And with Eggland's Best, we know just that! 

When I began planning my brunch, and scouring the many recipes on the website, I was immediately drawn to not one, but two mouth watering dishes. The first I'm sharing today was our "starter". The teaser if you will. The thing I brought them to the table with, only to be followed by something equally scrumptious. 

Plus, this recipe was so simple, it was a great opportunity to get little man into the kitchen with me. He loved stirring, mixing and helping any way he could.  If you're going to treat your family to a brunch, why not make them a part of it too? Get the kids into the kitchen with you, and make the entire thing a family event!


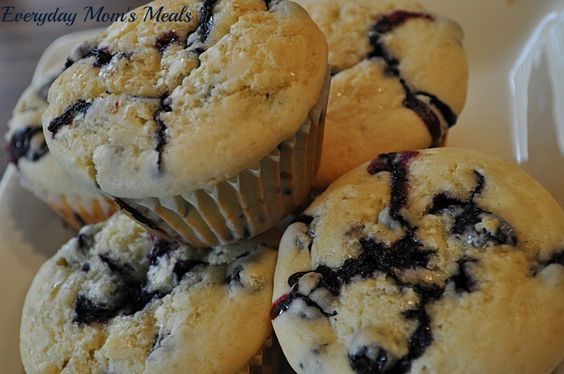
They thought they were getting ordinary blueberry muffins, which they would have been happy enough about, but little did they know when they bit into one, there was an extra surprise waiting on them. A creamy, lime flavored filling! And for my lime-loving boys...oh what a treat it was! They were absolutely thrilled! 

I think these would be a fantastic addition to your Easter brunch, or if you're like me, your any day, ordinary, every day brunch! 

Come back on Friday to see the main dish of my Sunday brunch, another great idea for this Easter weekend too! 

Be sure to check out Eggland's best on Facebook, Twitter, and Pinterest. And sign up for their free Newsletter, and download their FREE (for Facebook fans) e-book (a $9.99 value) too!

Plus, the great folks at Eggland's Best has a fantastic gift package to give away to ONE lucky EMM fan! 
Just scroll down after the recipe to see the prize pack and how to enter! 


Blueberry Surprise Muffins From Eggland's Best
For Filling:
1 Eggland's Best Egg
1/4 c. white sugar
8 oz. Neufchatel cheese (reduced fat cream cheese)
Juice of 1/2 lime

For Muffin Batter:
2 Eggland's Best eggs
1 c. low-fat buttermilk
6 TBS margarine, at room temperature
1/4 c. maple syrup
2 c. all purpose flour
2 1/2 tsp. baking powder
1/2 tsp. salt
1/4 c. white sugar
14 oz. blueberries
1 tsp. vanilla
1 TBS Turbinado sugar (sugar in the raw)

Preheat oven to 375. Grease a muffin pan, or line with baking cups. Prepare filling by mixing cream cheese, sugar, egg, and lime juice in a medium bowl. Beat with electric mixer until well blended. Set aside. Prepare muffin mix by whisking flour, baking powder, salt and sugar in a medium bowl. Set aside. In a small bowl combine maple syrup, margarine, eggs, milk and vanilla. Beat well with electric mixer until smooth. Slowly mix the egg mixture into the flour mixture and blend well until combined. Gently fold in blueberries just until swirls appear. Fill muffin tins 1/3 with batter, top with 1 TBS filling mixture and then 1 TBS or a little more batter mix to cover filling. Sprinkle with Turbinado sugar and bake for 25-35 minutes until slightly golden. 


Shared on Lady Behind The Curtain Mar. 27, 2013
Shared on Miz Helen's Country Cottage Mar. 28, 2013
Shared on The Country Cook Mar. 29, 2013
Shared on Make Ahead Meals Apr. 1, 2013


Included are:
(1) Coupon for one free dozen eggs
(1) Ceramic mixing bowl
(1) Egg shaped wooden cutting board
(1) Whisk
(1) Bowl scraper
(1) Ceramic Mug
(1) Eco Bag

TO ENTER: Visit the Eggland's Best website recipe section by clicking here and leave a comment telling me which recipe is your favorite. Contest ends April 3rd


Disclaimer: The Eggland’s Best coupon, information, and two gift packs have been provided by Eggland’s Best. 


Thursday, December 27, 2012

A Quick Breakfast With Better Oats

Do you struggle to get breakfast into your little ones' tummies every morning? Are you constantly looking for new and simple things to fuel the rest of their day? Well, our friends at Better Oats are making it even easier!


Better Oats oatmeal comes in 23 delicious varieties  including Raw Pure & Simple, Pomegranate  Blueberry Muffin and Apple & Cinnamon. Kids love it because it's fun and yummy; parents love it because it is nutritious and convenient. Better Oats uses 35% less packaging than other instant oatmeal brands, so more room on your pantry shelf, and the pouch doubles as a measuring cup!

Made with 100% whole grain oats and flax seeds, this complete line offers a simple and healthy option when it comes to instant oatmeal. But it's not only a great breakfast (or lunch... or snack...) but also a better ingredient to spice up a cookie or other baked goods.

 Their thick and hearty oatmeal is also a good source of fiber and omega-3, so it's better than good, it's good for you. Start your day off right with the indulgent taste of real muffin flavor in every bite...mmm.


Better Oats


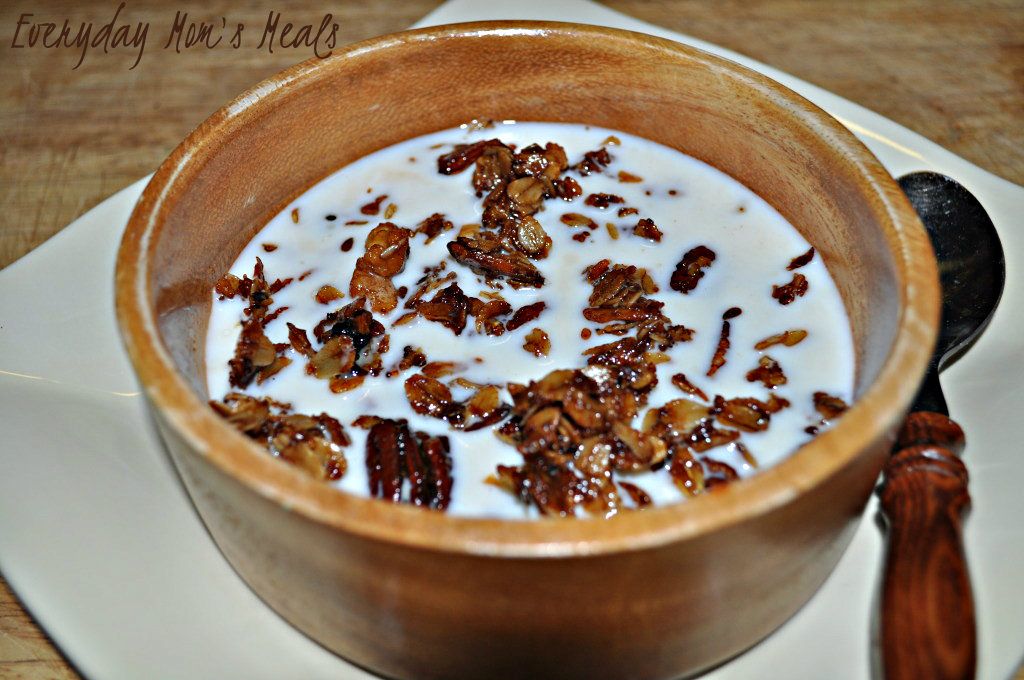
So when I was given the opportunity to use Better Oats oatmeal in a new recipe, I immediately thought of granola! It's one of my favorites, and my son's too. Put it in individual bags for simple after school snacks, or even quick on-the-go- breakfasts. Perfect for taking with you to the gym in the morning, or in the car for the kids. Eat it as is, or my choice, with a little milk poured over the top. However you serve it, this granola is so easy to make, and absolutely delicious to eat!

Blueberry Nut Granola
5 packets Better Oats Blueberry Muffin Instant Oatmeal
3 packets Better Oats Bare Instant Oatmeal
1/2 c. honey
3/4 c. vegetable oil
1/2 c. walnuts pieces
1/2 c. sliced almonds
1/2 c. pecan halves

Preheat oven to 350. In a small bowl whisk together oil and honey. In a large bowl combine oatmeal and all nuts. Pour oil mixture over. Stir well until coated. Spread onto a baking sheet. Bake for 45 minutes, stirring every 10 minutes. Remove from oven and allow to cool on pan. When cool, break up. Store in an airtight container.


Shared on Miz Helen's Country Cottage Dec. 27, 2012

Pin It

Disclaimer~ This sponsorship is brought to you by Foodie Blogroll who we have partnered with for this promotion.

Friday, September 28, 2012

Birthday Breakfast

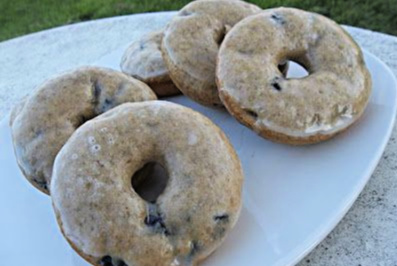
When my little boy's birthday rolls around, it's my job to make sure it is not just one fun filled day, but at least a couple! And if we are lucky like we were this year to have it on the weekend, I have the extra time to fit in as many treats as possible. As most of you know, we started his birthday weekend with a party on Saturday with his actual birthday on Sunday. So when I was making my "to-do" list for the weekend, I knew I wanted something extra special for breakfast, but knew we would be so busy I wouldn't have a lot of time either morning. I immediately knew the answer! It was time to put the new doughnut pan to use once again! I've already shared my Cinnamon Sugar Doughnuts, which were a huge hit. For the second time I knew exactly what kind I wanted to try next. Blueberry...Glazed Blueberry! When I had first gotten my new pan I started to look for various recipes with different flavor combos, and when I found this recipe it was at the top of my list because I knew both of my boys would love them. So what better time try to a new sweet treat than for a special birthday breakfast for my favorite Monkey? These are delicious! They are so much better than anything you can buy in the store, and truly take almost no time at all. And if you are a little leery of trying your hand at doughnuts, don't be! I'm telling you~if I can bake these, anyone can! If you can stir and pour, these will be perfect! If you need a new breakfast idea, or are just drooling from the photo, be sure to try these asap!

Glazed Blueberry Doughnuts Adapted from A Well Seasoned Life
1 c. flour
1/2 c. sugar
1 tsp. baking powder
1/4 tsp. salt
1 tsp. cinnamon
2 TBS milk
2 eggs
3 TBS vegetable oil
2 TBS water
1/2 c. blueberries, mashed slightly (I used a potato masher)
1 1/4 c. powdered sugar
3 TBS milk

Preheat oven to 325. In a small bowl combine powdered sugar and milk, a little at a time, to make glaze. Set aside. In a large bowl mix flour, sugar, baking powder, cinnamon and salt. In a medium bowl whisk eggs, oil, water, and milk. Pour wet ingredients into dry. Add blueberries. Stir well until combined. Don't over stir. Spray doughnut pan lightly with cooking spray. Fill each well half way with batter, smoothing tops with back of a spoon. Bake for 16-18 minutes until firm. Remove from pan. Let cool slightly. Dip each doughnut into glaze and place on cooling rack to set.


Makes 8 Doughnuts

Shared on The Country Cook Sept. 28, 2012
Shared on Maked Ahead Meals Oct. 1, 2012
Shared on Mandy's Recipe Box Oct. 2, 2012

Wednesday, August 22, 2012

Time To Learn {Association of Food Bloggers}

There are some foods that still elude me and my culinary skills. Some simply because I haven't had time to try them, and others because they down right intimidate the heck out of me! One of the foods on the later list was crepes...until now. And I will be very honest, they would probably still be on that list had it not been for my friends at the Association of Food Bloggers teaming up with Pete and Gerry's Heirloom Eggs to sponsor a crepe recipe contest using their fantastic organic eggs. Let's face it, most of us, me included, will try anything once if there is a prize involved!


So when I was deciding what kind of crepe to make, I didn't really have to think very hard. I know they can be savory or sweet, but for my first, I wanted something sweet. Something creamy. And something I could enjoy with some summer fresh berries before they are a thing of the past.

My husband loves crepes, and was so excited to hear I was going to try my hand at making them, but had one question. "What are you going to make them in." Well, my sponsors had solved that problem too because I was provided with a fantastic cast iron pan/griddle that is designed to make the perfect crepe.

These are great for an extra sweet breakfast treat or even an unique dessert. Either way you will be a super star with your family!!

If you have foods you are frightened to make too, be brave...take a deep breath and dive right in! After all, the first time they were made, it was someone's very first try! And if there is a prize up for grabs, even better!

Summer Berry and Vanilla Cream Crepes

For the filling: 
8 oz cream cheese, room temperature
1 1/2 c. powdered sugar
2 tsp vanilla

In a stand mixture with the paddle attachment  whip the cream cheese with powdered sugar until fluffy and creamy. Add vanilla and mix well. Spoon mixture into large plastic storage bag and snip end off to make piping easier.


For the berry topping:
1 c. strawberries, sliced
1/3 c. blueberries
1/4. cup granulated sugar
3 tsp tablespoons fresh lemon juice
1/4 c. water
1 TBS cornstarch    

In a medium saucepan on medium heat combine berries, sugar and lemon juice. While stirring, heat until sugar has melted. Add water and cornstarch. Stir well. Then using a potato masher, break up some of the berries. Increase heat to high, bring to a boil and reduce to simmer. Stirring constantly, cook until thick, about 5-7 minutes. Allow to cool slightly.


For the crepes:
2 c. flour
4 eggs, I used Pete and Gerry's Organic Eggs
1 c. milk
1 c. water
1/2 tsp salt
4 TBS butter, melted and cooled

In a large mixing bowl, whisk together the flour and the eggs. Gradually add in the milk and water, stirring to combine until the batter is consistency of heavy cream. (Mine only took 1/2 c. water) Add the salt and butter; stir until smooth. Heat a lightly oiled griddle over medium  heat. (If using an electric griddle, set the temp at 375) Pour or scoop the batter onto the griddle, using approximately 1/4 cup for each crepe. Tilt the pan with a circular motion so that the batter coats the surface evenly.Cook the crepe for about 2 minutes, until the bottom is light brown. Loosen with a spatula, turn and cook the other side.

To assemble, pipe about 3 TBS cream filling down one side of each crepe. Carefully roll up. Spoon berry mixture over each crepe and top with whipped cream if desired. Makes 8 crepes


Shared on Lady Behind The Curtain Aug. 22, 2012
Shared on Miz Helen's Country Cottage Aug. 23, 2012 
Shared on The Country Cook Aug. 24, 2012
Pin It  

*NOTE* Voting begins September 1st and I will announce where you can help me win!

Disclaimer: I was provided with eggs and a griddle for this contest. The thoughts and opinions are 100% mine.


Friday, August 17, 2012

One From My Working Days

These days when I'm meeting someone for the first time and the question "What do you do?" comes up, I answer with "I'm a stay at home mom and a food blogger." But there was a time I had a job outside the home, and for those who didn't know me 8 years ago, they don't realize this. I got my degree in 2002 and immediately started looking for a "real" job instead of waiting tables. I was blessed to find something that was the perfect fit for me at a local orthopedic medical office. I loved my job. I loved the people I worked with. I was there almost 3 years, and only one thing could make me quit...that's right, Monkey. He was born in September 2004 and my days of being a "working gal" were over. I knew my destiny had already been decided for me. I was supposed to stay home with him. After all, being a mom was all I ever truly wanted to be anyway. Early on when he was still a baby there were days, that while I was so happy to be with my baby enjoying every single minute, I did long for some adult conversation; and I would begin missing my friends from work. But those days became fewer and farther between, as we developed a routing, and especially as he grew older and we could interact more. There are many things I took away from that job. Lifelong friendships, job experience and even some incredible recipes! This is one that when I finally learned to make it I couldn't believe how easy it was. It's the perfect weeknight "throw together at the last minute" dessert; or if you serve it to guests it will be one they  request the recipe for. Yes, I was once in the working world, but this world of "mommyhood" and food blogging are what I'm all about now!

Blueberry Bubble Cake
1 (18 1/4oz) yellow cake mix, dry
1 (21oz) can blueberry pie filling
1 1/2 c. lemon lime soda

Preheat oven to 375. Grease a 9x13 baking pan. Spread pie filling over bottom of pan. Sprinkle evenly with cake mix. Pour soda over top. DO NOT mix. Bake for 45 minutes until a toothpick comes out clean and browned on top. Serve with whipped cream, vanilla ice cream and/or fresh berries.


Shared on The Country Cook Aug. 17, 2012
Shared on Make Ahead Meals Aug. 20, 2012 
Shared on Mandy's Recipe Box Aug. 21, 2012
Blueberries at Very Good Recipes
Pin It

Wednesday, June 20, 2012

Salad Inspiration

Sometimes the greatest ideas come by just hearing a tidbit of an idea, especially in the kitchen. All I need is to hear of something that sounds tasty, and more than likely, I will find a way to make it. hence was the case with this salad. I have no idea what the original tastes like. Never had it. I only know what it contains because I looked it up to see if I was on the right track. See, I recently saw a commercial for Wendy's new Berry Almond Chicken Salad. Four little words...and I was totally inspired. I guess they aren't just four little words. They are four SUPER yummy words! It was pretty clear what the salad contained, but I did check out the description online to make sure there weren't any surprises they tried to sneak in. This is so fresh, light and the perfect summer lunch or supper. Plus, it's especially convenient if you can find the already grilled chicken strips like I used. (I found mine in the meat case) It's also the type of salad you can add or subtract from to truly make it your own. Like raspberries? Add them! Blackberries? Yum! Have spinach instead of field greens? Perfect. Let your imagination and taste buds be your guide!

Berry Almond Chicken Salad Adapted from Wendy's 
Makes 2 dinner sized salads
1 bag field greens lettuce, washed and drained
1 c. blueberries
1 c. sliced strawberries
1/2 c. shredded Parmesan cheese
1/2 c. sliced almonds
2 tsp lemon pepper seasoning
2 c. grilled chicken, chopped into bite sized pieces (about 2 small boneless breasts)- I used precooked packaged ones

For Dressing: From Food Network

1/2 c. raspberries, fresh or frozen (if frozen, thawed)
1/4 c. olive oil
2 TBS lemon juice
1 TBS honey
Salt and pepper to taste


Place berries, lemon juice, honey and oil in blender. Blend until smooth. Season with salt and pepper.

On 2 large dinner plates, divide field greens. Sprinkle each w/ 1 tsp lemon pepper seasoning. Toss with fingers. To each plate add half of the blueberries, strawberries, almonds, cheese and chicken. Drizzle with dressing.

Shared on The Country Cook June 22, 2012

Salad at Very Good Recipes
Pin It

Tuesday, June 5, 2012

Good-Bye First Grade

Back in August I had a very special Guest Blogger share a great recipe for Lemon Fruit Salad with you. That Guest Blogger? Why it was Monkey, of course, to celebrate his 1st day of 1st grade. Well, 180 days of school have passed, and my little man is now going to be a 2nd grader. That's right, today is the last day of school, and we couldn't be happier to finally see summer vacation! As far as him officially being in 2nd grade, well, I'm just going to ignore that until August~ denial is a wonderful thing.

So I thought having him back to share yet another yummy fruit salad recipe would be an awesome way to book-end the school year. Even though he reads at a 4th grade level, writes 10 page long stories, can do math that most kids his age can't touch, he is still my baby who loves to be in the kitchen with Mommy helping and making things he can call all his own!

You've grown up so much this year Monkey, and Daddy and I couldn't be more proud of what you've accomplished and the little person you are growing into each and every day. I love you!

Hi everyone! I am really excited to share this yummy recipe with you today. I think it's perfect for summer lunches, or even breakfasts. I love having fruit for breakfast when it's warm outside. Mommy and I go on picnics a lot too, and I want to take this on those too. If you have kids, they will really like the flavors and being able to help make it too! They can help layer the fruit, add the coconut and pour on the yogurt. If you have plastic knives they can even help slice some of the fruit. I hope you enjoy my recipe and have a wonderful summer! 

Key Lime Fruit Salad Adapted from Kraft
1 c. pineapple chunks, drained
3/4 c. fresh blueberries
1 c. fresh strawberries, sliced                                           
1 banana sliced
1 (6oz) container key lime yogurt
2 TBS key lime juice
1/2 c. sweetened coconut

In a small bowl combine banana slices and key lime juice. Set aside. In a large bowl layer fruit: pineapple, blueberries, strawberries, bananas. Pour yogurt over top of fruit. Sprinkle with 
coconut. 
Layering the fruit.
Adding yogurt.
Sprinkling with coconut.

Shared on Mandy's Recipe Box June 5, 2012
Shared on Chef in Training June 5, 2012 
Shared on Lady Behind The Curtain June 6, 2012 
Shared on Miz Helen's Country Cottage June 7, 2012 
Shared on The Country Cook June 8, 2012

Fruit at Very Good Recipes
Pin It

Saturday, June 2, 2012

Weekend Company {Guest Blogger Tricia}

I always enjoy when I get to have my guest today back again to share w/ us. To me food is family, so who better to share in an EMM Saturday morning than my family? For those who don't know, Tricia is my cousin and at one time was a blogger herself. In order to focus all of her time and energy on her family she stepped away at the beginning of the year, and at the time I told her she would have to "visit" once in a awhile here to treat all of her fans who miss her, including me! Please welcome Tricia back to EMM~


Good Morning! A BIG thank you to my cousin Krista for asking me to be her company for the weekend guest post today. Living 6 hours apart we don't get to see each other as much as we would like but this makes me feel a little closer to her so I'm always happy to do it! Grab a cup of coffee and pull up a chair because I have a great recipe for you today!
Do you all love Pinterest as much as I do? I am currently sorting through all of my pins and trying those recipes I've been meaning to try. I have come across a few that have been added to our regular rotation. The recipe I am sharing with you today is one I found on Pinterest several months ago, it's from a blog called Alexandra's Kitchen.
On Sunday mornings we  have a nice breakfast that my husband, my four-year-old son and I always make together. It's become our Sunday morning tradition and it's such a fun time with lots of memories being made. We made this a couple of weeks ago and it was delicious! My husband went back for thirds and he is not a sweet treat kinda guy at all!
The best part about this cake is that it can be made the night before then just put in the oven in the morning. I am writing the recipe as it was written but I have a few tips:  1) The recipe calls for fresh blueberries. I used berries that I had frozen last summer with perfect results 2) The recipe calls for buttermilk. I do not use a lot of butter milk and don't like to buy it to use only 1/2 cup of it so I have two options. I buy a powdered buttermilk mix that I store in the refrigerator. When I am using a recipe that calls for it I reconstitute the amount needed with water. The other option is to take 1 cup of milk and add 1 Tablespoon of lemon juice or white vinegar. Let stand for 5 minutes then use the amount the recipe calls for. 3)  Letting it cool the 15 minutes before serving is important! The cake is so moist that if you don't let it sit it will fall apart!


Buttermilk-Blueberry Breakfast Cake
1/2 cup unsalted butter, room temperature
2 tsp. lemon zest, or more- zest from 1 large lemon
7/8 cup* + 1 tablespoon sugar**
1 egg, room temperature
1 tsp. vanilla
2 cups flour
2 tsp. baking powder
1 tsp. kosher salt
2 cups fresh blueberries
½ cup buttermilk

*NOTES*
* 7/8 cup = 3/4 cup + 2 tablespoons
** This 1 tablespoon is for sprinkling on top
Preheat the oven to 350ºF. Cream butter with lemon zest and 7/8 cup of the sugar until light and fluffy. Add the egg and vanilla and beat until combined. Meanwhile, toss the blueberries with ¼ cup of flour, then whisk together the remaining flour, baking powder and salt.  Add the flour mixture to the batter a little at a time, alternating with the buttermilk. Fold in the blueberries. Grease a 9-inch square baking pan (or something similar) with butter or coat with non-stick spray. Spread batter into pan. Sprinkle batter with remaining tablespoon of sugar. Bake for 35 minutes. Check with a toothpick for doneness. If necessary, return pan to oven for a couple of more minutes. (Note: Baking for as long as 10 minutes more might be necessary.) Let cool at least 15 minutes before serving.
Pin It