Everyday Mom's Meals: Appetizer
_____
Showing posts with label Appetizer. Show all posts

Sunday, February 18, 2024

Some Might Call Me Obsessed

 Over the past year, nothing has been posted more to EMM than frozen meatball recipes. I make no apologies for it, and I hope you guys are enjoying them as much as I am creating them. 

I blog what we eat. Sure, there are times when I try to keep up with food trends like when I made Marry Me Chicken, Whipped Hot Chocolate and Cafeteria Noodles to name a few. And while we enjoyed those recipes very much, for the most part what you see on the blog are dishes I have made with the intention to simply just get supper on the table.

Hence why so many meatball recipes have made their way to your feed thanks to my page. I have become a little obsessed with finding new ways to utilize one of my favorite frozen foods. 

So how did this latest one come to be? I was planning a Mexican night at home, but wasn't feeling tacos, burritos or nachos. Time to see if I could combine my meatball friends with Mexican flavors we love. The answer? YES! 

Crock Pot Enchilada Meatballs can be served as a tasty appetizer for a crowd or for an easy weeknight supper like I did, alongside some cheesy rice. You could also pile them into a hoagie roll, top with cheese, lettuce and tomato for a tasty twist on a meatball sub! 

If you saw yet another meatball recipe and groaned, I'm sorry you're disappointed. But I promise you might change your mind at the first bite!

What kind of meatballs do I use?

You want to look for the frozen meatballs called "homestyle" or sometimes original. Italian ones won't taste the same.

 Can I cook on high instead of low?

If time is an issue, yes you can cook these on high for 2 hours.

 Can I substitute something for the enchilada sauce?

While I haven't tried anything else, you could! Maybe a green verde sauce or even a salsa instead. If you do, let me know how it goes!

What do I serve with Crock Pot Enchilada Meatballs?

Some ideas: Cilantro rice, refried beans, chips and salsa, fiesta corn, black beans

 What is your favorite brand of frozen meatballs?

My two favorite frozen meatballs to use are the Great Value brand at Walmart and Bremer's at Aldi. Yep, both are just as tasty as name brand and much. more budget-friendly!

Crock Pot Enchilada Meatballs

 Best Tips
 
Be sure to stir the meatballs well before serving to coat them well in the sauce.
 
If you can find a packet of enchilada seasoning instead of taco, that would be perfect!
 
Like things spicy? Use Pepper Jack cheese, spicy Rotel and/or diced jalapeƱos.
 
A can of diced green chilies would be delicious too.
 

Crock Pot Enchilada Meatballs

1 (28 oz.) bag frozen homestyle meatballs

1 (10 oz.) cans red enchilada sauce

1 (10 oz.) can Rotel 

1 packet taco seasoning

Shredded Mexican style cheese 

Cilantro, for garnish

In the bottom of Crock Pot, whisk together enchilada sauce, Rotel and taco seasoning. Add meatballs. Stir to combine. Cook on LOW 4 hours. Keep on warm until serving. Stir before serving. Sprinkle with cheese and cilantro. 

Crock Pot Enchilada Meatballs

More Meatball Recipes To Try Next

Crock Pot French Onion Meatballs 

Crock Pot Italian Meatballs 

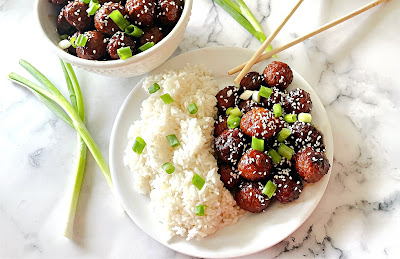
Crock Pot Korean Meatballs

Crock Pot Meatball Subs

Crock Pot Hawaiian Meatballs 

Meatball Pasta Bake

 Crock Pot Teriyaki Meatballs 

Crock Pot Swedish Meatballs

Sunday, June 11, 2023

Celebrations Galore

So...did you think I fell off the face of the earth? That EMM was on hiatus? I can't say I blame you. I haven't posted a new recipe in a month, which in the 12 years since I've been blogging has only happened one other time. When Max was born. Pretty good reason I would say. And while this break didn't come with a new baby, the reason is still pretty darn great- our oldest Alex graduated from high school with academic honors! We couldn't be more proud of him and it definitely made May and the beginning of June a whirlwind of events and celebrations. 

Along with all the things that come with graduation, it was also the end of Max's first year of Kindergarten which comes with its own set of calendar filling occasions. Yes, that's right, this mommy had both a High School and Kindergarten Graduate. Not many parents get to say that! It has been a very special time and I just had to take a break from work.

But you can rest easy because the streak has been broken. We are now full swing into summer vacation, and while our busy schedule hasn't really slowed down any, I managed to carve out a day when I could cook something new, that we ended up LOVING, and now I can share with all of you. 

You know how much I love making meatballs in the Crock Pot and this version has probably moved to the top of our favorite list. Yes, probably because it is new but the amazing flavor didn't hurt either! 

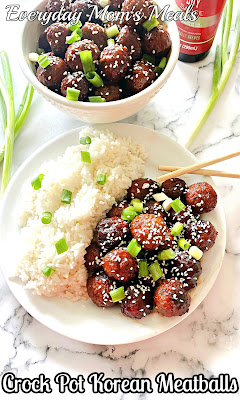
Crock Pot Korean Meatballs cook in just a few hours and can be a main dish like this or a great appetizer for your next summer party! Just set the slow cooker to warm after they are cooked, put out a bowl of toothpicks and let everyone serve themselves.

I put these alongside some white rice (my boys' favorite) and steamed broccoli. A simple meal for a hectic evening that looks like you put way more effort into that you actually did. 

Our house is still riding on cloud nine from all the celebrations we've had over the past month. Our sons make us proud every single day, but to see your oldest, whom you've spent 18 years dedicating your life to,  cross that stage, receive his diploma and know "I DID THAT" is a feeling I can't even begin to put into words. 

I thank you for your patience as things here have been slow and your support as we move onto this next chapter of parenting...

Crock Pot Korean Meatballs

Why use frozen meatballs?

Anyone who has been reading my posts lately know I have been raving about the quality of frozen meatballs. Coming in different varieties such as Italian, turkey, homestyle and flame broiled, they have great flavor at great prices. Store brands that we've tried taste just as good as the more expensive name brands too.

What is hoisin sauce?

Hoisin sauce is a thick, fragrant Asian sauce used mostly to glaze meats. It has a dark color and a very salty, slightly sweet, flavor. It has been described as "Asian barbecue sauce". It can be found in the Asian foods aisle next to the soy sauce.

Can I use low-sodium soy sauce?

Yes, of course. But let me say this: When I'm using soy sauce in a recipe, I always use the regular. I want that extra salty flavor. Then I put low-sodium on the table for serving.

How long do to cook frozen meatballs in the Crock Pot?

A good rule of thumb for frozen meatballs in the slow cooker is 2-4 hours on low and 1-2 on high. Hence why they make such a great last minute meal idea or party food.

 Best Tips 

Be sure to stir the meatballs a few times while cooking to redistribute the sauce.

Homestyle meatballs have a great neutral flavor. You don't want Italian for this recipe. Turkey meatballs could definitely be substituted. 

These would be delicious served with fried rice as well. Here is my recipe

If you like things spicy, add some crushed red pepper or sriracha to the sauce. 

If serving these as a party food, reduce heat to warm after they have cooked, and set out a bowl of toothpicks and/or a slotted spoon. Let guests serve themselves!

Crock Pot Korean Meatballs 

1 (28 oz.) bag frozen homestyle meatballs

1 TBS brown sugar

2 TBS honey

2 TBS soy sauce

1/2 cup hoisin sauce

1 tsp. garlic powder

1/2 TBS rice wine vinegar

3-4 green onions, chopped

Sesame seeds

Place meatballs in Crock Pot. In a medium bowl stir together hoisin sauce, soy sauce, honey, vinegar, brown sugar and garlic powder.  Pour over meatballs. Cook on LOW 2-4 hours, stirring a few times during cooking to coat meatballs in sauce. Stir well before serving and garnish with green onions and sesame seeds.

Crock Pot Korean Meatballs

Inspired by Tornadough Alli


More Meatball Recipes To Try Next

Crock Pot French Onion Meatballs

Crock Pot Teriyaki Meatballs 

Crock Pot Italian Meatballs 

Crock Pot Swedish Meatballs 

Crock Pot Hawaiian Meatballs

Slow Cooker Meatball Subs 

Meatball Pasta Bake 


Sunday, March 19, 2023

Thanks, Mrs. T

 We are huge pierogi fans in our house, and I am always looking for new ways to include them in our weekly meal plan. They are sort of a "new" thing for us, since I only started making them a couple years ago. They just weren't something I grew up with, and never thought to try. So, what changed you ask. 

Thanks to a foodie/blogging relationship with the great folks at Mrs. T's frozen pierogies, these little pillows of potato and cheese goodness are now a permanent part of our family's cuisine. 

Now, if you love to make homemade, or want to try, there are a thousand recipes out there for them and I fully support that approach. But for me, being able to grab a couple boxes out of the frozen food section, knowing I can have them on the table in almost no time, works for me. 

I use Mrs. T's for my Loaded Pierogi Skillet, which has quickly become a go-to 20 minute side dish for busy weeknights. And now I have a brand new recipe that we love just as much, thanks to inspiration from my friends at Mrs. T's. 

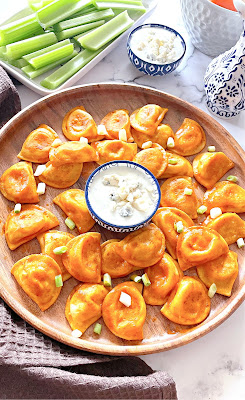
Combining their mini four-cheese medley pierogies with a buttery buffalo sauce is a GENIUS idea for a tasty appetizer for your next party, snacking while watching March Madness this week, or a side dish with a little kick perfect any night of the week. All the flavors of buffalo wings, but in a yummy dumpling.

I am so thankful we discovered pierogies, even if we were a little late to the party; and even more grateful for the opportunities to team up with a fantastic company any chance I get!

Buffalo Mini Pierogies


What Are Pierogies

Put simply, pierogies are filled dumplings. They can be savory or sweet, but the most popular fillings are potato, cheese, onions and cabbage.

Where Can I Buy Mrs. T's Frozen Pierogies

If you've never seen them before, Mrs. T's can be found in the frozen food section of your grocery store, usually close to the frozen pastas. 

What Kind Of Hot Sauce To Use

For this recipe I used a basic cayenne hot sauce, similar to Frank's Red Hot. But feel free to use any flavor or brand you like. 

Can I Make Pierogies In The Air Fryer 

YES! For this recipe, follow the directions but instead of baking in the oven, place the pierogies in the air fryer basket and cook at 400 for 12-14 minutes, flipping halfway through.

Buffalo Mini Pierogies

 Best Tips

Melt butter over low heat to avoid scorching.

No need to thaw pierogies.

Don't forget to turn halfway through cooking so they don't burn.

Save any leftover buffalo sauce mixture to baste on the pierogies when they come out of the oven.

Serve with blue cheese, ranch or your favorite dipping sauce.

If serving as an appetizer, include toothpicks or skewers so people can help themselves.


Buffalo Mini Pierogies

1 box mini 4-cheese medley pierogies

4 TBS butter, melted

1/2 cup hot sauce

1/2 tsp chili powder

Green onions, chopped, for garnish

Blue cheese dressing and crumbles, for serving

Carrots and celery, for serving

Preheat oven to 400. In a large skillet, melt butter over low heat. Add hot sauce and chili powder. Stir well. Toss with frozen pierogies. Transfer to a large baking sheet coated in nonstick spray. Bake for 16-18 minutes until browned, turning halfway through. When cooked, baste pierogies with extra sauce. Sprinkle with green onions. Serve with blue cheese and veggies. 

Buffalo Mini Pierogies

More Easy Side Dish Recipes

Souper Rice

Cafeteria Noodles

Sheet Pan Macaroni and Cheese 

Easy Corn Casserole 

Garlic Parmesan Roasted Potatoes 

Red Potato Salad 

Broccoli Grape Salad


Shared at Weekend Potluck


Wednesday, May 18, 2022

Summer Time App Or Light Supper

 Summer is quickly approaching and I am 100% here for it. Anyone that knows me knows not only is summer my favorite season, but I like it HOT! The hotter the better. Some who know me very well find this odd because I am what my grandma called a "hotbox". Yes, I'm the girl running around in flip flops in winter and running the AC year round. So why would someone who is always on the verge of spontaneous combustion like the heat and humidity of the next few months? 

Easy. As my husband says "You don't have to shovel sunshine!" I can always find relief inside with some chilly AC, or even better in the cool waters of a pool! If I had it my way every day of summer would be sunny and 85+. 

One thing I do find myself saying a lot during the dog days of summer is "It's too hot to cook." Now, 9 times out of 10, I end up cooking anyway, or I've already looked at the forecast when meal planning (yes, that is how OCD I am....I check the weather before I plan meals for the upcoming week.) and planned on a light meal in anticipation.

Some of the things we love on those nights when the thermometer still reads 90 at supper time are pasta salads, tuna salad sandwiches,  and big salads topped with grilled chicken or shrimp

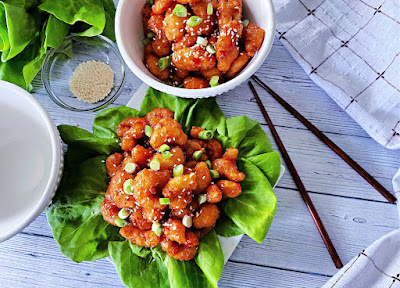
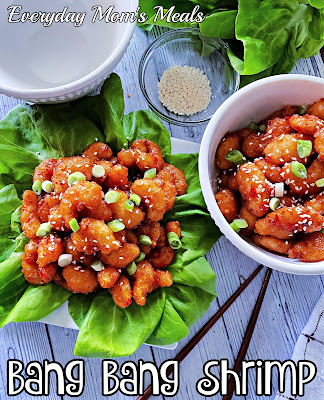
I also love taking dishes we usually eat as an appetizer and making them into a main dish. This Bang Bang Shrimp is a perfect example. The amount this recipe makes is great for a cookout app, but if I take the same amount, add a pasta salad and fresh summer time fruit (hello, watermelon) on the side, it's a light meal perfect for a scorcher of an evening.

Now, this quick version of the favorite appetizer does take a little help from the store with some frozen popcorn shrimp, so you will have to turn the oven on. But it's not for long, and if you happen to have an air fryer, you could always cook the shrimp in that instead! 

I can't wait for those nights when it comes time for supper and I'm hot from being outside in the sun all day. Or better yet, tired from a fun day at the pool. Summer is my time and I am ready to welcome it, and all of its tasty foods with open, tanned arms! 


Bang Bang Shrimp

1 (18-20 oz.) box frozen popcorn shrimp

1/4 cup sweet Thai chili sauce

2 TBS mayonnaise

1 1/2 TBS honey

1 TBS sriracha

Boston lettuce, for serving

Chopped green onions, for garnish

Sesame seeds, for garnish

Cook shrimp according to package directions. I add a few extra minutes to make sure the shrimp are nice and crispy. In a medium bowl whisk together chili sauce, mayo, honey and sriracha. When the shrimp are cooked, transfer to a large bowl. Pour dressing over and gently mix until well coated. Serve on lettuce leaves, garnished with green onions and sesame seeds. 


Shared at Weekend Potluck


Sunday, December 27, 2020

Happy (Almost) 2021

 How was your Christmas? I hope it was a day surrounded by those you love most in the world, with magic, joy and peace. (Even if some had to join virtually!)

We had a wonderful holiday, with celebrations over a couple days. According to the mound of presents under our tree Christmas morning, our boys were VERY good this year. (But Mommy could have told Santa that!) 

Now that my most favorite time of year is behind us, I tend to get a little depressed. I won't even lie. December 26th is my least favorite day of the year. But I do have something to look forward to! Our annual New Year's Eve Buffet! 

If you've been following me for a good amount of time, you know our tradition. Every NYE, I make a huge appetizer buffet filled with yummy things. We stay in, my parents come over, we eat, we watch movies, we play games, we eat, we stay up for the ball drop, we eat....you get the picture. 

So while many will be doing an "at home New Year's Eve" for the first time this year, we are experts and it's one of our most fun traditions!

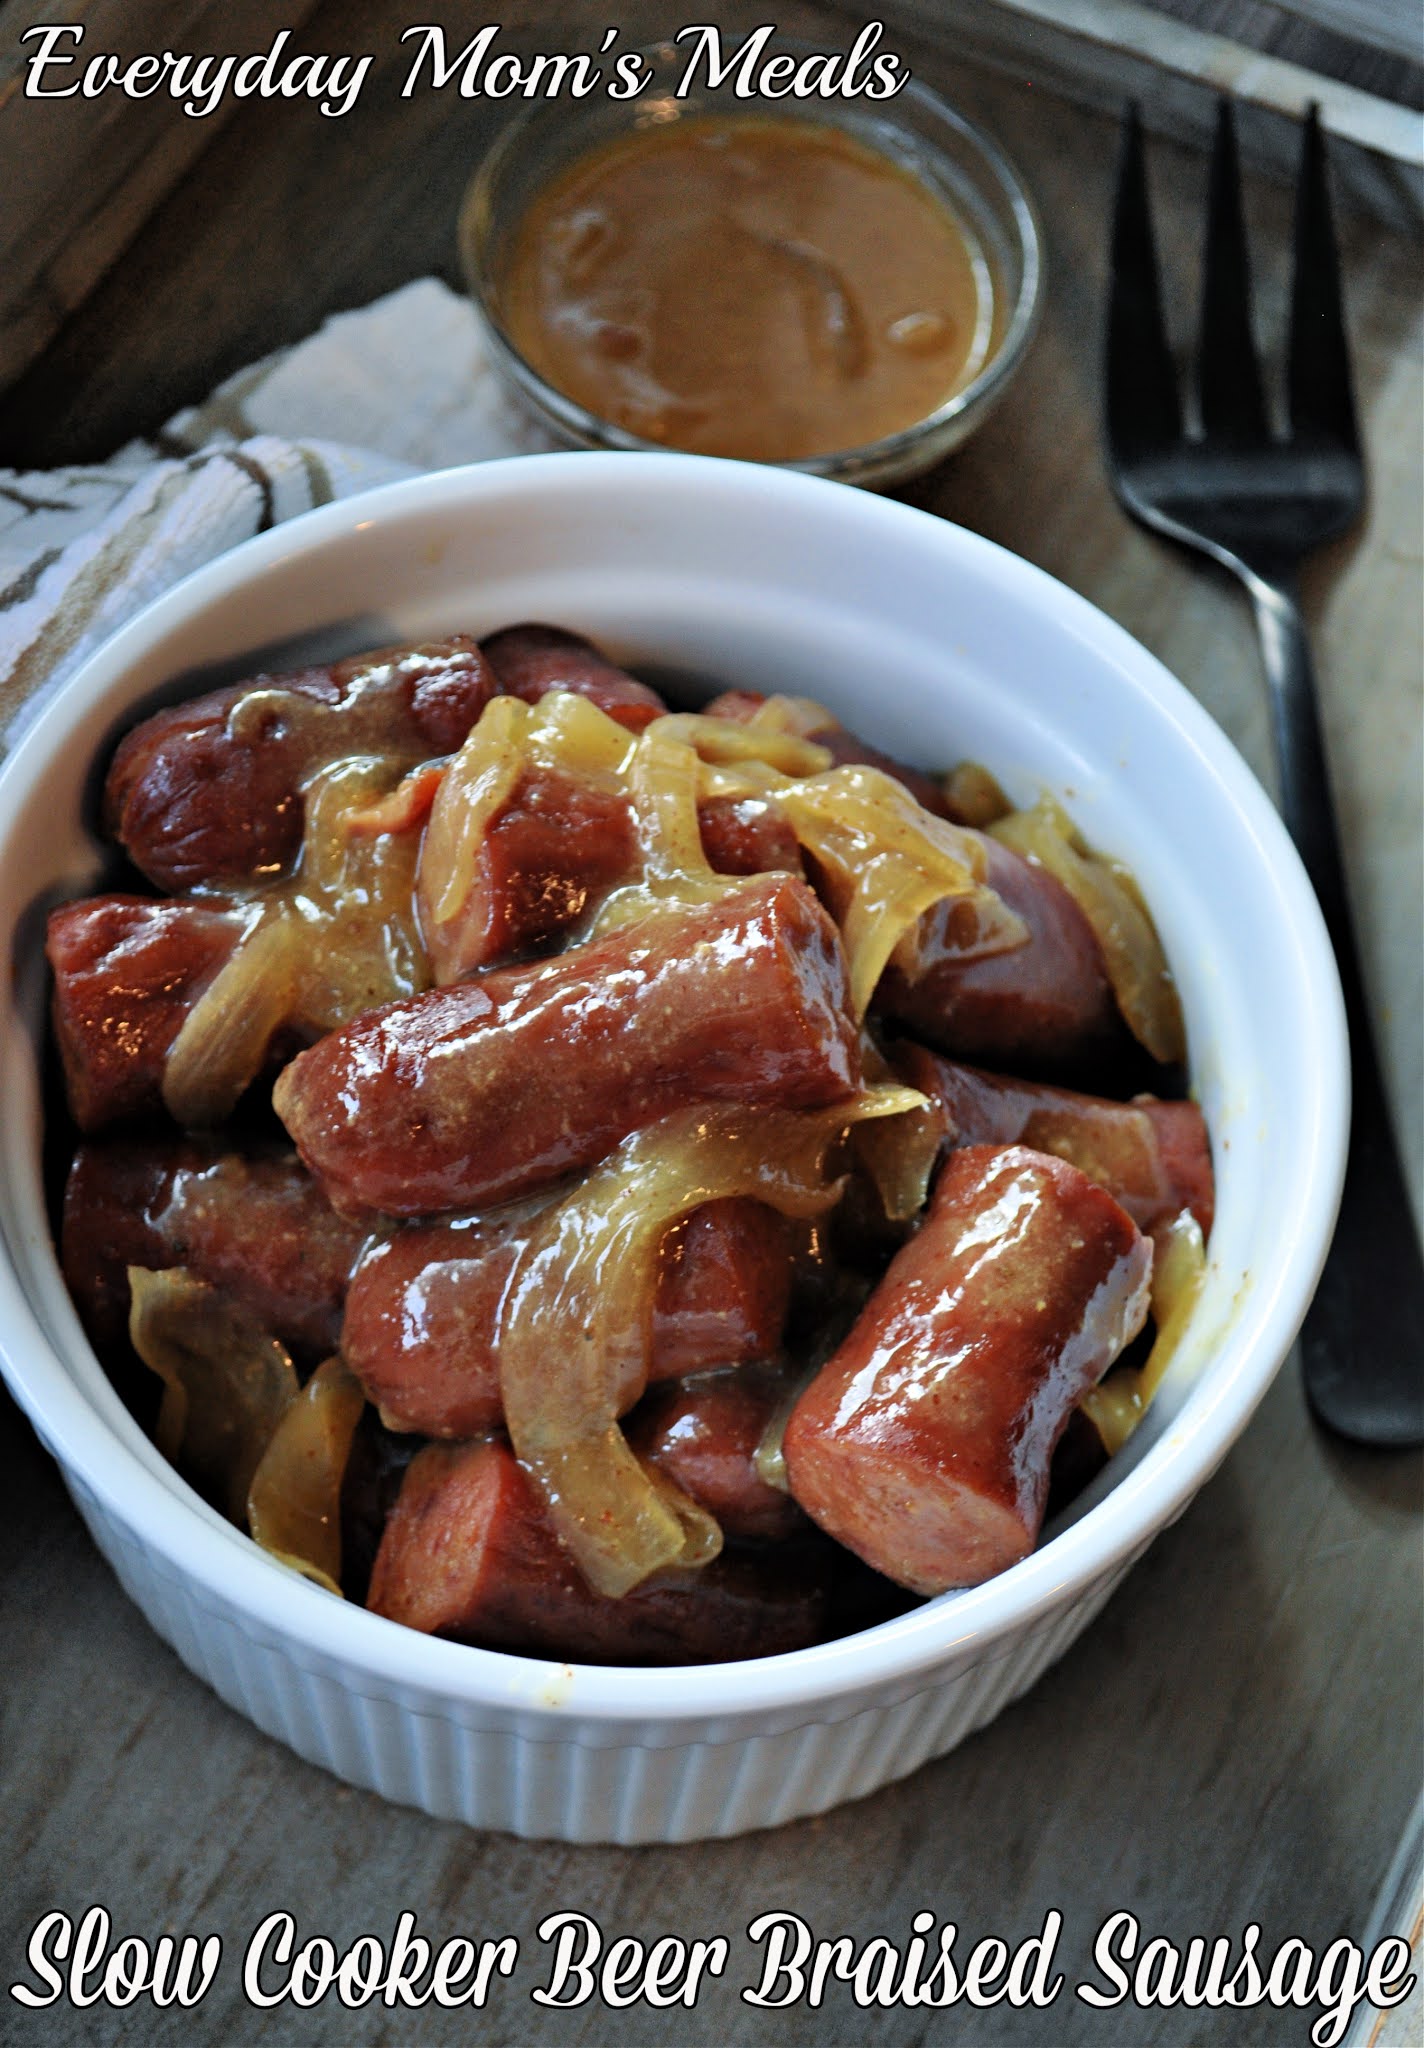
If you're planning some tasty food to welcome 2021, this slow cooker beer braised sausage could definitely be added to the menu! This is a versatile recipe that you can serve as an appetizer (just cut it into smaller pieces) or for a simple weeknight supper. It's delicious right out of the Crock Pot, but we also love putting it on some hoagie buns for a sandwich dripping in yum factor. 

I know many like to serve pork for good luck in the New Year, so this could be a fun twist on that tradition too! 

Without a doubt, 2020 will go down in history as one of the worst years ever, at least in most of our lifetimes. But I think there is a lot to be thankful for as we look back too. Sure, it might not always be the easiest to see, or focus on, but even in the darkest days this year, our family has been so incredibly lucky. So I am trying to focus on that as we say goodbye to another year, but am also ready to welcome 2021 with open arms. I wish you a happy, healthy and delicious New Year...only good things ahead!

 Slow Cooker Beer Braised Sausage

3 (9 oz.) packages smoked sausage

1 large white onion, thinly sliced

1/2 c. brown sugar

2/3 c. light beer

1/4 c. spicy brown mustard

1/4 c. apple cider vinegar

1 TBS water

2 tsp. cornstarch

Slice sausage into 1-2 inch pieces. Spray the slow cooker with nonstick spray. Lay sliced onions in bottom. Lay sausage on top of onions. In a medium bowl, whisk brown sugar, beer, mustard and vinegar. Pour over sausage. Cover and cook on LOW for 6 hours. About 15 minutes before serving, mix water and cornstarch. Add to slow cooker. Stir and cook on HIGH about 10 minutes until thickened. Serve as is or on hoagie buns with sauce drizzled over top.

 Shared at Weekend Potluck


Sunday, September 27, 2020

Welcome October(ish)

With posting new recipes on Mondays, the timing of something I want to say doesn't always line up perfectly with the calendar. Thus is the case this week. I wanted to welcome the new month with this simple, fun, autumn inspired snack...but October doesn't begin until Thursday. Oh well. I think you appreciate my effort. 

By now, you have seen quite a few snack mixes from me like my Sweet n Salty Snack Mix, Halloween Snack Mix, and Harvest Party Mix. I try to come up with a new one every fall, and my boys always look forward to my yearly creation.

I don't know what it is about autumn that makes me want to dig into a big bowl of salty, sweet goodness, but it never fails- the minute the temps drop a bit and pumpkins are on the porch, I find myself walking up and down the grocery store aisles waiting for inspiration.

 This year's is especially simple because there is no baking. No sauce. No cooking. You literally dump, stir and eat. It will last forever (okay, not really, but a long time) in an airtight container at room temp, so it's perfect to enjoy all season long. My boys love it for an afternoon snack, road trip treat or movie night! With Halloween just around the corner, you're going to need plenty of spooky movie snacks and this will satisfy both the popcorn and candy taste buds, all in one handful! 

Get the little ones in the kitchen and have them help make a big batch of this, get out side and enjoy some crisp, sunny days, visit a pumpkin patch or U pick apple orchard...soak up all October has to offer!


Scarecrow Crunch

2 (6 oz.) boxes butter toffee popcorn

2 c. buttered popcorn

1 (16 oz.) bag candy corn

1 (16 oz.) bag candy pumpkins

2 c. Cheerio cereal

1 (5 oz.) box Whopper candy

1 (4 oz.) box Reece's pieces candy

In a very large bowl combine all ingredients. Gently stir. Store in an airtight container at room temperature. Stir before each serving, as some of the smaller pieces will fall to the bottom.  


 Shared at Weekend Potluck

Shared at Meal Plan Monday

Sunday, August 9, 2020

Where Did Summer Go

For many of us, our kids have been home since March; and while I know many households struggled to juggle working from home, virtual learning, and extra time with the kids home 24/7, our house relished in the fact that we got Alex home for an extended period of time.

I can not put into words what a blessing it's been to have him home for almost 5 months. It was a gift I didn't know I needed, but one I am so grateful for. I didn't think the bond he shares with his baby brother could get any stronger, but over these past few months, oh it has. 

But now, it's the second week of August, and our world, that means back to school. And while yes, it's going to look very different this year, Alex's high school is only offering an in person option, and we support it. We feel confident in their ability to follow the protocols they have laid out, and do their best to keep this kids safe. We feel very fortunate to have him enrolled in a smaller, private high school where they can implement things and hopefully control the "new ways" in a way the kids and teachers will feel comfortable and everyone healthy. 

This is one teenager who is READY to go back to school too. He is looking forward to seeing his friends again, being in an actual classroom and something feeling somewhat normal. But we are going to miss him. Oh so much. 

This week just so happens to also be Max's 4th birthday. (For those of you who've been long time followers, you might recall, I went into labor on Alex's first day of 6th grade and Max was born the next day!) So we've got lots of celebrating to do, and then we will be sending Bubbie off to his sophomore year. 

Alex and I had quite a few mom/son lunch dates over the summer, and one of our favorite places to go is always Chili's. We love their food, and one of Alex's most requested items is their chips, salsa and queso. So, you can imagine the mom points I earned when I learned to make this cheesy goodness at home.

Oh, and I decided a slow cooker recipe would be even better because fall game days are coming fast, hopefully of course, and we love a great dip kept all day in the Crock Pot. 

For your next Mexican Night, Taco Tuesday or sitting around watching football Sunday, you will love this simple, delicious dip. 

I can't believe it's back to school time already. It is definitely bitter sweet this year. I pray it goes well, and they can stay in school. But I also know if the day comes he has to come back home, what a treat that would be too!

Crock Pot Copycat Chili's Queso
16 oz. Velveeta cheese, cubed
1 (15 oz.) can chili without beans
1 c. milk
1/2 tsp. dried cayenne pepper
3 tsp. chili powder
2 tsp. cumin
2 tsp. paprika
1 tsp. salt
Juice of 1 lime

Put all ingredients in Crock Pot. Cook on LOW 2 hours stirring occasionally. Keep on warm while serving. 


Sunday, May 10, 2020

Summer Time Cookout Season

I know, I know, many of us across the country are still social distancing, and not planning any get togethers for a while. However, I am the type that can plan a cookout when it is just the 4 of us; and we have been seeing grandparents again, after 8 weeks. Many don't feel comfortable visiting relatives yet, and I respect that. I think we all have to do what we are most comfortable with at this point. Things are starting to open back up, and with as much caution as possible, we can start to live a little again.

With Memorial Day just around the corner, it's time to start thinking about our first backyard barbecue of the summer! Even if it's just your family, with no extra guests, you can still make it as delicious as always and ring in the season on a yummy note!

I love a great dip! I will eat it with veggies, crackers, chips..heck, just pass a spoon! Seriously, I am a dip connoisseur from way back, and at any party, you will find me filling my plate multiple times. Add in the fact that I am a dill fanatic, and this is a dream come true!

I've been making this for years, most of the time on a whim because I always have the ingredients on hand! You can easily double or even triple it for a big crowd, but I enjoy the fact I can make a small batch when I'm craving it!

The weather might not feel like summer is on it's way, but I have faith. I am counting the minutes until these chilly temps are gone, the warm sun shines and the thermometer hits 80.

Summer cookout season is one of my favorite things in the world. Grilling, eating on the deck and enjoying great company, big or small is truly one of life's simple pleasures.

Dill Veggie Dip
1 c. sour cream
1 c. mayo
2 TBS dill weed
2 TBS dried minced onion
1 TBS dried parsley, extra for garnish
1 tsp. garlic powder
Salt and pepper to taste

In a medium bowl combine all ingredients and mix well. Chill several hours before serving. Serve with fresh veggies, chips, crackers, etc.  


Shared at Weekend Potluck

Shared at Meal Plan Monday

Sunday, September 22, 2019

Hello Fall

If you aren't paying attention, we have arrived at the first day of fall. Sure, some of us have had our autumn decor out since the calendar still said August (*cough cough*...I might resemble that remark) but it's official. Now our husbands can't make fun of our pumpkins and scarecrows anymore.

Autumn brings so many reasons to "party". Between bonfires, those last few warm evening cookouts, Halloween parties, Game Day...the list goes on and on! And if you don't have a reason to party, make one! There are days when we are outside raking or doing jobs around the house, and I have a big pot of chili or soup cooking, plus some snacks for motivation too! So you can't make it to the stadium to tailgate for your favorite team. Have a football day at home in your living room!

My point is a delicious party mix can be appreciated for so many reasons this time of year. This would be great for an after school snack, kids' Halloween party or classroom party (if home made is allowed).

We love Chex Mix, or more specifically Adam's late grandma's Chex Mix recipe. I make it a lot. It's the perfect salty snack. But this time I wanted something a little sweet, and of course autumn inspired.

Oh. My. Gosh. As Alex said, "This stuff is dangerous!" Talk about addicting! We couldn't stay out of it! Sweet, salty...mmmmm. We have a couple days trips planned for this fall, and I think I will make sure we have a bag of this for the car too!

Fall might not be my favorite season, but I do enjoy it and all the fun activities it brings. Add in some yummy snacks and it's a party any day of the week!

Harvest Party Mix
1 (12 oz.) box rice cereal, like Chex
4 c. pretzel twists
1 (7 oz.) bag original Bugles
2 ( 4 oz.) boxes Reece's pieces
2 ( 9 oz.) bags autumn candy mix
3/4 c. margarine, melted
3/4 c. brown sugar, packed
2 TBS vanilla extract

Preheat oven to 275. In a medium bowl whisk together margarine, brown sugar and vanilla until combined. In a very large bowl combine cereal, pretzels and Bugles. Pour sauce over mix. Stir gently, but well. Spread evenly on a baking sheet* and bake for 45 minutes, stirring every 15 until crisp and brown. Remove and allow to cool. Add candy and stir well. Store in airtight container.  
*NOTE* You will either need to do this in batches, or use 2 cookie sheets at a time. 


Inspired by One Little Project

Sunday, September 8, 2019

Lunch or Game Day

I won't lie. This recipe was supposed to up on the blog weeks ago as an idea for a hot summer night when the thermometer still read 90 at 6pm and you needed something light and refreshing. Well...obviously that didn't happen. Oops.

So when I found the post sitting there in the draft folder, staring back at me, mocking me, knowing my OCD would kick into overdrive and I would be kicking myself for the mistake, I had to adapt.

Honestly, we eat this stuff year round. A couple years ago, I made it for our annual New Year's Eve buffet! Therefore, it wasn't that hard for me to find a way to share it with all of you now that fall is in the air.

This would be fantastic for Game Day! We are a football loving family and there are times we will be watching the game at home, just the 4 of us, and I still put out a party spread. It's fun to eat all day and cheer on our favorite teams. And it would be just as tasty in the parking lot while yo tailgate with your friends! It would easily travel in a cooler.

But if football isn't your thing, make a big batch on the weekend and have something yummy for lunch all week long.

Or if neither of those "trip your trigger" (As grandma used to say!) it would be terrific for any fall party as well! Get the friends around the bonfire and give them something to snack on while the hot dogs roast or the chili stays warm in the Crock Pot.

Delicious food can be enjoyed any time of year, any season you want! Don't box yourself if and think if you like it in July you can't enjoy it in September too!

Seafood Salad
1 lb. imitation crab, chopped
1 c. frozen cooked extra small shrimp, thawed
2 celery ribs, diced
1/2 c. mayonnaise
1 tsp. Chesapeake seasoning
1/2 tsp. dill weed
1 TBS lemon juice
Salt and Pepper

Combine shrimp and crab in a large bowl. In a small bowl whisk together remaining ingredients. Pour over seafood. Stir gently to combine. Chill until ready to serve, at least an hour. Serve with crackers.


Sunday, July 14, 2019

All That & A Bag Of Chips

Many years ago, my husband had what he proclaimed to be the BEST potato chip of his life. Now, I have actually heard him say this about a couple kinds, but that's okay. In that moment, in his excitement, that's how he felt.

One of those brands/flavors he can still readily find. In fact, I ordered him a case for our 16th anniversary this year. Nothing says love like a spicy potato chip! But the other, the one I started this story with? We haven't been able to find it for years. At least not in our area. And that makes him sad. To the point that he talks about it quite a bit.

What is this magical chip you ask? It was a Steak & Worcestershire flavor, and for him it was love at first bite. For years, it has been the one he mentions any time we try a new one. The one he longs for. So, how many wife points do you think I scored when I found a way to recreate that for him, kind of?

The minute I saw a new dip by buddy Mandy over at South Your Mouth debuted, I knew I could take that idea, build on it, and recreate those flavors for him!

I couldn't wait to make it for him; and it didn't disappoint. He said it is "spot on" and could not stop eating. Woo hoo!

Need another snack for around the pool? A big bowl of this and a couple bag of chips. Done! I bet it would be super tasty with a big veggie platter too!

Making things for my boys they love gives me so much joy. But nailing something he loved and has been missing? That's just the icing on the cake, or the dip on the chip in this case!

Steak & Worcestershire Dip
16 oz. sour cream
2 1/2 TBS steak seasoning (like Montreal)
1/2 tsp. garlic powder
1/2 tsp. onion powder
1 TBS Worcestershire sauce
1 tsp. dried parsley

Mix all ingredients in a medium bowl. Chill a few hours before serving. Serve with chips, veggies, crackers, etc.


Sunday, June 2, 2019

Tweaked and Tweaked Again


I first debuted this terrific salsa on the blog about 5 or 6 years ago. Since then, it's become a staple in our house and requested by countless family members for parties.

When you make something literally hundreds of times, sometimes a funny thing happens. You end up tweaking it, making it even more your own, and one day you realize you aren't following the original recipe you began with. Sure, the base it still there, and the concept is the same, but it's now one you have memorized and the exact formula that makes it perfect every time.

This comes with a few warnings. One, if it's sitting in your fridge, nobody will be able to stay out of it. Two, if you take it to a party, be sure to take the recipe too. Everyone will want it. Three, make sure you only make it for people you really, really like because they will keep coming around for more!

From Mexican night to snacking around the pool all summer, this will be your go-to. From start to finish, you have about 10 minutes in the whole thing, making it perfect for those impromptu guests too!

Restaurant Style Salsa
1 (28 oz.) can whole tomatoes
2 (10 oz.) cans diced tomatoes with green chilies (like Rotel)
1 medium yellow onion, chopped
1 garlic clove
1 bunch cilantro, stems removed
1/4 tsp. sugar
Juice of a lemon
Salt to taste

Combine all ingredients in food processor and pulse until fine. (This might require batches) Check for salt and season again if necessary. Transfer to a large bowl and chill. Allow to come to room temperature before serving.


Shared at Weekend Potluck

Sunday, May 19, 2019

Give Them Bread

If you are planning a summer cookout, any time over the next few months, you will want to keep the ingredients for this on stand by!

We are bread loving people. We are the ones at a restaurant that are usually half full by the time the entree' comes because we've snacked on so much bread. And if I can find something to put on that bread that makes it even yummier, that's the icing on the cake so to speak.

When I'm entertaining, I try to find ways to have dishes made ahead of time that I can put out and let my guests serve themselves. Appetizers are of course the best way to do this; and keep people from starving before the big meal is ready. Happy guests mean a happy host!

Honestly though, the day I made this it was raining, and we weren't even thinking about grilling. I served it as a side to a pasta supper...and it was perfect that way too. So, you're really getting a double duty recipe!

Summer time is when we want to have people over, spend hours outside in the sun, catching up, having fun, and of course eating some great dishes to share!

Olive Caper Spread
1 (5 oz) jar green olives, drained
1 (3 oz.) jar capers, drained
2 tsp. lemon juice
1 large garlic clove, peeled
Salt and Pepper to taste

Put all ingredients in food processor. Pulse until fine. Chill. Serve with baguette, crackers, pita chips, etc. 


Shared at Weekend Potluck

Sunday, December 16, 2018

Almost 2019


It is truly mind boggling to me to think that another year has come and gone. We are almost to the end of 2018, and in a couple weeks we will be ringing in the start to another new year. I seriously don't know where the time goes.

With the hustle and bustle of the holiday season, you might not want to think about another party or get together, but tis the season!

Are you hosting a Christmas or New Year's Eve party? Are you searching for something easy and yummy to add to your menu? Then you've come to the right place.

As many of you know, every year on December 31st, we stay in, where it's warm and safe with our boys. I put out a huge buffet of appetizers, or "nibbly bits" as Alex used to call them, and we eat all night long. Some years it's just us, and others my parents stop by. Either way, there is enough food to feed our neighborhood (and probably yours too!) and we enjoy every single bite.

We have our favorites I am always sure to include on the menu, and then I try to add a couple new things too. But, in order to make sure that works, I have to recipe test early. I actually made this for the first time back in October, and the boys told me it had to be added to our NYE extravaganza!

This can be whipped up in almost no time, so if you have the ingredients on hand, it can become a life saver. Serve it up with some chips, crackers, or even some frozen taquitos! The dipping possibilities are endless.

I hope your holiday season is in full swing, and filling up with love, magic, friends, family and delicious food too!

Baked Chili Cheese Dip
1 (15 oz.) can chili with beans
8 oz. cream cheese, room temp
2 c. shredded extra sharp cheddar cheese, divided use
1/2 tsp. garlic salt
1/4 tsp. chili powder
1/4 tsp. cumin
Dried Chives

Preheat oven to 375. Grease a 9 inch pie plate. In a large skillet heat chili over medium heat. Break cream cheese into pieces and add to chili. Stir until combined and melted. Add 1 cup shredded cheese and stir until melted. Add garlic salt, chili powder and cumin. Stir and cook for flavors to combine, about 3 minutes. Transfer to pie plate. Spread evenly. Sprinkle with remaining shredded cheese. Bake for 15-20 minutes until bubbly and heated through. Garnish with chives.


Inspired by South Your Mouth

Sunday, December 9, 2018

Holiday Appeitzers


If you think about it, I don't know if any other time of the year requires as many appetizer recipes as RIGHT NOW! From Thanksgiving to New Years, we have so many reasons to need a great appetizer menu, or the chance to enjoy someone else's!

If you've been following me for any amount of time, you know our New Year's Eve tradition is to stay home, in comfy clothes, safe, warm and eat all. night. long. I put out a huge spread of "nibbly bits" as Alex used to call them and we feast. It is literally one of my favorite holiday traditions, and we set the menu for this year's festivities over a month ago.

I actually made these for the first time last year, but must have had a little too much sparkling grape juice (I know...I'm such a rebel) because I totally forget to snap a pic and blog them! So this year I made them early (actually before Halloween) so I was sure to share them with all of you in time.

This is one of those recipes that can pull double duty. See, you can fill your Crock Pot with them for a party, set out a slotted spoon and watch them disappear. Easy as can be. But they also make a terrific simple weeknight supper! Just cook some white rice on the side, serve them over the top and you have a fantastic meal! The sticky, sweet sauce mixes with the rice and makes something magical!

If you're looking for a new appetizer for your next holiday party I hope these make the cut! I promise you won't regret it!

Crock Pot Hawaiian Meatballs
1 (32 oz.) bag frozen home style meatballs
1 (18 oz.) bottle barbecue sauce
1 (21 oz.) can pineapple chunks, with juice
1/2 c. brown sugar, packed

Spray Crock Pot with nonstick spray. Place meatballs inside. In a medium bowl combine barbecue sauce, pineapple and brown sugar. Stir well. Pour over meatballs. Cook on HIGH 2-3 hours. Serve as an appetizer or over rice for a meal. 


Shared at Weekend Potluck

Sunday, October 14, 2018

Tailgate at Home

It is football season! And while nobody plays in our house, we are avid fans! Between watching the games on tv, following stats online (that would be the teenager), cheering for our favorite teams, and yes even yelling at the refs, we are definitely a football family.

Here is a little secret though. We don't share the love of any one team. There is some overlap though. Let's see, Mr. E and I are avid Steelers fan. Alex is Seahawks all the way. My love for Notre Dame is DEEP, and I've passed that onto Alex, but his dad is Purdue all the way. And Max, well, we still have time to brain wash him!

Let me tell you about that Notre Dame love though. See, as a kid all I wanted to do was go to Notre Dame and march in their band. It was my DREAM. To have a degree with that gold emblem and to play my flute in the greatest half time show ever. I had the grades in high school. In fact, I got accepted my junior year! But, another local university offered me a full ride, and I'm not going to turn down free money. But I will tell you what, I still have that acceptance letter, as a reminder that all my hard work paid off.

Fast forward to after Adam and I were married, and I finally got to attend my first home Notre Dame football game. I got to walk the campus, see the band practice, visit the bookstore, be inside the stadium, see "Touchdown Jesus", watch as they ran onto the field, and yes enjoy that half time show I had dreamed about. I' won't lie. I spent most of that day crying. Seriously, ND campus and the entire experience is one of the most beautiful things I've ever seen.

And those football Saturdays in South Bend all include on thing. Tailgating. Those fellow ND fanatics take their pre-game food very seriously!

It has been years since we've been to a game, but we can still have some tailgating fun, right in our own living room. Just minus the tailgate!

To me, a party or gathering has to have a great veggie tray. I know everyone always teases me, but I love fresh, crunchy veggies in a creamy, cool flavorful dip. Plus all the other stuff too! Oh, and this is super tasty on chips, pretzels, and crackers too!

This has been my go-to dip for years now. Every time I make it, I get rave reviews, and requests for the recipe. With only 5 ingredients, and a lot of help from the store, it can be your new favorite too! 


Irresistible Veggie Dip
16 oz. sour cream
16 oz. French onion dip
1 envelope Ranch Dressing Mix
1 envelope Knorr Vegetable Mix
1 TBS Dried Parsley, extra for garnish

In a medium bowl combine all ingredients. Chill a few hours or overnight before serving. Stir well. Garnish with parsley. Serve with veggies, chips, crackers, etc. 


Shared at Weekend Potluck

Thursday, April 5, 2018

Upping Your Frozen Food Game

I am so blessed to have so many connections because of what I do here. One of my favorite communities I've been working with lately is MyMagazine Sharing Network through the Kroger family of stores. 

I receive free samples or coupons for free items and get to try them and let the powers that be know what I think of them. Plus, share my thoughts on social media too! 

My latest campaign came at a perfect time. They sent me coupons for various items from the frozen food section of my local Kroger store, and asked I try to elevate one or more of them to something new. 

Mission accomplished! I knew exactly which one I was going to play around with first too. The oldest was home for Spring Break and it was time to come up with a fun, tasty lunch for him using Farm Rich Mozzarella Cheese Sticks.


I looked in the pantry to see what I had on hand, and about 30 minutes later I had a dish he loved and I knew would be a big hit with your kids too! Rather it be lunch, after school snack or a kids' party these will be the star! I can just see a bunch of littles around the pool, soaking up the sun, scarfing these down!

Oh, and if you wonder why there is no sauce on this pizza? I was afraid it would make it too wet, but some on the side to dip might be good. I just didn't have any on hand! 

If you want to learn more about MyMagazine Sharing Network, click here & maybe you can start to receive yummy free samples too!

Cheese Stick Pizza 
15 frozen mozzarella sticks*
Sliced Pepperoni
3/4 cup shredded mozzarella cheese
Sliced Black Olives
Canned Mushrooms
Dried Oregano

Cook cheese sticks according to package directions. When finished, allow to cool for just a couple minutes. Reduce oven temp to 350. Transfer to a 9 inch pie plate. Top with cheese, pepperoni, olives and mushrooms.  Bake for 5-7 minutes until cheese is melted. Sprinkle with oregano. *NOTES* 15 cheese sticks fit in my pie plate perfectly, be sure to check yours. Some marinara on the side for dipping would be fun too, I just didn't have any on hand. 


Disclaimer: I received a free sample I used in this recipe. The blog post and recipe were all my ideas.

Tuesday, September 5, 2017

Fall Football and Bonfires


Well, there is no denying it. Summer is O.V.E.R.

Okay, so I might be a little melodramatic. I can't help it. As soon as Labor Day comes and goes I feel like it's all downhill from here...at least in the weather department. Sure, we still have some warm, sunny days ahead of us, but soon the leaves will be turning...the chill will return...the rain will come...and then after autumn is over...I can't even bring myself to say it.

I do enjoy fall. I love the pretty colors, the delicious food and all the fun things that return. Fall festivals, pumpkin patches, late night bonfires, and of course football! We are a pigskin loving family, and proud of it! Heck, even the baby is obsessed!


Even if you aren't a huge football fan, most everyone can get behind the food that comes with the game. From tailgating in the parking lot, to gathering around the tv at home, the big game usually comes with something yummy to eat!

Or maybe you like to throw a lot of fall parties. Sitting outside on a warm day, then around the fire once the sun goes down. Those usually come with some delicious treats too.

Either way, I have got something your family, friends, guests, whoever, will love. A little Mexican bite that is perfect in every way.

Oh and if you make a double batch, add some chips and salsa and maybe rice on the side, you could even serve these as a quick, easy weeknight meal!

I know many of you are excited to see the hot days end and autumn return. But I will be over in the corner crying, clutching  my pool toys, sunscreen and shorts.

Green Chile Pinwheels
4 oz. cream cheese, softened
1 (4 oz.) can diced green chilies
1 cup shredded Colby Jack cheese
1 (2.2 oz) can chopped black olives
5 8-inch flour tortillas

In a medium bowl combine cream cheese, chilies, olives, and shredded cheese. Stir well to combine. Spread evenly over tortillas. Roll Up. With seam down, wrap in plastic wrap or aluminum foil. Chill at least 2 hours. Remove wrap. Trim off jagged edges. Cut into individual pieces. Serve with your favorite salsa for dipping.


Friday, September 30, 2016

Game Day Food

If you've been logging onto the blog lately, you know new recipes are few and far between right now. I can't help it. Max is keeping me pretty busy, and just getting supper on the table is sometimes a chore, let alone making something new, and then having the camera handy to snap a photo.

I mean, how can you worry about food photo lighting when you've got this face looking at you?


But there was a night last week that Max was napping, and knew it was time to try a recipe a friend had given me back during the summer that I hadn't had the chance to make yet.

She had shared it thinking it would be a perfect idea for summer time cookouts or barbecues, but obviously the time has passed for those. That's okay though, because I don't think anything goes with football better than a great dip. This would be perfect on Game Day! Rather you've got a big crowd coming over to watch, or it's just your family. Maybe you are tailgaters, that's even better. It doesn't matter where you serve it, as long as you've got plenty of chips for dipping!

As we get more of a schedule, I hope to get back to posting new recipes on a more regular basis, but if you follow me on Facebook, I am always sharing photos of Max (and his Big Brudder Alex too) and old recipes too. I haven't disappeared. I promise. In the meantime, enjoy this dip and think of me!

Warm Corn and Bacon Dip
2 (15 oz.) cans NO salt added corn, drained
6 slices bacon, cooked crisp
4 oz. cream cheese, softened
1/4 c. sour cream
2 c. finely shredded sharp cheddar cheese
2 TBS dried chives, extra for garnish
Salt and Pepper to taste

Preheat oven to 350. In a large bowl combine corn, bacon, cheeses and sour cream. Gently stir until well combined. Add salt, pepper and chives. Stir again. Transfer to a baking dish. Bake for 30 minutes until cheese is bubbly and golden on top. Garnish with extra chives. Serve warm with tortilla chips. 


Wednesday, December 30, 2015

Our New Year's Eve Tradition

If you've been reading EMM for any length of time now, you are well aware of how the Marshall family likes to ring in the New Year every December 31st. For those of you who have joined our little blogging family since last NYE, let me explain.

Ever since Little E was about 6, our annual tradition is to stay home, inside where it is warm, and safe off the roads, wear our pjs, watch movies, and eat ALL night long. I put out a huge buffet of appetizers (or nibbly bits as the boy calls them) and we make an entire meal out of them, for hours. And when I say huge, I'm talking enough to feed an entire house full of party guests, but just for the 3 of us. It's become such a special little tradition for us, and we look forward to it so much. It's a terrific way to finish out the holiday season.

So every year I try to come up with at least one new dish to add to the menu, and start testing them out in about mid November. This is the new addition for 2015.

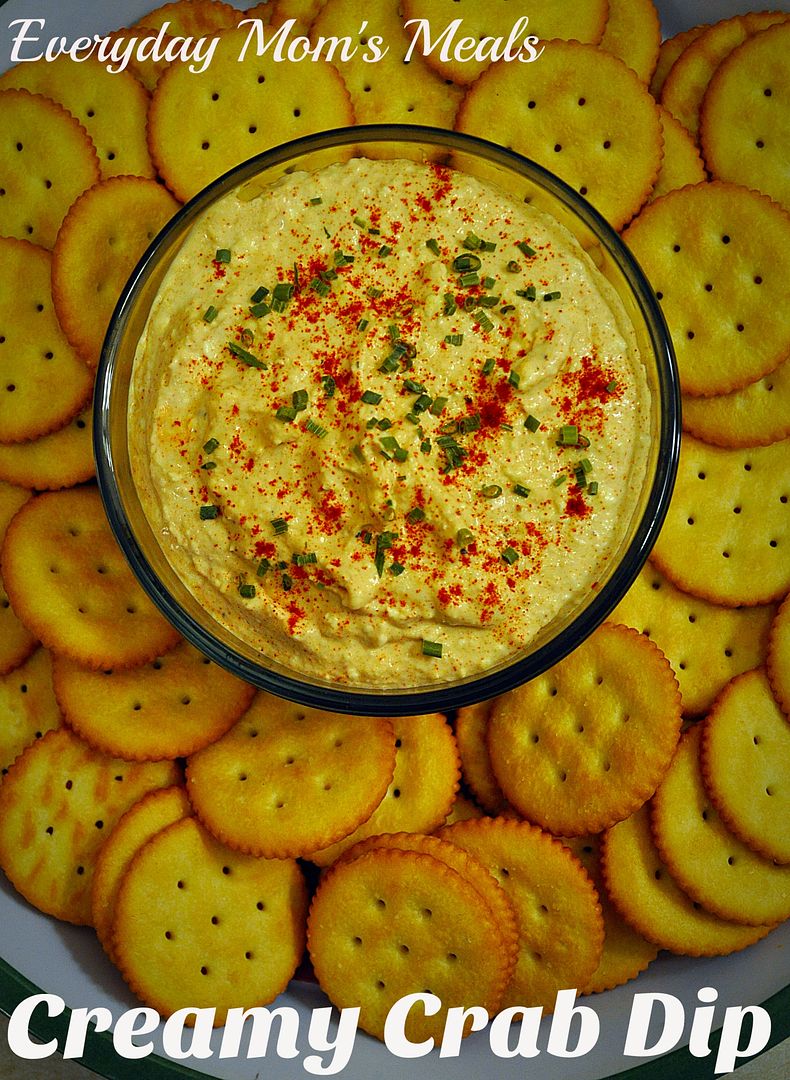
No party is complete without a tasty dip, and this one combines that notion with another favorite of ours, crab! Perfect for a platter of crackers or even some pita chips! Plus you can make it ahead of time and keep it in the fridge until party time.

However you are welcoming in 2016, I hope it's in a fun, safe and of course yummy way! May the New Year bring you all the happiness and joy you can hope for!

Creamy Crab Dip
1 (6 oz.) can crab meat, drained and cartilage removed
8 oz. cream cheese, room temperature
2 TBS mayo
1 tsp. Dijon mustard
1 tsp. lemon pepper seasoning
1/4 tsp. garlic powder
2 tsp. paprika, extra for garnish
1-3 tsp. horseradish, to taste
Salt and pepper, to taste
Dried chives, for garnish

In a medium bowl combine cream cheese, crab, mayo, mustard, lemon pepper seasoning, garlic powder, salt and pepper. Beat with electric mixer on LOW for 1-2 minutes, just until combined. Stir in horseradish. Chill for 1-2 hours. Add paprika and stir to combine. When ready to serve, sprinkle with extra paprika & chives. Serve with crackers or veggies.