Everyday Mom's Meals: Lime
_____
Showing posts with label Lime. Show all posts

Sunday, May 16, 2021

A 18 Year Tropical Twist

 How did we get to the middle of May already? I'm not complaining, but it just proves the point that warm weather days and months go by ten times faster than their cold counterparts. Seriously! We are going to blink and it will be July 4th. But before we bust out the fireworks, we've still got Memorial Day to plan for! 

Memorial Day weekend is the gateway to summer. Especially this year since the holiday is literally the last day of the month. Are you planning a cookout or backyard barbecue to celebrate? Many of us are gathering once again, but even if it's just your household or pod, fire up the grill and make your kickoff to summer menu delicious! 

Coleslaw is such an American classic for summer time parties, picnics, and gatherings. From graduation parties to burgers on the grill and picnic baskets over flowing, coleslaw is definitely a go-to dish. But this version? It's going to put a little tropical twist on this warm weather staple. 

Plus, it gives me a reason to gush about my hubby for a minute. See, he loves mangoes and we happen to be celebrating our 18th wedding anniversary on May 17th. However, 18 years is only the marriage part. We've actually been together for 24 years; and feel very blessed to be celebrating another year. I have loved him from the time I was a 16 year old girl, and I am so proud of the time we have built. He's given me two amazing boys and our family is not only my biggest blessings, but also what I am most proud of. 

So when I saw this recipe in Food Network Magazine I knew it would score me major wife points. A creamy coleslaw with bites of mango was right up his alley. The dressing has sweet and sour notes in it with coconut milk and lime. And he loved the added crunch from the peanuts too. It really is a unique version that screams summer time and lets you take a little tropical beach vacation without leaving your backyard. 

If you are looking for new dish for your Memorial Day bash, be sure to save this one! If you take it with you to share, carry the recipe too because everyone is going to want it!

 Mango Coleslaw

1 (14 oz.) bag coleslaw mix

3/4 c. canned coconut milk

Juice of 3 limes

1 mango, peeled and diced

3/4 c. roasted salted peanuts

Salt and Pepper 

In a small bowl whisk together coconut milk, lime juice, salt and pepper. In a large bowl pour dressing over coleslaw mix. Mix well. Add mango and peanuts. Stir again. Chill until serving. Garnish with a few extra peanuts before serving.  


Shared at Weekend Potluck


Sunday, August 18, 2019

Only 177 Days to Go


Whew. We did it. We survived the first week of school. HIGH SCHOOL! Okay, so it wasn't a full week, but hey, it still counts! And yes, that countdown above is how mommy is coping! I know exactly how many days until Labor Day, Fall Break, Thanksgiving, Christmas, Spring Break...you get the picture. I miss my boy!

But when the weekends roll around, it's still summer in our house! I'm still going to plan outdoor fun, and soak up every last bit of the warm, sunny days because this is Indiana and the minute the calendar says September, you never know what's going to happen!

There are still plenty of cookouts to have, and you're going to want to take this to your next one! Sure, it makes a terrific no bake, simple dessert, but in this family, it's a side dish. Let me explain. When I was growing up, my Grammy always had at least one "fluff salad" dish at holidays or big gatherings. Why was something so sweet called a salad? Two reasons. 1. Most of the time they contained fruit. 2. If she called it salad, we could eat it with the meal, and still have pie when we were done. It's all about optics!

In that spirit, I almost always serve my fluff dishes as a side dish, including this one. All the flavors of a favorite summer time beverage rolled into a delicious, gorgeous sweet treat that will be a huge hit, no matter how you serve it!

Cherry Limeade Fluff
15 large marshmallows
8 oz. cream cheese, softened
1 lime, juiced
16 oz. jar maraschino cherries, halved
1 small box cherry Jello
1 (29 oz.) can mandarin oranges, drained
8 oz. tub Cool Whip
 1 1/2 c. Cherry 7-Up

In a saucepan over medium heat, combine soda and marshmallows. Stir until marshmallows are melted and mixture is combined. Set aside. In a separate bowl, use an electric mixer to combine cream cheese, Jello and lime juice until smooth. Stir marshmallow mixture into cream cheese mixture until well combined. Gently fold in cherries and oranges. Cover and chill overnight. When ready to serve, add Cool Whip and stir well. 


Inspired by The Country Cook
Shared at Weekend Potluck

Thursday, August 30, 2018

Bye Bye Summer Sweet Treat

So, summer was a fun 15 minutes...or so it seems! Winter lasts 36 months, but you blink and summer is gone. But we've still got some warm days ahead of us, and there are Labor Day cookouts this weekend, so we still need some summer time food! 

Looking back over this summer, of course one of our favorites memories is our Florida vacation. Two weeks on our favorite beach, lazy days in the pool, watching our boys at Sea World, and of course eating amazing food. And one treat, we get every single year, and drool over the entire time we're eating it, is key lime pie.

Our favorite? Out of the Publix grocery store bakery. No joke! They are always perfect, and oh so yummy.

So when I wanted to bring back some of those memories, as we prepare to say goodbye to summer, I took a page out of the key lime book. Maybe not pie, but just as delish!

This would be a great take along to that lake party this weekend. Or if you're having a crowd over to barbecue in the backyard, you could easily whip up a couple of these in almost no time!

Key lime is such a summer time, tropical flavor, but I will be honest, I might have bought some extra pie filling, so there is a good chance we will be eating this as we watch the leaves fall or even worse...that stuff that comes next!

Key Lime Cobbler
2 (21 oz.) cans key lime pie filling
1 box white cake mix
1 stick butter, melted
Whipped Topping, if desired


Preheat oven to 350. Prepare a 9x13 baking dish with nonstick spray. Pour pie filling in dish and spread evenly. In a medium bowl combine DRY cake mix and butter. Mix with a fork until a crumbly dough forms. Using your fingers, sprinkle topping on pie filling evenly. Bake for 30-45 minutes until browned around edges. Serve warm, or transfer to wire rack to cool. We actually like this in the fridge.


Shared at Weekend Potluck
Shared at Meal Plan Monday

Sunday, April 29, 2018

A Spring Saturday at Home

Are Saturdays a day of relaxing in your house? Lucky you! At our house, they don't turn out that way very often. Saturdays are sometimes grocery day. Others we have plans with family. And most of the time, we have church in the evening, followed my dinner out. 

I'm not complaining. I love getting out and about on the weekends since I'm home a lot during the week. I feel blessed we have the option of a Saturday casual church service so Sunday mornings aren't rushed and hectic. But sometimes, once in a blue moon, we find ourselves with a Saturday with no plans, and that is a nice change of pace. 

This past weekend was one of those. We had taken a mini road trip on Friday, headed to Indianapolis and The Children's Museum (a post sharing our adventure will be coming soon) and didn't get home until after 9pm Friday night. (That's late for us!) We had a super fun day, soaking up family time. In preparation for this, I had gotten groceries on Thursday, and purposely made sure our Saturday was open on the calendar. I knew we would be tired from our big day, and I would need a day to catch up on all the chores I had left behind. 

So, Saturday rolled around, and yes, we were all a little tired, and very thankful we didn't have to be anywhere. I caught up on laundry, worked on a couple other projects around the house, and we grilled out. Hog dogs, potato salad, sliced veggies and I wanted one more thing. Fruit. More specifically, fruit salad. 

A friend had just told me about this amazing fruit salad she had made with a really easy dressing, that included lime...one of my boys' favorite flavors. I had plenty of fruit on hand (thanks to Aldi's great prices) and I decided to throw it together for our simple supper.

So fresh. So tasty. So easy! You can easily switch out whatever fruits you have on hand, or whatever is in season. I can't wait to make it again once we go strawberry picking, and maybe add in some blackberries or raspberries, another of my boys' favorites. 

We are all so busy days at home have become a welcomed treat. I hope we get more of them this summer, so I can make this over and over!

Honey Lime Fruit Salad
1 lb. strawberries, sliced
1 pint blueberries
1 cup green grapes, halved
1 (11 oz.) can mandarin oranges, drained
1 banana, sliced
3 TBS honey
1 lime, juiced and zested

In a large bowl, combine all fruit. In a separate small bowl whisk together honey, lime juice and zest. Pour over fruit. Chill for 2 hours before serving. Stir before serving. *NOTE* To measure honey easily, spray measuring spoon with cooking spray or dip in warm water. Honey will slide right off!


Shared at Weekend Potluck

Monday, May 11, 2015

More Meat Free

Need some inspiration for your Meat Free Monday supper? Do you practice Meat Free Mondays? I know more and more of you are because I keep getting asked for dishes that would work. And while we aren't weekly participants, I do think these "meal days" as I like to call them are fun once in a while.

Let's see. We've covered Mondays. Then there is Taco Tuesday, Pizza Friday...what am I missing? Which ones does your family enjoy?

I actually made these a couple weeks ago when my guys were in full training for the Taekwondo State Championships. For the little guy it meant repeating his title from last year; and for Mr E. it meant going out on top. As many of you know, he was very ill last summer, and he fought his way back, recovered, and was determined to have his fight at state be his last one. He is retiring, so to speak. He will still train, and he might do some light competition, but his hard fighting days are behind him. So what better way to do that than competing at the State Finals with our boy.

Well, I am happy to report, I now have TWO state champs in my house!! That's right! They both won GOLD medals in their divisions! Alex defended his title to the fullest in a hard fought match, and Mr. E. indeed went out on top, with his last match being his best one yet.


Can you tell I'm proud? Yeah, so much I might burst.

But back to the food. Little man wanted Mexican food, but I wanted something light, and extra protein during a hard training week is always good.

These are absolutely delicious, and could not be easier. Plus, they are super light, perfect for a hot summer night.

If you need a little help with your Meat Free Monday dinner tonight, I've got you covered! Or if you just want to listen to a mom/wife gush about the boys she loves, well, I'm happy to oblige that too! 

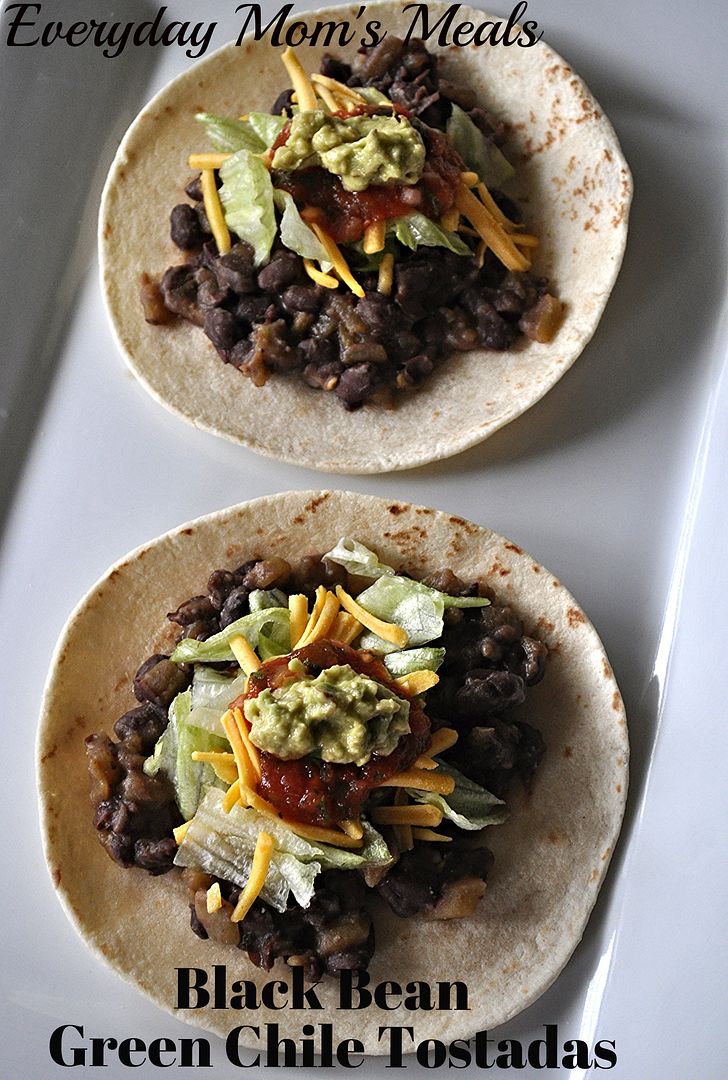
Black Bean Green Chile Tostadas
8 small white flour tortillas 
1 (15 oz.) can black beans, rinsed and drained
1 ( 4 oz.) can green chilies
1/2 tsp. garlic salt
1/2 tsp. cumin
1 avocado
Juice of 1/2 lime
Splash Water
Cheese
Salsa
Chopped Lettuce

Preheat oven to 350. Spray tortillas with cooking spray, lightly. Bake until desired crispiness and browned. We like ours still a little soft, so about 7 minutes. In a small sauce pan place beans. Smash slightly with a potato masher, leaving some beans intact. Add green chilies, garlic salt, cumin and splash water. Cook over low heat until warmed through, about 5 minutes. In a small bowl smash avocado and combine with lime juice. Stir well. Top tortillas with black beans mixture, lettuce, cheese, salsa and avocado mixture. 


 Shared on The Country Cook May 15, 2015

Friday, August 8, 2014

My First Time

Thai food. Do you love it? Or maybe I should start with, have you ever tried it? I say that because until a few weeks ago, I hadn't. I have been wanting to for a long time, and my hubby has been encouraging me to because of his love of it, but I just never had the opportunity until now. 

I will be honest, I had always been a tad apprehensive to try Thai because I had heard how a lot of it is spicy; and as I've said before, I'm a wimp and while the mister enjoys tears it while he eats, I do not. Now, usually when I am going to try a new cuisine for the very first time, I "leave it to the experts" so to speak. As in, I will go to a restaurant that is known for it, or I will have someone who prepares it on a regular basis treat me. But this time, I found a great recipe on a great blog that I just knew would be the best way for me to stick my toes in the water, so to speak.

If you love cold noodle salads, this is going to be your new favorite go-to. If you have never made one at home, this is going to be your new favorite period. This makes a great side dish with some egg rolls or hot and sour soup. Or make a double batch and turn it into a light summer, it's too hot to cook, supper. Or, make that same double batch and you have lunch for the week! I think it would be a great dish to take to your next potluck or cook-out too...something new and unique everyone will rave about! You will be the one with the dish everyone wants the recipe for! 

If you are like me and have never tried Thai food, then this should definitely be your first time. This creamy, cool, crunchy, sweet and savory all rolled into one, delicious, simple dish will have you wanting to try even more as soon as possible!

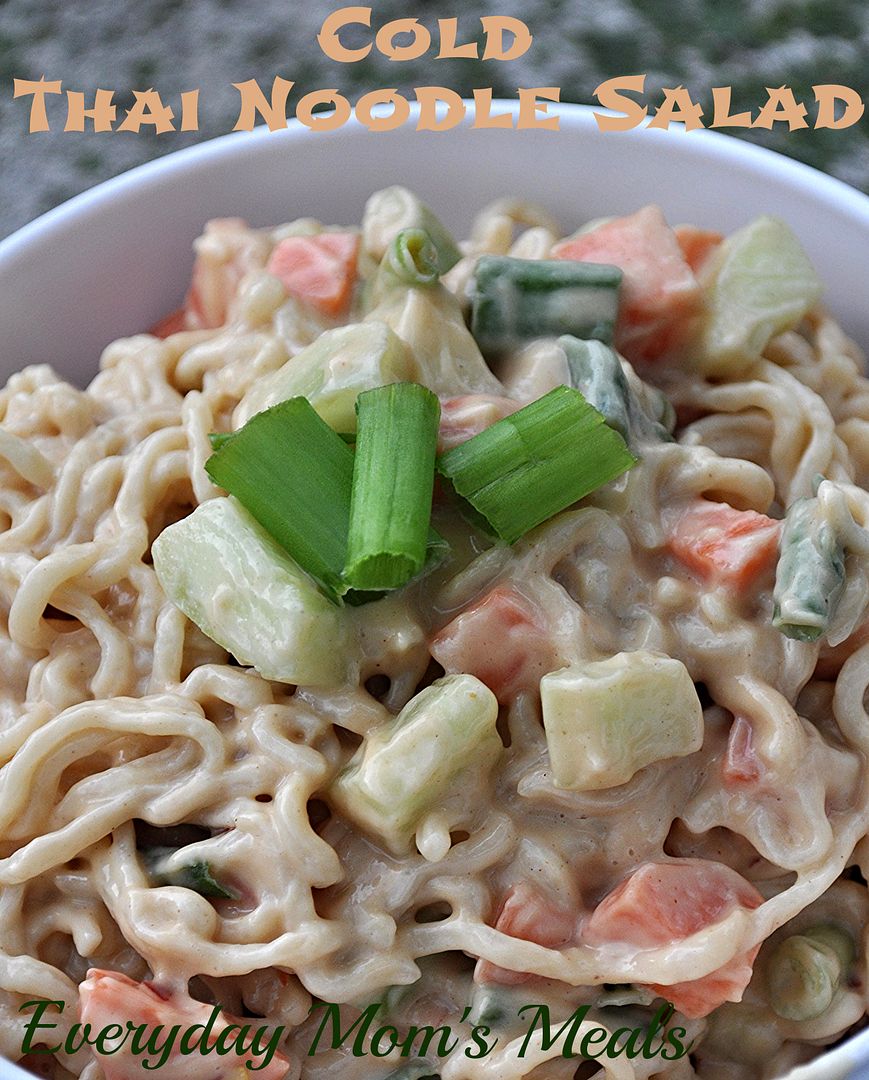
Cold Thai Noodle Salad From Cajun Mama Cooks
2 (3 oz.) packages ramen noodles, any flavor, seasoning packets discarded
3/4 c. coconut milk
3/4 c. peanut butter
1 medium cucumber, seeded and finely diced
6 green onions, chopped
2 medium carrots, peeled and finely diced
1/4 tsp. red pepper flakes
1/4 c. lime juice
1 TBS sugar
3/4 tsp. salt

Bring a medium pot of water to boil. When boiling, break noodles into water. Cover and remove from heat. Let sit until noodles are tender. Drain and rinse with cold water, separating with fork. In a large bowl whisk together peanut butter, coconut milk, lime juice, red pepper flakes, sugar and salt. Add veggies. Stir to coat. Add noodles. Toss gently to coat. Chill until serving. 


Shared on The Country Cook Aug. 8, 2014
Thai at Very Good Recipes

Saturday, June 14, 2014

Soul Food Saturday


With summer comes more time to grill; Along with more outdoor parties with family and friends. Who isn’t always looking for a new way to kick up an old favorite? For me it’s a given. Adding fruit to my Pico de Gallo salsa has become a favorite thing for me to do. Why not go one step further with it, and really wow everyone? A hollowed out pineapple serves as a serving dish for this simple salsa. Whether you scoop it up with chips or top your favorite burger, this one is sure to be a crowd pleaser. Grab a pineapple its party time!
Pineapple Spiked Pico de Gallo
 1 whole pineapple
1 small onion, diced
2 jalapenos, minced
4 Roma tomatoes, diced
½ c. cilantro, finely chopped
1 garlic clove, minced
Salt to taste
Juice from half a lime
Begin by slicing the pineapple in half lengthwise, then cut leaf end off. With a paring knife cut vertical and horizontal cuts into each side of pineapple; Taking care not to go all the way through the back side. Then with a sturdy spoon start along the edges and move to the middle of the pineapple removing the cut pieces. Place them in a medium sized bowl. Add remaining ingredients, and toss to combine. Taste for seasoning. Sprinkle with a pinch of salt if desired. Add finished salsa to hollowed out pineapple halves.
Serve with chips or along side your favorite burger toppings. Enjoy!


Friday, June 6, 2014

That's What The Sun Looks Like

Finally. That's the only word to describe how I feel about today. See, it's the last day of school for us. HOORAY!!!! As of 3:30 pm, I will have a 4th grader in my house. And while that seems impossible, and in 2 months when classes begin again I will be in a total depressed denial about it, today it means SCHOOL'S OUT FOR SUMMER!! 

With the awful, and when I say awful, I mean awful with a capital A, winter we had, I don't think I've ever been more happy to see summer. And honestly, our spring wasn't so great either. We had snow in April...need I say more? So when the temps finally began to rise, and that big ball of yellow in the sky reappeared, it took all of us a couple days to remember, "Ah, yes. That is what the sun looks like!!" 

During that first week of constantly sunny, warm weather I wanted to do many things, but grilling was at the top of the list. Sure, we grill year round, but I feel the need to more when we have beautiful weather and can go right from the grill to the backyard table, enjoying our dinner outside. 

Luckily I had gotten some beautiful drumsticks on sale that week and they were ready and willing to be put on the fire. I'm always looking for new marinades for chicken, and this one from Grilling and Campfire Cooking is simple and super flavorful. (In case you didn't know, I'm giving away a copy of this book from Gooseberry Patch. Click here to enter!) This is one of those dishes you can put in the fridge to marinate all day, and then grill off when you're home from work and don't want to think too much about supper. It's perfect for cookouts, picnics or tailgating too! 

I'm so incredibly happy summer is upon us. I'm thankful I get to be reacquainted with our good friend Mr. Sun and look forward to all the fun things the next couple months have in store!

Grilled Lemon Lime Chicken Adapted from Gooseberry Patch
10 chicken drumsticks, or your favorite cut
1 heaping TBS grill seasoning
1/2 c. brown sugar, packed
1/4 c. apple cider vinegar
3 TBS whole grain mustard
Juice of 1 lime
Juice of 1 lemon, 1/2 saved for later
3 cloves garlic, minced
6 TBS vegetable oil
Salt and Pepper to taste

In a medium bowl whisk together all ingredients except chicken. Add chicken and marinade to large plastic bag. Chill in fridge for 8 hours. Remove chicken 1 hour before ready to grill, allowing it to come up to room temp. Discard marinade. Preheat grill to medium high. Spray with nonstick spray. Sear chicken for 5 minutes and then reduce heat to medium and cook 15-20 minutes more until juices run clear. Remove to serving platter and squeeze remaining 1/2 lemon over top. 


Shared on The Country Cook June 6, 2014


Saturday, March 22, 2014

Soul Food Saturday #48

What is it about winter that makes us crave a good grilled hunk of meat, and a nice cocktail along with it? Maybe it's because we are daydreaming of barbecues with family and friends during nice summer evenings. Well why not wrap it up into one? That's right. I used a seasoning pack to mix up a  great marinade that any meat would be delighted to bathe in.  Let's dream about summer together, tonight pork chops are what's for dinner.

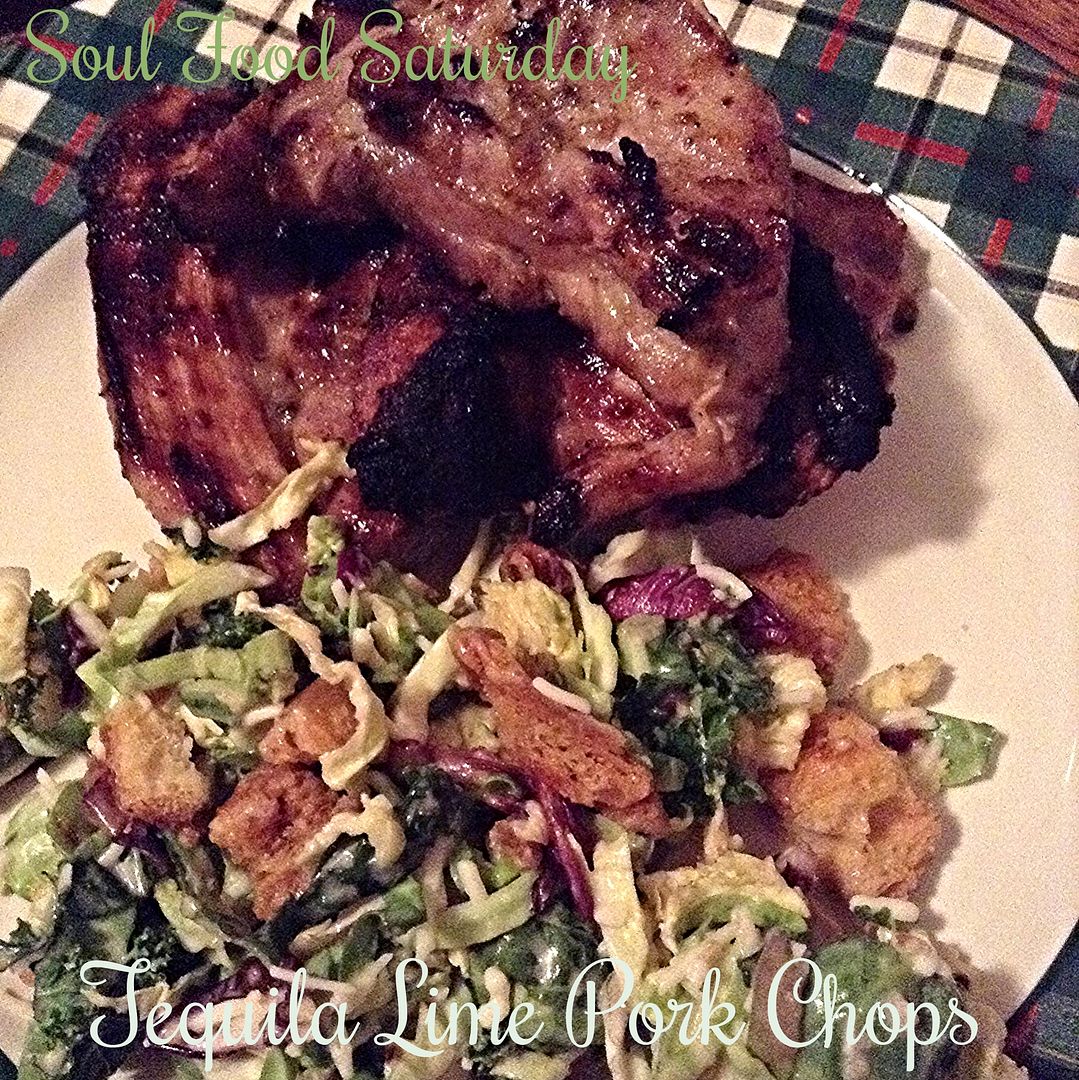
Tequila Lime Pork Chops Adapted from Weber
2 tequila lime seasoning packs, found in the baking and spices aisle 

2 lb boneless pork loin, sliced into chops
1/2 c. Vegetable oil
1/4 c. Tequila
1/4 c. Lime juice
1/4 c. Water
Zip top gallon size food storage bag

In a small bowl add spice mix, oil, tequila, lime juice and water. Stir to combine. Add meat to food storage bag, and pour marinade over meat. Carefully remove air from and seal the top of the bag. Gently tip bag back and fourth to distribute marinade and coat meat entirely. Set aside for 30 minutes. Remove meat from marinade and grill as desired.


Monday, August 5, 2013

Feel Good Chicken {A Review and Giveaway with NatureRaised Farms}

We eat a lot of chicken in this house; and according to studies I've read, we are not alone. Chicken is quickly becoming the protein of choice in many households, so when you are standing in the grocery store trying to decide which brand to take home, you want to make sure it's the best value for the price. I know I do; and for me, the answer is NatureRaised Farms.

NatureRaised Foods works with independent family farmers to raise and produce fresh chicken products. Their birds are raised by farmer who share their commitment to responsible farming practices and healthy growing conditions.

All NatureRaised Farms brand chickens enjoy a 100% vegetarian diet. This means no animal, protein or bakery by-products are used in their feed- just vegetables, grains, vitamins, and minerals. Plus, they have no added hormones or steroids, as regulated by federal standards.

NatureRaised Farms chicken products are available both in the fresh and frozen sections of the grocery store, making them easily accessible for busy cooks like you and me! The choices include, fresh boneless chicken breasts, tenders, drumsticks, and boneless thighs too, for those out there, like me, who enjoy the dark meat without the bone and skin!

Their fully cooked items include whole-grain breaded breast nuggets, gluten free grilled strips, and gluten free grilled breasts fillets. With so many families with just one person with a special diet, it's nice to know there is something everyone can eat and enjoy.

And for so many of us who are paying more and more attention to not only where our food comes from, but how the animals producing it are treated, it's so nice to know that the chickens used by NatureRaised Farms are bred through natural selection, not genetic modification. They are raised in modern, open barns and provided barn enrichments to perch and climb on and other natural elements to ensure a comfortable and interactive environment.

I can tell you first hand, many times when I buy boneless, skinless chicken thighs of a different brand, I still find myself having to trim away a lot of extra fat and doing more prep work than I would like to. But with the NatureRaised Farms package, I literally took them from the package to the bowl. No extra work on my part needed!

Oh, and did I mention what a value they are? I got the "family" size pack with 12 chicken thighs inside for under $10!! Chicken is not cheap; and to know I'm getting this much value for my dollar is an added bonus!

When I found this recipe on their site, I couldn't wait to try it. I love using the boneless chicken thighs as an alternative to white meat. I enjoy the dark meat more, but still want the added ease and nutrition of skinless. Plus, with the word "citrus" I knew we would love the flavor. Ya'll know how much our family loves anything citrus; and this has not only one, but two different citruses complimenting each other perfectly. This recipe is super easy, overflowing with flavor, and quick enough for any busy mom (or dad) any night of the week!

So the next time you are in the chicken section trying to decide which brand to take home to your family, remember NatureRaised Farms and all they are doing to ensure quality from the farm to your table. Oh, and they have a GREAT prize package for one lucky EMM reader, so be sure to keep reading after the recipe for the giveaway details!

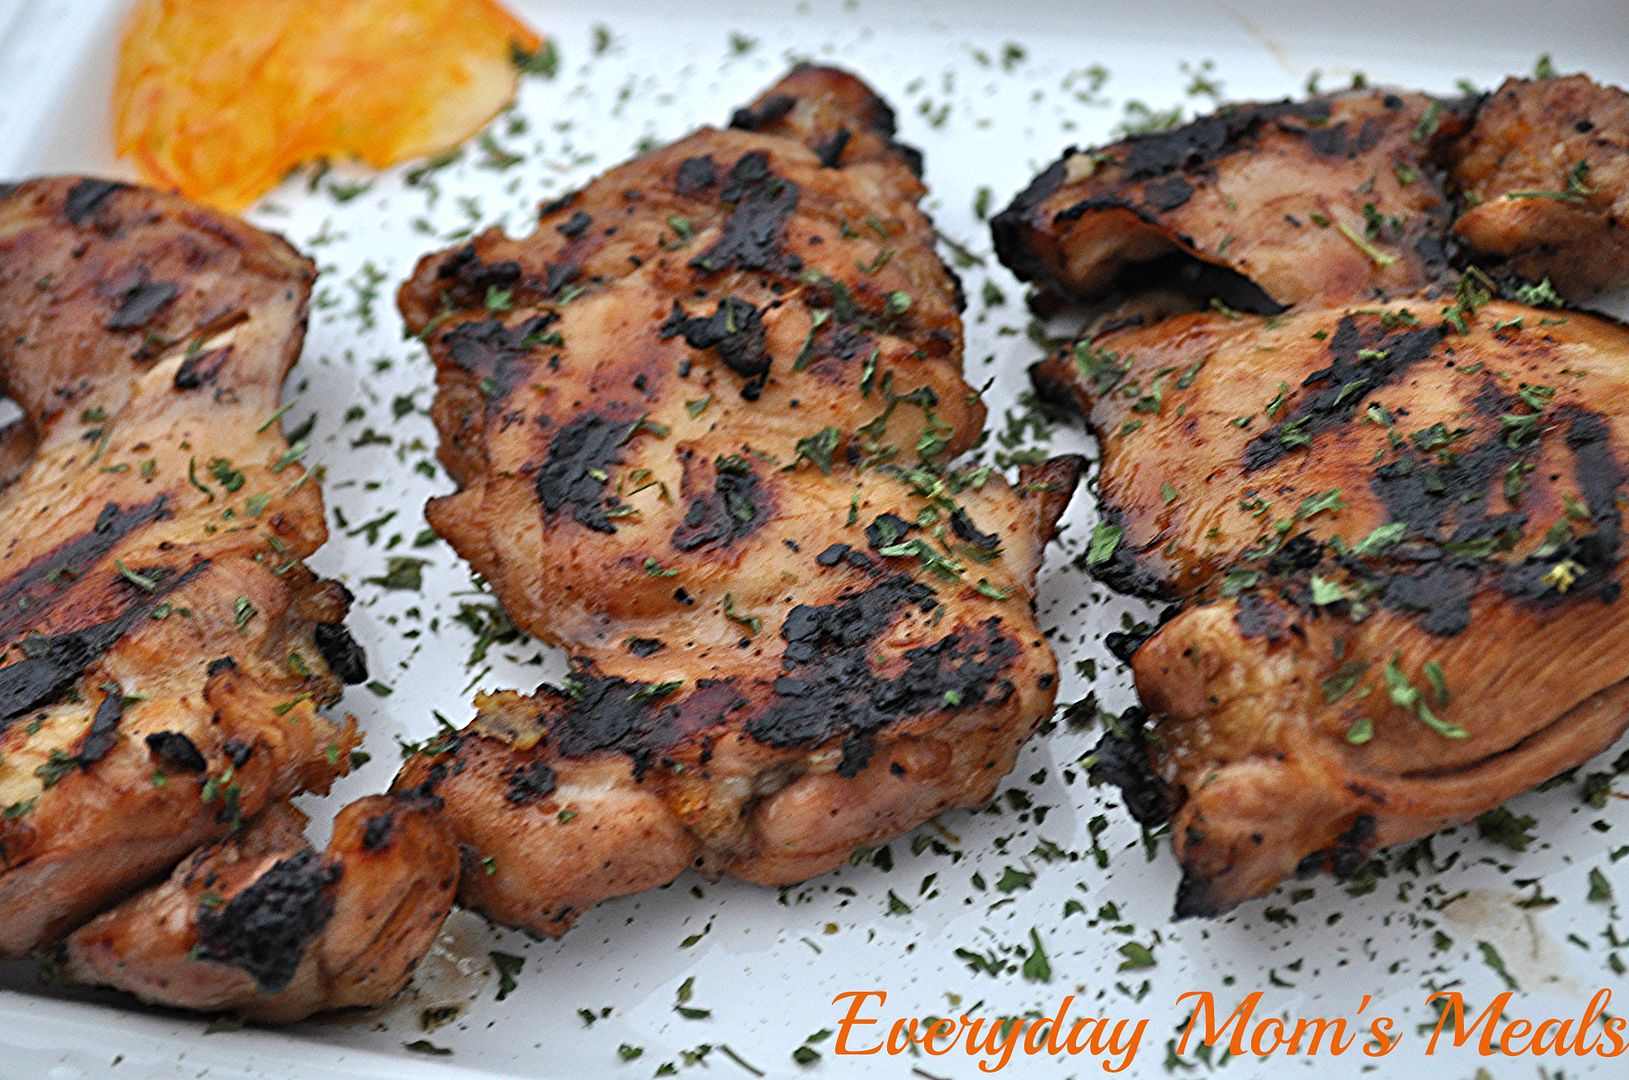
Tangy Citrus Grilled Chicken Thighs From Nature Raised Farms 
6 Nature Raised Farms boneless skinless chicken thighs
1 c. lime juice
2 TBS cayenne pepper sauce
1/3 c. balsamic vinegar
3/4 c. orange marmalade
1/4 c. vegetable oil
4 garlic cloves, minced
*I added Salt and Pepper to taste and Dried Parsley for garnish*

Combine lime juice, cayenne pepper sauce, vinegar, marmalade, oil, and garlic. Whisk well.  Pour over thighs. Cover, marinate 1 hour in refrigerator, then drain. Preheat grill to medium. Grill 6 to 8 minutes on each side over medium heat, or until cooked through. I served these with extra marmalade on the side for dipping too. 


Shared on Mandy's Recipe Box Aug. 6, 2013
Shared on Lady Behind The Curtain Aug. 7, 2013
Shared on The Country Cook Aug. 9, 2013


Chicken at Very Good Recipes
Pin It


********Giveaway********

Rules:
1. This contest is open to US Residents 18 and older ONLY.

2. The winner will be chosen by Random.org 

3. The winner will be notified by email and Facebook. He/she will have 48 hours to respond or another winner will be chosen. I will then pass on your address to the sponsor for shipping.

4. When leaving comments for entries, they MUST BE SEPARATE ones AND include an email address so it's easy for me to find the winner. If entries are together, it will only count as (1) and if no email, entry will not be considered.

5. If any of the extra entries are items you are already doing, please just remind me!


6. Contest Ends: Monday Aug. 12, 2013


One Lucky Winner Will Receive:
(1) Nature Raised Farms Prize Package
-Engraved Bamboo Cutting Board
-Reusable Shopping Bag
-$10 Gift Card


Mandatory Entry:
1. Leave a comment telling me a recipe you would like to try NatureRaised Farms chicken in. 

Extra Entries:

1. Follow NatureRaised Farms on Facebook. Leave a comment when you have.

2. Follow NatureRaised Farms on Twitter. Leave a comment when you have.

3. Tweet about this giveaway, tagging @everydaymomsmls and @NatureRaised. Leave the link to the tweet as a comment. 

That's up to 4 entries per person!!!

Good Luck!

Disclaimer: I was provided with free prize package for this review, and an extra one for a fan giveaway. All thoughts and opinions are my own.

Wednesday, May 22, 2013

Summer Salad Supper {A Review/Giveaway with Taylor Farms}

I love when I can take a little help from the store, making my life just a little simpler when it comes to meal time. I think busy moms (and dads) everywhere would agree with me, it's okay to take help where we can when it comes to getting good food on the table for our families. 

And when it comes to convenience foods, one of my favorites are bagged salads. From the simple tossed salad to the complete salad kits, I use these in my kitchen a lot! Hence why I was so excited to team up with my new friends at Taylor Farms to introduce you to all of their bagged salad sensations! 

Founded in 1995, Taylor Farms was on a quest to become America's favorite salad maker. They have partnered with the finest companies in North America to provide excellent quality salads for their loyal customers. With salad varieties from Garden Vegetable, to BBQ Ranch, Southwest Chopped, Asian Chopped and many more, there is a salad, or complete salad kit to fit anyone's tastes. 


The folks at Taylor Farms were kind enough to send me quite the sample box to experiment with, and after a lot of fun in the kitchen, I decided to feature the Southwest Chopped Salad today. Filled with chopped cabbage, Romaine lettuce, cilantro, and green onions, it also comes with crunchy tortilla strips, pumpkin seeds and a creamy cilantro dressing. Now, that would be a tasty salad all on it's own, but of course, me being me, I had to add a little EMM flare to it. I decided on a couple more southwest inspired veggies, plus topping it with a fabulous grilled chicken bursting with chili and lime flavor, with just enough kick to make you know it's there! Not too spicy for those who can't take the heat, but with enough heat to remind you what the Southwest is all about! 

Plus, did you know May is National Salad Month? What a better way to celebrate than with a great salad kit filled with fresh, tasty ingredients. Plus, if you are on Instagram, snap a photo of your chopped salad, add #choptalk and you could have the chance of being featured on Taylor Farms website and Facebook page! 

And now, you have the chance to win some Taylor Farms coupons for your kitchen too! Just scroll down under the recipe for full giveaway details and rules! 

Southwest Chopped Salad with Grilled Chili Lime Chicken
2 bags Southwest Chopped Salad 
1 (1.5 lb.) package chicken tenders
1/2 c. vegetable oil
Juice of 2 limes
Zest of 1 lime
1 TBS chili powder
1/2 TBS paprika
1 tsp. garlic powder
1 TBS Montreal Chicken Grill Seasoning
1 (15 oz.) can black beans, drained and rinsed
1 (11 oz.) can corn, drained
1 avocado, chopped
1/2 c. grape tomatoes, halved
1/4 c. green olives, chopped
Salt and Pepper to taste

In a medium bowl whisk together oil, lime juice and zest, chili powder, paprika, garlic powder, grill seasoning, salt and pepper. Place chicken in a large plastic bag. Pour marinade over chicken and chill for 2 hours. When ready, preheat grill to high. Spray with nonstick spray. Sear chicken on both sides for about 1-2 minutes and then reduce heat to medium-low and cook for about 15-20 minutes, until done, turning occasionally. Remove to platter and allow to cool slightly. In a large bowl combine salad mixes, black beans, corn, avocado, tomatoes and green olives. Mix well. Divide among serving plates. Drizzle with cilantro dressing included in kit. Chop chicken and top each salad with equal portions. 


Shared on Lady Behind The Curtain May 22, 2013
Shared on Miz Helen's Country Cottage May 23, 2013
Shared on The Country Cook May 24, 2013


********Giveaway********
Rules:
1. This contest is open to US 18 and older ONLY.

2. The winner will be chosen by Random.org 

3. The winner will be notified by email and Facebook. He/she will have 48 hours to respond or another winner will be chosen. I will then pass on your address to the sponsor for shipping.

4. When leaving comments for entries, they MUST BE SEPARATE ones AND include an email address so it's easy for me to find the winner. If entries are together, it will only count as (1) and if no email, entry will not be considered.

5. If any of the extra entries are items you are already doing, please just remind me!


6. Contest Ends: June 1, 2013


Two Lucky Winners Will Receive:
$25 in Taylor Farms coupons
(2 winners will each be given 25 $1.00 coupons)


Mandatory Entry:
1. Become a fan of Taylor Farms on Facebook. Leave a comment when you have.

Extra Entries:

1. Become an EMM Facebook fan. Leave a comment when you have.

2. Follow EMM on Twitter. Leave a comment when you are.

3. Follow EMM on Pinterest. Leave a comment when you have. 


4. Follow me on Instagram. Leave a comment when you have. 


5. Upload a photo to the Instagram contest. Tag @everydaymomsmeals on it, and then leave a comment here.

That makes up to 6 entries per person!!!

Good Luck!

Disclaimer: I was provided with free samples in exchange for this review. The coupons were given to me for a giveaway. All thoughts and opinions are my own.


Pin It

Wednesday, March 27, 2013

Any Day Brunch {Eggland's Best Eggs}

The word brunch can conger up countless images in a person's head. Long buffets filled with all the favorites: eggs, bacon, sausage, French Toast, potatoes, etc. Holiday meals surrounded by family and friends. Lazy Sunday mornings drinking coffee and enjoying the morning paper. But for most of us, all the images are connected by one thing, happy people enjoying delicious food; and I'm here to say brunch doesn't have to be saved for a special occasion. Brunch can be a meal your family enjoys any "not so special" day, any time of the year. And with help from my friends at Eggland's Best, my family did exactly that a couple weeks ago.

It was a Sunday like most other Sundays at our house. It was the 3 of us at home, sleeping in, and catching up on things around the house. But I had a little surprise up my sleeve that neither of my "boys" knew about~ I was going to treat them to a yummy brunch, filled with recipes from Eggland's Best. Their site has entire section dedicated to delicious recipes using their fantastic eggs, including a Breakfast Burrito and Sunny Side Breakfast Pizza, just to name a couple; but there are so many more to choose from.

Have you ever tried Eggland's Best eggs in your home? Well, if you haven't, let me give you just a few reasons why you should! Compared to ordinary eggs, Eggland's Best contain:

10 times more Vitamin E
Double the amount of Omega-3's
Twice the amount of Vitamin D
3 times more Vitamin B12
25% less Saturated Fat
38% more Lutein

As parents, we understand the importance of feeding our families nutritious food that provides them with power and energy to go through the day. With March being National Nutrition Month, it's a great time to reevaluate the foods we are all using in our kitchen every day, so we can feel confident we are giving our loved ones healthy foods to help them grow. And with Eggland's Best, we know just that! 

When I began planning my brunch, and scouring the many recipes on the website, I was immediately drawn to not one, but two mouth watering dishes. The first I'm sharing today was our "starter". The teaser if you will. The thing I brought them to the table with, only to be followed by something equally scrumptious. 

Plus, this recipe was so simple, it was a great opportunity to get little man into the kitchen with me. He loved stirring, mixing and helping any way he could.  If you're going to treat your family to a brunch, why not make them a part of it too? Get the kids into the kitchen with you, and make the entire thing a family event!


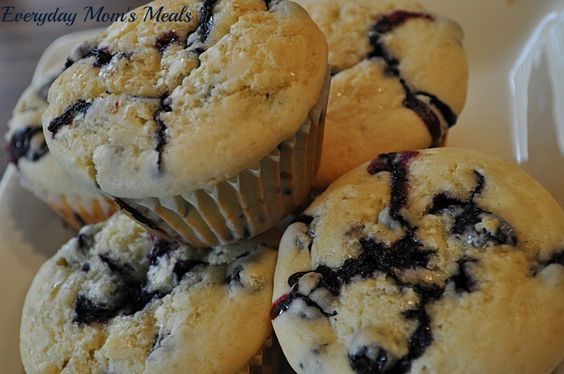
They thought they were getting ordinary blueberry muffins, which they would have been happy enough about, but little did they know when they bit into one, there was an extra surprise waiting on them. A creamy, lime flavored filling! And for my lime-loving boys...oh what a treat it was! They were absolutely thrilled! 

I think these would be a fantastic addition to your Easter brunch, or if you're like me, your any day, ordinary, every day brunch! 

Come back on Friday to see the main dish of my Sunday brunch, another great idea for this Easter weekend too! 

Be sure to check out Eggland's best on Facebook, Twitter, and Pinterest. And sign up for their free Newsletter, and download their FREE (for Facebook fans) e-book (a $9.99 value) too!

Plus, the great folks at Eggland's Best has a fantastic gift package to give away to ONE lucky EMM fan! 
Just scroll down after the recipe to see the prize pack and how to enter! 


Blueberry Surprise Muffins From Eggland's Best
For Filling:
1 Eggland's Best Egg
1/4 c. white sugar
8 oz. Neufchatel cheese (reduced fat cream cheese)
Juice of 1/2 lime

For Muffin Batter:
2 Eggland's Best eggs
1 c. low-fat buttermilk
6 TBS margarine, at room temperature
1/4 c. maple syrup
2 c. all purpose flour
2 1/2 tsp. baking powder
1/2 tsp. salt
1/4 c. white sugar
14 oz. blueberries
1 tsp. vanilla
1 TBS Turbinado sugar (sugar in the raw)

Preheat oven to 375. Grease a muffin pan, or line with baking cups. Prepare filling by mixing cream cheese, sugar, egg, and lime juice in a medium bowl. Beat with electric mixer until well blended. Set aside. Prepare muffin mix by whisking flour, baking powder, salt and sugar in a medium bowl. Set aside. In a small bowl combine maple syrup, margarine, eggs, milk and vanilla. Beat well with electric mixer until smooth. Slowly mix the egg mixture into the flour mixture and blend well until combined. Gently fold in blueberries just until swirls appear. Fill muffin tins 1/3 with batter, top with 1 TBS filling mixture and then 1 TBS or a little more batter mix to cover filling. Sprinkle with Turbinado sugar and bake for 25-35 minutes until slightly golden. 


Shared on Lady Behind The Curtain Mar. 27, 2013
Shared on Miz Helen's Country Cottage Mar. 28, 2013
Shared on The Country Cook Mar. 29, 2013
Shared on Make Ahead Meals Apr. 1, 2013


Included are:
(1) Coupon for one free dozen eggs
(1) Ceramic mixing bowl
(1) Egg shaped wooden cutting board
(1) Whisk
(1) Bowl scraper
(1) Ceramic Mug
(1) Eco Bag

TO ENTER: Visit the Eggland's Best website recipe section by clicking here and leave a comment telling me which recipe is your favorite. Contest ends April 3rd


Disclaimer: The Eggland’s Best coupon, information, and two gift packs have been provided by Eggland’s Best. 


Tuesday, December 11, 2012

Tropical Holiday

As I have shared with you before, but will once again for those just tuning in, my "boys" are lime crazy!  Anything and everything made with the little green gems is a favorite of theirs. From Cilantro Lime Rice to Key Lime Pie, they just can't get enough. So when I saw this recipe in my new Gooseberry Patch cookbook, The Christmas Table I knew it would one of the new holiday treats I tried this year. Oh sure, we have our favorites...the ones I make every year, but each year when the tree goes up, and usually before, I start to compile a list of new and fun things I've seen to try, and possibly add to our holiday traditions. I couldn't believe this when I saw it. I had never even thought of it, but it's pretty genius! Especially for those of us who love all the Christmas candies, but sometimes find a few to be too heavy. It's not so much that this is "lighter" than other fudge, but the lime flavor makes it so refreshing, and it gives your mouth a burst of flavor. If you have tried either my Peanut Butter or Easy Chocolate Fudge, you will love this too because once again, it's a simple method and you do NOT have to be a candy maker expert to be successful. Believe me, if I can make it, you can! I've had some candy disasters in the kitchen, but these easy fudge recipes never let me down! I hope I've found something yummy for you to include in your holiday baking extravaganza too, after all those neighbors and teachers gifts can always use something new and fun!

Key Lime Fudge From Gooseberry Patch
3 c. white chocolate chips
1 (14 oz) can sweet condensed milk
2 tsp. key lime zest, a little reserved for top
2 TBS key lime juice
1 c. chopped macadamia nuts, a few reserved for top

In a medium saucepan on low heat, combine chocolate chips and milk. Stir and cook until melted together. Remove from heat. Stir in zest and juice. Add in nuts. Stir well to combine. Line a 8x8 baking pan with foil, with enough covering over edges for easy lifting.  Grease foil well. Pour into prepared pan and spread evenly. Sprinkle with extra nuts and zest. Gently. pat to adhere. Chill 2 hours in fridge. Remove from pan by lifting on foil and then removing. Cut into squares. Store in fridge.


Shared on Mandy's Recipe Box Dec. 11, 2012
Shared on Lady Behind The Curtain Dec. 12, 2012
Shared on Miz Helen's Country Cottage Dec. 13, 2012
Shared on The Country Cook Dec. 14, 2012


Lime at Very Good Recipes
Pin It

Friday, August 17, 2012

One From My Working Days

These days when I'm meeting someone for the first time and the question "What do you do?" comes up, I answer with "I'm a stay at home mom and a food blogger." But there was a time I had a job outside the home, and for those who didn't know me 8 years ago, they don't realize this. I got my degree in 2002 and immediately started looking for a "real" job instead of waiting tables. I was blessed to find something that was the perfect fit for me at a local orthopedic medical office. I loved my job. I loved the people I worked with. I was there almost 3 years, and only one thing could make me quit...that's right, Monkey. He was born in September 2004 and my days of being a "working gal" were over. I knew my destiny had already been decided for me. I was supposed to stay home with him. After all, being a mom was all I ever truly wanted to be anyway. Early on when he was still a baby there were days, that while I was so happy to be with my baby enjoying every single minute, I did long for some adult conversation; and I would begin missing my friends from work. But those days became fewer and farther between, as we developed a routing, and especially as he grew older and we could interact more. There are many things I took away from that job. Lifelong friendships, job experience and even some incredible recipes! This is one that when I finally learned to make it I couldn't believe how easy it was. It's the perfect weeknight "throw together at the last minute" dessert; or if you serve it to guests it will be one they  request the recipe for. Yes, I was once in the working world, but this world of "mommyhood" and food blogging are what I'm all about now!

Blueberry Bubble Cake
1 (18 1/4oz) yellow cake mix, dry
1 (21oz) can blueberry pie filling
1 1/2 c. lemon lime soda

Preheat oven to 375. Grease a 9x13 baking pan. Spread pie filling over bottom of pan. Sprinkle evenly with cake mix. Pour soda over top. DO NOT mix. Bake for 45 minutes until a toothpick comes out clean and browned on top. Serve with whipped cream, vanilla ice cream and/or fresh berries.


Shared on The Country Cook Aug. 17, 2012
Shared on Make Ahead Meals Aug. 20, 2012 
Shared on Mandy's Recipe Box Aug. 21, 2012
Blueberries at Very Good Recipes
Pin It

Thursday, August 16, 2012

The New Chip On The Block {A Review & Giveaway}

I've told you before that one of the best things about this job is the opportunity to try new food items, let my family sample them, and then pass them onto you. It's so much fun to discover new products out there and broaden our culinary horizons. So when my friends at RecipeLion asked me to create a recipe for Beanitos, using their new Always Corn Free™ Bean chips, I was super intrigued and could not to taste them and get cooking!


What are Beanitos you ask? Well, I'm about to tell you! Let's learn together! Beanitos are made from whole beans. Per 1 ounce serving, Beanitos have:

  • 4 grams complete protein
  • 5 grams fiber
  • 14 grams complex carbohydrates
  • 8 grams fat
  • 140 calories
They also have lower sodium than most chips, ranging from 55mg to 150mg per serving. Plus a serving of 1oz. equals about 10 chips!

Take a look at the comparison between Beanitos and other brands out there: 


Plus for those of you with dietary needs, Beanitos are proud to be gluten-free. They contain no gluten ingredients and are made on dedicated gluten-free lines. They are also low-glycemic because they are made from beans. And beans, unlike corn or potatoes, take longer to break down into glucose. Lastly, Beanitos are all verified through the NON-GMO Project , which is quickly becoming a requirement for the natural foods industry. Special steps are being taken to minimize the possible introduction of any ingredients that have been bio-engineered. The makers of Beanitos believe it is the right thing to do for both our bodies and the planet. The most significant change Beanitos has made to go Non-GMO was the switch from canola oil to pure sunflower oil. Not to mention, Beanitos come in 4 fantastic flavors to choose from:
  1. Black Bean  (my favorite)
  2. Pinto Beans and Flax 
  3. Chipotle BBQ
  4. Cheddar Cheese

So if you are as intrigued as I was, be sure check out the giveaway below for you chance to win some Beanitos for you and your family. Or you can order them direct from their online store. Oh, and if you win, be sure to make this yummy recipe too!

Grilled Mexican Chicken Nachos
1 (28.8oz) package boneless chicken thighs, trimmed if necessary
1/2 c. fresh lime juice
2 tsp. chili powder
1 tsp. paprika
1 tsp. garlic powder
1 tsp. onion powder
1/4 c. vegetable oil
Salt and Pepper to taste
2 (6oz) bags Beanitos Black Bean Chips
1 (7oz) can salsa verde
1 (2.25oz ) can sliced black olives
2 c. pico de gallo, store bought or homemade
1 (8oz) bag shredded pepper jack cheese
Lime wedges if desired

In a large bowl combine chicken, lime juice, chili powder, paprika, garlic powder, onion powder, oil, salt and pepper. Stir well to coat. Marinate at least an hour. When ready, preheat grill to medium. Cook chicken for 6-7 minutes per side until juices run clear. Allow to cook a few minutes until it's cool enough to handle. Chop chicken into small bite sized pieces. On (4) large dinner plates divide chips equally. Spoon salsa verde over chips. Sprinkle with grilled chicken (figure about 1 thigh per plate). Top with olives and cheese. Spoon about 1/2 c. pico de gallo on top of each. Serve with lime wedges if desired.


Shared on The Country Cook Aug. 17, 2012

 Now on to the GIVEAWAY!!
 Rules:
1. This contest is open to US and Canada Residents 18 and older ONLY.

2. The winner will be chosen by Random.org 

3. The winner will be notified by email and Facebook. He/she will have 48 hours to respond or another winner will be chosen.

4. When leaving comments for entries, they MUST BE SEPARATE ones AND include an email address so it's easy for me to find the winner. If entries are together, it will only count as (1) and if no email, entry will not be considered.

5. If any of the extra entries are items you are already doing, please just remind me!

6. Contest Ends: August 23, 2012 12am EST

One Lucky Winner Will Receive
(1) Case Beanitos Chips

Mandatory Entry:
1.Leave a comment telling me which flavor you would most like to try!.

Extra Entries:

1. Follow EMM through GFC, Linky Followers, or Networked Blogs. Homepage, left hand side. Leave a comment when you have.

2. Follow EMM on Twitter. Leave a comment when you are.

3. Follow me on Pinterest and leave a comment.

4. Like Beanitos on Facebook. Leave a comment when you have.

5. Follow Beanitos on Twitter. Leave a comment when you have.

6. Follow Beanitos on Pinterest. Leave a comment when you have.

 That makes up to 7 entries per person!!!

Good Luck!

Pin It