Everyday Mom's Meals: Green Olives
_____
Showing posts with label Green Olives. Show all posts

Sunday, May 7, 2023

Just In Time For Your First Summer Cookout

May has arrived bringing Mother's Day, Memorial Day, Graduation Season (yep, in only 3 weeks my first baby will walk across that stage and get his diploma) and of course, cookout/backyard barbecue season.  

Have you fired up the grill for the first time? Do you have plans for your first cookout, or maybe you've already been invited to one? Memorial Day is seen as the kickoff to summer, and it will be here before you know it. 

This recipe is sure to become your new go-to for a cookout take-along that everyone wants the recipe for. If you're hosting the gathering, you better really like every single person you invite, because after a plate of this, they are going to want to come back over and over. 

Mediterranean Pasta Salad is terrific for all your summer parties, picnics and outdoor suppers. It has to be made ahead to soak up all the flavor of the dressing, so you can assemble it totally last minute. It has some unique flavors you might have never though of for pasta salad, but I promise you will be blown away how well they play together. 

I am so excited for warm weather and all the fun outdoor activities that go with it. Pasta salad is always a hit no matter when or how you serve it, so I hope this one makes its way to your menu soon!

Why Add Dressing To Warm Pasta

When you mix the warm pasta with the Italian dressing, it acts like a sponge to soak up all that flavor. The longer it sits, the better the flavor. 

Do I Rinse The Pasta

No! Many pasta salad recipes call for rinsing under cold water and draining. Not this one! Simply drain and then leave warm. 

What Kind Of Veggies To Use

This recipe is great because the possibilities are endless when it comes to the vegetables to use. You could give it more of an Italian twist with black olives, red onion and cheese!

Where To Find Canned Artichokes and Hearts Of Palm

Both of these are normally on the canned vegetable aisle. In my store they are usually near the end of the selection, right next to each other. 

What Are Hearts Of Palm

If you've never had them, hearts of palm are a literally the inside of a palm tree. They have a slightly sweet, mild flavor. When canned, they are in a brine that is best rinsed off. They can be added to salads or eaten as is. My Hearts of Palm Salad is a delicious way to include them in your menu.

How To Store Leftover Pasta Salad

Mediterranean Pasta Salad will last 2-3 days in the fridge in a container with a tight fitting lid. You will want to stir every time you serve.

Best Tips

*Do not rinse pasta before adding dressing. You want the warm pasta to soak all the flavor up.

*Regular Italian dressing works fine too. I like the extra "zip" of the zesty.

*Sun-dried tomatoes can be found with the olives and pickles or on the canned tomato aisle.

*Any short-cut pasta would work: elbows, shells, rotini, etc.

 *Swap out the veggies for any you like. Some suggestions: Red onion, black olives, cherry tomatoes, green onions, sweet cherry peppers, red bell pepper, mushrooms.

Mediterranean Pasta Salad

Mediterranean Pasta Salad

1 lb. mini penne, cooked and drained

1 (16 oz.) bottle zesty Italian dressing

1 envelope Italian dressing dry mix

1 English cucumber, diced

1 (10 oz.) jar green olives, drained

1 (8 oz.) jar sun-dried tomatoes, chopped

1 (14 oz.) can whole artichokes, rinsed, drained and chopped

1 (14 oz.) can hearts of palm, rinsed, drained and chopped 

1 TBS dried parsley

In a medium bowl whisk together Italian dressing and dry Italian mix. When pasta is cooked and drained, add to a large bowl. Pour dressing over warm pasta and stir well. Chill for at least 3 hours or up to overnight. Just before serving, add all veggies and stir well. Sprinkle with parsley and serve. 

Mediterranean Pasta Salad

Inspired by South Your Mouth


Sunday, May 19, 2019

Give Them Bread

If you are planning a summer cookout, any time over the next few months, you will want to keep the ingredients for this on stand by!

We are bread loving people. We are the ones at a restaurant that are usually half full by the time the entree' comes because we've snacked on so much bread. And if I can find something to put on that bread that makes it even yummier, that's the icing on the cake so to speak.

When I'm entertaining, I try to find ways to have dishes made ahead of time that I can put out and let my guests serve themselves. Appetizers are of course the best way to do this; and keep people from starving before the big meal is ready. Happy guests mean a happy host!

Honestly though, the day I made this it was raining, and we weren't even thinking about grilling. I served it as a side to a pasta supper...and it was perfect that way too. So, you're really getting a double duty recipe!

Summer time is when we want to have people over, spend hours outside in the sun, catching up, having fun, and of course eating some great dishes to share!

Olive Caper Spread
1 (5 oz) jar green olives, drained
1 (3 oz.) jar capers, drained
2 tsp. lemon juice
1 large garlic clove, peeled
Salt and Pepper to taste

Put all ingredients in food processor. Pulse until fine. Chill. Serve with baguette, crackers, pita chips, etc. 


Shared at Weekend Potluck

Wednesday, November 18, 2015

Holiday Nibbly Bits

Appetizers. Who else out there could make an entire meal out of them? Yeah, me too! At parties, I'm usually the one that gets so full on all the pre-meal snacks I'm not even hungry by the time the main dish arrives. In fact, our whole family is that way. Many of you long time readers remember our annual New Year's Eve tradition of a huge appetizer buffet we eat off of all night long.

So, with the holiday entertaining season almost upon us, it is time to start thinking of some new "nibbly bits" (that is what Alex has always called appetizers) to enjoy from Thanksgiving until the ball drops at midnight on Jan. 1st. Sure, we all have our favorites, our go-tos, but I'm always looking for new ideas, or ways to make ones I already rely on even easier.

The latter is the inspiration behind these. I love a good cheese ball. What's not to love? Cheese. Nuts. The end. And one of my all time favorite ones has green olives on the inside. But what happens when time simply gets away from you and the forming of the ball, and covering in nuts, and allowing it to set...just isn't in the cards? You take all the same flavors and do this instead!

These little cracker bites taste just like they are supposed to but can literally be done in about 10 minutes, especially if you utilize your food processor like I do.

The holidays were meant for gathering around those we love most in the world, and enjoying some terrific food. Starting next week with Turkey Day, there will be so much of that, and I for one am incredibly thankful.

Olive Cheese Ball Bites
1 (10 oz.) jar green olives, drained
1 (8 oz.) cream cheese, room temperature
2 TBS dried chives
1 TBS dried parsley
Crackers
Pecan Halves

In a food processor, pulse olives until finely chopped. Add cream cheese pulse until combined. Scrape sides. Remove to bowl. Add chives and parsley. Stir well. Scoop onto crackers. Top each with pecan halve. Chill until ready to serve.


Shared at Weekend Potluck

Wednesday, July 22, 2015

Summer Salad...Hold The Mayo

I love summer. I love everything about summer. The sun. The heat. The water. The FOOD! I crave summer time foods year round (Yeah, I'm the girl that you will find making potato and macaroni salad while the snow falls!) but they never taste quite as good as they do in the backyard on a warm summer evening.

However, the one thing I find that most of our favorite summer dishes (especially the sides) have in common is mayo. Now, I love mayo. I eat it by the bucket loads...on sandwiches, in salads, from the jar with a spoon..okay that one might be pushing it; but it's probably my most used condiment. But during the hot summer days, sometimes mayo isn't your friend.

One, depending on the time of day, mayo can seem a little heavy. We like to eat later in the evenings during summer vacation, and a few times, salads with mayo have just seemed a little too much at that time of day. And two, this being the biggest issue, mayo and sunshine do NOT mix. If you're having any outdoor party or meal, those mayo filled salads must be kept chilled, and let's face it, that's not always practical.

So, I set out to make a delicious, summer quality salad/side dish that didn't have one ounce of mayo in it. Not one drop. I wanted something with a lot of veggies, but a light dressing that would could hold up to the heat and sunshine.

This is what I came up with. I was inspired by artichokes and olives because, well, if I'm being honest, I was just hungry for them. And the hearts of palm? If you've never had them they fall into that same category of salty, briny...mmm good. They are one of Mr. E's favorites, so I threw those in too. If you go to look for them, they are usually right next to the canned artichokes.

Feel free to add whatever veggies you love, pretty much anything would be delicious in here. In fact, I wanted to add zucchini too, and simply forgot it at the store, so it's definitely going in next time!

Summer salads are so tasty, and we all love the creamy mayo filled ones. But after you've eaten 100 lbs of those this summer, maybe something lighter could go on the menu too!

Quick Artichoke Salad
1 (14 oz.) can quartered artichoke hearts, drained
1 (14 oz.) can hearts of palm, drained and sliced
1 (14 oz.) can petite diced tomatoes, well drained
1/2 c. black olives, sliced
1/2 c. green olives, sliced
1 red bell pepper, diced
 2 TBS olive oil
1 TBS red wine vinegar
1 TBS lemon juice
1/4 tsp. garlic powder
2 TBS dried parsley
Salt and Pepper to taste

In a large bowl combine and toss all veggies. In a small bowl whisk together oil, vinegar lemon juice and garlic powder. Pour over veggies. Sprinkle with parsley, salt and pepper. Toss to coat. Cover and chill for at least an hour before serving.


Shared at Weekend Potluck

Wednesday, April 1, 2015

$50 Dollar Challenge Month #1 {Indiana Family of Farmers}

I am super excited to bring you this new series from my great friends over at Indiana Family of Farmers. Each month, for the next 4, we are going to explore exactly how many meals we can make for $50. I will share my meal plan, the inspiration behind each one, and a new recipe too! Plus, I want to hear from you and what you can do in the kitchen with $50. Here are the rules (don't worry, there are only 2!) 

1. The meals can be breakfast, lunch, dinner or a combo of all three.

2. Each one must include one meat protein. 

That's it! Easy, right? Well, maybe not so much for some of you, but that's why we are doing this. To learn, to share and to make our hard earned dollars stretch farther. So, without further adieu, let's get to it.

For April, my meal plan is based on one thing. Leftovers. More specifically, Easter Leftovers. See, this is how my brain works. Whenever I know there is a big holiday coming, I buy too much, I make too much, but in the back of my mind, I don't worry about it because I know one way or the other it will all get used. Rather I simply serve the same dishes later in the week, transform them into something new, or use extra ingredients I bought to make new things, in the end it all works out. Plus, I can make my weekly grocery budget stretch if I'm combining the holiday meal with my weekly menu. 

Here is my menu, and my thought process behind each meal.

Meal #1
Double Cheese Mac n Cheese
Fresh Pineapple

** Even though I normally make the sandwiches with deli ham, there is no doubt they would taste even better with some leftover Easter ham! Oh, and the pineapple? It always goes on sale around this time because so many use it with their ham, so it's a great time to use it as a fresh side too! 

Meal #2
Dinner Rolls

**This soup is a great way to use up extra produce you have laying in the crisper drawer. Let's face it, what holiday is complete without a veggie tray? And the extras can easily be turned into a soup the next day. And even though the original recipe doesn't call for meat, you could easily add leftover ham for a delicious new flavor! Dinner rolls are always something we have leftover after a holiday too! 

Meal #3
Bacon

** Can't figure out where the leftovers come into play here? EGGS! I always buy extra for dying and then making deviled eggs too. So when I have an extra dozen...or two...laying around, breakfast for supper is always on the menu! 

Meal #4
Hamburgers
Egg and Olive potato salad*
Baked Beans

** This a great time to explain one big way I keep my grocery bill down. We have freezer beef on hands at all times. Sure, the initial cost is a little pricey, but then it saves us $$$ every single week. The potato salad is actually a new recipe (see below) and just like the soup, it's based on those extra veggies I'm going to have laying around. Not to mention the extra potatoes too! Oh, and baked beans? Those will simply be a reheated leftover from the holiday! 

So there you have it. My first $50 challenge! I get such a thrill when I'm able to save money; and when I can feed my family at the same time, well that's just icing on the cake!

Don't forget to comment with how YOU would feed your family for $50. How many meals can you make? Have any great tips? Share them, please!!!

Egg and Olive Potato Salad
4 large Russet potatoes, peeled and cut into 1 inch cubes
4 hard boiled eggs, chopped
1 large rib celery, finely chopped
1 (5.75 oz.) jar green olives, chopped
1 1/4 c. mayo
1 TBS white vinegar
1 heaping TBS yellow mustard
1/2 tsp. onion powder
Salt and Pepper to taste
Paprika for garnish

Place potatoes in large pot and cover with cold water. Add some salt. Bring to a boil and cook until just fork tender, about 10 minutes. Drain and rinse with cold water. Allow to cool. In a large bowl combine potatoes, olives, and celery. Toss to combine. In a medium bowl combine mayo, mustard, vinegar, onion powder, salt and pepper. Mix well. Pour over potato mixture. Stir to combine. Chill until serving. Sprinkle with paprika.


Monday, December 29, 2014

New Year's Eve Tradition {A Post for Earth Fare}

Happy Monday! Did you have a restful weekend? Were you recovering from all the holiday festivities? Or did you have more holiday gatherings to attend? Either way, I hope you had a very Merry Christmas and Santa was very good to you!

Now that all the packages are put away, the toys are assembled and the leftovers are beginning to dwindle in the fridge, it's time to shift our focus to the New Year.

In our house, NYE has become a family affair, ever since we went from a family of two to three, over 10 years ago. We used to do the whole "go out" thing on Dec. 31st, but when Alex was born, it just didn't make much sense anymore. So, we started to stay in and have a quiet night at home. Then when he got old enough to understand it was indeed a night for celebration, he wanted to stay up late, throw some confetti and turn it into a night of fun. My job? Make sure we have enough to eat all night long.

So, instead of making a huge meal, I put out a big table of appetizers (or "nibbly bits" as Alex calls them) and we eat and eat and eat, until the ball drops. We get in our jammies early, watch movies and stuff ourselves and welcome in the New Year.

If you have yet another holiday party to attend, or maybe a college football bowl game tailgating party, I've got the perfect idea! This cheese ball comes together in almost no time, the food processor does almost all the work for you, and it is simply delicious! Serve it with crackers, pita bread, veggies...anything you like. Your guests will devour it guaranteed!

I tend to get a little depressed when Christmas is over, but now with our little family tradition of New Year's Eve, it gives me something else to look forward to! Not to mention, we get to eat yummy things like this. Maybe our tradition can become part of yours this year!

Olive Cheese Ball
8 oz. cream cheese, room temperature
1/3 c. green olives
1/3 c. black olives
1/4 tsp. hot sauce
1 TBS dried minced onion
1 c. chopped pecans

Add all ingredients, except pecans, to food processor. Pulse until smooth. Remove with rubber spatula onto a piece of plastic wrap. Fold up sides and form mixture into ball. Chill in fridge for about 30 minutes to set for easy handling. Using your hands, cover cheese ball in pecans, pressing gently to adhere. Serve with favorite snack crackers. 


Friday, July 11, 2014

Real Southern Food with South Your Mouth Day 2 {A Review}

If you follow me on Facebook or Instagram you might have caught my photos of our picnic last week on Independence Day. Picnics are a long standing family tradition during the summer months, and this year's 4th of July one also included a little bit of work for me. 

Work because I knew it would be the perfect time for me to try a second recipe from the new fabulous cookbook I introduced you to Wednesday, from my foodie friend Mandy over at South Your Mouth

Working on the holiday isn't that bad when it includes something yummy to eat! (The only downside is taking the time to get the perfect photo before you load up the picnic basket.) I usually include a side salad of some sort for all our picnics....potato...macaroni...something along those lines, so I knew this recipe would fit right in. After all, it has the word picnic right in the title! 

To be honest with you this would be also be a fabulous summer time lunch (It makes a ton, so just keep it in the fridge all week long!) or even a light supper for those nights when you are super busy and it's too hot to even think about anything heavy and complicated. 

Filled with fresh veggies and zesty flavor, it's sure to please each and every time you serve it up, no matter what the occasion. And be sure to click on the link below to see the great ideas Mandy has for switching out ingredients for even more options! 

I'm so happy summer picnic season is in full swing. If you haven't packed up your picnic basket in a while, I highly recommend it. It's an inexpensive, fun family activity that provides smiles galore and memories to last a lifetime!

Picnic Pasta Salad
1 lb. rotini pasta, uncooked*
Salt
2 medium cucumbers, peeled and chopped
1 pint grape tomatoes, halved
1 bunch green onions, chopped
1 (6 oz.) jar green olives, halved
2 tsp. minced garlic
1 1/3 c. Italian dressing

Cook pasta according to package directions for al dente in liberally salted water. Drain, rinse with cold water and drain well. Combine pasta with remaining ingredients and stir to combine. Refrigerate until ready to serve. *NOTE* I used extra large elbows because they were on sale for $.49!! I also added salt and pepper to taste, and some dried parsley for color. 

Mandy includes some alternative versions of this salad in her cookbook. You can also see them on her blog here


Shared on The Country Cook July 11, 2014

Monday, January 20, 2014

Another Re-Do

Today's recipe is another that I first posted almost 3 years ago! It's funny when I find these previous posts because I can't believe it's been that long since I first shared it. But too, for some of them, I haven't made them since, and I can't imagine we've went that long without enjoying the dish. I mean, the reason I'm going back and "re-blogging" most of them is because 1. only a handful of people would have seen them back then and 2. the photos are...how shall I say....less than up to my current standards, so I want to reintroduce them looking pretty! But that neither of those have anything to do with how great the recipes were, or how much we liked them, so it amazes me that I haven't went back and found them before now. 

I came across this recipe when I was first discovering a food blogger my friends were raving about...Ree Drummond. Yep, ya'll know I'm talking about the Pioneer Woman. So many of my fellow moms/home cooks were making her recipes and loving them; and I have to admit I had never heard of her. Well, that quickly changed! In fact, not long after I "found" her, she became a big star on the Food Network. (I don't think one had any influence on the other though.)

We are olive fiends, so I knew we would love this. It reminded me of a cross between a good olive tapenade and garlic bread. That first time I served it, I was actually entertaining my in-laws, and had it with a baked pasta dish. But we all agreed, it was so filling by itself, it could really stand alone as a pizza like meal. So, this time, when my son requested it, I did exactly that. I served it with my Easy Caesar Salad and it made the perfect meal. It really was like a French bread pizza, or loaded open faced sandwich and with the salad, was just the right amount for an easy weeknight meal.

If you love olives on your pizza, I really recommend making this and using it as a main dish like I did. Or, if you are looking for something new for your next party (the Super Bowl is just around the corner!) you could easily slice this into small pieces for a great appetizer. Either way, it's a re-do I think everyone will enjoy!

Olive Cheese Bread From The Pioneer Woman
1 loaf French bread, cut lengthwise into 2 halves
1 (6 oz.) can black olives, drained
1 (6 oz.) jar stuffed green olives, drained
2 green onions, chopped
1 stick butter, room temperature
1/2 c. mayo
8 oz. shredded Monterrey Jack cheese

Preheat oven to 325. In a food processor, add green and black olives. Pulse until chopped very fine. In a medium bowl combine chopped olives, green onions, butter, mayo and cheese. Stir very well to combine. Spread evenly onto bread. Using hands, press gently to adhere to bread. Bake for 25-30 minutes until cheese is bubbly. Slice into large pieces to serve. 


Shared on The Country Cook January 24, 2014

Olives at Very Good Recipes

Wednesday, November 27, 2013

Party Planning Time

Are you ready for tomorrow? Have you started prepping your meal? Do you still have some last minute additions needed to your party/meal plan? Maybe an appetizer? If so, you've come to the right place. I've got you covered with the most simple, but absolutely delicious "nibbly bit" (as my Monkey calls them) perfect for your party table!

Now to be honest, when I decided to post this, I wasn't even thinking appetizers for your Thanksgiving celebration. I actually tested this recipe a couple weeks ago, already thinking ahead to our annual New Year's Eve appetizer blow out. As many of you know, each year the 3 of us stay in, I make a big spread of appetizers and fun foods, we eat all night, watch movies and ring in the New Year! So about this time of year I begin to look for new things to offer on my table that night, and this will definitely make the list this year!

But then I got to thinking, I shouldn't wait to share this with you. I know many of you need appetizers for your Turkey Day weekend, all of the holiday parties coming our way, Christmas celebrations, so many parties, so little time. So, all of us can always use something quick, simple and yummy to throw together, maybe even at the last minute!

How much better can you get than olives, cream cheese and bacon. Yes, BACON! These are especially nice because you can make batches of them throughout your party, without having to be in the kitchen too long, so your guests always have fresh ones to enjoy.

Party planning time is here people. This time of year we all have so many to attend, and I hope like me, you're looking forward to each and every one. But that doesn't mean we still don't need easy ideas to make the holidays just a little less stressful on ourselves!

Bacon and Olive Toasts
Pumpernickel Cocktail Bread or Large pieces cut into squares
Green olives, sliced
Bacon, cooked crispy
Whipped Cream Cheese

Preheat oven to 375. Lay bread pieces on baking sheet. Toast for 6 minutes. Remove. Spread evenly with cream cheese. Top with bacon and green olives.


Appetizers at Very Good Recipes

Monday, September 9, 2013

Still Time For A Picnic

We are a picnic loving family. It's one of our favorite summertime rituals. But with Labor Day behind us, and the stores filling up with pumpkins and scarecrows, I have got to face the fact autumn is well on it's way. It's knocking on the door, just waiting for us to answer.

But there is no doubt we've still got some warm, sunny days ahead of us (I love Indian Summer days!!), so why not enjoy a picnic then too? Sounds like a great idea to me; and I've got the perfect dish for you picnic basket.

My mom and grandma have been making this macaroni salad for as long as I can remember. And I must admit, while I'm happy to be continuing the tradition, no matter how many times I make it myself, it will never taste as good as theirs. Never. I've given up!

If you love hard boiled eggs, or you love green olives, this pasta salad is going to become your new favorite. They are definitely what makes it unique and stand out from others I've had before. I can tell you first hand, I've seen this sitting on a table at a pot-luck, with other pasta salads, and it is always the first to go. Everyone loves it. Simple but scrumptious, those are the two perfect words to describe it.

Now, many of you might read this and say "I don't use Miracle Whip, will mayo work." Quite frankly, no. I am a mayo lover and 99% of the time it is all I have in the house, but when I know I'm going to be making this, I have to buy the other. Why? Well, first off, it is what grandma and mom have always used, and that means I don't mess with it. But I actually have tried it with mayo before, and it just doesn't taste the same. The "whip" has a little more tangy flavor, marrying so well with the mustard and briny olives. I guess to be fair though, you won't have anything to compare it to, so if you want to use mayo, I'm sure it will still be yummy, it's just not what our family is used to; and I always want to be completely honest with you.

If you live in an area of the country where it is picnic weather year round...lucky you! You can enjoy this anytime. But if you're like us, just trying to fit in a final picnic or backyard barbecue of the season before the autumn leaves begin to fall, be sure to add this to your menu!

Mom's Macaroni Salad
1 lb. rotini pasta, cooked, rinsed and drained
1 ( 10 oz.) jar green olives, sliced
1 small onion, finely chopped
6 hard boiled eggs, chopped
1 1/2 c. Miracle Whip (mayo does NOT taste the same in this dish)
3 TBS mustard
3 TBS sweet relish
1 tsp. celery seed
Salt and Pepper to taste
Paprika, for garnish

In a large bowl combine pasta, olives,  eggs and onions. In a small bowl whisk together Miracle Whip, mustard, relish, celery seed, salt and pepper. Pour over pasta mixture. Stir well to combine. Cover and chill until serving, at least 2 hours. Before serving, stir again and sprinkle with paprika.


Shared on The Country Cook Sept. 13, 2013

Monday, June 10, 2013

Take A Cheesy Dip {A Gooseberry Patch Review and Giveaway}

It doesn't take much to excite me. As I get older, the little things are what I find the most enjoyment in. And one on the top of the list is getting an envelope or package in the mail from my great friends at Gooseberry Patch.

From getting notified that another of my recipes is going to be published in one of their fabulous cookbooks, to having the honor of reviewing their newest publication, my relationship with the wonderful folks of Gooseberry is one of the things I'm most proud of in my blogging career.

And this time, I have a fun filled, yummy food packed cookbook to introduce you to: Game- Day Fan Fare. If you are sports fanatics like we are, then you are probably always looking for delicious game day fare; but even if you aren't, you will still find such an array of easy, tasty recipes to choose from, you will want to make them any day of the week!

I actually chose a new appetizer to try this time, and I debuted it for my family over Memorial Day weekend when we were packing up the car for a family picnic. We were headed about an hour north of our house to this fabulous "off the beaten path" park that has a wonderful playground for an afternoon full of fun in the sun, with of course, a picnic basket of favorites.

I also love the story that comes with this dish. The reader who submitted it tells of a steakhouse in Massachusetts, that was loved but went out of business. This was the dip they served to people while waiting for their meals to be served. The mother of the lady who gave it to Gooseberry had gotten the recipe from the restaurant back in the 1940's. I not only love the history that comes with that story, but the ability to recreate a restaurant favorite at home. You know how much of that I do with our favorite restaurant dishes too!

It was the perfect new offering to our regular picnic flare. I served it with crackers, but we found it was just as yummy with vegetable dippers too! However you serve it, it will become a new favorite at home or for parties, I'm sure!

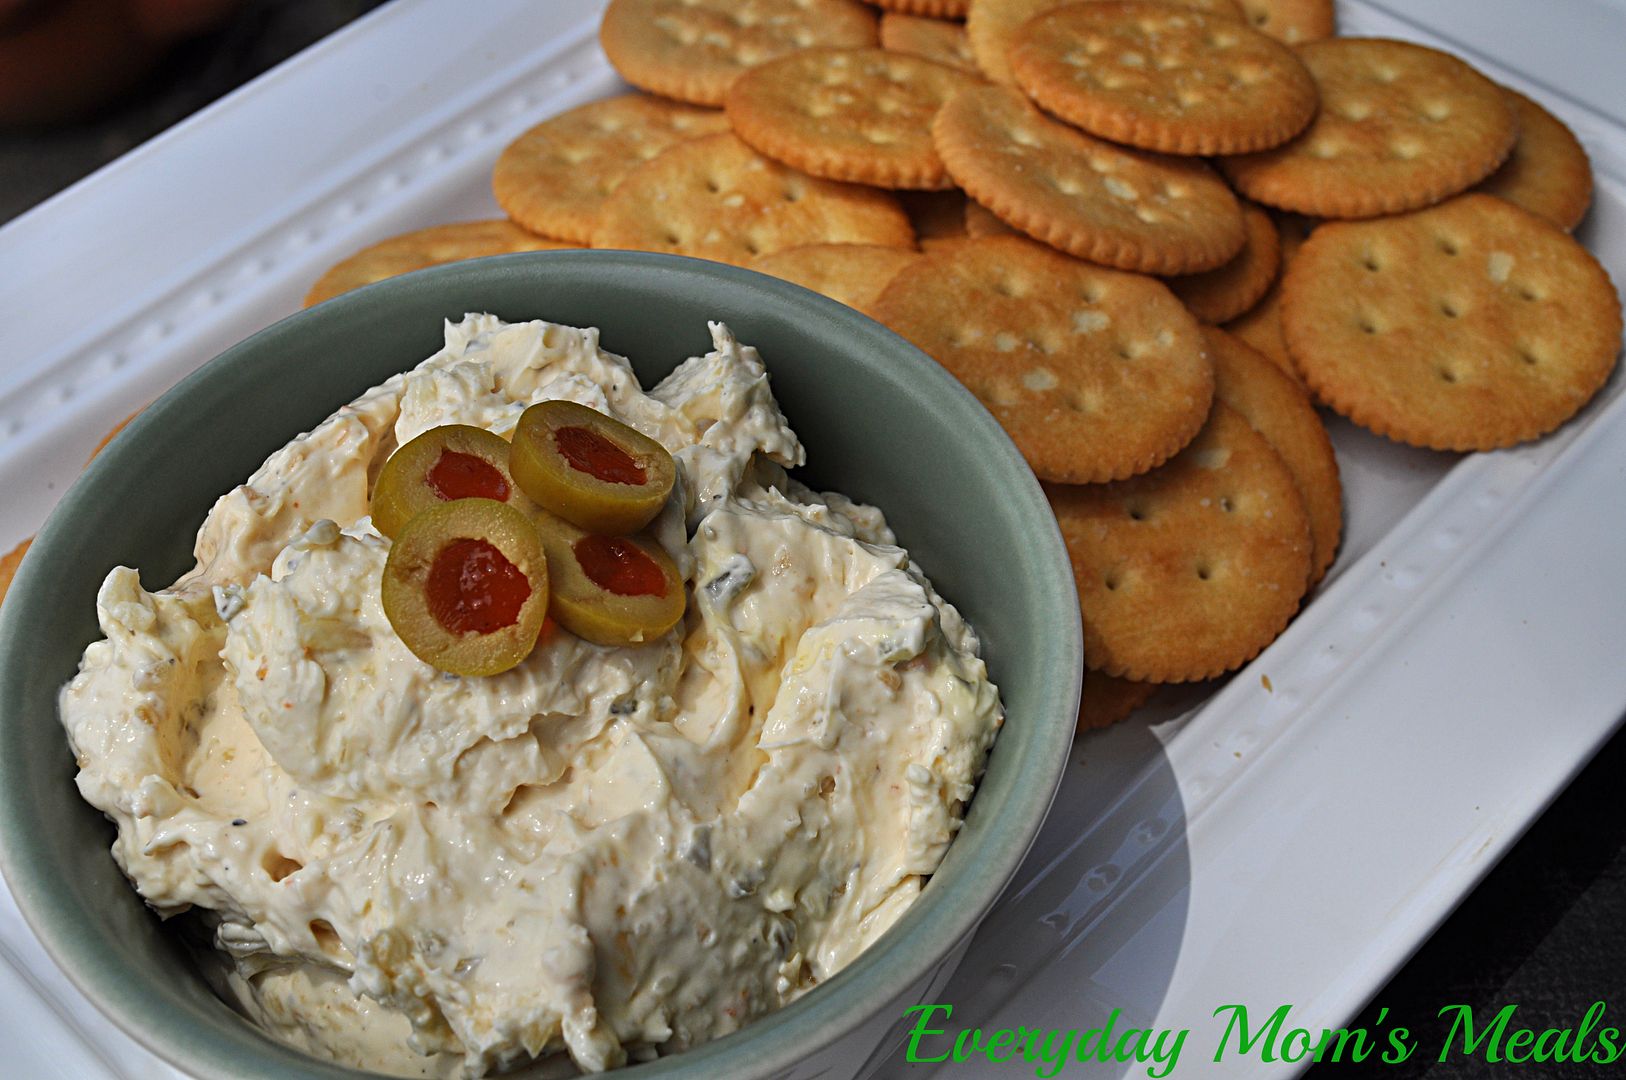
Charlie's Steakhouse Cheese Spread 
Submitted by Barb Henderson, Everton, AR, Page 48
8 oz. cream cheese, softened
2 TBS onion, minced
1 1/2 tsp. ketchup
1 1/2 tsp. sour cream
2 TBS sweet pickle relish
3 green olives with pimentos, diced
1 clove garlic, minced
1/2 tsp. dry mustard
1/2 tsp. Worcestershire sauce
Salt and Pepper to taste

Combine all ingredients in a large bowl; mix well. Cover and refrigerate for 2 hours or overnight. Serve with veggies or crackers.
*NOTE* I put all ingredients in a food processor and pulsed until creamy and smooth. I also added a dash more Worcestershire sauce and garnished with extra olives.


Shared on Make Ahead Meals June 10, 2013
Shared on Mandy's Recipe Box June 11, 2013
Shared on Lady Behind The Curtain June 12, 2013
Shared on The Country Cook June 14, 2013


****GIVEAWAY****

Rules:
1. This contest is open to US Residents 18 and older ONLY.

2. The winner will be chosen by Random.org 

3. The winner will be notified by email and Facebook. He/she will have 48 hours to respond or another winner will be chosen.

4. When leaving comments for entries, they MUST BE SEPARATE ones AND include an email address so it's easy for me to find the winner. If entries are together, it will only count as (1) and if no email, entry will not be considered.

5. If any of the extra entries are items you are already doing, please just remind me!

6. Contest Ends: Monday June 24, 2013 12am EST

One Lucky Winner Will Receive

(1) Game-Day Fan Fare Cookbook


Mandatory Entry:
1. Leave a comment telling me your favorite game day food.

Extra Entries:

1. Follow Gooseberry Patch on Twitter. Leave a comment saying you've done so.

2. Become a fan of Gooseberry on Facebook. Leave a comment when you've done so.

3. Follow EMM on Twitter. Leave a comment when you are.

4. Follow me on Pinterest and leave a comment.


That makes up to 5 entries per person!!!

Good Luck!


Disclaimer: I was provided with 2 cookbooks for this review. One to keep, one to giveaway. All thoughts and opinions are my own.


Wednesday, May 22, 2013

Summer Salad Supper {A Review/Giveaway with Taylor Farms}

I love when I can take a little help from the store, making my life just a little simpler when it comes to meal time. I think busy moms (and dads) everywhere would agree with me, it's okay to take help where we can when it comes to getting good food on the table for our families. 

And when it comes to convenience foods, one of my favorites are bagged salads. From the simple tossed salad to the complete salad kits, I use these in my kitchen a lot! Hence why I was so excited to team up with my new friends at Taylor Farms to introduce you to all of their bagged salad sensations! 

Founded in 1995, Taylor Farms was on a quest to become America's favorite salad maker. They have partnered with the finest companies in North America to provide excellent quality salads for their loyal customers. With salad varieties from Garden Vegetable, to BBQ Ranch, Southwest Chopped, Asian Chopped and many more, there is a salad, or complete salad kit to fit anyone's tastes. 


The folks at Taylor Farms were kind enough to send me quite the sample box to experiment with, and after a lot of fun in the kitchen, I decided to feature the Southwest Chopped Salad today. Filled with chopped cabbage, Romaine lettuce, cilantro, and green onions, it also comes with crunchy tortilla strips, pumpkin seeds and a creamy cilantro dressing. Now, that would be a tasty salad all on it's own, but of course, me being me, I had to add a little EMM flare to it. I decided on a couple more southwest inspired veggies, plus topping it with a fabulous grilled chicken bursting with chili and lime flavor, with just enough kick to make you know it's there! Not too spicy for those who can't take the heat, but with enough heat to remind you what the Southwest is all about! 

Plus, did you know May is National Salad Month? What a better way to celebrate than with a great salad kit filled with fresh, tasty ingredients. Plus, if you are on Instagram, snap a photo of your chopped salad, add #choptalk and you could have the chance of being featured on Taylor Farms website and Facebook page! 

And now, you have the chance to win some Taylor Farms coupons for your kitchen too! Just scroll down under the recipe for full giveaway details and rules! 

Southwest Chopped Salad with Grilled Chili Lime Chicken
2 bags Southwest Chopped Salad 
1 (1.5 lb.) package chicken tenders
1/2 c. vegetable oil
Juice of 2 limes
Zest of 1 lime
1 TBS chili powder
1/2 TBS paprika
1 tsp. garlic powder
1 TBS Montreal Chicken Grill Seasoning
1 (15 oz.) can black beans, drained and rinsed
1 (11 oz.) can corn, drained
1 avocado, chopped
1/2 c. grape tomatoes, halved
1/4 c. green olives, chopped
Salt and Pepper to taste

In a medium bowl whisk together oil, lime juice and zest, chili powder, paprika, garlic powder, grill seasoning, salt and pepper. Place chicken in a large plastic bag. Pour marinade over chicken and chill for 2 hours. When ready, preheat grill to high. Spray with nonstick spray. Sear chicken on both sides for about 1-2 minutes and then reduce heat to medium-low and cook for about 15-20 minutes, until done, turning occasionally. Remove to platter and allow to cool slightly. In a large bowl combine salad mixes, black beans, corn, avocado, tomatoes and green olives. Mix well. Divide among serving plates. Drizzle with cilantro dressing included in kit. Chop chicken and top each salad with equal portions. 


Shared on Lady Behind The Curtain May 22, 2013
Shared on Miz Helen's Country Cottage May 23, 2013
Shared on The Country Cook May 24, 2013


********Giveaway********
Rules:
1. This contest is open to US 18 and older ONLY.

2. The winner will be chosen by Random.org 

3. The winner will be notified by email and Facebook. He/she will have 48 hours to respond or another winner will be chosen. I will then pass on your address to the sponsor for shipping.

4. When leaving comments for entries, they MUST BE SEPARATE ones AND include an email address so it's easy for me to find the winner. If entries are together, it will only count as (1) and if no email, entry will not be considered.

5. If any of the extra entries are items you are already doing, please just remind me!


6. Contest Ends: June 1, 2013


Two Lucky Winners Will Receive:
$25 in Taylor Farms coupons
(2 winners will each be given 25 $1.00 coupons)


Mandatory Entry:
1. Become a fan of Taylor Farms on Facebook. Leave a comment when you have.

Extra Entries:

1. Become an EMM Facebook fan. Leave a comment when you have.

2. Follow EMM on Twitter. Leave a comment when you are.

3. Follow EMM on Pinterest. Leave a comment when you have. 


4. Follow me on Instagram. Leave a comment when you have. 


5. Upload a photo to the Instagram contest. Tag @everydaymomsmeals on it, and then leave a comment here.

That makes up to 6 entries per person!!!

Good Luck!

Disclaimer: I was provided with free samples in exchange for this review. The coupons were given to me for a giveaway. All thoughts and opinions are my own.


Pin It