Everyday Mom's Meals: Cake
_____
Showing posts with label Cake. Show all posts

Saturday, November 10, 2018

Think Outside The Pie Box

I realize the dessert of choice on Thanksgiving is pie. I am not even going to argue that point. Pumpkin, Apple, Mincemeat, Pecan, Sweet Potato... we all have our favorite. And I am not complaining. My mom's pumpkin pie is something I look forward to each and every year.

But maybe you want to include another option. Maybe you want a different option other than pie. Or maybe you are having a smaller holiday and don't need a big pie for only a few people. Or maybe you're going to have house guests for an extended time that week, and you want an idea for dessert other than the big meal. If any of these are true, have I got a treat for you!

A super simple cake, that starts with a little help from the store, that smells and tastes like autumn, and has two of fall's favorite flavors...apple and cinnamon!

This makes the perfect amount for 4-6 people, depending on the size of the pieces, and I'm guessing if you need to feed more, you could easily double the recipe, use a 9x13 pan and have it be just as yummy.

Pies are as much a part of Thanksgiving as turkey and dressing. But that doesn't mean we can't make a little room on our table for another sweet treat!

Apple Cinnamon Cake
1 (7 oz) package apple cinnamon muffin mix
1/4 c. milk
1 egg, beaten
1 1/2 TBS apple butter
1 TBS brown sugar, packed

Icing
4 oz. cream cheese, softened
1 1/2 tsp. apple butter
2 tsp. brown sugar, packed

Preheat oven to 350. Grease 8x8 baking pan. In a large bowl combine first 5 ingredients. Stir well. Pour into pan. Bake for 25-30 minutes until toothpick comes out clean. In a small bowl combine last three ingredients. Mix until smooth. When cake is done, cool on wire rack. Frost with cream cheese icing. 


Shared at Weekend Potluck

Sunday, July 29, 2018

Mr. E Turns 44

Today is a BIG deal on the blog. Not only do I have a terrific dessert for you, I actually baked it!

Look, I am the first to admit I am not a baker. It just doesn't make me as happy as "regular" cooking. Now, yes I can make a mean muffin, and I will bake every once in a while, but if there is a dessert served in this house my family knows it's going to be something no baked, a fluff, or store bought. Oh, okay, I'm pretty good at those pre-sliced cookies too.

But for a special day, and a special request from my special someone, I threw on my big girl apron and made it happen!

Here is the scene. We were driving home from FL. Oh, and for those who don't know, we drive straight through...all night...which usually ends up being about 22 hours in the car, with stops for gas and food. We have been blessed with 2 boys who are amazing travelers, and Mr. E doesn't mind staying up all night. I will drive if he needs me to, but usually he does it all, with my co-piloting and helping to keep him awake...until I snooze a bit.

Anyway, we were in about hour 17...the boys were sleeping and it was just him and I. I have to be honest, I actually enjoy those times. We talk. We enjoy the scenery. We make fun of other drivers. And usually we get a little slap happy and end up making each other laugh so hard we cry.

That's when I asked him what kind of dessert he wanted for his birthday. In our house, you can have anything you want for your special day. It doesn't have to be cake. Alex and I have both been known to ask my mom for her pumpkin pie. And one year Alex requested root beer floats.

I had already asked his parents to come over for a cookout since his birthday was on a Saturday this year, and planned the menu, all he needed to do was decide which sweet treat he wanted. It didn't take him long to tell me..."I want a cold, orange cake, that is creamy and has mandarin oranges on top."

"Okay....sure...I will get right on that." That was my first thought. But with the rest of the drive I brainstormed and by the time we got home I had a plan.

Well, I have to admit, I hit a home run with this one. He said it was EXACTLY what he wanted and everyone thought it was delicious! I was pretty proud of myself. It is a pretty tasty, cool end to any summer meal!

Tropical Orange Cake
1 (15.25) oz. white cake mix
1 (11 oz.) can mandarin oranges, reserve juice, save a few for top
Water, combined with juice- enough to make 1 cup total
1/3 c. vegetable oil
3 egg whites
1 (8 oz.) tub Cool Whip
1 (3.4 oz.) box instant vanilla pudding
1 (16 oz.) can crushed pineapple
1 1/2 c. sweetened shredded coconut

Preheat oven to 325. Grease and flour a 9x13 pan. In a large bowl combine cake mix, egg whites, oil and 1 cup juice/water mix. Beat with electric mixer on medium speed until combined. Turn to high speed and beat 2 minutes more until creamy. Fold in oranges. Transfer to dish. Bake for 35 minutes or until toothpick comes out clean. Place on wire racks to cool. In a medium bowl combine pineapple and pudding mix. Fold in Cool Whip. Add 1/2 c. coconut. Stir well and chill until ready to use. When cake cool, top with frosting, spreading evenly. Sprinkle with remaining coconut and  garnish with oranges. Cover and refrigerate 24 hours before serving. *NOTE* READ the directions on the box for your type of pan and cake mix. I used a glass pan, hence more cooking time. You want 1 cup TOTAL liquid between the reserved juice and water. Measure how much juice you have and add enough water to make 1 cup. 


Shared at Weekend Potluck

Friday, September 25, 2015

A Sweet Treat For Mom

My poor mom, she can barely eat anything. Not because she doesn't want to, but between health conditions and allergies, her "okay" list is pretty short. Think I'm exaggerating? The lady has to check the ingredients on bread because most of them she can't have. No joke. So, when I find something she can eat, and it would be a treat for her, you bet I'm going to! 

Okay, so technically these began as her idea. She emailed me a recipe for pound cake she found that she could actually eat. Well, it sounded just a bit too complicated for this busy food blogger, so I decided to find something with similar ingredients that could be made in "mini" form. More fun anyway, right??!! Plus, with only her eating them, they are portioned perfectly!

Oh, and the other part of this story is the poor lady that can't eat, is now recovering from her 6th operation, in 5 years, on the same foot. Yep, we are holding our breath, and crossing our fingers and our toes (No pun intended) this is the last one! So, you can see why I was totally up for giving her a sweet treat she could really enjoy!

Love pound cake? Then you're going to adore these! Same flavors. Same density. Just individualized for easy snacking! They would make a great breakfast on the go too! 

I love my sweet mom. She is a special lady. Ask anyone who knows her, and they will tell you how lucky they are to know her. But I'm the luckiest. I get to call her mom, and make her special treats that make her smile.

Mini Pound Cakes
1 1/2 c. flour
1 c. sugar
1 1/2 tsp. baking powder
1/4 tsp. salt
3 eggs
2 sticks butter, softened
1/4 c. milk
1 tsp. vanilla

Preheat oven to 350. Line 2 muffin trays with papers. In a large bowl combine flour, sugar, baking powder and salt. Add butter, milk and vanilla. Mix until just combined. Using an electric mixer, mix at medium speed for about 4 minutes. Scrape the sides of the bowl. Add eggs one at a time, mixing for 30 seconds after each. After all eggs are added, mix at medium speed for another minute. Batter will be thick and fluffy. (It will resemble frosting!) Spoon into muffin in, filling each well 1/2 way. Smooth out with back of spoon or spatula. Bake for 20 minutes or until toothpick comes out clean. Cool on wire rack.  *NOTE* If you have extra wells in your tin, put some water in them before baking for more even cooking.  


Recipe from Cupcake Recipes
Shared at Weekend Potluck

Saturday, December 27, 2014

Soul Food Saturday


With Christmas just passed most of us have baked until wee hours of the morning for everyone we love and had little to nothing left to have with our morning coffee. Grab a steamy mug full of your favorite drink and pull up a seat, this one's for you! 

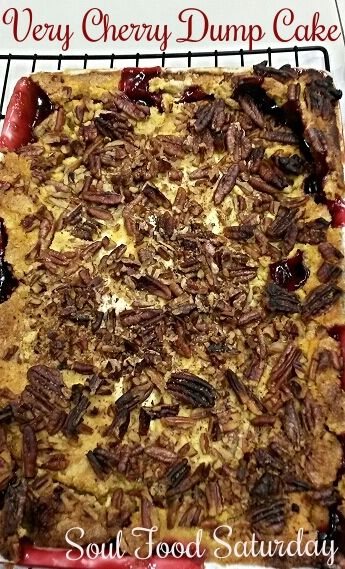
Very Cherry Dump Cake 
2 21oz. cans cherry pie filling
1 box yellow cake mix
1 stick of butter, melted
1 c. chopped pecans
 
In a microwave safe bowl, melt butter and set aside. In a 9x13 baking dish add cherry pie filling. Add cake mix on top, evenly. Drizzle entire top with melted butter, then sprinkle with chopped pecans.


Place into 350 preheated oven for 50-60 minutes or until browned and bubbling. 
 
Serve hot with ice cream or whipped cream, however you choose this one will be a winner with your family too!


Saturday, May 24, 2014

Soul Food Saturday


This year for my mother’s birthday I decided to bring the party to her. Her having to work on her birthday wasn’t going to stop the celebration or in anyway slow it down. I took it upon myself to deliver this fresh baked out of the oven coffee cake to lift her birthday spirits, and share a pick me up with others in the office. Let them eat cake, celebrate a birthday, and have coffee on a work day! Grab a big fork, a cup of your favorite coffee, and a friend. Because this is a party, and everything sweet is best shared with a friend!

Cinnamon Cranberry Coffee Cake
Package yellow cake mix
1 small package instant vanilla pudding mix
3 eggs
1 c. sour cream
½ c. vegetable oil
1 c. dried cranberries
½ c. brown sugar
2 tsp. ground cinnamon
 
Preheat oven to 350 degrees. Grease or spray 9”x13” pan with non stick butter spray. In a large bowl, add the cake mix and pudding mix, stir to combine, and remove lumps. Add the eggs, sour cream and oil. Mix until well blended. In a small bowl combine the sugar, and cinnamon. Set aside. Pour half of the batter into the prepared pan. Then place cranberries in a layer over the batter. Then sprinkle with half of the cinnamon sugar mixture. Pour the remaining batter over the top. Then finish with the remaining cinnamon sugar mixture. Bake for 35 minutes in the preheated oven. Then cover top with foil sprayed with non stick spray so as not to stick to topping. It will keep the top from over browning. Bake an additional 30 to 35 minutes until toothpick will come out clean, and top will be golden brown. Allow to cool 15- 20 minutes before slicing. Serve warm with coffee, or at room temperature. Either way you choose, you’ll want more than one slice.


Saturday, April 26, 2014

Soul Food Saturday


Today we are celebrating the birthday of Soul Food Saturday. That’s right. One year ago, (April 27, 2013) I shared the first recipe with you, and haven’t looked back. Along with Mrs. Everyday by my side we've celebrated, shared memories, and toasted along the way. So I wanted to celebrate our first big milestone with a quick dessert you're going to love. So, let's toast SFS and to another yummy year!

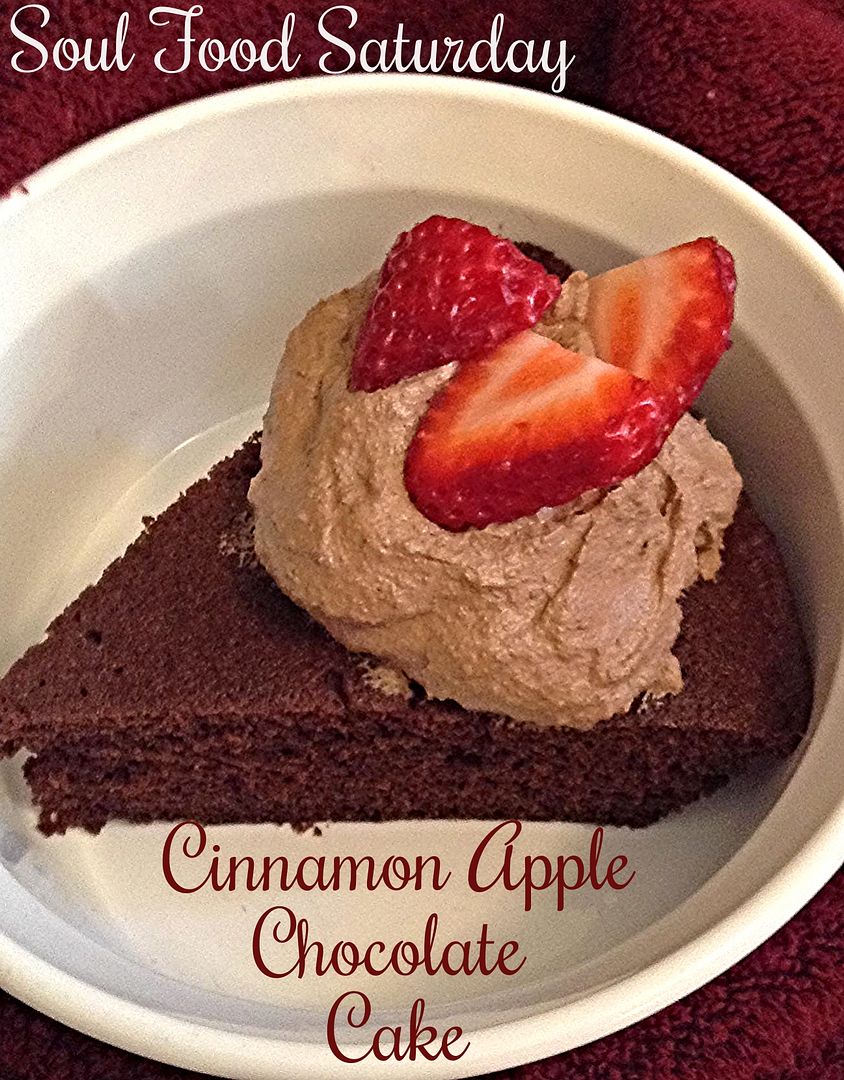
Cinnamon Apple Chocolate Cake in a Flash!
1 box devils food cake mix
1¼ c. water
½ c. unsweetened apple sauce
3 eggs
½ tbs. ground cinnamon
Butter spray for pans

In a large bowl add cake mix, apple sauce, water, cinnamon and eggs. With an electric mixer beat on low for 30 seconds to combine, and then a few minutes to get everything completely incorporated. Batter will be lumpy. Coat two 9 inch pie plates with butter spray. Divide batter between both. Microwave on high power for 7 minutes, test with toothpick for doneness.
Remove from the microwave. Allow to cool on a rack before adding topping. Repeat with 2nd pie pan.

Chocolate Whipped Topping
1 tub whipped topping
2 tbs. cocoa powder
1 tsp Vanilla

In a medium bowl add whipped topping, cocoa and vanilla. Mix until combined.
*Note: We enjoyed the sweetness that the whipped topping already had without adding additional sugar. If you prefer sweeter whipped topping, add powdered sugar by the teaspoon until desired sweetness is acquired.

Our favorite way to enjoy this cake is warm, minutes from being done. Top with whipped topping and your favorite fruit. We love strawberries so that’s how we enjoyed it here.


Wednesday, April 9, 2014

Childhood Lunchbox Treat

When I was a kid, I preferred a packed school lunch to a cafeteria one. I wasn't a picky eater, and some days I would eat what they were serving, I simply enjoyed things my mom would send for me more. And one of the things she would treat me with, which to this day I still love, were Twinkies.

The spongy cake, the sweet creamy center. Oh, I can taste them now. Yes, we were those people when they stopped making them last year. A phone call of desperation went out to my husband, he stopped at the store, and when he came home that night he had 7 boxes in tow to last us until the crisis was over.

I love these snack cakes so much my brother even got me a Twinkie baking set for Christmas so I can make my own any time I want! So, I might be a little obsessed...no judging!

So when I came across this cake I knew it would be one we would gobble up! Sure, the base is made with a pre-made cake, but don't let that fool you into thinking it's not pretty enough for guests. In fact, if you are looking for something for Easter dessert, I think this would be perfect. It's rich, so it can really stretch to feed a crowd because every one will only want a small piece! But on a holiday when the sweet tooth is taking over, it will certainly satisfy!

Who knew a lunchbox treat from my child hood could be transformed into a decadent dessert my whole family would love. And since there is fruit on the top, that means I can feel less guilty about eating a whole box, right??!!

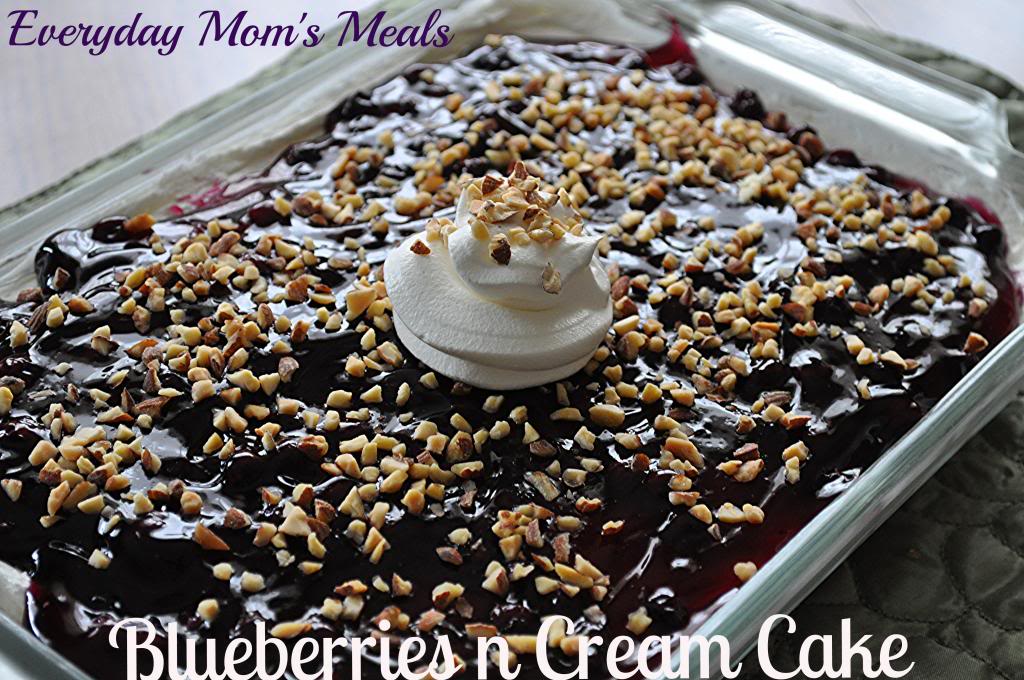
Blueberries n Cream Cake  Inspired by Mr. Food
1 box Twinkies (see note below), sliced lengthwise
1 (21 oz.) can blueberry pie filling
8 oz. cream cheese, softened
2 cups powdered sugar, sifted
2 (8 oz.) containers Cool Whip
1/4 c. almonds, finely diced

In the bottom of a 9x11 baking dish, place enough sliced Twinkies to cover and fit. Cut to fill entire bottom if necessary. Combine cream cheese and powdered sugar in a large bowl. Beat with an electric mixer, on low speed, until creamy. Fold in 1 container Cool Whip. Spread over Twinkies. Pour pie filling over cream cheese layer. Spread evenly. Sprinkle with almond chips. Chill 2 hours. When serving, garnish with extra Cool Whip and more almond chips. *NOTE* You will more than likely not use the entire box of Twinkies, so slice as you go. I used 6 total.


Shared on The Country Cook April 11, 2014

Saturday, July 6, 2013

Soul Food Saturday #12

Happy Saturday! I hope your holiday weekend is bringing you sun, fun and some relaxation too. Today Bekki is celebrating a special day in her family by jazzing up a store bought cake mix into a chocolate lover's dream dessert!


Tomorrow is my parents' 40th wedding anniversary! Its so amazing to see how beautiful marriage can be through the eyes of the ones that brought me into this world. It inspires me to give everything I've got to my marriage, and to everything I hold close to my heart. For this big celebration I am sharing my Daddy’s absolute favorite cake. Believe it or not it’s a box cake dolled up, just like I did for my wedding cupcakes. But this one goes over the top with a big side of vanilla ice cream on the side. 
Be careful who you share this cake with, because they will definitely be back for more! Happy Anniversary to the best parents on the planet, I pray that God gives you 50 more anniversaries just as beautiful as your hearts!!!! This one is just for you!!!
Daddy’s Ultimate German Chocolate Cake
Pillsbury German chocolate cake mix
3 eggs
½ c. apple sauce
1 c. water
1 can Pillsbury coconut pecan frosting
Preheat over to 350 degrees

Spray 13x9 inch pan with non stick cooking spray and set aside
Blend cake mix, eggs, apple sauce and water until moistened. Then blend on medium speed for several minutes or until completely combined.
Pour mixture into prepared pan, and bake for 34-38 minutes. Toothpick will come out clean when inserted in the cake’s center. Cool 10-15 minutes before removing from pan. Cool completely before frosting.
You can frost this beauty however you like, but for Daddy’s ultimate cake I used the store bought frosting. The entire can for one 13x9 cake. Don’t forget the ice cream on the side. That’s mom’s favorite part. Whether its natural vanilla or rocky road, I hope you enjoy this as much as my parents always have!

“Let them all be merry and eat cake”!!!!


Pin It

Wednesday, February 13, 2013

I Finally Did It...Just In Time

For a very long time now I have been wanting to try making my own buttercream frosting. See, I have this tiny obsession with good frosting. Cookies and cakes are great, but for me, they are simply a vessel to carry the frosting into my mouth. Yep, I was the kid that would eat the piece of birthday cake and inevitably leave behind cake after all the yummy frosting was gone.

However, I am kind of a frosting snob. I don't like whipped frosting at all. And for me to enjoy a buttercream, it has to be smooth. Those grainy ones you sometimes find on things from the supermarket bakery, well that just makes me mad. It looks great, but the minute I take a bite my sweet tooth is totally disappointed. The canned varieties are okay, and some flavors are even close, but there just isn't anything like the made from scratch, tastes like grandma's, kind.

After reading the recipe that has been collecting dust in the back of my recipe box for years now about 100 times over, I finally convinced myself I could do it. Plus, I had extra motivation. Our local Kroger market has these sugar sandwich cookies that are filled with some of the yummiest frosting I've ever had; and I'm a little addicted to them. I seriously can NOT step into that store without walking out with one. But I'm not there a lot...maybe once every couple weeks...so I needed to be able to sustain in between those visits. (I told you...I'm addicted)

This frosting is so super simple, I honestly felt like saying to myself "Really? That's it?" I can't believe I always thought it would be too involved. Especially now that I have my stand mixer. It literally did all the work for me.

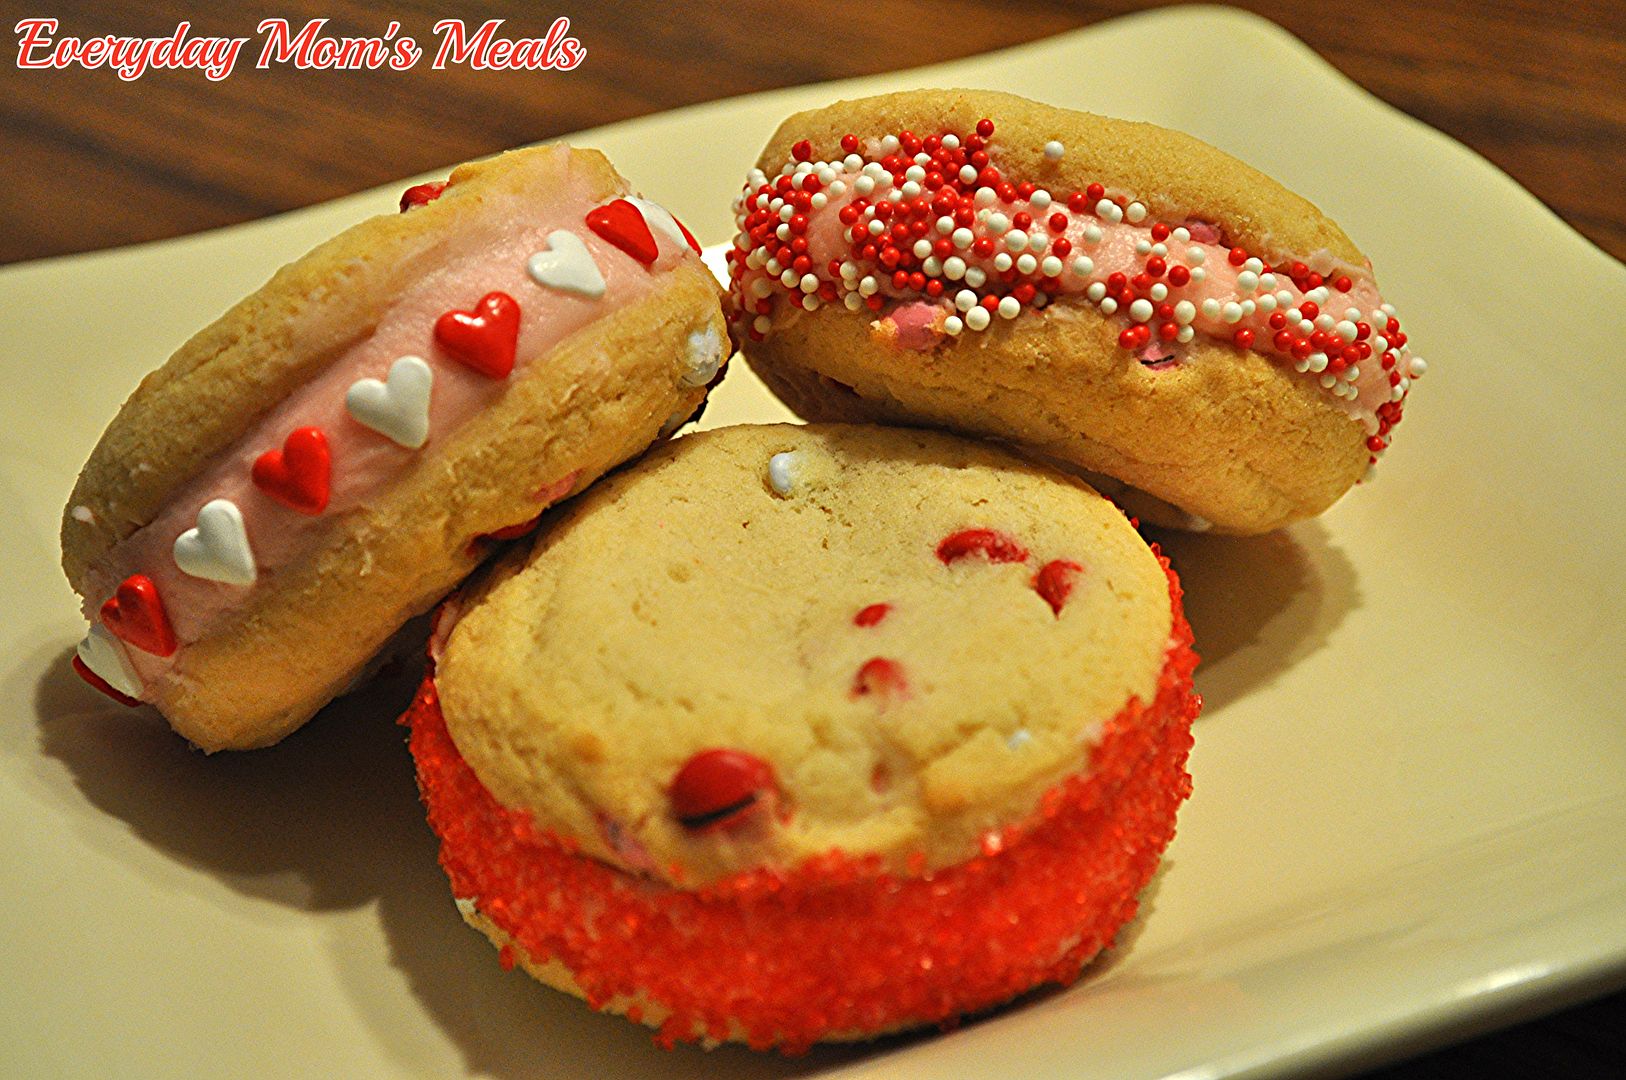
Now this recipe will make enough to frost a 2 layer (8 inches each) cake, about a dozen cupcakes, or about 12-14 of these sandwich cookies. Since I was making the frosting from scratch, I took some help from the store with some cute Valentine's sugar cookies, but feel free to bake your own!

Be warned though. This stuff is dangerous. You will find yourself eating it straight from the bowl with a spoon, it's that delicious! Don't worry though, my lips are sealed....sealed with frosting!

Buttercream Frosting
1/3 c. softened butter
1 lb. powdered sugar
1/4 tsp salt
1 tsp vanilla extract
3-4 TBS milk

Using an electric or stand mixer, cream butter, salt and vanilla together until light and fluffy. Add powdered sugar a little at time, mixing between each. (Don't worry, it's going to appear very thick) Add milk and mix until creamy, and spreadable.

To make cookies, spread frosting onto bottom cookie. Top with another. Gently push down so frosting comes out sides. Using a butter knife, remove excess and smooth. Roll in sprinkles.


Shared on Lady Behind The Curtain Feb. 13, 2013
Shared on Miz Helne's Country Cottage Feb. 14, 2013
Shared on The Country Cook Feb. 15, 2013
Dessert at Very Good Recipes
Pin It

Tuesday, January 22, 2013

Baking With Love

Yep, that's right, I am already thinking about that day of love that is actually quickly approaching! But this year, the first treat I wanted to make that was Valentine's inspired, actually started at Christmas! Let me explain...

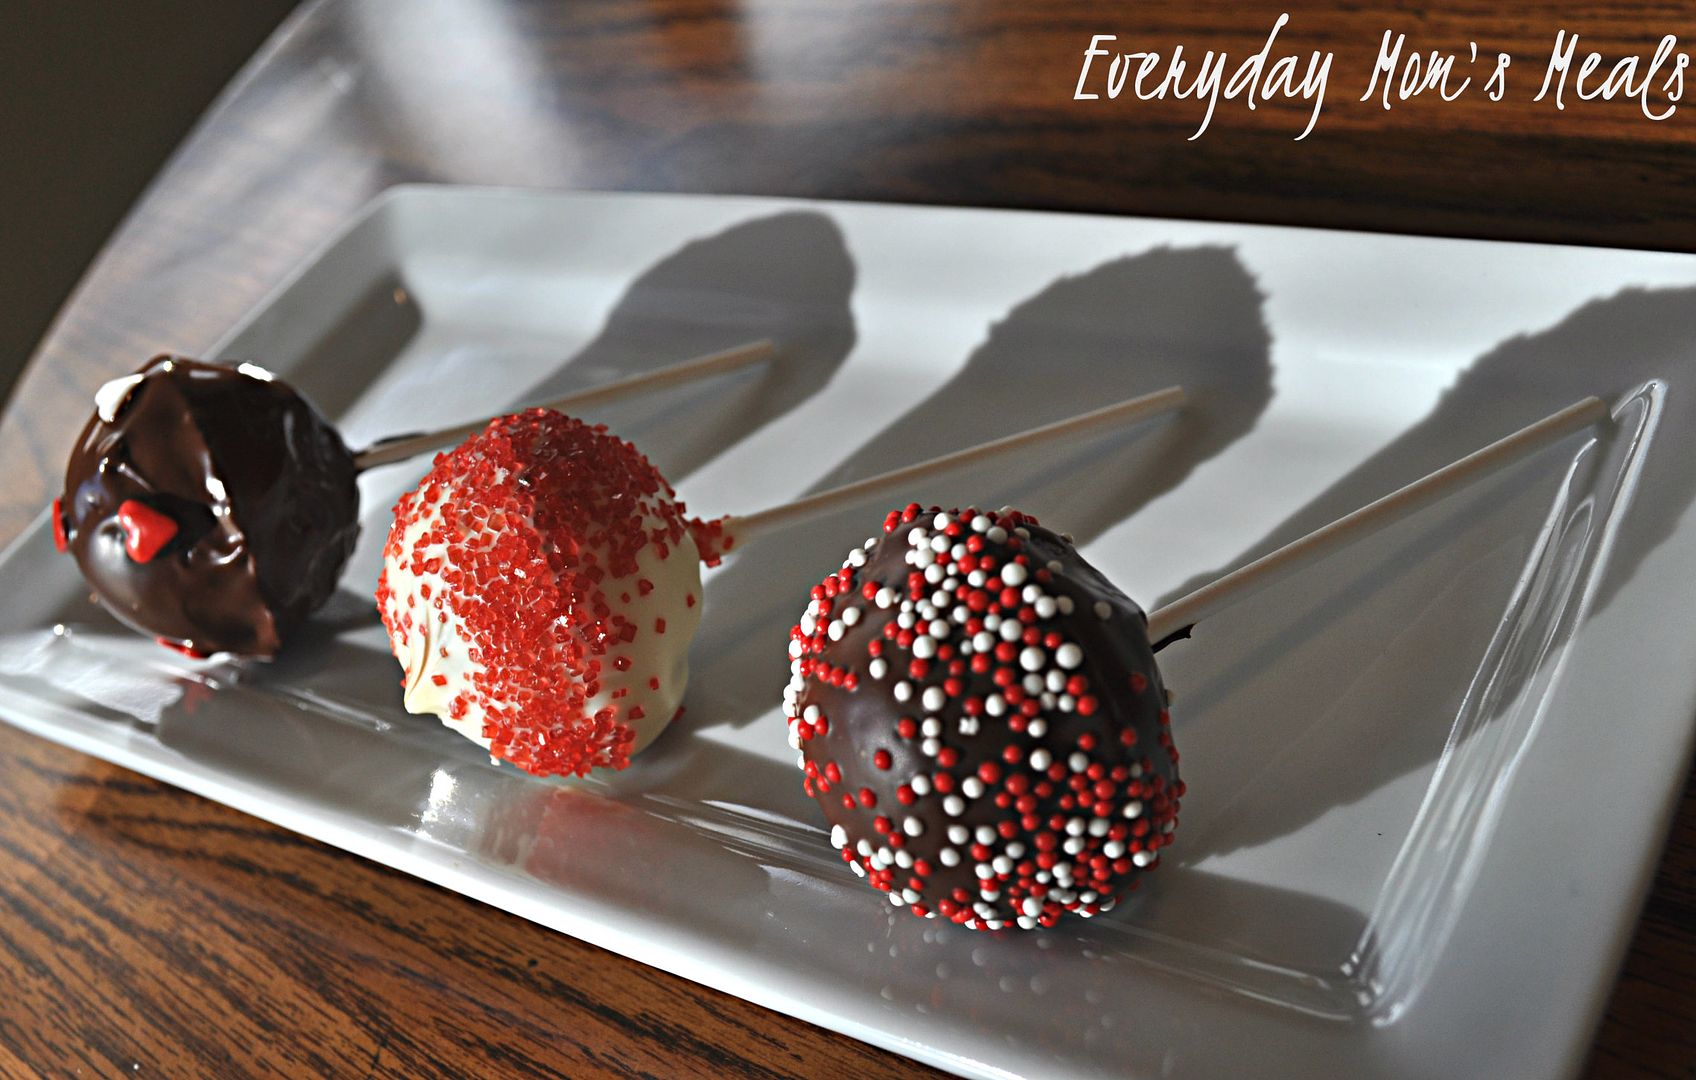
I have been wanting to try my hand at cake pops for a while now. Why? Because I've had them at Starbucks before and I quickly became addicted! So when I spotted a cake pop pan I immediately added it to my  wishlist; and on Christmas morning, Mr. Everyday came through with flying colors. I didn't want a machine to make them, just a simple pan to use in the oven. It's the perfect cake pop helper! I'm telling you, these are no fail! Mix, pour, bake! How much simpler could it be?

These would certainly please any valentine from young to old! Maybe a special after school treat on the festive day! Or, if you are lucky enough to be able to share home made treats with your child's class, these could make you a rock star mom! Or better yet, if your little ones are home with you, making these would be the perfect fun activity for the day!

I love treating my little valentine to something yummy and fun each February 14th, and for me, there is no better definition of "baking with love" than either surprising him with a sweet treat, or having him in the kitchen next to me making one! Plus, we always share with my other "big" valentine too, his Daddy!

Valentines Day is the perfect chance to show all those special people in your life just how much you care about them, and we all know the quickest way to anyone's heart is through their stomach, especially when it includes chocolate!

Fudge Cake Pops Adapted from Nordicware
3/4 c. semi sweet chocolate chips
1/2 c. butter
3/4 c. sugar
2 eggs
3/4 c. flour
1/4 tsp. salt
3 TBS cocoa
8 oz. semi sweet chocolate baking bar
8 oz. white chocolate baking bar
Sprinkles
Cake pop sticks

Preheat oven to 325. Grease cake pop pan. In a small sauce pan over low heat, melt chocolate chips and butter. Stir to combine until smooth. Remove and pour into a large mixing bowl. Add sugar and cocoa. Stir well. Add eggs, one at a time, stirring after each. Add flour and salt. Stir well until combined. Spoon mixture into pan and bake for 25 minutes or until a toothpick in the center comes out clean. Remove from oven, cool in pan for 5 minutes and then remove to cool completely. To melt baking bars, break into small pieces in glass bowls. Microwave for 30 second increments stirring after each until melted. Insert sticks into cake pops. Dip each into melted chocolate, swirling to remove excess. Decorate with various sprinkles.


Shared on Mandy's Recipe Box Jan. 22, 2013
Shared on Hun What's For Dinner Jan. 22, 2013
Shared on The Hopeless Housewife Jan. 23. 2013
Shared on Lady Behind The Curtain Jan. 23. 2013
Shared on Miz Helen's Country Cottage Jan. 24, 2013
Shared on The Country Cook Jan. 25, 2013

Disclaimer: This is NOT a paid endorsement for Nordicware. All thoughts and opinions are mine.

Chocolate at Very Good Recipes
Pin It

Saturday, December 15, 2012

Weekend Company {Guest Blogger Amber}

Good Morning. I hope you had a great week, and are in the full swing of Christmas. Is your shopping done? Headed out to the mall today? Is it all wrapped? I know so many of you are working on those Christmas presents, treats, decorations, etc. So I really appreciate you taking a minute to stop by EMM and see who I have sharing another yummy recipe! She stopped by once, back in autumn, and I'm so happy to have her back. Please welcome Amber back to EMM~


Hello again to the EMM family -- this is Amber from Whole Foods for Whole Families, and I'd like to thank Krista for letting me do another guest post. 

If you saw my post on Baked Apples, you may remember my family: my youngest daughter became really sick and conventional medicine gave us a diagnosis (chronic benign neutropenia of childhood) just shrugged its shoulders. So our research led us to a drastic diet change: gluten-free and dairy-free. Then my husband and I went grain-free (also called Paleo) about 8 months ago. We feel so much better, we haven't looked back!

For today's recipe, I'll be honest: I struggled. I couldn't decide on what to make that was gluten-free and dairy-free yet would also appeal to the masses.

Then I figured everyone loves dessert, so I started there.

This recipe for Flourless Dark Chocolate Cake is wonderful for a few reasons. 

First, it's chocolate. Lots of chocolate. And it’s baked together into a fudgy kind of goodness that makes just about anybody happy.

Secondly, it's best when made a day ahead of time. That may not sound like much of a great thing, but when you're planning a busy holiday dinner, getting a dish done a day or two ahead of time can be a real time-saver.

And last, it's a normal recipe that can be found outside of the gluten-free world, and that makes me feel just a tiny bit normal.

So make this Flourless Dark Chocolate Cake because you can put it together a day ahead of time. Or make it because your Aunt Sally is lactose intolerant. Or make it because a holiday guest is trying out a gluten-free diet, and you want to impress them with a dessert even they can enjoy. Or make it because it's chocolate. And it’s good.

Flourless Dark Chocolate Cake
 4 oz unsweetened bakers chocolate
7 oz dark chocolate (60-70% cacao)
¾ cup palm shortening* or ghee**
¼ cup honey
7 eggs

Preheat oven to 325 degrees. Generously grease a 9-inch round cake pan. Fill a medium saucepan or a teakettle with water and bring to a boil while preparing cake.

Place a large, heat-safe mixing bowl over a large saucepan filled with about 1 inch of water. Bring water to a light simmer. Break chocolate into smaller chunks and place into mixing bowl. Add shortening and honey, stir to melt chocolate and shortening slowly.

While chocolate is melting, beat eggs with a mixer on medium speed until they are doubled in size, about 4-5 minutes.

When chocolate and shortening are completely melted, take the bowl off the heat. Gently fold in half of the eggs into the chocolate until fully incorporated. Repeat with remaining eggs until no streaks remain.

Pour cake batter into prepared pan. Place the cake pan inside a large roasting pan so it lays flat. Carefully pour boiling water inside the roasting pan (not on top of the cake!) until the water reaches half way up the sides of the cake pan.

Place in the oven and bake for about 15-18 minutes. The cake is done when the sides are set but the middle still looks wet. Do not over bake, the middle will set up as it cools. Remove cake pan from water and allow to cool on a wire rack. Cover in plastic wrap, place in refrigerator overnight (or up to 4 days).

To remove from pan: pour a small amount of very hot water into the roasting pan. Place cake pan into water for about 10-15 seconds and remove. Set a serving plate upside down on top of the cake pan, then quickly flip them over together. The cake will pop right out!

Dust with cocoa powder or powdered sugar before serving.


*Palm shortening is similar to shortening like Crisco, except it has no preservatives and no soybean oil (soy can inadvertently affect hormonal levels among other things). Palm shortening is also lower in polyunsaturated fats which are highly susceptible to rancidity and oxidation, both which are harmful to our bodies.
**Ghee is also called clarified butter. The butter is heated, the milk solids (casein and lactose) separate and are removed from the fat. Just the fat remains and that’s called ghee.


Pin It

Saturday, October 20, 2012

Weekend Company {Guest Blogger Erin}

Good Morning! Are you as happy as I am that the weekend is once again upon us? Did you have a good week? I hope so. We actually get a 3 day weekend this week because Monkey had Fall Break yesterday, and believe me, the extra day was much appreciated!  It seems like the weeks are going by faster and faster, with us already into the last half of October already!

Today I have a real treat for you. My dear friend Erin is back once again with such a decadent recipe the pictures had me drooling the minute they showed up in my inbox.

For those who don't know, Erin and I have been friends for over 20 years now, and while life may get in the way of us seeing each other as much as we would like to, we always find a way to catch up, and immediately pick up right where we left on. So, when she is kind enough to drop by EMM to share something delicious, it's extra special for me because it's as if we are sitting down over a cup of coffee, sharing something we both love...food.

~So please welcome her back, sit down, and stay a bit~


Good Morning!  Happy Saturday to all!  I am so honored to be guest blogging again here on Everyday Mom’s Meals.  Krista and I have been friends for over twenty years now and I can honestly say, without a doubt, we will be friends for the rest of our lives.  I love watching her blog grow and develop and I am always impressed with the new and exciting things she has to offer!


Today I would like to share with you a recipe that is near to my heart.  You see, I was born and raised in Indiana and I love my cornfields!  I would have been perfectly content to spend my days on familiar ground; but God had bigger plans for me, and in 2004 I graduated from college, got married and moved to Ohio.  I love Indiana and I always will; but now my life is in Ohio.  I’m not a Hoosier and I’m not a Buckeye, so what am I?  I’m a Hoosier-Hioan!  That is what inspired me to create this cake.  I have been to a lot of church suppers in my life, and there was always a sheet cake.  Always.  At least in Indiana!  The sheet cake was a novel concept to all my new church friends here in Ohio.  I’ve made lots of sheet cakes, white ones, chocolate ones, all good in their own right.  I’m always looking for ways to improve on favorite recipes, so when I made my chocolate sheet cake recipe, I decided to kick it up a notch.  I started by adding whipped cream – good, but common.  Then it came to me…..BUCKEYES!  I make buckeyes at least once a year.  Yummy peanut butter and chocolate bites no one can resist.  My cake had the chocolate; it just needed the peanut butter!  I tinkered with a basic peanut butter sauce until I got it just right.  Served on my rich chocolate sheet cake, with whipped cream on top, the sauce was PERFECT.  And so the Hoosier-Hio cake was born, a Hoosier cake at heart with a little bit of Buckeye for excitement.  Enjoy!


Hoosier-Hio Cake
by Mrs. Erin King

Preheat oven to 350 degrees.  Grease 18 x 13 inch rimmed baking sheet. 

Cake:

2 c. flour
2 c. sugar
½ tsp baking soda
½ tsp salt
2 eggs, plus 2 yolks
2 tsp vanilla
¼ c. sour cream
8 ounces semisweet chocolate, chopped
4 Tbs unsalted butter
¾ c. vegetable oil
¾ c. water
½ c. dutch-processed cocoa powder

Chocolate Icing:

8 Tbs (1 stick) butter
½ c. heavy cream
½ c. dutch-processed cocoa powder
1 Tbs light corn syrup
3 c. powdered sugar
1 Tbs vanilla

Peanut Butter Sauce (recipe follows)
Whipped Cream

In a large bowl, combine flour, sugar, baking soda and salt.  In another bowl, whisk egg yolks, vanilla and sour cream until smooth. 


Heat chocolate, butter, oil, water and cocoa in a large sauce pan over medium heat, stirring occasionally, until smooth, about 3-5 minutes.  Whisk chocolate mixture into flour mixture until incorporated.  Whisk egg mixture into batter, then pour into prepared baking pan.  Bake until toothpick inserted comes out clean, 18 to 20 minutes. 

About 5 minutes before the cake is done, heat butter, cream, cocoa and corn syrup in a large saucepan over medium heat, stirring occasionally, until smooth.  Off heat, whisk in powdered sugar and vanilla.  Spread warm icing over hot cake.  Let cake cool to room temperature, for about an hour, then refrigerate until icing is set, about 2 hours.  Bring back to room temperature before serving. 

Peanut Butter Sauce:

1 c. peanut butter (I only use Jiff.)
splash vanilla
2 tsp heavy cream

Mix together in a microwave safe dish.  Microwave on high for about 2 minutes, stirring after first minute.  Drizzle warm sauce on cake right before serving, garnish with whipped cream.


Thursday, October 11, 2012

If You Can Pour...

 Then you can make this dessert! Last Thanksgiving I shared my Pumpkin Dump Cake with you in the spirit of the autumn season. The idea of a "dump cake" is pretty straight forward. You dump everything into the baking dish, cook it and in little less than an hour you have a dessert warm from the oven. What I love about them is the use of a dry cake mix making it so time friendly; and giving the cake a more cobbler or crisp texture. By using the mix dry and adding butter instead of the normal eggs, water and oil, it becomes something totally different than the prepared cake. So in that same spirit I decided to do another one this fall with pumpkin's distant autumn cousin...the apple. Or more specifically apple pie filling. Not to mention another favorite of this time of year, pecans. There is just something about the smell of apples, spices and nuts baking the oven that make me want to put on a hoodie, grab a mug of hot apple cider, and go on a hayride. This is great served warm w/ a scoop of ice cream, or with a little dollop of whipped cream. If you are looking for a sweet treat to get your family into the autumn spirit, this is definitely one to try. Or, even jot down and tuck away for next month and Turkey Day!

Apple Dump Cake
2 cans no sugar added apple pie filling
1 (18.25oz) box butter pecan cake mix
2 sticks butter, thinly sliced
1 c. pecan chips
1/4 tsp cinnamon
1/8 tsp nutmeg
1/4 c. brown sugar

Preheat oven to 350. Lightly spray a 9x13 baking dish with cooking spray. Spread pie filling into bottom. Sprinkle with cinnamon and nutmeg. Stir well. Sprinkle with brown sugar and then cake mix. DO NOT MIX. Sprinkle with pecans. Top with butter slices. Cover dish with foil and bake for 45 minutes to an hour until browned and set. Refrigerate leftovers.


Friday, August 17, 2012

One From My Working Days

These days when I'm meeting someone for the first time and the question "What do you do?" comes up, I answer with "I'm a stay at home mom and a food blogger." But there was a time I had a job outside the home, and for those who didn't know me 8 years ago, they don't realize this. I got my degree in 2002 and immediately started looking for a "real" job instead of waiting tables. I was blessed to find something that was the perfect fit for me at a local orthopedic medical office. I loved my job. I loved the people I worked with. I was there almost 3 years, and only one thing could make me quit...that's right, Monkey. He was born in September 2004 and my days of being a "working gal" were over. I knew my destiny had already been decided for me. I was supposed to stay home with him. After all, being a mom was all I ever truly wanted to be anyway. Early on when he was still a baby there were days, that while I was so happy to be with my baby enjoying every single minute, I did long for some adult conversation; and I would begin missing my friends from work. But those days became fewer and farther between, as we developed a routing, and especially as he grew older and we could interact more. There are many things I took away from that job. Lifelong friendships, job experience and even some incredible recipes! This is one that when I finally learned to make it I couldn't believe how easy it was. It's the perfect weeknight "throw together at the last minute" dessert; or if you serve it to guests it will be one they  request the recipe for. Yes, I was once in the working world, but this world of "mommyhood" and food blogging are what I'm all about now!

Blueberry Bubble Cake
1 (18 1/4oz) yellow cake mix, dry
1 (21oz) can blueberry pie filling
1 1/2 c. lemon lime soda

Preheat oven to 375. Grease a 9x13 baking pan. Spread pie filling over bottom of pan. Sprinkle evenly with cake mix. Pour soda over top. DO NOT mix. Bake for 45 minutes until a toothpick comes out clean and browned on top. Serve with whipped cream, vanilla ice cream and/or fresh berries.


Shared on The Country Cook Aug. 17, 2012
Shared on Make Ahead Meals Aug. 20, 2012 
Shared on Mandy's Recipe Box Aug. 21, 2012
Blueberries at Very Good Recipes
Pin It

Thursday, May 3, 2012

Favorite Pie Morphed

Last summer I shared that one of Adam's favorite pies is Key Lime, and every year during our annual 2 week vacation in Florida, we have one in the fridge at all times just waiting for us to indulge. I don't know why, but it always tastes better in the Sunshine State than at home. Well, okay, let's face it, all food tastes better when you're eating it in the sunshine, watching the ocean's waves rolling in! Lately I've noticed a new craze in the cooking world, or at least new to me~ Poke Cakes. I'm assuming these have been around for some time now, but for me, they have become one of those ideas I see once and think "oh that looks yummy" and then I start to see them everywhere! All different flavors, all different kinds, from all different people! So it got me to thinking "if I tried one, what flavor would I want the first to be?" And then the idea hit me. Key Lime!!! Take my hubby's favorite Florida pie and turn it into a cake we can enjoy during the spring time while we're still looking forward to that vacation! After a little research, I found exactly what I was looking for and couldn't wait to surprise the boys with it! Absolutely delicious, the perfect lime flavor and super easy to make, this cake is will be something we can enjoy for years to come! Do you make poke cakes? What are your favorite flavors?

Key Lime Poke Cake from Betty Crocker
1 box white cake mix
The oil, water and eggs for cake- Look on Box (Mine took 1/3 c oil, 1/2 c. water and 3 eggs)
1 can whipped white frosting
1 (14oz) can sweetened condensed milk
3/4 c. heavy whipping cream
1/2 c. key lime juice (look for a bottle on the juice aisle)
3 tsp. grated lime peel
4 drops yellow food coloring
1 drop green food coloring
Lime slices for garnish, optional

Preheat oven to 350. Spray a 9x13 pan w/ cooking spray with flour. Using an electric mixer, prepare cake according to package directions and bake until toothpick comes out clean. (Mine too 30 minutes). In a large bowl combine condensed milk, whipping cream, key lime juice, 1 tsp. grated peel and both food colorings. Stir well until mixture combines and thickens. When cake is finished, allow to cool 5 minutes. Using the handle of a wooden spoon, 1/2-inch in diameter, poke holes in cake every inch or so. Wipe off handle often to avoid sticking. Pour milk mixture over cake and spread evenly allowing it to fill holes. Some of the mixture will be left on top of cake. Refrigerate 1 hour. Frost cake using a spatula and sprinkle w/ 2 tsp. grated peel. Store in fridge, loosely covered. Garnish w/ lime slices.


Shared on Miz Helen's Country Cottage May 3, 2012
Shared on The Country Cook May 4, 2012 
Shared on Around My Family Table May 4, 2012 
Shared on Justa's Kitchen May 5, 2012 
Shared on Make Ahead Meals May 7, 2012 
Shared on  Mandy's Recipe Box May 8, 2012
Shared on Gooseberry Patch May 24, 2012 

Cake at Very Good Recipes
Pin It

Saturday, April 7, 2012

Weekend Company {Guest Blogger Melissa}

Happy Easter weekend! I hope you had a great week and this weekend you are spending time w/ family and celebrating this holiday having fun, being blessed and eating some yummy food! Today my guest is Melissa from Served Up With Love. She has a yummy dessert to share w/ us, and if you are still looking for one more sweet treat for tomorrow, this would be perfect. Be sure to stop by her blog, and visit her on Facebook too! I wish each of you and your families a very joyous Easter. He has Risen! Hallelujah, He Lives!

Hi, my name is Melissa and I live in Northeast Virginia. Lived here my whole life and love it. I have always enjoyed cooking and creating. When I try a dish I rave about it to my friends and family and tell them I will get them the recipe. I then never get around to sharing that recipe. Starting my blog in March 2011, this gave me an opportunity to share my recipes not only with my family and friends but now the world. What could be better? One day I stumbled upon Southern Plate and I absolutely fell in love with it. The stories that Christy tells makes you feel as though you are right there with her as she is telling them. I loved how she shares a tidbit of her life with her recipes. When I was younger I had a dream to be a writer. I loved to write and one time I won a local essay contest, I was in elementary school. I don’t remember the dollar amount that I won, only the pride I felt. As I became a wife and mother I kind of put the dream of becoming a writer on the back burner, what most of us moms do. I began cooking and creating my own dishes and just fell in love with that as well. One day I realized that I could share my two loves and I set out on a quest to do just that. Without Christy Jordan I do not know if I would have realized that I could do this. That is how Served Up With Love was born. Everything I do is with love so the name was only fitting.. All my grandparents passed away when I was young so I don’t have those memories of all the yummy goodness they served up. I rely on the few things I remember and what my parents tell me. I try to recreate those recipes for them when I can and give them a little piece of their childhood as well. May not be the same but I sure do try. Life keeps me extremely busy between working full time, being a wife and a mother of two great kids. My son is 16 and my very active daughter is 5.


The recipe I chose to share with you today is what I call Berrylicious. This cake is easy and very versatile. I usually don't make this often as most of my family does not like cream cheese. I just don't understand that at all. They do not know what they are missing. Whenever I see a recipe and think it looks good, I know if cream cheese is involved my family will not eat it. This being my Mom, Sisters, and their families. My husband and kids have no problem. This can be solved though with substituting cool whip instead. This is made with pie filling. Since pie filling comes in so many different options, this cake is easily changeable: Blueberry, cherry, apple, lemon, and could even make this patriotic by mixing blueberry with strawberry or cherry. One on the inside and one on top. See what I mean about versatile. Endless possibilities here. I sure hope you get to try this cake, if you do I would love to hear how it goes.
 

Berrylicious

1 box of yellow cake mix (ingredients called for on box)
1 can of strawberry pie filling
2 blocks of cream cheese, softened
1 stick of butter, softened
2 cups of powdered sugar
1 teaspoon of vanilla extract

Mix cake according to direction on box in two 8 or 9 inch pans. Allow to cool. Cream the cream cheese and butter together until mixed, add vanilla and powdered sugar gradually, mix until creamy. Place the bottom layer on a cake plate. Spread a little bit of cream cheese icing between the layers and add a little strawberry pie filling over that. Careful not to get to edge or this will mix in with you icing around the cake. Place the top layer on and spread on remainder of the icing. Add the remaining pie filling on top. Keep this in the fridge and enjoy. 


Thank you all for allowing me to join you today and I hope you stop by my little neck of the woods often, I sure do enjoy your visits. I will have the sweet tea ready for you. Happy Cooking.
 

Melissa

Pin It