Everyday Mom's Meals: Oats
_____
Showing posts with label Oats. Show all posts

Monday, April 3, 2017

Middle of the Night Hunger

We've all heard the saying "It's a stick to your ribs kinda meal." Most of the time it is usually in reference to a big meal at supper time, or when talking about sending the kids off to school, a hearty breakfast that will keep them going. But what happens when those worlds collide? This is what happens.

See, we are big breakfast for supper fans. I plan it at least a few times a month. And the meals vary. Eggs, potatoes, meat, pancakes, waffles, quiche, toast, biscuits n gravy...I come up with all sorts of combos to indulge our preference for morning food at night.

But the one thing I find myself having an issue with is ending up hungry later in the night. Now, I know it's not the meal itself because I've got two "boys" with big appetites eating the same thing, and they don't end up with grumbling tummies, so it must just be me. Many times when we have these types of meal, I find myself waking up in the middle of the night starving. Or at least I think I'm starving.

When I saw this recipe, my first thought was "Wow. What a stick to your ribs kinda breakfast." What? Wait a minute...that means if I made it for supper, it would have the same effect and maybe I wouldn't wake up chewing on my pillow!

I was right! This will stay with you! It's perfect for a hearty breakfast to get your day started right, or a weekend brunch. Maybe even Easter Sunday after sunrise service. It makes a pretty good dinner too. I served it with some sausage links on the side, and we were all full and satisfied. And I stayed that way all night long!

This tastes just like a warm oatmeal cookie straight from the oven. And I can tell you, neither me or Alex are huge oatmeal fans, and we gobbled this down. This was the perfect amount for the 3 of us, so if you're making it for a bigger crowd, be sure to double the recipe. (See note below)

Waking up in the middle of the night feeling like you haven't eaten in hours is no fun. Laying awake counting cows instead of sheep, just so you can think about steak isn't normal. But now I've found a way to enjoy our little tradition and keep those pangs of starvation away!

Amish Baked Oatmeal
3 c. quick cooking oats
1 c. brown sugar, slightly packed
2 eggs
1 c. milk
1 tsp. vanilla
1 tsp. cinnamon
2 tsp. baking powder
1 large apple, peeled and chopped
1 stick butter, melted
1 1/2 tsp. salt
Extra Milk
Toppings: Fresh berries, nuts, dried fruit, etc

Preheat oven to 350. Lightly grease a 8x8 baking dish. In a large bowl combine first 10 ingredients. Stir well until mixed. Pour out into baking dish. Bake for 30-45 minutes until edges are brown and middle is set. Let sit for 5 minutes before serving. Garnish with milk and toppings. *NOTE* If you double this recipe, switch to a 9x13 pan, and increase cooking time a little, but start checking at the 30 minute mark.


Disclaimer: Recipe adapted from Taste of Home. As a field editor, and not a paid employee, I share this with no compensation.

Wednesday, October 7, 2015

Celebrate #Oatober with Peanut Butter & Co.

Just in time for Halloween, and all the sweetness that goes with it, I've teamed up with my good friends at Peanut Butter & Co. and Bob's Red Mill to transform October into "Oatober"!

I've got something that the little ones can not only enjoy for an after school snack, lunchbox treat, or Halloween party dish, but can also help make! They will love getting their hands sticky and messy, and then maybe even licking them when done!

So many schools don't allow homemade treats at classroom parties, but if yours is okay with it, these would be perfect! So yummy and a perfect little sweet bite.

We love peanut butter. Like eat from the jar with a spoon love, so the double peanut butter punch in these, with the Reese's candies, makes them extra special.

If you're looking for something fun to make with your kids, or maybe something to feed all those little goblins and witches that come to your big Halloween bash, I've got you covered!

No Bake Halloween Balls
2 1/2 c. old fashion oats ( I used Bob's Red Mill)
1 c. creamy peanut butter (I used PB & Co. Smooth Operator)
1/2 c. honey
1 tsp. vanilla
1/2 c. mini chocolate chips
1/2 c. Reese's pieces

Combine all ingredients in a large bowl. Mix well. Roll into balls. Chill for 30 minutes to set. Store in fridge in airtight container. *NOTE* When rolling, some of the candies will want to fall out. Just keeping pressing. 


Shared at Weekend Potluck

Disclaimer: As part of Yum Squad I received product in exchange for this post. All thoughts, opinions and the recipe are all mine.

Friday, September 11, 2015

Jump on the Pumpkin Bandwagon

Pumpkin Spice is everywhere....in every thing! From chapstick (yep I saw that) to coffee creamer, cupcakes and candy...tis the season! Now, I'm not complaining because I have yet to find something pumpkin flavored I didn't like, so I figured why not jump on the bandwagon?

I know many of you share my love of all things "no bake" during the hot summer months, but who says that convenience has to end at Labor Day? I say let's carry it right on through to fall, after all our schedules aren't any less busy, so why not make dessert something we can whip up in no time? Plus, there are still going to be days that are warm enough we don't really want to bake anyway.

Parfaits are a great no bake treat when you don't have much time, but want to impress. Layer anything into a nice dish or glass and it looks so fancy, nobody will care it only took you about 20 minutes!

A couple notes about this recipe. One, if you make your own granola, of course use that instead. I was going for all out help from the store. Secondly, if you can't find the pumpkin spice pudding (it's a seasonal thing) you can easily substitute vanilla, and add pumpkin spice to taste.

I'm all about welcoming fall in the most delicious way, and if that means I need to find more ways to fit pumpkin into recipes, well I'm okay with that too!

Pumpkin Spice Parfaits
12 oz. bag granola with raisins and almonds
1 small box (4 serving) pumpkin spice pudding
1 1/2 c. milk
1/4 tsp. pumpkin pie spice
Cool Whip
Ground Cinnamon

Combine pudding mix and milk in large bowl. Whisk well. Chill for 10-15 minutes to set. Open bag of granola. Add pumpkin pie spice. Shake well.  In parfait cups, place a couple TBS granola. Top with a couple TBS pudding. Continue layers.Top with Cool Whip. Sprinkle with extra granola and cinnamon.


Shared at Weekend Potluck


Monday, July 28, 2014

"Science Only Goes So Far, And Then There's God"...

I found the above quote online last week, and nothing could have been more appropriate for what was going on in our lives at the time.

As many of you already know, two weeks ago tomorrow, we had quite the scare. After four days of shortness of breath, my husband went to the ER, and was later diagnosed with multiple large pulmonary emboli in each lung. In layman's terms, his lungs had very large blood clots in them. Not exactly the news you are expecting on a Tuesday morning!

He was admitted to the hospital for 2 1/2 days for a battery of tests and observation. Many scary causes of PE have been ruled out, and for now they are thinking it might be something genetic, which we will get the results from those labs in another week or so. He was sent home on blood thinners, and since then we've been trying to get back to "normal."

I have been with this man for 17 years, and never has he scared me like this. The doctors told us they had no idea how he was able to walk into the clinic that morning. He was about 15 minutes away from full cardiac arrest; and 1/3 of all patients who present with what he had, don't last 24 hours. It was when I heard those statistics I knew without a doubt my husband is a walking miracle.

And while we are so incredibly grateful to all the doctors, nurses and hospital staff that helped to save his life, we also know there was a bigger hand in play. Even they had to admit, there was no explanation other than God's work as to why he was still with us.

So fast forward to the next Monday, and ironically enough it was his 40th birthday. That's right, we had oh so much more to celebrate this year, and I wanted to make sure it was extra special for him. It was the perfect time to make a new dessert using his favorite summer time berry, black raspberries. But after such a long week, I needed something quick and easy too! He loved every bite, and I was just thankful to have him here to cook for.

Each and every day is a gift. Be sure to tell those you love most, just how much they mean to you. And if you have a husband you love more than life, like me, hug him extra tight tonight for me!

Raspberry Crumble
2 c. red or black raspberries, fresh or frozen, if frozen, thawed
2 TBS sugar
1 tsp. cornstarch
1 1/2 tsp. water
1/2 tsp. lemon juice
1/2 c. old fashion oats
1/4 c. flour
1/4 c. brown sugar, packed
1/2 tsp. cinnamon
1/4 c. cold butter, diced

Grease a 2 quart casserole dish. Preheat oven to 375. Place berries in prepared dish. In a small bowl combine lemon juice, cornstarch, water, and sugar. Stir until smooth. Pour over berries. In a food processor, combine oats, flour, brown sugar, cinnamon and butter. Pulse until crumble mixture appears. Sprinkle over berries. Bake for 25 minutes until bubbly. 


Monday, June 2, 2014

Saturday Morning Cartoons and Breakfast

When my little man was a even smaller little man, Saturday mornings were for two things. Hanging out with Daddy and watching cartoons. Yep, they would let Mommy sleep in late, and fend for themselves for a few glorious hours every weekend. And Daddy's go-to breakfast for his favorite buddy was instant oatmeal; and for Alex it had to be maple and brown sugar.

I can't say I blame him, when I was growing up, it was the only flavor of oatmeal my mom could get me to eat too. There is just something about those flavors that scream comfort breakfast to me. To this day, if I eat oatmeal it is more than likely flavored with those two things.

As I've mentioned before, lately I am just a little obsessed with muffins. I'm not sure why the joy of making homemade muffins found me so late in life, but it has, and I find myself busting out the muffin tins more and more. Plus, now I have this nifty carrying case for them that is airtight and super convenient, so they last even longer. And when I get a new kitchen gadget I am inclined to use it as much as possible!

These little bites of goodness are perfect for breakfast, brunch or even a light dessert. Pack them in a school lunch (for those of you like us who are, yes indeed, wrapping up the school year...only 4 more days!!) or keep them on hand this summer for a great, quick, or even on-the-go snack for the little ones. They are just their size and they will love the flavor!

Now that he's older, Saturday mornings are for many different things, depending on our schedule, but every once in a while you can still catch my little man in front of the television, watching a favorite cartoon and enjoying a bowl of oatmeal; or now some of these instead!

                 Maple and Brown Sugar Oatmeal Mini Muffins Inspired by Crepes of Wrath
1 3/4 c. all purpose flour
3/4 c. old fashioned oats, plus extra for garnish
1 c. packed homemade brown sugar, see recipe below
1 egg
1 c. milk
1 stick butter, melted and slightly cooled
1 tsp. vanilla
2 TBS maple syrup
1 tsp. cinnamon
1/2 tsp. salt
1 tsp. baking soda
1 TBS turbinado sugar

Homemade Brown Sugar
1 c. white sugar
1 1/2 TBS molasses

Combine sugar and molasses and stir well until completely combined.

Preheat oven to 375. Grease a mini muffin tin. In a medium bowl whisk together flour, oats, baking soda, cinnamon and salt. In another bowl (I used my stand mixer) beat together butter and brown sugar until smooth. Add egg and beat on low. Add milk, vanilla, and maple syrup. Beat on low until well combined. Add half of flour mixture. Beat on low. Scrape down sides. Add other half. Beat on low until mixed. Increase speed to medium, scrape sides again, and beat until well incorporated. Spoon mixture into muffin tin, filling each about 2/3 of the way. (I use a cookie scoop for this and it takes 1 scoop to fill each vessel.) Sprinkle each with turbinado sugar and a few extra oats. Bake 20-25 minutes until browned and toothpick comes out clean. Allow to cool in pan, on a wire rack for 5 minutes. Remove from pan to wire rack to cool rest of way.


Wednesday, May 14, 2014

Springtime Snack with Peanut Butter & Co. {A Giveaway}

I don't know how it is in your house, but when the temps start to rise, and we are spending more and more time outdoors, our appetites begin to rise with them. I guess we're so busy and doing so many fun activities outside, instead of sitting inside avoiding the cold of winter, we burn more calories and need to refuel more often. 

And then when summer vacation arrives (In this house, that's in 17 days...not that I'm counting or anything!) it takes me a few days to remember I'm responsible for feeding this little person lunch every.single.day. until school starts again! Not to mention snacks while he is enjoying time outside, or while we are on the go doing all the things we love to during summer. 

Needless to say, easy, effortless, yummy snacks are a must in this house! They have to be something you can eat with your hands, no matter what you're doing, and they need to give us the energy we need to suck every last drop of fun out of summer we can! 

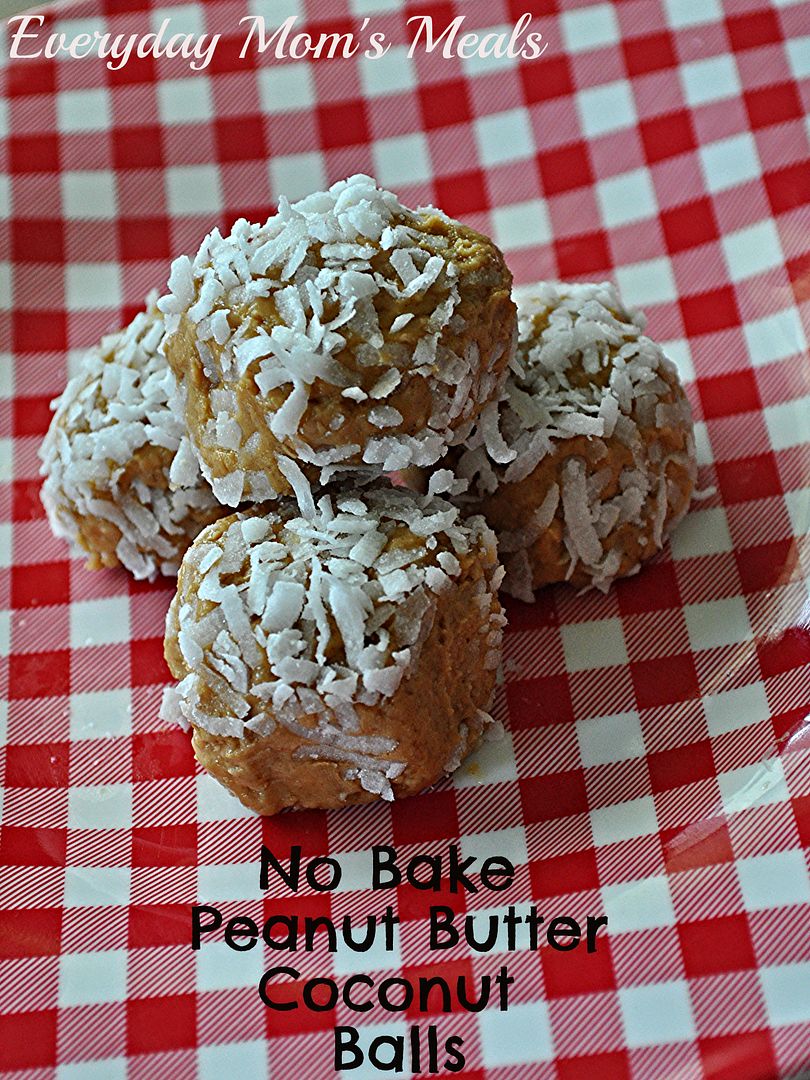
That's exactly what I had in mind when I created these using my buddy's Peanut Butter & Co's The Bees Knees Peanut Butter! My son loves the flavor of peanut butter and honey. In fact, during the school year, it's one of his favorite sandwiches for me to pack in his lunch. So when I remembered a friend telling me about these no bake peanut butter balls she makes for snacks after her trip to the gym, I knew this peanut butter would be perfect in them! 

If you love peanut butter, you're going to flip for these. If you love no bake sweets, you're going to flip for these. If you love coconut, you're going to flip for these. (Oh, and if you don't, you can easily roll them in something else. Chopped nuts perhaps!) These are so easy, even the kids can get in the kitchen and help make them. Yet another thing we love to do during summer vacation...usually on rainy days! 

The summer months are just around the corner, and your family is going to need extra energy to stay ahead of the sun. So be sure to make a big batch of these for them to nibble on while around the pool, enjoying a ball game, having a picnic, whatever summer means to you. Oh, and Peanut Butter & Co. wants to send (1) lucky winner 2 jars of The Bee's Knees to try in your kitchen! Just scroll down for the giveaway!! 

No Bake Peanut Butter Coconut Balls 
1/2 c. old fashioned oats
1 c. Peanut Butter & Co. Bee's Knees Honey
1 tsp. vanilla
2 pinches salt
1/3 c. sweetened flaked coconut

Place oats in a food processor and pulse until very fine. (Think flour consistency) In a large bowl add ground oats, peanut butter, vanilla and salt. Stir well. Using a cookie scoop, form balls, about 1 inch in diameter. Roll in coconut. Place in fridge for 1 hour to set. Refrigerate leftovers.


Shared on The Country Cook May 16, 2014


a Rafflecopter giveaway
Disclaimer: As a member of Peanut Butter & Co.’s Yum Squad food blogger club, I received product in exchange for this post. All opinions expressed are my own.

Monday, March 3, 2014

Good- for- You Everyday Meals Day 1 {A Review and Giveaway}


Welcome to Gooseberry Patch week on EMM! I'm so excited to share this latest cookbook with you from my good friends at GP, and can't wait to show you just a few yummy recipes you can find in their newest cookbook gem.

Good-for-You Everyday Meals...you know when I read that title, it was like kismet! What better title for your Everyday Mom to dive into and cook my way through!

So, every day this week I will be featuring recipes from this newest title in my collection, each one more delicious than the next!

With everything from starters and main dishes, to sides, salads, snacks and desserts, it has something for everyone!

Each section has so many yummy things to choose from, it was hard to pick only a few to share with ya'll. Believe me, there are enough pages "dog-earred" in my copy, I could share a different one each day, and not finish for months! But I decided the best one to begin with would be something for breakfast!

When I saw this recipe I knew it would be perfect for a busy weekend when we had a lot going on. Why? because it would cook itself while I slept, and breakfast would be waiting on us when we got up Sunday morning. But think about how great that would be on a busy weekday morning when you're rushing around for work and school too! In fact, I think this would also be wonderful to cook on Sunday, cool it down, and keep in the fridge to reheat for breakfast all week long!

I had never tried the steel cut oats before, but had heard they were perfect for the Crock Pot. They hold up really well to slow cooking, and make for a hearty, comforting way to start your day. Oh, and let me just tell you...the house is going to smell amazing when you cook these, which makes crawling out of bed just a little bit easier!

If your mornings are super crazy, but you still want something warm to send your family on its way, this would be absolutely perfect! Oh, and the great folks at Gooseberry Patch have included a copy of Good-for-You Everyday Meals for one lucky EMM fan too! Just scroll down to find the giveaway! And be sure to come back Wednesday and Friday to see what other scrumptious things I made!

Overnight Apple-Cinnamon Oats
Found on page 25, Contributed by Dana Rowan Spokane, WA
2 apples, peeled, cored and chopped
2 c. milk
1 1/2 c. water
1/2 c. unsweetened applesauce
1 c. steel-cut oats, uncooked
1/4 c. brown sugar, packed
1 TBS butter, diced
1 tsp. cinnamon
1/4 tsp. salt
Garnish: maple syrup, milk, applesauce, chopped walnuts, raisins, dried cranberries, etc.

Spray a Crock Pot with non stick spray. Add all ingredients except garnish. Stir. Cover and cook on LOW for about 7 hours. If desired, stir in a little more milk or water for desired consistency. Spoon into bowl, garnish as wanted. Makes 6 servings
*NOTE* After 7 hours, mine had scorched just a bit on the sides, so I probably would do 6 hours next time. If you have a programmable slow cooker, I'm sure it wouldn't do this. Also included with this recipe is this great tip, which I just had to share: Fill a muffin tin with yummy oatmeal toppings...making it easy for everyone to help themselves!


Shown here garnished with maple syrup and dried cranberries

Shared on The Country Cook Mar. 7, 2014


CLOSED

********Giveaway********
Rules:
1. This contest is open to US Residents 18 and older ONLY.

2. The winner will be chosen by Random.org 

3. The winner will be notified by email and Facebook. He/she will have 48 hours to respond or another winner will be chosen. 

4. When leaving comments for entries, they MUST BE SEPARATE ones AND include an email address so it's easy for me to find the winner. If entries are together, it will only count as (1) and if no email, entry will not be considered.

5. If any of the extra entries are items you are already doing, please just remind me!


6. Contest Ends: Friday March 14, 2014


(1) Lucky Winner will receive:
(1) copy of
Mandatory Entry:
1. Leave a comment telling me your favorite good-for-you dish!

Extra Entry:
1. Become a Gooseberry Patch fan on Facebook. Leave me a comment when you have. 

2.  Follow Gooseberry Patch on Twitter. Leave a comment saying you've done so.


3. Follow Gooseberry Patch on Pinterest. Leave me a comment when you have. 

GOOD LUCK!


Disclaimer: I was given a free cookbook and one to give away to a fan for this review. All thoughts and opinions are my own.


Friday, February 21, 2014

Oatmeal On The Go

It seems these days, we can all use more recipes that can be incorporated into our busy schedules. And not just simply made once we are home after a long day. Ones that we can make and take with us, while we are constantly on-the-go.

Today's recipe gives you that option! Make a batch of them over the weekend, and you can have breakfast for the gym bag, or even at your desk at work, all week long. Send them with the kids in their lunch boxes for a sweet, but still healthy treat. Have them waiting on them when they get home, for a snack in the car on your way to your next activity. Or just make them for an almost guilt free dessert. There are so many options with these, you can't go wrong.

I love granola bars, and I really enjoy making my own, but for me, they must be chewy, not crunchy. It's just how I prefer mine. I know there are many tasty crunchy granola bars out there too, but the chewy ones just appeal to me more.

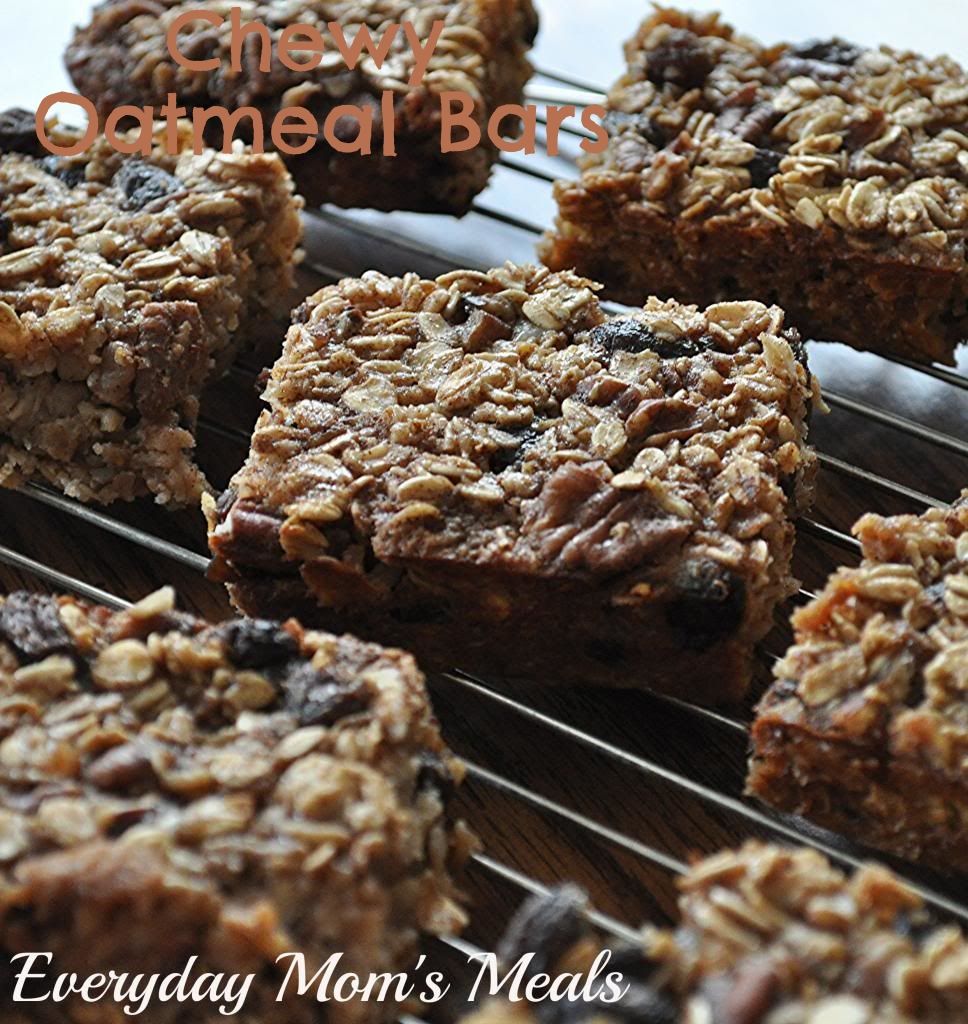
These have a great almost cake like texture, but hold up to travel and are sweet, but not too sweet, and truly taste like a big bowl of oatmeal you can eat with your hands. Plus, there are endless combinations of dried fruit and nuts you can use to change the flavor profile again and again.

If your hectic lives could use more on-the-go goodness, these are just for you! After all, just because we are all busy doesn't mean we have to sacrifice delicious things, we just have to make sure we can multitask!

Chewy Oatmeal Bars Inspired By Kath Eats Read Food
1 3/4 c. old fashioned oats
1/2 c. brown sugar
1/2 c. raisins
1/2 c. pecans, chopped
1 1/4 c. milk
1 egg
1 tsp. vanilla
1 tsp. cinnamon
1 tsp. salt

Preheat oven to 350. Grease a 8 x 8 baking pan. In a medium bowl combine oats, sugar, raisins, nuts, salt and cinnamon. Mix well. In a separate bowl combine egg, milk and vanilla. Whisk well. Pour into oat mixture. Stir to combine well. Mixture will be wet. Pour into prepared pan. Bake for 40 minutes until set and edges pull away. Cool on a wire rack. Cut into 9 squares.


Shared on The Country Cook Feb. 21, 2014

Tuesday, January 28, 2014

31 Days of Dark Chocolate Dreams {A Review & Giveaway}

Do you love peanut butter? Do you love trying new flavors of peanut butter? Do you love making yummy snacks for your kids to enjoy after school or maybe packed in their lunch? If you answered "Yes" to any of those, then boy have I got a treat for you!

My good friends over at Peanut Butter & Co. are so excited to announce the release of a new cookbook, 31 Days of Dark Chocolate Dreams, featuring  a month's worth of recipes using their Dark Chocolate Dreams all natural peanut butter, written by Founder and President, Lee Zalben.

This cookbook is page after page of delicious treats, the one only more exciting than the last. Containing recipes for everything from breakfast to snacks, to desserts and candy...it has a little something for everyone.

When I received my advanced copy and started flipping through the pages, I only made it to #15 before I found the first thing I wanted to try. Reading the description of "These bears are a marriage of differences-sweet and salty, chewy and crispy, and smooth and crunchy" had my mouth watering! I love all of those combinations, and in one tasty snack I could make for my son, how exciting!

These would be perfect for after school, packed lunches, or an on-the-go treat. Heck, throw a couple in your gym bag for a pick me up after a long workout. However or whenever you make them, they are sure to please everyone in your house young to old.

Now, here is the greatest part! The kind folks at Peanut Butter & Co. also want to send one lucky EMM reader a copy 31 Days of Dark Chocolate Dreams and a jar to play around with in your kitchen too. Just keep reading after the recipe for all the details and follow the instructions to enter!


Dark Chocolate Dreams Trail Mix Bars
1 c. firmly packed brown sugar
2/3 c. Dark Chocolate Dreams peanut butter
1 large egg
5 TBS unsalted butter, melted
1 c. flour
1/2 tsp. baking soda
1/8 tsp. cinnamon
1/4 tsp. salt
2 1/4 c. rolled oats
3/4 c. roasted peanuts
3/4 c. chopped pretzels

Preheat oven to 350. Spray a 9x13 baking dish with nonstick spray. In a large bowl, whisk together brown sugar, peanut butter, egg and butter until smooth and creamy. Whisk in flour, baking soda, cinnamon, and salt until well combined. Fold in oats, peanuts and pretzels. Turn out into baking dish. Cover the mixture with plastic wrap and press down, packing the bars into the dish and removing air pockets. Discard plastic wrap and bake for 20 minutes, just until they begin to turn a slightly darker color. Let cool 2 hours before cutting. Store in airtight container for up to 10 days.


Disclaimer: I received (1) cookbook and (1) sample for this review. Plus an additional set to giveaway. All thoughts and opinions are my own.