Everyday Mom's Meals: Brown Sugar
_____
Showing posts with label Brown Sugar. Show all posts

Sunday, January 15, 2023

Air Fryer Novice

 So, who  got a new air fryer for Christmas? *Raises hand*

Yep, I have joined the cool kids club!

Want to hear the funny part? 

I actually had an air fryer given to me through the blog. It was a very nice one, but on the larger side. It was very intimidating, at least to me. Plus, we don't have a lot of extra counter space in the kitchen and when I decided I wanted an ice maker, I decided the air fryer had to go. I found it a very lovely home with a friend, and she was super excited. (And that ice maker? One of the best purchases ever!)

Fast forward to this past fall and I had the opportunity to have another air fryer given to me for work purposes. I did learn from the last time and asked for it to be a smaller model. We still didn't have the counter space for it, so a new microwave cart was promptly ordered and it now resides happily on the bottom shelf. 

I will fully admit I am having fun playing around with it, finding all sorts of things to make in it. From frozen taquitos and jalapeƱo poppers for our New Year's Eve appetizer buffet, to tasty weeknight meals. 

One of the first dishes I knew I wanted to try was salmon-for my boys. I don't eat salmon (thanks to a nasty food poisoning over 20 years ago) but oh my they love it. So, I knew I would score major wife/mom points with this one! 

This is the easiest fish recipe ever, and it comes out with immense flavor. Since I don't eat it, I will share what the hubby said after the first bite. "Oh my gosh. It's moist. Falling apart tender. I taste sweet, savory and a little tang too." Both he and the teenager agreed it was 100% delicious and I had their "permission" to make it again and again. I would say that is a rave review!

If you're experimenting with your new air fryer, or even a seasoned pro, I hope this simple but oh so flavorful salmon makes it way to your table soon. And be on the lookout for more air fryer recipes as I get more comfortable with my new toy!

What Temperature To Cook Salmon In The Air Fryer

Various recipes will say temps between 350 and 400. I did 400 because my filets were a little thicker than 6 ounces. 

How Long Do I Cook Salmon In The Air Fryer

Again, different recipes have different cook times. Some say it's done as quick as 7-9 minutes. This one takes a little longer. The size of your air fryer will determine cook time.

Can I Use Oil In The Air Fryer

When you want to use oil on something in the air fryer, be sure to put it directly on the food. Brushing or spraying oil on the food itself helps to protect the air fryer surface.

Should I Use Salmon With or Without Skin

You can use either in this recipe, but I will tell you while I prefer skin off, it would help to keep the salmon together once cooked. This was super fragile and fell apart very easily-having the skin on would have helped to prevent that. Salmon skin is absolutely edible, and would nice and crisp in the air fryer.

 How Do You Know Salmon Is Cooked In The Air Fryer

Salmon turns opaque when cooked and becomes very flaky. But the only sure way to know it has reached that 145 degree temp is with an internal meat thermometer.
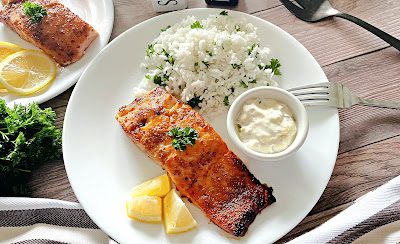
Easy Air Fryer Salmon


Easy Air Fryer Salmon

2 salmon fillets, 6-8 ounces each

1 TBS stone ground mustard

1 TBS brown sugar

1/2 TBS olive oil

1/2 TBS soy sauce

1/4 tsp. garlic powder

Salt and pepper

Fresh parsley

Lemon 

Preheat air fryer to 400. (Check your manual- mine needs about 5 minutes) In a small bowl combine mustard, soy, brown sugar, olive oil, garlic powder, salt and pepper.  Using paper towels, dab salmon dry on both sides. Brush mustard mixture on salmon, on both sides. Sprinkle with extra salt and pepper. Place in air fryer basket. Cook for 10-15 minutes, until internal temp of 145. Carefully remove and garnish with parsley. Serve with lemon and tartar sauce if desired. 
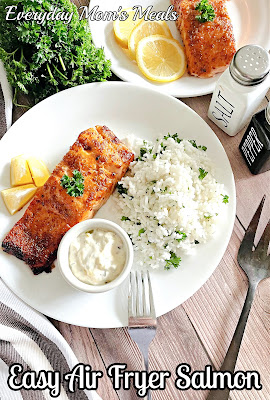
Easy Air Fryer Salmon


Best Tips

You can use salmon with or without skin. I prefer without.

Air fryer size will alter cooking times. Mine is an 8 quart. 

Start checking salmon after 10 minutes and continue cooking until a meat thermometer reaches 145 degrees.

The salmon will be very fragile. Use a sturdy, flat spatula to remove. It might still fall apart. 

Dijon or spicy brown mustard would also be delicious.

You can substitute honey for brown sugar. 

Want a great homemade tartar sauce? Here is my recipe


Shared at Weekend Potluck

Sunday, November 21, 2021

Happy Thanksgiving From The EMM Family

I hope your turkey is in the refrigerator thawing and your shopping list has been conquered. It is almost time! Thanksgiving is only a few days away, and I'm starting to drool! 

After last year's holiday being very different for many of us, I pray your gatherings involve more family, hugs and laughter this year. I know I'm looking forward to hosting again and have my to-do lists made!

What lists you ask? Let me tell you, making lists for every step of the Turkey Day process can save your sanity. Here are the lists I currently have:

  • Things to make ahead
  • Times things need to go into oven
  • Serving dishes I need for every course
  • Order of preparation day of

I'm telling you, out of all of them the oven times is the one I will rely on most! Since my turkey will take up most of my oven space, I need to time other things to fit and then to finish once the turkey is resting. No guess work when it come time for that Green Bean Casserole- just check the list!  

I tested this recipe over a month ago and as soon as I shared the picture with friends they were going nuts over it! "Is that squash with a PRALINE topping??" Yes, yes it is! 

This side dish is as easy as can be, and is a real showstopper coming out of the oven. Now, in full disclosure, if you are serving a huge crowd, making a half for each person would never work, but if you just have a few coming to dinner, I love serving them just like this, giving each person a pretty squash half on their plate. 

If you do need to serve many, the preparation would still be the same, except when they came out of the oven, I would carefully pour the pecan topping from each into a separate bowl, scrape the cooked squash into a large bowl and then top with the reserved praline topping. 

This is the perfect autumn pairing of sweet and savory. We love squash, and the addition of brown sugar and pecans takes it over the top. 

I hope you and yours have a truly Happy Thanksgiving! Take a minute between the cooking and entertaining to look around and thank God for all the blessings you have in your life. And for our family, you, my faithful fans and followers, are definitely on that list!

 Praline Roasted Acorn Squash

2 large acorn squash, halved and cleaned

4 TBS butter, room temp

1/4 cup brown sugar

1/2 cup chopped pecans

Salt and Pepper

Preheat oven to 400. Once the squash is halved, cut a small piece of flesh off bottom of each halve. This makes them more stable to sit without falling over. In a bowl combine softened butter and brown sugar until smooth. Rub mixture over each squash halve, covering edges and middle. Equally divide pecans into each squash. Line a large baking sheet with foil. Place squash on baking sheet. Bake for 1 hour- 1 hour 20 minutes until squash is tender when poked with fork. Serve as is.


Shared at Weekend Potluck
 

Sunday, December 27, 2020

Happy (Almost) 2021

 How was your Christmas? I hope it was a day surrounded by those you love most in the world, with magic, joy and peace. (Even if some had to join virtually!)

We had a wonderful holiday, with celebrations over a couple days. According to the mound of presents under our tree Christmas morning, our boys were VERY good this year. (But Mommy could have told Santa that!) 

Now that my most favorite time of year is behind us, I tend to get a little depressed. I won't even lie. December 26th is my least favorite day of the year. But I do have something to look forward to! Our annual New Year's Eve Buffet! 

If you've been following me for a good amount of time, you know our tradition. Every NYE, I make a huge appetizer buffet filled with yummy things. We stay in, my parents come over, we eat, we watch movies, we play games, we eat, we stay up for the ball drop, we eat....you get the picture. 

So while many will be doing an "at home New Year's Eve" for the first time this year, we are experts and it's one of our most fun traditions!

If you're planning some tasty food to welcome 2021, this slow cooker beer braised sausage could definitely be added to the menu! This is a versatile recipe that you can serve as an appetizer (just cut it into smaller pieces) or for a simple weeknight supper. It's delicious right out of the Crock Pot, but we also love putting it on some hoagie buns for a sandwich dripping in yum factor. 

I know many like to serve pork for good luck in the New Year, so this could be a fun twist on that tradition too! 

Without a doubt, 2020 will go down in history as one of the worst years ever, at least in most of our lifetimes. But I think there is a lot to be thankful for as we look back too. Sure, it might not always be the easiest to see, or focus on, but even in the darkest days this year, our family has been so incredibly lucky. So I am trying to focus on that as we say goodbye to another year, but am also ready to welcome 2021 with open arms. I wish you a happy, healthy and delicious New Year...only good things ahead!

 Slow Cooker Beer Braised Sausage

3 (9 oz.) packages smoked sausage

1 large white onion, thinly sliced

1/2 c. brown sugar

2/3 c. light beer

1/4 c. spicy brown mustard

1/4 c. apple cider vinegar

1 TBS water

2 tsp. cornstarch

Slice sausage into 1-2 inch pieces. Spray the slow cooker with nonstick spray. Lay sliced onions in bottom. Lay sausage on top of onions. In a medium bowl, whisk brown sugar, beer, mustard and vinegar. Pour over sausage. Cover and cook on LOW for 6 hours. About 15 minutes before serving, mix water and cornstarch. Add to slow cooker. Stir and cook on HIGH about 10 minutes until thickened. Serve as is or on hoagie buns with sauce drizzled over top.

 Shared at Weekend Potluck


Sunday, July 15, 2018

Red, White & Barbecue

Today's recipe is because I had another opportunity to try a great product from My Magazine Sharing Network. And you're going to be so glad I did.

This time, they wanted me to check out McCormick® Grill Mates® Bottle Blend Seasoning at my local Kroger store. With so many flavors to choose from I knew it wasn't going to be easy to pick. But I was in the mood for tasty, summer time barbecue, and had a new sauce I had been waiting to try too...so I was immediately drawn to the Brown Sugar & Bourbon. Just reading that, you're drooling, aren't you? Just wait! 

Backyard barbecues are one of the best things about this time of year. And I don't care if you're hosting the whole neighborhood or having a quiet evening at home with your family, there is just something so fun about a hot grill with great food! It is truly an All American tradition! 

Since we just got back from our Florida vacation, I had southern barbecue on the brain. No, not because we were in the Sunshine state, but because we drive through Kentucky, Tennessee and Georgia on the way down and back. SO many signs for tasty, finger lickin' barbecue, my mouth was watering! 

The flavors in the spice blend complimented the sauce I made perfectly, but would be absolutely delicious on its own too. Kind of like a dry rub! 

If you're looking for a new barbecue recipe to throw on your grill before summer is over, this one is super easy, but BIG on flavor!

Sweet Southern Barbecue Chicken
4 chicken leg quarters, fat trimmed but skin on
1/4 c. vegetable oil
3 TBS McCormick Brown Sugar & Bourbon seasoning
1 c. ketchup
1 c. cola
1/4 c. Worcestershire sauce
1 tsp. onion powder 
1 tsp. garlic powder
Salt and Pepper to taste

In a medium sauce pot combine ketchup, cola, Worcestershire sauce, onion powder, garlic powder and black pepper. Stir. Bring to a boil over medium heat, stirring often. Reduce heat to low and simmer for about 10 minutes until thickened, stirring often. Transfer to a bowl and allow to come to room temperature. Baste chicken with oil and sprinkle with seasoning, salt and pepper. Allow to chill in fridge for 2 hours. Before grilling, let chicken come up to room temperature. Preheat grill to high. Spray with cooking spray. Sear chicken on both sides for 5 minutes. Reduce heat and cook chicken for 35-40 minutes, turning often. In the last 15 minutes baste liberally with sauce. *NOTE* The amount of oil and seasoning is based on the size of your chicken quarters. 


Disclaimer: I received free samples to use in this post. All opinions and the recipe are my own.  

Tuesday, February 20, 2018

Be Adventerous

Before my husband came long, I wasn't the adventurous eater I am today. I was always a good eater, mom and dad made sure of that, but I just didn't have the opportunity to try so many new things until Adam shared them with me. He loved all different cuisines and forced me to try things I had never dreamt of. And for the most part, I discovered I loved them too. Sushi, Calamari, Raw Tuna, just to name a few. Oh, and of course Korean food, which is where today's recipe comes in.

We have this little Korean restaurant here in town, a little "hole in the wall" if you will, and the first time he took me there I was not impressed. That will teach me not to judge a book by its cover! I had NO idea what to order, but he guided me to something he was pretty sure he knew I would love, and he was right! 

If you've never had Bibimbap, it literally means "mixed rice." It is this huge rice, meat, veggie mixture, and then...here is my favorite part...it has an ooey gooey fried egg served on top. Why? Because the minute you cut into it, the warm yolk covers everything making it's own sauce. I know it might sound weird, but you have to take my word for it...one bite and you will be hooked. 

Every time we go, I order the same thing, savor each and every bite and am always sad when it's gone. So it was about time I made a version at home we could enjoy any time. 

You can easily adapt this to include veggies you love, these are what I had on hand. You can also add some sriracha or garlic chili paste if you like it hot! 
And don't get overwhelmed! It really isn't a complicated recipe, it just has a lot of steps. But you can prep the veggies, and even pre-cook the rice too! Then all you have to worry about is the beef and frying up some eggs. Just take your time and take it one step at a time. No lie- I made this on a Monday night, with 1 hour until dinner had to be ready for Alex to eat before Tae Kwon Do, and Max was at my feet the whole time! My point? If I can do it, YOU can too! 
If you aren't a very adventurous eater, or maybe your kids won't touch anything that isn't a chicken nugget or hot dog, I urge you to start small. Try something like this that has things that are familiar, and then go from there!

Korean Beef Bowl
2 lbs. ground beef
6 garlic cloves, minced or grated
1/2 c. packed brown sugar
1/2 c. low sodium soy sauce
4 tsp. sesame oil
1/2 tsp. ground ginger
1/4-1/2 tsp. crushed red pepper flakes
Black Pepper to taste
1 medium cucumber, sliced thin
3 medium carrots, grated*
1 bunch green onions, chopped*
6 cups cooked white rice*
4 eggs, cooked over easy or sunny side up
Sesame Seeds for garnish 

Prep ALL veggies, and set aside. In a large skillet brown beef with garlic until no longer pink. Drain well, return to skillet.  In a medium bowl whisk together brown sugar, soy sauce, sesame oil, ginger, red pepper and black pepper. Pour over beef. Bring to a boil. Reduce heat to low and simmer about 5 minutes until sauce reduces a little. To assemble, place rice in bottom of bowl. Top with beef, cucumber, carrots and green onions. Place 1 cooked egg on each bowl. Sprinkle with sesame seeds. *NOTES* When grating carrots, use the large hole on a box grater. You only want the dark green parts of the green onions. Don't stress over using "fancy" rice. Save yourself some time and energy and use minute rice! Brown can be substituted too. 


Inspired by The Recipe Critic  

 Shared at Weekend Potluck
Shared at Meal Plan Monday

Monday, November 13, 2017

Holiday House Guests...Not For Just a Day


Are you hosting a holiday this year? Rather it be Thanksgiving or Christmas, are you going to have house guests for a little while? If so, I'm going to be your new BFF. 

I will be honest, we have never had overnight house guests. Now, before you think I'm super weird, you have to understand a couple things. First off, we have a 3 bedroom house. You can do the math. And even before Max came, his room was an office/junk room. Secondly, we live 20 minutes from both of our parents. So when family comes into town, they always stay with them. See, it isn't as strange as you thought. 

But some of my best memories as a kid were big holiday at m grandparent's house with everyone home. Adults in the beds, kids on the floor. An entire house full...for a few days! Oh, the fun we had! God bless Grammy for feeding all of us for that long!

Anytime I think about holiday house guests the image of National Lampoon's Christmas Vacation enters my mind. If you've seen the movie, you know where I'm going with this. Both sets of parents, cousins, aunts, uncles...and then of course Cousin Eddie shows up. The house is over flowing, everyone is stressed out, and then Eddie makes the comment they will be staying right on through to the New Year. 

My point is that if you've got people staying, the big holiday meals isn't the only time you have to feed them. No, you have to plan for 3 meals a day, for as long as they are there! You need some great, easy recipes up your sleeve! 

These would be perfect for a simple breakfast, or dessert. Seriously, you can serve them for either and they will disappear. I made them for a post dinner treat, and then the leftovers were heated up for breakfast the next day. 

If you love the original version, this mini, simple, quick version will knock your socks off! 

Holiday house guests are coming. Quicker than some of you might be ready for. But take a deep breath and relax. That's what the holidays are all about. Being surrounded by the people you love most in the world, making memories to last a lifetime. 

Mini Monkey Bread
2 (7.5 oz) cans refrigerated cans biscuits
1/2 c. butter, melted
1/2 c. packed brown sugar
2 tsp. ground cinnamon
1/4 c. white sugar

Preheat oven to 350. Grease a 12 count muffin tin. Separate biscuits. Cut each into 6 pieces. (You need 120 pieces total) In a large plastic bag, combine white sugar and cinnamon. In a medium bowl whisk together brown sugar and butter. Spoon 1 TBS butter mixture into each well of muffin tin. Place biscuit pieces in bag and shake well to coat. (This might take a few batches to avoid sticking) Place 10 biscuit pieces in each well. Press gently to adhere. Bake for 12-15 minutes until golden brown and set. Cool for 1 minute. Either turn upside down, or carefully slide out with a spatula. 


Recipe Inspired by Pillsbury

Monday, October 16, 2017

Simple Weekend, Simple Dessert

Do you ever have those weekends you have to actually schedule time at home? That was us this past weekend. There was so much to get done outside, and Alex had a big project for school...I knew it was time for mama to step in and black out a couple days on the calendar. 

It feels like if the weeks fly by, the weekends are on jet speed. Like I told my mom, "It is nice to know we don't have to be anywhere." 

I had gotten a couple frozen pizzas at the grocery store, some chips, the boys and I had made some Halloween and Star Wars Jell-O Jigglers, all I needed was dessert.  And I had just the thing.

I had this bad boy tucked away on my "must try before holidays" list and I knew this was the perfect time to test it out. I love being able to give you guys ideas way ahead of time so you can plan, and hopefully be a little less stressed out. 

I had actually planned on making this Sunday to go with our "big meal" but couldn't wait any longer! Plus I figured we would have some leftovers so it could work for both days.

This is something magical. First of all, your house is going to smell like fall while it cooks; and even more so, like a holiday. Secondly, if you can chop, stir and set a timer, you will rock this. 

I'm not much of a baker. I wasn't before Max, and now with the 14 month old literally hanging on my legs while I'm in the kitchen, there is no crust making going on! The best way I can describe this is "naked apple pie". (Thank you to my friend Roxie who gave me that!)

In fact, when I was trying to figure out what to call this, I asked friends and fans on Facebook, and promised to mention the one I liked best. Well, Roxie's worked perfectly as a description, but as far as the actual recipe name, I took a few suggestions and put them together to find the right one.  So thank you also, for everyone who left a comment and totally inspired me! 

This is so simple it's perfect any night of the week, or on your simple weekend. Or like I said, save it when Thanksgiving rolls around...which is quicker than you might think!

Autumn Apple Delight
5 Honeycrisp Apples, cored and chopped SKIN ON
1 c. golden raisins
1 c. brown sugar
1 c. chopped walnuts
1 TBS ground cinnamon
1 tsp. ground allspice

Preheat oven to 350. In a large bowl combine all ingredients. Stir well to coat. Transfer to a deep dish pie plate. Cover with foil. Bake for 20 minutes. Stir gently. Bake another 20 minutes, uncovered, until apples are tender. Serve alone or over dessert shells, pound cake, angel food cake or ice cream. Store in fridge and reheat as wanted.


Inspired by Southern Plate

Monday, April 3, 2017

Middle of the Night Hunger

We've all heard the saying "It's a stick to your ribs kinda meal." Most of the time it is usually in reference to a big meal at supper time, or when talking about sending the kids off to school, a hearty breakfast that will keep them going. But what happens when those worlds collide? This is what happens.

See, we are big breakfast for supper fans. I plan it at least a few times a month. And the meals vary. Eggs, potatoes, meat, pancakes, waffles, quiche, toast, biscuits n gravy...I come up with all sorts of combos to indulge our preference for morning food at night.

But the one thing I find myself having an issue with is ending up hungry later in the night. Now, I know it's not the meal itself because I've got two "boys" with big appetites eating the same thing, and they don't end up with grumbling tummies, so it must just be me. Many times when we have these types of meal, I find myself waking up in the middle of the night starving. Or at least I think I'm starving.

When I saw this recipe, my first thought was "Wow. What a stick to your ribs kinda breakfast." What? Wait a minute...that means if I made it for supper, it would have the same effect and maybe I wouldn't wake up chewing on my pillow!

I was right! This will stay with you! It's perfect for a hearty breakfast to get your day started right, or a weekend brunch. Maybe even Easter Sunday after sunrise service. It makes a pretty good dinner too. I served it with some sausage links on the side, and we were all full and satisfied. And I stayed that way all night long!

This tastes just like a warm oatmeal cookie straight from the oven. And I can tell you, neither me or Alex are huge oatmeal fans, and we gobbled this down. This was the perfect amount for the 3 of us, so if you're making it for a bigger crowd, be sure to double the recipe. (See note below)

Waking up in the middle of the night feeling like you haven't eaten in hours is no fun. Laying awake counting cows instead of sheep, just so you can think about steak isn't normal. But now I've found a way to enjoy our little tradition and keep those pangs of starvation away!

Amish Baked Oatmeal
3 c. quick cooking oats
1 c. brown sugar, slightly packed
2 eggs
1 c. milk
1 tsp. vanilla
1 tsp. cinnamon
2 tsp. baking powder
1 large apple, peeled and chopped
1 stick butter, melted
1 1/2 tsp. salt
Extra Milk
Toppings: Fresh berries, nuts, dried fruit, etc

Preheat oven to 350. Lightly grease a 8x8 baking dish. In a large bowl combine first 10 ingredients. Stir well until mixed. Pour out into baking dish. Bake for 30-45 minutes until edges are brown and middle is set. Let sit for 5 minutes before serving. Garnish with milk and toppings. *NOTE* If you double this recipe, switch to a 9x13 pan, and increase cooking time a little, but start checking at the 30 minute mark.


Disclaimer: Recipe adapted from Taste of Home. As a field editor, and not a paid employee, I share this with no compensation.

Wednesday, January 11, 2017

BBQ In The Snow

Well, we've officially entered the doldrums of winter. The holidays are over, spring is no where in sight and it's frigid outside. Blah.... Yeah, if you can't tell, I'm not a fan. As far as I'm concerned as soon as Christmas is over, we can go back to 75 and sunny!

But alas, I live in Indiana, and we have a lot of days before that happens, so we better make the best of them. One way I've learned to do that is through food. And not just because we love to eat!

I like to take recipes we usually enjoy during the warm, summer months and find a way to make them more cold weather appropriate, as in the case of this recipe.

Now if you know me, or have been following me for a while, you know we are NOT opposed to grilling in the winter. In fact, a few years back we were in the middle of a blizzard...A. Real. Life. Blizzard. (The weather channel said so!) and Mr. E was outside grilling up some juicy t-bone steaks! All the neighbors were out shoveling snow, and we could hear them saying "What smells so good? Where is that coming from?" Yeah, that was us.

However, right now our grill is broke, so there is no using it no matter what the weather is. Luckily it made it to the end of summer before dying, and we decided to just wait until spring to deal with it. So that meant when I got a craving for good barbecue chicken, I needed to find a way to make it happen...indoors.

I will be honest, when I first started to think about how I would make that happen, my slow cooker wasn't the first thing that popped into my head. When I think good barbecue, I think a good sear, some black marks, and maybe even some burnt pieces...all from being cooked over an open flame. But I wasn't going to achieve that no matter how I prepared it, so instead I went for slow cooked, tender, and a great smoky flavor.

Well, let me tell you, this was some of the best barbecue chicken I've ever made, inside or out! Both of my boys (well the two that eat solid food) enjoyed it and couldn't get over the fantastic flavor.

If you need a simple weeknight meal, or maybe are having a football party, this is perfect for both! So much flavor and so little effort, just what we need to get us through these yucky winter days!

Slow Cooker Barbecue Chicken
4 boneless chicken breasts
1 TBS steak seasoning
1 (18 oz.) bottle barbecue sauce, your favorite
1/4 c. white vinegar
1/4 c. brown sugar
1 tsp. garlic powder
1/4-1/2 tsp. red pepper flakes
Salt and Pepper to taste
Dried Parsley, for garnish


Pat chicken dry. Season with steak seasoning, salt and pepper. Grease slow cooker. Place chicken inside. In a small bowl whisk together barbecue sauce, vinegar, brown sugar, garlic powder and red pepper flakes. Pour over chicken. Cook on LOW for 4-6 hours. Spoon extra sauce over top and garnish with parsley.


Monday, November 28, 2016

Holiday Ham

Okay, so the turkey is so last week. It is time to move on. Now it's time to talk ham.
Well, that might not be totally true, because I know many, many people who will enjoy another bird come Christmas. But in my head, as soon as Thanksgiving is over, it's time to think about that big, beautiful, tasty, holiday ham.

In fact, as you can see from this recipe I actually started thinking about it pre-Turkey Day. I have to. I'm a food blogger, and while holiday recipes are terrific, it means we foodies are developing, testing and re-testing weeks before the big day.

I made this for a simple weeknight meal (Yay for Crock Pot!) but I think it would be terrific for those upcoming holiday parties and family gatherings. Plus, if you make a big ham one day, and need another meal the next, you could usually substitute the deli ham with some leftovers, and make it even more delicious.

I served this family style, with the buns on the side. The ham has a pretty tasty sauce that comes with it, and if it sits on the rolls or buns too long, they will get soggy. So if you're thinking of putting this out for a Christmas party, I suggest doing the same thing; and that way, you can keep the meat on warm in the slow cooker all night long.

I can't believe Christmas is less than a month away. We are super excited at our house of course, with this being Max's first. These boys are by far the two most precious gifts of my life and I'm going to enjoy every single minute of this holiday season.


If you're looking for something new to do with your holiday ham, I think this is just what you've been wanting. A good ham sandwich is a classic, and these have a little something extra to make your guests say YUM!

Slow Cooker Ham Sandwiches
1 1/2 lbs. deli ham, sliced thin
1/2 c. sweet relish
2/3 c. packed brown sugar
2 c. apple juice
2 tsp. yellow mustard
1 tsp. paprika
Buns
Extra mustard/relish for serving

Spray slow cooker with nonstick spray. Layer ham in bottom. In a medium bowl whisk together apple juice, relish, brown sugar, mustard and paprika. Pour over ham. Cook on LOW for 4-5 hours. Serve on buns with extra mustard and relish if desired. 


Monday, March 14, 2016

My Little Sous Chef

I can't remember exactly when it was, but it was sometime right before Christmas. Out of the blue, little man came to me and said "Mommy, will you teach me to cook? Like, cook for real?" Sure, he's been in the kitchen with me since before he could even sit up on his own, and he's always been a fantastic helper, but now he was wanting more. He didn't want to just stir and pour. He wanted to learn how to make dishes from beginning to end. 

Well, you can imagine how excited I was to share my passion with my son. So, we started with some simple things he could easily do 90% on his own, and take the credit for. That first night his dad came home and he proclaimed "Dad, I made supper", the smile on his face said it all.

It's so funny how things work out, because it was only a week or so after he asked me to start teaching him, when the pregnancy test turned positive, and soon after that food became my number one enemy. Little did he know when he asked to learn, just how quick he would be getting some true hands on experience. 

There were many evenings during that first trimester I would give directions to him from my recliner, and he would handle most of the meal. He was such a trooper. Sure, I made sure I planned simple meals he could easily conquer, but still, there he was making sure we still had supper, with only a little help from me. 

Then at Valentine's Day his aunt and uncle got him a kids crock pot cookbook and he dove right in. Marking page after page of things we just had to try. By this time I was feeling a little more human like, so I could direct him a little more, and/or change the recipes a bit to fit our schedule. 

This was the first recipe he wanted to make, and I'm so glad he did. These are super easy, not to mention delicious. Plus, it makes a ton which you can use for leftovers all week, or freeze for another time.

I've always referred to him as my little sous chef, but little did I know just how true that would become over these past few months!


Crock Pot Barbecue Beef Sammies
2 lbs. ground beef
2 TBS dried onion
2 TBS Worcestershire sauce
1 1/2 c. ketchup
4 TBS brown sugar
1 c. water
1/2 tsp. garlic powder
Salt and Pepper to taste

In a large skillet, brown beef until no longer pink. Season with salt and pepper. Add to slow cooker. In a medium bowl combine ketchup, water, Worcestershire sauce, dried onion, garlic powder and brown sugar. Mix well. Pour over ground beef. Cover and cook on LOW for 2 1/2 hours. Take lid off for last 30 minutes of cooking. Serve with a slotted spoon on buns. Top with pickles if desired.


Friday, March 4, 2016

So Many Casseroles {A Gooseberry Patch Review & Giveaway}

Yes! I am back with another great cookbook from my friends at Gooseberry Patch. I tell you what, these folks just keep getting better and better with their recipe collections! Each time I get one of their books, I am amazed at how many delicious dishes they can fit between the two covers. 


This one holds a special place in my heart because it is filled with one of my favorite things...casseroles. You have heard your Everyday Mom (Yes, that's me) say it time and time again.."Casseroles are a busy mom, or dad's best friend." A yummy, simple meal that can be on the table when your family is hungry, and you don't have to be in the kitchen for hours preparing it! 

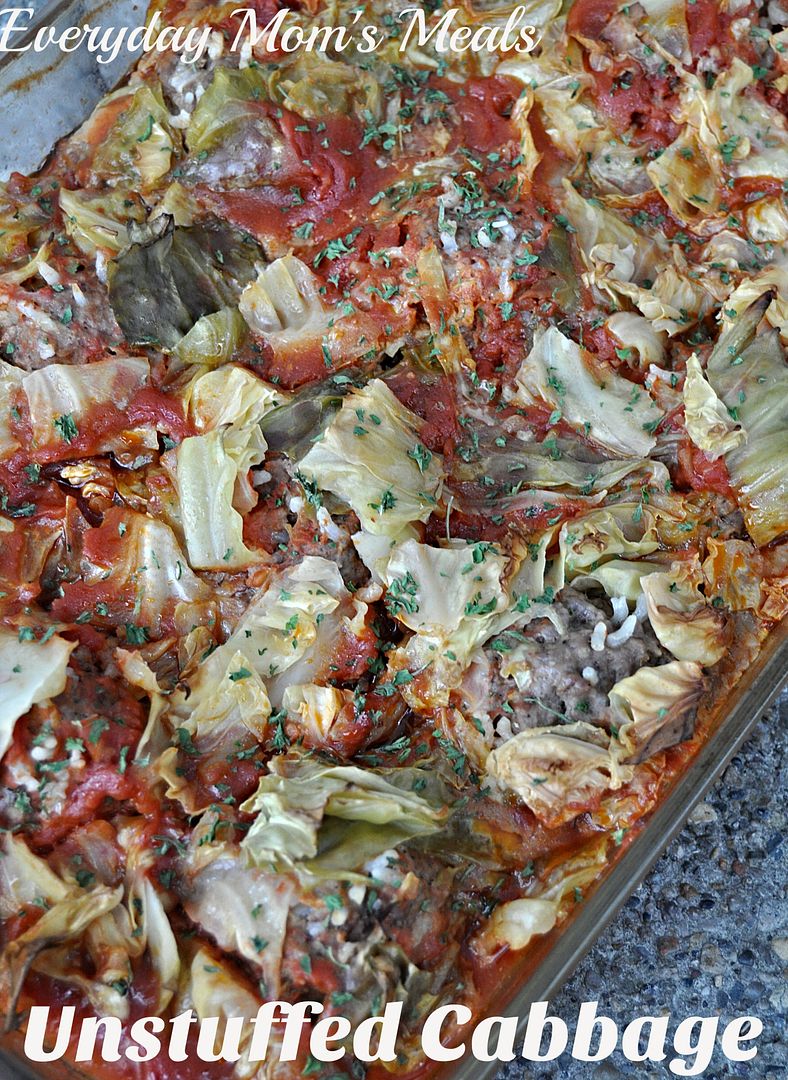
When I started the elimination process of picking one recipe to share with ya'll, it wasn't easy! There are terrific ideas for everything from breakfast and brunch, all the way through dessert. But the minute I saw the word cabbage, I stopped in my tracks.  We are cabbage fiends. Seriously, we can't get enough of the stuff. It's really becoming an addiction of sorts. And even though I have a recipe for a Cabbage Roll Casserole, I knew by reading the ingredients, this one would taste very different, but yet still familiar. 

Now, I will warn you, this one slow cooks in the oven, so make sure you've got a little extra time on your hands. Maybe for a Sunday supper. Or make it ahead and reheat! I'm sure it would taste great like that too. But it's all worth it, because it is so incredibly tasty, and hearty too! We gobbled the entire dish down, and everyone went back for seconds.

If you are a casserole lover like me, this cookbook has to be added to your collection. And you're in luck, because I've got an extra copy to give away! Just scroll to the bottom to see how!

Unstuffed Cabbage
1 1/2 lbs. ground beef
3 TBS long grain rice, uncooked
2 eggs
2 tsp. minced white onion
1 (28 oz.) can diced tomatoes
1 (6 oz.) can tomato paste
1/2 c. packed brown sugar
1/2 c. white vinegar
2 tsp. dried onion
1 medium head cabbage, chopped
Salt and Pepper to taste
Dried Parsley, for garnish*
In a large bowl mix together beef, rice, fresh onion, eggs, salt and pepper. Form into (12) 1-inch balls. Set aside. In another bowl, combine tomatoes, tomato paste, brown sugar, vinegar and dried onion. Mix well. Grease a 9x13 baking dish and place half of the cabbage in the bottom. Top with half of the tomato mixture. Add meatballs. Pour remaining sauce over top. Sprinkle with remaining cabbage. Cover with foil. Bake at 325 for 1 hour. Reduce heat to 250 and bake an additional 3 hours. Garnish with parsley before serving.


Shared at Weekend Potluck


***Giveaway***

To Enter: Leave me a comment sharing your favorite casserole. Be sure to include your email address so I can find the winner!

 Open to US Residents 18 and older

Contest Ends: March 21, 2016 


Disclaimer: I received two cookbooks in exchange for this review. All thoughts and opinions are my own.


Monday, February 15, 2016

Mommy, You Can't Eat That!

When you are pregnant, there are so many things to remember about food. It's so funny to me because the list of okay things to eat and the STAY AWAY FROM AT ALL COSTS list is constantly changing. It can be a little overwhelming if you are a foodie, and love food as much as we do. And when you have a little man living in your house, it can produce some pretty interesting conversations.

In the almost 14 weeks I've been expecting, the words "Because Mommy can't eat that" have come out of my mouth more times than I count. One, because I'm one of those women who don't just get morning sickness. I get all day, every day, can't get out of bed, need to be on medicine sickness, and the simple though of eating some foods isn't even possible. And two, because there are certain foods that are big no-nos, that he knows I would normally be gobbling down. (Oh, spicy tuna rolls, how I miss you.) 

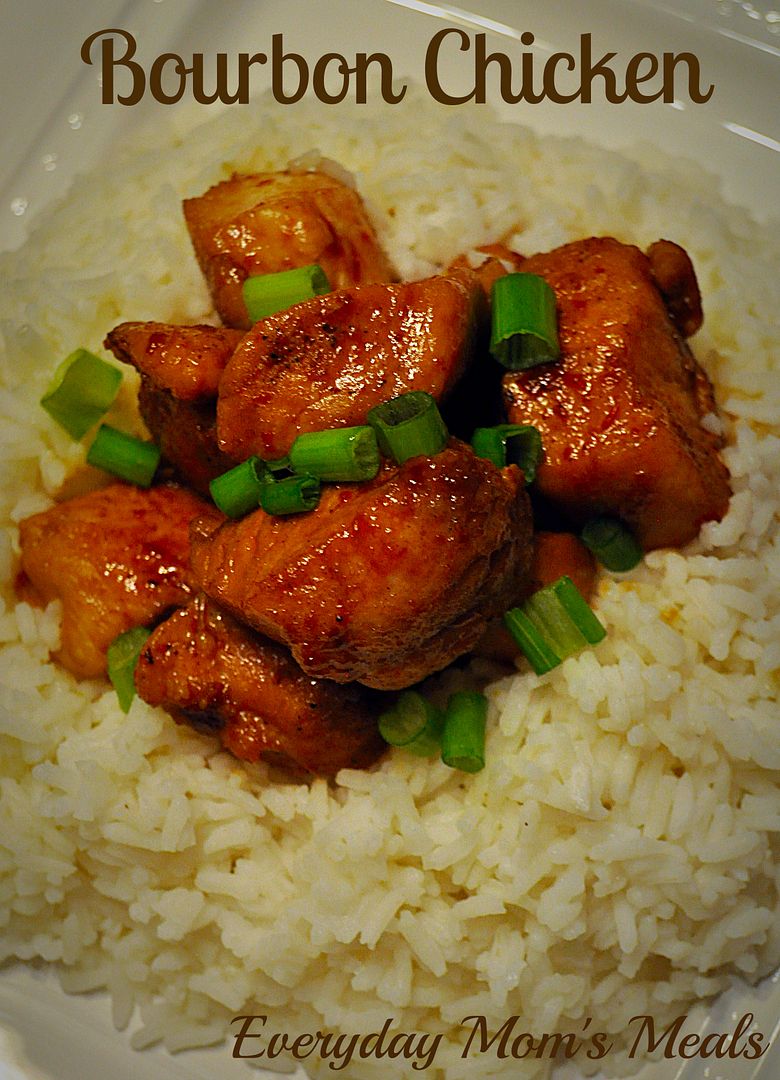
But he's learning; and now even becoming like a little watch dog about it. So a couple weeks ago when he asked me what we were having for supper, and I answered "bourbon chicken", it only took a few minutes for it to register in his brain and for him to almost tackle me in the kitchen exclaiming "But Mommy, you can't eat that!"  (Yes, he thought the chicken was gonna be drunk.)

Well, lucky for him, and our little peanut, I could. See, it gets the name from the chef who legend has it created the recipe while working on Bourbon street, not the alcohol. Whew...was he relieved! 

If you want to switch up your mundane chicken routine, this is the recipe to do it! Super simple for any weeknight too. Plus, I bet you have most of the ingredients in the kitchen right now! 

I'm glad my little man is watching out for me....even if he cares with a mouth full of sushi! 

Bourbon Chicken
3 boneless chicken breasts, cut into 1 inch pieces
2 TBS olive oil
1/4 tsp. ground ginger
1/4 tsp. garlic powder
1/4-3/4 tsp. red pepper flakes
1/4 c. apple juice
1/3. packed brown sugar
2 TBS ketchup
1 TBS cider vinegar
1/2 c. water
1/3 c. soy sauce
Salt and Pepper to taste
Chopped Green Onions
Cooked Rice

Heat oil in a large skillet over medium high heat.  Season chicken with salt and pepper. Cook in oil until browned on all sides. In a medium bowl, combine remaining ingredients, whisk well. Pour over chicken. Bring a boil. Reduce heat and simmer for 20 minutes until chicken is cooked through and sauce is slightly thickened. Serve over rice, spooning extra sauce over the top and garnish with green onions.


Shared at Weekend Potluck

Friday, December 11, 2015

Christmas Baking

So what do you do when you aren't much of a baker, and the biggest baking season of the year rolls around? Well, you suck it up, find some simple recipes you know even you can't screw up and get into the ho-ho-ho, fa-la-la-la spirit! 

Yes, that's right, even after over 5 years of doing this blog (Hard to believe!) I still do not consider myself much of a baker. Sure, I can do it, but it just isn't "my thing". There are just things I enjoy more in the kitchen. But if you've been following me for a while now, you know the one thing I do enjoy baking, and have become kind of an expert at, are muffins

This time of year I have some favorite flavors and favorite smells. For flavor, I can't get enough peppermint. It just makes my tongue feel Christmas-y. And for smells? Ginger, cinnamon...basically gingerbread. Oh, the house just smells like a holiday when you've got some gingerbread baking in the oven. So when a friend, who knows my love of all things "spicy" this time of year, passed these on, I couldn't wait to make them!

They are so much more simple than old fashion gingerbread, are ready in almost no time, and still give you all those same festive flavors. Oh, and they just happen to be the perfect dessert, breakfast, snack, or even teacher/neighbor gift!

What are your favorite things to bake this time of year? Do you go the easy route or maybe you have some tried and true recipes that are a little more labor intensive? Either way, make sure you are doing things you love, with those whom you love the most, for it truly is the most wonderful time of year.


Gingerbread Muffins
2 c. all purpose flour
1/2 c. molasses
1/4 c. packed brown sugar
1 egg
1/3 c. vegetable oil
1/3 c. milk
1 tsp. ground ginger
1 tsp. baking powder
1/2 tsp. cinnamon
1/2 tsp. baking soda
1/2 tsp. salt
1/4 tsp. allspice
Decorating Sugar Crystals, I like gold

 Preheat oven to 400. Line a muffin tin with papers, or grease bottoms only. In a large bowl using a wooden spoon, beat together molasses, brown sugar, egg, milk and oil until well combined. Add flour, ginger, baking powder, baking soda, cinnamon, salt and allspice. Stir until mixture is combined, but do NOT over stir. Divide mixture among 12 wells evenly. (I used a cookie scoop and it was 2 scoops each.) Sprinkle with sugar crystals. Bake for 18-20 minutes until toothpick comes out clean. Cool completely on wire rack. Makes 1 dozen.


Shared at Weekend Potluck
Recipe from Betty Crocker

Wednesday, December 9, 2015

Exhaustion

For those of you who didn't know, my poor mom has been in the hospital for over a month now. What started as a simple foot surgery back in July ended with her in the ER on November 8th with a serious infection and sepsis. We were very lucky they caught it when they did, and are very thankful to the wonderful doctors, nurses and hospital staff who worked so hard to get her into the healing process.

Needless to say, it's been a long month in our family, and for me, it has meant running back and forth to the hospital at least once per day, sometimes more. Don't get me wrong, I am more than happy to do it. She's my mom. I love her. I adore her. I want her better. But that doesn't take the fact away that between the running around, the extra work, the mental fatigue....I'm exhausted. Again, happy to do it; just sleepy most days.

So when it comes to meals these days, my "it needs to be quick and yummy" mentality is in over drive. We need them now more than ever. I want to be with her as much as I can, but I also have to make sure my family is fed. It has become quite the balancing act, let me tell you. But when I come up with delicious meals like this one, it makes it worth it!

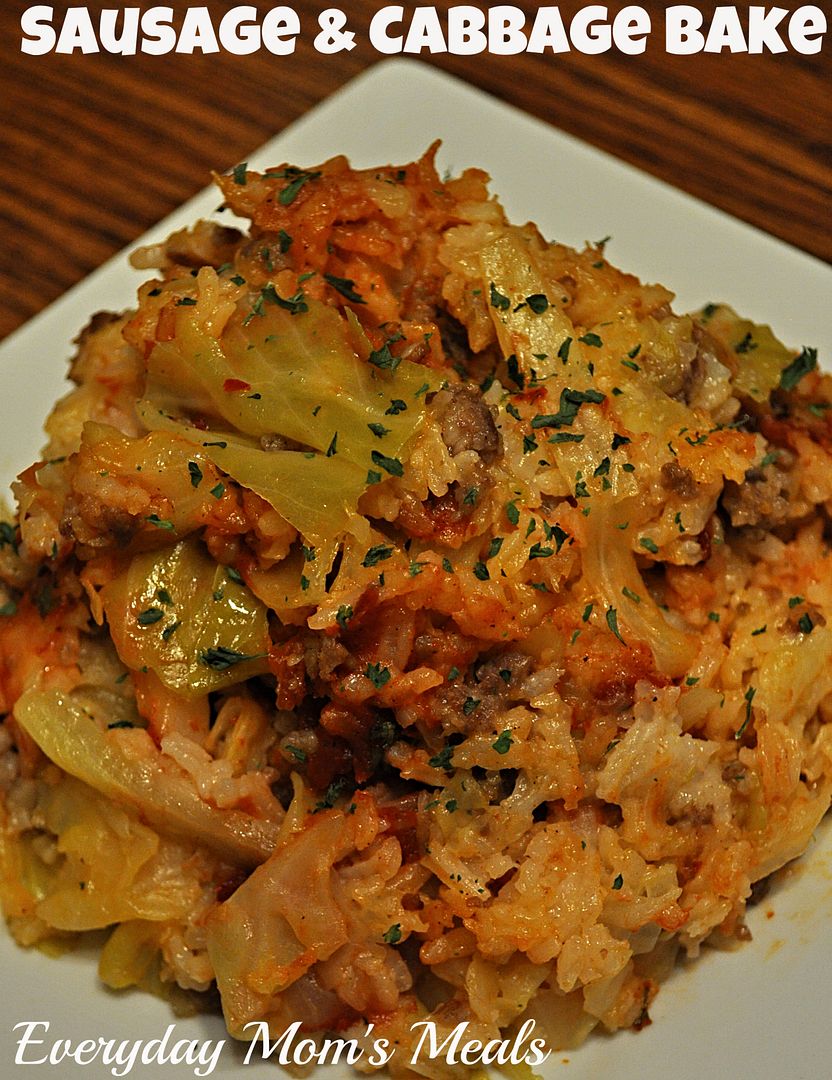
We love cabbage. Can't get enough of the stuff. I probably incorporate it into our menu plan at least once per week, or once every other. This is a new twist on my classic Cabbage Roll Casserole. A lot of the same element, but still different enough to taste like something new.

If you're in the holiday rush, you are probably exhausted too. Or maybe you are already thinking ahead to how you are going to feed those house guests in a couple weeks. This would work perfectly for either of those scenarios.

And if you have an extra minute, and an extra prayer or well wish laying around, please lift my mama up...we are keeping our fingers crossed the progress she has made continues and we will get to have her home by Christmas.

Sausage & Cabbage Bake
1 lb. mild Italian sausage*
2 c. cooked long grain white rice, NOT instant
1 medium head of cabbage, thinly sliced
1 medium yellow onion, chopped
1 (15 oz.) can tomato sauce
1 TBS brown sugar
1 TBS lemon juice
1 tsp. Worcestershire sauce
1/2 tsp. seasoned salt
Salt and Pepper to taste
Dried Parsley

Preheat oven to 350. Grease a 9 x 13 baking dish. In a large skillet brown sausage and onion until no longer pink. Drain if necessary. Add cabbage and cook until slightly wilted. Add rice and stir to combine. Season with salt and pepper. Transfer to baking dish. In a medium bowl whisk together tomato sauce, brown sugar, lemon juice, Worcestershire, seasoned salt and pepper. Pour over casserole. Spread evenly. Sprinkle with parsley. Bake uncovered for 1 hour until cabbage tender. Stir before serving. Garnish with extra parsley. *NOTE* You can add spice by using hot Italian sausage. 


Shared at Weekend Potluck


Monday, November 9, 2015

Put Some Ease Into Your Holiday

When it comes to the holiday rush, and by rush, I mean every day from now until New Year's, I think all of us are looking for ways to make things just a little easier on ourselves. From the cooking, to the entertaining, to the shopping, and everything in between, any time we can find a shortcut we will take it. Of course, for my purposes as your Everyday Mom, it's my job to try to find you as many of those when it comes to the food, as I can.

If we are going to talk about finding shortcuts in the kitchen, I think we would be remiss not to turn to our slow cookers! We use them any other day of the week to help us get dinner on the table, so why not on the holiday? Those are the days we should be really putting them to the test!

We love sweet potato casserole, and I have a terrific and really quite simple recipe for it. So why try a new one? Easy. This one doesn't involve the oven! Think about it. With a giant turkey basting away for hours, we need to make sure we have side dishes that can be cooked stove top, or in our trusty slow cookers. The more we have cooking outside the oven, the better, in my opinion anyway.

My husband says this is like eating dessert for dinner. I can respect that. It really is quite sweet, but it's a pecan brown sugar topping, it's supposed to be sweet! It really does come together so simply, and would taste perfect next to your Thanksgiving turkey, or even ham too!

Putting some easy into our holiday really should be at the top of our "to do" lists. After all, the less time we spend stressing about the holidays, the more we can enjoy them, spending time with the ones we love most in the world.

Slow Cooker Sweet Potato Casserole
2 (29 oz.) cans sweet potatoes in syrup, drained
1/3 c. butter, melted
3 TBS packed brown sugar
1/2 c. white sugar
2 eggs
1 tsp. vanilla
1/2 tsp. ground cinnamon
1/4 tsp. ground nutmeg
1/3 c. heavy cream

Pecan Topping:
1 c. chopped pecans
1/4 c. flour
2 TBS butter, melted
3/4 c. packed brown sugar

In a large bowl, mash sweet potatoes. Add butter, 3 TBS brown sugar, white sugar, eggs, vanilla, cinnamon and nutmeg. Beat with an electric mixer, on low, until smooth. Stir in cream until combined. Spray slow cooker generously with nonstick spray. Add sweet potato mixture and spread evenly. In a medium bowl combine all topping ingredients and stir until combined. Sprinkle over sweet potatoes. Cook on HIGH for 2-3 hours until browned and set. Serve immediately, or remove slow cooker insert and keep covered until ready.  *NOTE*  I have a 6 quart slow cooker and mine was done in 2 hours. A smaller one might take longer. I always use light brown sugar, but especially in this recipe because it gets dark enough, the darker variety might make it too dark. Watch this carefully because with all the sugar, this can burn easily.


Recipe from Pillsbury
Shared at Weekend Potluck


Friday, October 16, 2015

Just Around The Corner {A Post for Earth Fare}

I'm going to go out on a limb here and say most of you haven't even though about your Thanksgiving menu. Of course not. We are just now creeping up on Halloween, and you've got candy and caramel apples on the brain. I get that. I really do. 

But see, as a food blogger, it's my job to think ahead like that. I've got a few Halloween themed posts under my belt, so now my brain moves on to the next "big" thing on the calendar, and here in the U.S. that is most definitely Turkey Day. And truthfully, it really is only a little over a month away, so with the way time sees to fly, we will blink and it will be here.

This recipe didn't even start out as something I would be featuring as an idea for your Thanksgiving holiday meal. I was simply cooking some squash for us to have as a side dish on a random Tuesday night. But then I started thinking. What if I could cook it in new way, and be able to utilize one of my favorite "big holiday meal" tips? Those two ideas came together and this genius dish was born.

While I usually am not the one in charge of our elaborate holiday meals, due to having family so close, I am done it before, so that means I do have some tricks up my sleeve. And one that I share each year is to free up oven/stove space as much as you can. If you can find a way to cook something you traditionally would be doing in the oven, or on the stove, either in your slow cooker, or maybe even head of time, DO IT! You will be so happy you did when your work level, and stress level, the day of is reduced! 

Such was the case with my squash. I also roast it in the oven, remove it, scoop it out, (while trying not to burn my skin off) season it, and serve it. But not this time! This time, it spent some time in my slow cooker, and then I could handle them cool, and reheat at meal time. 

Translated, this would make a terrific dish for your holiday meal! Make it the day of, or even a couple days before. If you've go some traveling to do, make it at your house, but take it scooped and seasoned with you. Using the slow cooker really gives you so many more options, all while the same flavors you love!

Slow Cooker Acorn Squash
2 medium acorn squash, halved and seeded
2 TBS butter, cut in half
2 TBS packed brown sugar
Salt and Pepper to taste

Place squash in slow cooker, stacking if necessary. Put 1/2 TBS butter and 1/2 TBS brown sugar in each. Sprinkle with salt and pepper. Add a splash of water to bottom, around squash. Just enough to cover bottom of cooker. Cook on HIGH for 3 hours. Take lid off, and allow to cool to handle. Scoop out flesh, add more butter, salt and pepper. Reheat when ready to eat. 


Shared at Weekend Potluck


Disclaimer: I received at gift card in exchange for this post. The recipe and all thoughts are my own. 

Friday, June 5, 2015

What Did We Ever Do?

It is well known in our inner circle of friends and family, I am NOT a naturally cool person. And no, I'm not talking about my personality. I mean my actual body temperature. As my grandma has always said about me, I'm a "hot box." 

I have two temps...warm and hot. There is not in between. I'm the girl who sweats in the winter. I drive around when there is snow on the ground with the AC cranked. When I was pregnant with little man, I made Mr. E turn the air conditioner on in March and it didn't get turned off until he was born in September.

So you can imagine my utter despair a few weeks ago when just as the thermometer started to rise to 85 degrees and higher, with 80% humidity, our central air quit working. Literally, one minute it was blowing nice cold air and the next the temp in the house was climbing to 75 degrees. I was pretty miserable, pretty quickly. I started to think back to when I was a kid and we didn't have AC at all. We had fans. And open windows. Those hot sticky nights when you would wake up in the morning soaked from sweltering all night long. Not fun. 

We are so addicted to our AC we don't even own fans!!! Luckily my parents hooked us up, and we got some up in this joint very quickly! So we had air circulating, but at one point, it was still 80 degrees in here. Needless to say, I thought I was going to spontaneously combust! 

Come Monday night I had a repair company scheduled to come look at it, but in the meantime I had to cook supper, which I hadn't done since it went out. Between the weekend and Mother's Day, I had yet to be made to prepare a meal in the sauna, but my time had come. 

I was craving barbecue, but knew it needed to be stove top because I wasn't turning on the oven, and I didn't really even want to grill either...that just meant being outside in the heat, and no relief once I came in. So, this is what I came up with. It gave me the bbq flavors I was craving but without the time and effort, and most importantly high temperatures I couldn't deal with. 

These would be fantastic for a party, potluck or cookout that gets interrupted by rain! Think sloppy joe texture but a different flavor...perfect for summer time.

I'm not sure what we did before the days of AC. but I know I don't want to find out any time soon again. Oh, by the way, I am currently typing this...in my nice and cool house...so thankful it's working again!

BBQ Ground Beef Sandwiches
1 lb. ground beef
1 small onion, chopped
3 ribs celery, finely chopped
1 c. ketchup
1/2 c. water
1 TBS butter
2 TBS apple cider vinegar
1/2 TBS. lemon juice
1 TBS Worcestershire sauce
1 TBS brown sugar
1 tsp. garlic powder
Salt and Pepper to taste
 Buns
Pickles

In a large skillet over medium high heat, saute beef, onion and celery in butter until no longer pink. In a medium bowl whisk together ketchup, vinegar, lemon juice, Worcestershire, brown sugar, garlic powder, salt and pepper. When beef is cooked, add ketchup mixture and water. Stir to combine. Bring to a boil. Reduce heat to low and simmer, covered, for 40 minutes. Serve on buns with pickles.


Shared on The Country Cook June 5, 2015

Monday, April 13, 2015

That's What Friends Are For

A few weeks ago my good friend told me about this treat she had a party the night before and how she "couldn't stop eating it." Well, you know with an endorsement like that, I had to know what it was, and how I could make it!

She described this amazing fruit salsa, how simple the recipe was, and how if she had just a touch less self control, she could have eaten the whole bowl herself. Well, that's all I needed to hear. The next day I was in the produce section, picking up everything I needed and by that night, I too was trying to avoid gobbling down the entire batch all by myself.

This is the perfect sweet treat for the kids, a summer cookout, a pool or lake party, or simply for snacking. So fresh, so tasty and really, actually healthy too. Just a hint of sugar, and the rest of the sweetness comes naturally from the fruit itself.

I served this with graham crackers and little man couldn't get enough. In fact, when he ran of crackers, he asked for a spoon to eat the rest. No joke! However, my friend said the batch she had was served with some cinnamon sugar chips you can find next to the tortilla chips at the store. I think those would be absolutely scrumptious too! 

I can't wait to make this again...and again...and again. Especially this summer when we go strawberry picking! Oh, I can only imagine how fresh picked berries would make it even better!

Great friends are for so many things, including yummy recipes I can then share with you!

Fruit Salsa
1 lb. strawberries, diced
2 granny smith apples, peeled and diced
2 kiwis, peeled and diced
1 ( 6 oz.) container raspberries
Juice of 1 lemon
3 heaping TBS strawberry preserves
2 TBS packed brown sugar

In a large bowl combine apples and lemon juice. Stir to combine. Let sit 2 minutes. Add strawberries, raspberries and kiwi. In a small bowl stir together preserves and brown sugar well. Pour down over fruit. Mix well. Allow to sit at room temperature 15 minutes before serving. Serve with graham crackers, cookies, etc. 


Shared on The Country Cook April 17, 2015