Everyday Mom's Meals: Soy Sauce
_____
Showing posts with label Soy Sauce. Show all posts

Sunday, January 15, 2023

Air Fryer Novice

 So, who  got a new air fryer for Christmas? *Raises hand*

Yep, I have joined the cool kids club!

Want to hear the funny part? 

I actually had an air fryer given to me through the blog. It was a very nice one, but on the larger side. It was very intimidating, at least to me. Plus, we don't have a lot of extra counter space in the kitchen and when I decided I wanted an ice maker, I decided the air fryer had to go. I found it a very lovely home with a friend, and she was super excited. (And that ice maker? One of the best purchases ever!)

Fast forward to this past fall and I had the opportunity to have another air fryer given to me for work purposes. I did learn from the last time and asked for it to be a smaller model. We still didn't have the counter space for it, so a new microwave cart was promptly ordered and it now resides happily on the bottom shelf. 

I will fully admit I am having fun playing around with it, finding all sorts of things to make in it. From frozen taquitos and jalapeño poppers for our New Year's Eve appetizer buffet, to tasty weeknight meals. 

One of the first dishes I knew I wanted to try was salmon-for my boys. I don't eat salmon (thanks to a nasty food poisoning over 20 years ago) but oh my they love it. So, I knew I would score major wife/mom points with this one! 

This is the easiest fish recipe ever, and it comes out with immense flavor. Since I don't eat it, I will share what the hubby said after the first bite. "Oh my gosh. It's moist. Falling apart tender. I taste sweet, savory and a little tang too." Both he and the teenager agreed it was 100% delicious and I had their "permission" to make it again and again. I would say that is a rave review!

If you're experimenting with your new air fryer, or even a seasoned pro, I hope this simple but oh so flavorful salmon makes it way to your table soon. And be on the lookout for more air fryer recipes as I get more comfortable with my new toy!

What Temperature To Cook Salmon In The Air Fryer

Various recipes will say temps between 350 and 400. I did 400 because my filets were a little thicker than 6 ounces. 

How Long Do I Cook Salmon In The Air Fryer

Again, different recipes have different cook times. Some say it's done as quick as 7-9 minutes. This one takes a little longer. The size of your air fryer will determine cook time.

Can I Use Oil In The Air Fryer

When you want to use oil on something in the air fryer, be sure to put it directly on the food. Brushing or spraying oil on the food itself helps to protect the air fryer surface.

Should I Use Salmon With or Without Skin

You can use either in this recipe, but I will tell you while I prefer skin off, it would help to keep the salmon together once cooked. This was super fragile and fell apart very easily-having the skin on would have helped to prevent that. Salmon skin is absolutely edible, and would nice and crisp in the air fryer.

 How Do You Know Salmon Is Cooked In The Air Fryer

Salmon turns opaque when cooked and becomes very flaky. But the only sure way to know it has reached that 145 degree temp is with an internal meat thermometer.
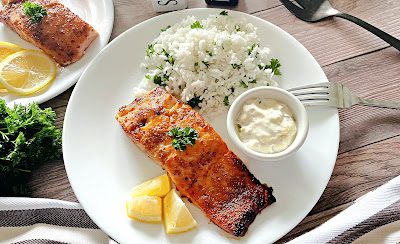
Easy Air Fryer Salmon


Easy Air Fryer Salmon

2 salmon fillets, 6-8 ounces each

1 TBS stone ground mustard

1 TBS brown sugar

1/2 TBS olive oil

1/2 TBS soy sauce

1/4 tsp. garlic powder

Salt and pepper

Fresh parsley

Lemon 

Preheat air fryer to 400. (Check your manual- mine needs about 5 minutes) In a small bowl combine mustard, soy, brown sugar, olive oil, garlic powder, salt and pepper.  Using paper towels, dab salmon dry on both sides. Brush mustard mixture on salmon, on both sides. Sprinkle with extra salt and pepper. Place in air fryer basket. Cook for 10-15 minutes, until internal temp of 145. Carefully remove and garnish with parsley. Serve with lemon and tartar sauce if desired. 
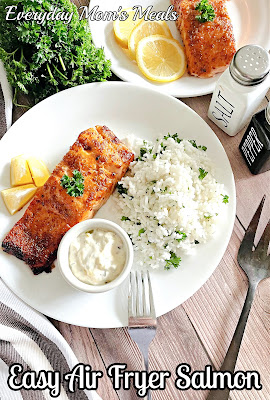
Easy Air Fryer Salmon


Best Tips

You can use salmon with or without skin. I prefer without.

Air fryer size will alter cooking times. Mine is an 8 quart. 

Start checking salmon after 10 minutes and continue cooking until a meat thermometer reaches 145 degrees.

The salmon will be very fragile. Use a sturdy, flat spatula to remove. It might still fall apart. 

Dijon or spicy brown mustard would also be delicious.

You can substitute honey for brown sugar. 

Want a great homemade tartar sauce? Here is my recipe


Shared at Weekend Potluck

Sunday, February 20, 2022

Silver Linings

 Are there things that changed in your life over the last two years due to the pandemic that you don't see changing soon? Silver linings that came from a horrible shared situation for all of us that you can see the value in and are thankful for? With how hard these past 24 months have been, I know it's hard to see the good sometimes, but I truly believe they can be found if you look.

One of the things that came about because of the pandemic in my world is a new Facebook page for our community that has grown into something nobody could have ever imagined. In March of 2020 when the governor announced all restaurants had to shut their doors to dine-in customers, for hopefully 2 weeks, a group of people in our city immediately started a public page aimed at supporting local restaurants for take out/curbside business. Many were trying to quickly adapt to focus on carry out orders, and some that had never even offered carry out were trying to figure out how to implement it so they could keep the lights on.

The idea of this page was simple. Share pictures and shout outs to local restaurants and spread the word about their food, staff and support this new world of carry out as much as possible. Well, I am here to tell you this page exploded! By the time restaurants could reopen their dining rooms in May, there were thousands of followers and local joints saw their carry out business double or even triple. 

Now here we are almost 2 years later, and the page is still going strong, and has turned into this amazing place for the community to come together to share restaurants recommendations, ask questions, share terrific meals, give shout outs to the servers, staff and owners who are working so hard, and in some ways still struggling. 

Our city has a pretty amazing foodie community, and this Facebook page has shone a light on it in a way I don't think any of could have imagined. There is no doubt it will stick around long after we say good-bye to this pandemic once and for all.

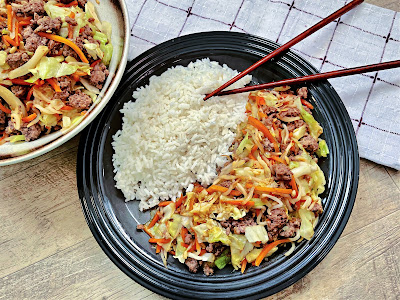
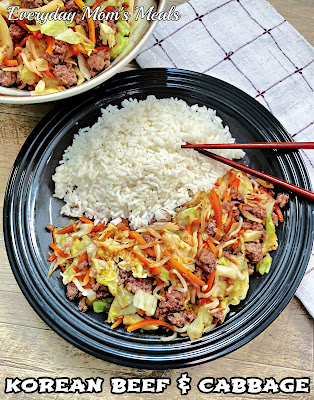
With all that being said, I still love finding ways to enjoy great take out quality recipes at home. This Korean Beef and Cabbage is a quick cooking stir fry with simple ingredients that is full of flavor and can be on your table in almost no time! In about the time it takes to steam some rice to serve it over! 

Oh, that reminds me of another great thing about the last 2 years. If your local grocery store is out of things you need, have you ever stopped by an Asian market? We have quite a few around us, and while we've always shopped them, they became a God send when we couldn't find things in our other stores. In fact, the soy sauce and sesame oil I used in this recipe game from our favorite Asian market! (Hence the total random thought at the end of this post.)

 The world has been put through the ringer over the last two years, but I bet if you look closely, and think really hard you might be able to find a silver lining of your own that was a blessing in disguise. Something you've decided to keep around once you throw your mask away once and for all; and years from now when you look back, you can actually be grateful for. 


Korean Beef and Cabbage

1 lb. ground beef

1/4 cup soy sauce

1 TBS sesame oil

4 cloves garlic, minced

1/2 tsp. ground ginger

1 cup carrots, shredded

2 cups cabbage, coarsely chopped 

1 (14 oz.) can bean sprouts, drained, rinsed and patted dry

Cooked white rice for serving

In a small bowl whisk together soy sauce, sesame oil, garlic and ginger. Set aside. In a large skillet over medium high heat, brown beef until no longer pink. Add cabbage and carrots and sauté for a few minutes until they just begin to soften. Add bean sprouts and sauce. Stir well and sauté about 5 minutes for flavors to develop. Serve immediately with cooked rice and extra soy if desired.


Sunday, April 21, 2019

Salad Season

When the sun decides to come out and play more, and the temps begin rise, my summer taste beds set in, and fast.

I start to crave all things fresh, light, grilled, from the garden, cookout staples, picnic favorites. ALL. OF. IT.

Last week we had some crazy weather. That's quite common for Indiana in spring. How crazy you ask? On Sunday we had snow. By Tuesday, it was sunny and 75.

Since I am a meal planner, when there is a sudden shift like that, supper doesn't always line up with the weather. Like on a 80 degree day in October, we might be sitting down to a piping hot bowl of soup. But not this time. As luck would have it, I had planned barbecue chicken and this salad.

Oh, how delicious it was. It was the perfect meal to sit down to after a walk outside, with the sun still shining through the windows, and even thought it wasn't quite time to eat outside yet, that's what it put me in mind of. A meal we could enjoy on the patio table, or even at a cookout. I know what I'm taking to the first one we are invited to this summer, and I bet everyone will want the recipe too.

This salad might be simple, but it brings BIG flavors. I think it could even be made into an entire meal if you added some grilled chicken to it, perfect for a hot summer night!

I think we might finally be turning a corner here as far as seasons go. Winter lasted 927 days, spring has been wet and kinda cold, but there just might be light at the end of the tunnel. And with it, more and more fresh dishes like this to enjoy all season long.

Asian Romaine Toss
3 Romaine lettuce hearts, chopped
2 crowns broccoli, chopped
1 package Ramen noodles, broken, seasoning packet discarded
1 c. chopped walnuts
3 TBS butter
1/2 c. sugar
1/4 c. red wine vinegar
1/2 c. vegetable oil
2 tsp. soy sauce
Salt and Pepper to taste

In a medium bowl whisk together oil, sugar, vinegar, soy sauce, salt and pepper until well combined. Set aside. In a large skillet melt butter over medium heat. Saute broken noodles and walnuts until browned, about 5-7 minutes. Transfer to a paper towel lined plate to cool.

In a large bowl combine lettuce, broccoli and cooled nut mixture. (Reserve a little nut/noodle mix for top.) Toss well. Pour dressing down over. Toss to coast. Chill for 10-15 minutes before serving. Add extra nuts/noodles to top. 


Inspired by Plain Chicken
Shared at Weekend Potluck

Sunday, October 21, 2018

Asian Saturdays

That title actually comes from something Mr. E says all the time. Why? Because he loves Asian food, and on the weekends when lunch rolls around, he is usually in the kitchen making some for himself. Could be as simple as a pack of ramen noodles, or a really tasty dish filled with exotic ingredients. And every time he sits down at the table to eat he will declare "Oh look, it's Asian Saturday!"

It is no secret how much we love Asian cuisine in our house. All of us. Heck, Max would be happy if I gave him rice for every meal, every day. We can't get enough of Chinese, Japanese, Korean, Thai...all of it.

Most of the time when we reach for a take out menu, you can bet it is going to be Chinese. We have a few different places in town we love, and we tend to rotate our trips to them. Oh, and let's not forget the buffets too! That is actually where Alex had this dish for the first time. On the Asian buffet we've been going to for years, but this was a "new" dish to him.

So the next time we were getting take out, he said to me, "Mom can I see if they have that dish I had at the buffet last time?" Sure enough they did and this was even better than the first.

Well, we can't be ordering take out or visiting the buffet all the time, after all private school and diapers aren't cheap! So it was time for mommy to come up with a make at home version he could enjoy just as much, anytime!

Black Pepper Chicken
2 lbs. boneless chicken thighs, cut into 1 inch pieces
5-6 stalks celery, chopped (about 2 cups)
1 medium white onion, chopped
1 TBS corn starch, divided use
3 1/2 tsp. black pepper, divided use
3/4 c. chicken broth
1/4 c. soy sauce
4 TBS vegetable oil, divided use
3 TBS white vinegar
Salt to taste
Cooked White Rice 

In a large bowl, combine chicken, 1/2 TBS corn starch, sat and 2 tsp. black pepper. Mix to coat. In a medium bowl, whisk together broth, soy sauce, vinegar, 2 TBS oil, 1/2 TBS corn starch and 1 1/2 tsp. black pepper.  Heat 2 TBS oil over medium high heat. Saute onions and celery until soft, about 5 minutes. Add chicken and saute', stirring often for 5-7 minutes. Add sauce into the pan. Stir well. Bring to a simmer, and reduce heat to medium low. Cook for additional 10-15 minutes until chicken is cooked through and slightly thickened. Serve over cooked rice and extra pepper.


Shared at Weekend Potluck

Tuesday, February 20, 2018

Be Adventerous

Before my husband came long, I wasn't the adventurous eater I am today. I was always a good eater, mom and dad made sure of that, but I just didn't have the opportunity to try so many new things until Adam shared them with me. He loved all different cuisines and forced me to try things I had never dreamt of. And for the most part, I discovered I loved them too. Sushi, Calamari, Raw Tuna, just to name a few. Oh, and of course Korean food, which is where today's recipe comes in.

We have this little Korean restaurant here in town, a little "hole in the wall" if you will, and the first time he took me there I was not impressed. That will teach me not to judge a book by its cover! I had NO idea what to order, but he guided me to something he was pretty sure he knew I would love, and he was right! 

If you've never had Bibimbap, it literally means "mixed rice." It is this huge rice, meat, veggie mixture, and then...here is my favorite part...it has an ooey gooey fried egg served on top. Why? Because the minute you cut into it, the warm yolk covers everything making it's own sauce. I know it might sound weird, but you have to take my word for it...one bite and you will be hooked. 

Every time we go, I order the same thing, savor each and every bite and am always sad when it's gone. So it was about time I made a version at home we could enjoy any time. 

You can easily adapt this to include veggies you love, these are what I had on hand. You can also add some sriracha or garlic chili paste if you like it hot! 
And don't get overwhelmed! It really isn't a complicated recipe, it just has a lot of steps. But you can prep the veggies, and even pre-cook the rice too! Then all you have to worry about is the beef and frying up some eggs. Just take your time and take it one step at a time. No lie- I made this on a Monday night, with 1 hour until dinner had to be ready for Alex to eat before Tae Kwon Do, and Max was at my feet the whole time! My point? If I can do it, YOU can too! 
If you aren't a very adventurous eater, or maybe your kids won't touch anything that isn't a chicken nugget or hot dog, I urge you to start small. Try something like this that has things that are familiar, and then go from there!

Korean Beef Bowl
2 lbs. ground beef
6 garlic cloves, minced or grated
1/2 c. packed brown sugar
1/2 c. low sodium soy sauce
4 tsp. sesame oil
1/2 tsp. ground ginger
1/4-1/2 tsp. crushed red pepper flakes
Black Pepper to taste
1 medium cucumber, sliced thin
3 medium carrots, grated*
1 bunch green onions, chopped*
6 cups cooked white rice*
4 eggs, cooked over easy or sunny side up
Sesame Seeds for garnish 

Prep ALL veggies, and set aside. In a large skillet brown beef with garlic until no longer pink. Drain well, return to skillet.  In a medium bowl whisk together brown sugar, soy sauce, sesame oil, ginger, red pepper and black pepper. Pour over beef. Bring to a boil. Reduce heat to low and simmer about 5 minutes until sauce reduces a little. To assemble, place rice in bottom of bowl. Top with beef, cucumber, carrots and green onions. Place 1 cooked egg on each bowl. Sprinkle with sesame seeds. *NOTES* When grating carrots, use the large hole on a box grater. You only want the dark green parts of the green onions. Don't stress over using "fancy" rice. Save yourself some time and energy and use minute rice! Brown can be substituted too. 


Inspired by The Recipe Critic  

 Shared at Weekend Potluck
Shared at Meal Plan Monday

Monday, July 18, 2016

Another Recipe Contest

Yep, once again I am trying to see if a recipe I create can be named "best in show." I have to admit, I really enjoy entering recipe contests, but just don't have as much time to do them right now as I would like. (For those of you keeping track, I am almost 9 months pregnant...hence the short on time issue!)

But when I heard about this one from JSL Foods, I decided to make the time to enter one more before my days are completely full of bottles, diapers and cooing!

The idea was simple. They would send me whichever of their products I wanted to incorporate into a recipe and then I got to play and create in my kitchen. How cool!

I decided to use their Teriyaki Yakisoba Noodles, but in a different way than I normally would.


We are Asian food fanatics, but in the summer time, we are also salad ones too. We like eating lighter, cooler and more refreshing meals when the sun is beating down and it's too hot to move. So I decided I could take these tasty noodles, add some fresh ingredients, a tasty sauce and create a salad that is both filling and light at the same time.

This makes a terrific main dish, with some fresh fruit on the side. Or whip up a big batch of it for your next cookout. Feel free to add whatever veggies you think you would be delicious, I think I might add zucchini next time.

If you want to learn more about JSL Foods and all the great products they have to offer, check them out online, on Facebook and Twitter. Or, look for them at your local Safeway or Target store. Oh, and wish me Good Luck!!

Sweet n Spicy Asian Noodles Salad
3 packages Fortune Teriyaki Yakisoba Noodles, sauce packets discarded
1 (12 oz.) bag frozen cooked medium shrimp, thawed and tails removed
1 (8 oz.) bag frozen shelled edamame, thawed
1 lb. fresh broccoli crowns, cut into florets
1 red bell pepper, julienned
1/4-1/3 c. creamy peanut butter
1/4 c. soy sauce, extra for serving
1/4 c. lemon juice
1/2 c. chicken broth
3 TBS sesame seeds, extra for garnish
1-3 tsp. sriracha, to taste

Bring 2 large pots of water to a boil. When they are rapidly boiling, add noodles to one, and broccoli to the other. Cook EACH 2 minutes total. Immediately transfer both the noodles and broccoli to a large bowl of ice water to stop the cooking process. Drain well.  In a medium bowl whisk together soy sauce, lemon juice, chicken broth, peanut butter, sriracha and sesame seeds. Transfer noodles and broccoli to a large bowl. Pour sauce over. Add shrimp, peppers and edamame. Toss to combine. Chill for at least an hour before serving. Stir well again. Sprinkle with extra sesame seeds. Serve with extra soy sauce on the side. *NOTES* I use 2 teaspoons of sriracha, because I can't take much heat. Feel free to use less or more depending on the heat level your family enjoys. Or, you can always serve extra on the side. When you pour the sauce down over the noodles, you will notice extra. This is fine because it will absorb a lot while chilling. 

Monday, February 15, 2016

Mommy, You Can't Eat That!

When you are pregnant, there are so many things to remember about food. It's so funny to me because the list of okay things to eat and the STAY AWAY FROM AT ALL COSTS list is constantly changing. It can be a little overwhelming if you are a foodie, and love food as much as we do. And when you have a little man living in your house, it can produce some pretty interesting conversations.

In the almost 14 weeks I've been expecting, the words "Because Mommy can't eat that" have come out of my mouth more times than I count. One, because I'm one of those women who don't just get morning sickness. I get all day, every day, can't get out of bed, need to be on medicine sickness, and the simple though of eating some foods isn't even possible. And two, because there are certain foods that are big no-nos, that he knows I would normally be gobbling down. (Oh, spicy tuna rolls, how I miss you.) 

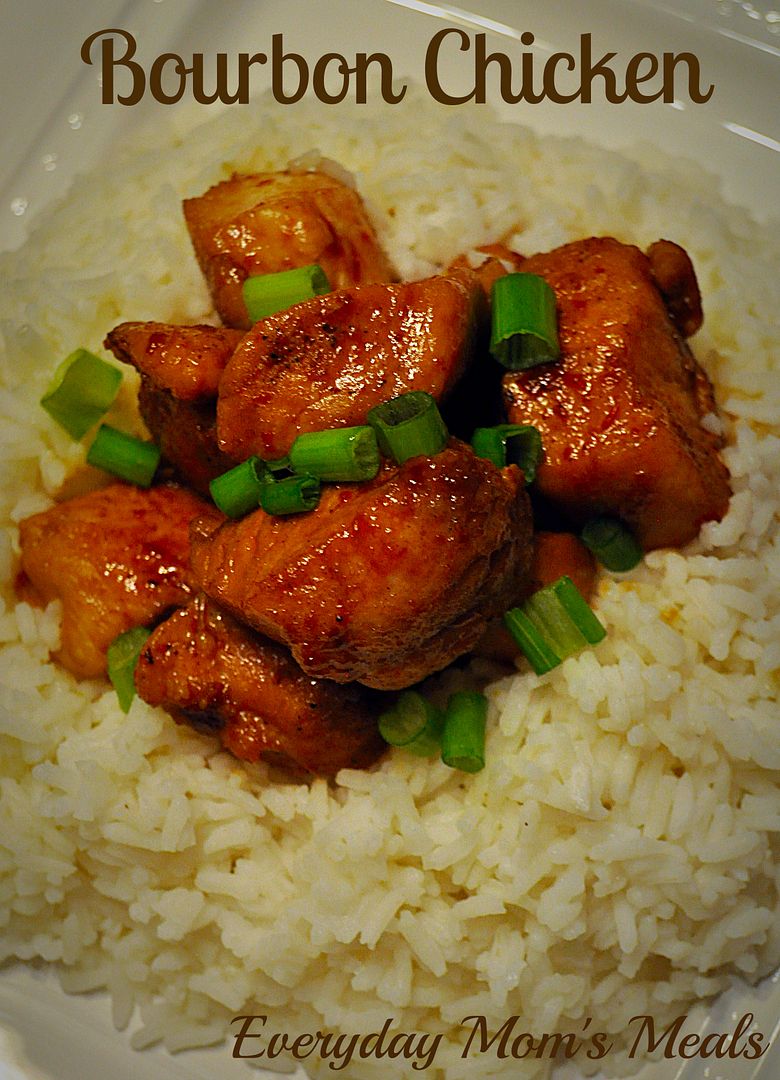
But he's learning; and now even becoming like a little watch dog about it. So a couple weeks ago when he asked me what we were having for supper, and I answered "bourbon chicken", it only took a few minutes for it to register in his brain and for him to almost tackle me in the kitchen exclaiming "But Mommy, you can't eat that!"  (Yes, he thought the chicken was gonna be drunk.)

Well, lucky for him, and our little peanut, I could. See, it gets the name from the chef who legend has it created the recipe while working on Bourbon street, not the alcohol. Whew...was he relieved! 

If you want to switch up your mundane chicken routine, this is the recipe to do it! Super simple for any weeknight too. Plus, I bet you have most of the ingredients in the kitchen right now! 

I'm glad my little man is watching out for me....even if he cares with a mouth full of sushi! 

Bourbon Chicken
3 boneless chicken breasts, cut into 1 inch pieces
2 TBS olive oil
1/4 tsp. ground ginger
1/4 tsp. garlic powder
1/4-3/4 tsp. red pepper flakes
1/4 c. apple juice
1/3. packed brown sugar
2 TBS ketchup
1 TBS cider vinegar
1/2 c. water
1/3 c. soy sauce
Salt and Pepper to taste
Chopped Green Onions
Cooked Rice

Heat oil in a large skillet over medium high heat.  Season chicken with salt and pepper. Cook in oil until browned on all sides. In a medium bowl, combine remaining ingredients, whisk well. Pour over chicken. Bring a boil. Reduce heat and simmer for 20 minutes until chicken is cooked through and sauce is slightly thickened. Serve over rice, spooning extra sauce over the top and garnish with green onions.


Shared at Weekend Potluck

Monday, January 4, 2016

Pork in the New Year

Do you have any traditions when it comes to food on New Year's Day? Black Eyed Peas or Collard Greens maybe? My grandma always served pork and cabbage to begin a new year, and while I might not do it every year, or even on the exact day, every time the calendar flips to January 1st, I think about ways I can keep the tradition alive.

We love any and all Asian food. We can't get enough. I would venture a guess and say it is the cuisine we eat the most of in this house. But let's face it, sometimes it can be a tad less than healthy. Now, yes I do pride myself on being able to make take-out favorites in my own kitchen and leave out all the "extra" ingredients that might come in the little white box, so that does help.

If you are trying to lighten things up in 2016, and love egg rolls, this is going to quickly become a go-to in your meal rotation. All the same flavors, and textures, but no fried wrapper. Yep, all the yummy inside stuff, in a simple to make, one skillet dinner. Oh, did I forget to mention that? Not only are you getting a meal that is a tad healthier, but yes, it is also a one pot wonder!

If your new Year foodie resolutions include finding ways to make your favorites a little more guilt-free; or if you are determined to make dinner as stress-free as possible, this should definitely be your first new recipe of 2016!

Pork Egg Roll Skillet
1 1/2 lbs. ground pork*
8 oz. white button mushrooms, sliced
1 (14 oz.) bag coleslaw mix
1/4 c. soy sauce
2 tsp. Asian ginger garlic spice blend*
Chopped green onions
Salt and Pepper to taste

In a large skillet brown pork. Season with salt and pepper. When browned, add mushrooms, coleslaw mix and Asian seasoning. Cook and stir over medium heat until mushrooms browned. Add soy sauce. Stir to combine. Let cook a few minutes to reduce. Garnish with green onions before serving. *NOTE* You don't want sausage for this. You want ground pork, usually near the pork chops. You could also use ground chicken. The spice blend I use is found on the regular spice aisle in the grocery store. I like the Simply Asia brand.  


Wednesday, August 26, 2015

Not Too Much Spice

By now most of you know while Mr. E loves his spicy food, the hotter the better, I am the wimp in the family and can't take the heat. And to top it off, Little E. has inherited his father's love of all things spicy, so I am out numbered 2:1.

So, in that spirit, I am trying to find more dishes that do indeed have some spice to them. But not too much. Just enough the boys can taste it and I'm not in misery while eating, for while my husband might not care to sweat and/or cry while he chews, it really isn't my cup of tea.

So far I've found that Asian dishes seem to be where I can add some heat, and not burn my tongue off. I'm guessing it's because the slightly sweet tones of other flavors included in the dishes help to subdue the heat.

For me, Asian noodles are some of the best ones around. But then again, I just like noodles. I just think there are so many things you can do with them, so many veggies you can add and so many flavors you can use.

Take a little help from the store with some egg rolls, serve these on the side and you have a simple dinner! Plus, the leftovers make a fantastic lunch the next day. The flavors only intensify with sitting. And if you have a spice lover in your house, you can easily add more sriracha, or serve it on the side so they can.

I will never be the heat connoisseur my husband is, but I am trying to ease my palate into more dangerous territory...one spicy bite at a time.

Spicy Thai Noodles
1 lb. linguine
1 1/2 TBS olive oil
8 oz. white button mushrooms, sliced
1 medium zucchini, sliced into half circles
1/3 c. soy sauce
2 TBS brown sugar
1/2 tsp. garlic powder
1-2 TBS sriracha*
4 green onions, chopped
1/4 c. peanuts, chopped
Salt and Pepper to taste

Cook pasta according to package directions. Meanwhile, heat oil in large skillet over medium high heat. Saute' mushrooms and zucchini until browned, about 5 minutes. Season with salt and pepper. When pasta is cooked, drain well. Add to skillet. Toss well. In a medium bowl combine soy sauce, garlic powder, sriracha and brown sugar. Whisk well. Pour over noodles. Stir to combine until pasta is coated. Garnish with green onions and peanuts. *NOTE* I used 1 TBS of sriracha because I can't handle heat. If you like it spicy, add the 2 TBS or more!


Shared at Weekend Potluck

Wednesday, May 20, 2015

Those Hot Summer Nights

It won't be long before all those folks that were just complaining about snow and freezing temps a few months ago are now whining it's too hot and they are melting. But not me. Nope. I refuse to complain about the heat. Even though I am hot blooded by nature and sweat like a Democrat at at GOP party, you will never hear me say it's too hot, or  wish it could cool down. However, I do have to find ways around the heat when I can.

When the temps get to a point where at dinner time, it's still 98 degrees with 110% humidity, nobody in our house wants to eat. A common phrase you will hear in our house during the summer is "It's just too hot to eat right now." But that's not a complaint. It's an observation. So many nights during those dog days supper gets postponed until later in the evening; which is fine, but means we need something a little lighter. One because who wants really heavy food when it's so hot and two, because we don't want a huge meal only a couple hours before bedtime.

When those nights hit, I turn to things like salads and lettuce wraps...a lot. They fill us up, are cool, refreshing and satisfying, but still light too. These are sure to make an appearance on our summer time dinner table again and again. They are so easy to make, have amazing flavor and put some of our favorites things into one hands friendly dish. Oh, and if you're having a party, your guests would go ga-ga for these too! Plus they can be super budget friendly, stretching both seafood and veggies a long way!

I can't wait until it's so hot outside. It's my favorite time of year. I love being in the sunshine, or laying in the pool, or enjoying the heat from inside my nice and cool air conditioned house!

Spicy Shrimp and Noodle Lettuce Wraps
1 (12 oz.) bag small frozen shrimp (deveined and tail off), thawed
2 TBS sriracha sauce
2 TBS olive oil
4 large garlic cloves, minced
Salt to taste
1 package Pork Ramen Noodles
Green Leaf Lettuce, cleaned and separated
1 red bell pepper, diced
3 large carrots, julienned
3 green onions, chopped
4 large radishes, thinly sliced
2-3 TBS soy sauce

In a large plastic storage bag, combine shrimp, sriracha, oil, garlic and salt. Toss to combine. Chill in fridge for several hours before cooking. Cook Ramen noodles according to package directions, drain and allow to cool. Once cool, mix with soy sauce in medium bowl and stir to separate noodles. Set aside. Heat a large skillet over high heat. Add shrimp and cook on both sides, until golden brown, about 5-7 minutes.To build wraps, place some Ramen noodles on lettuce leaf. Add veggies and then shrimp. Serve with extra sriracha and soy on side.


Shared on The Country Cook May 22, 2015

Friday, March 6, 2015

Mystery Ingredient

As some of you know already I am lucky enough to be part of the Yum Squad for Peanut Butter & Co., the makers of the best peanut butter I've ever tasted! We squad members had a challenge put to us a couple months ago, and I for one was up for the task! 

It was simple. We were sent some of their delicious peanut butter and a mystery ingredient, and we were to create a recipe using those. Easy right??!!! Well, if I'm being completely honest I was a bit nervous when my box got here, because it could have had anything in it. What the heck was I going to do if I was supposed to mix peanut butter with anchovies? Or pigs feed? Or chocolate covered grasshoppers? Okay...so my imagination kind of got carried away. 

So, can you imagine my pure relief and joy when I opened it up, and there was a bottle of sriaracha? Yep, something I already cook with. Something I have in my cupboard at all times. Something my boys will pretty much put on anything. Whew....how lucky was I? 


The second I thought of the hot of sriaracha and the sweet of peanut butter, my tongue immediately called out for something Asian! It's a flavor combo we have all the time in Asian dishes I make at home, and ones we have at our favorite restaurants. They meld so well together, and taste so great, it's one of those things you would never guess go together, but truly do. 

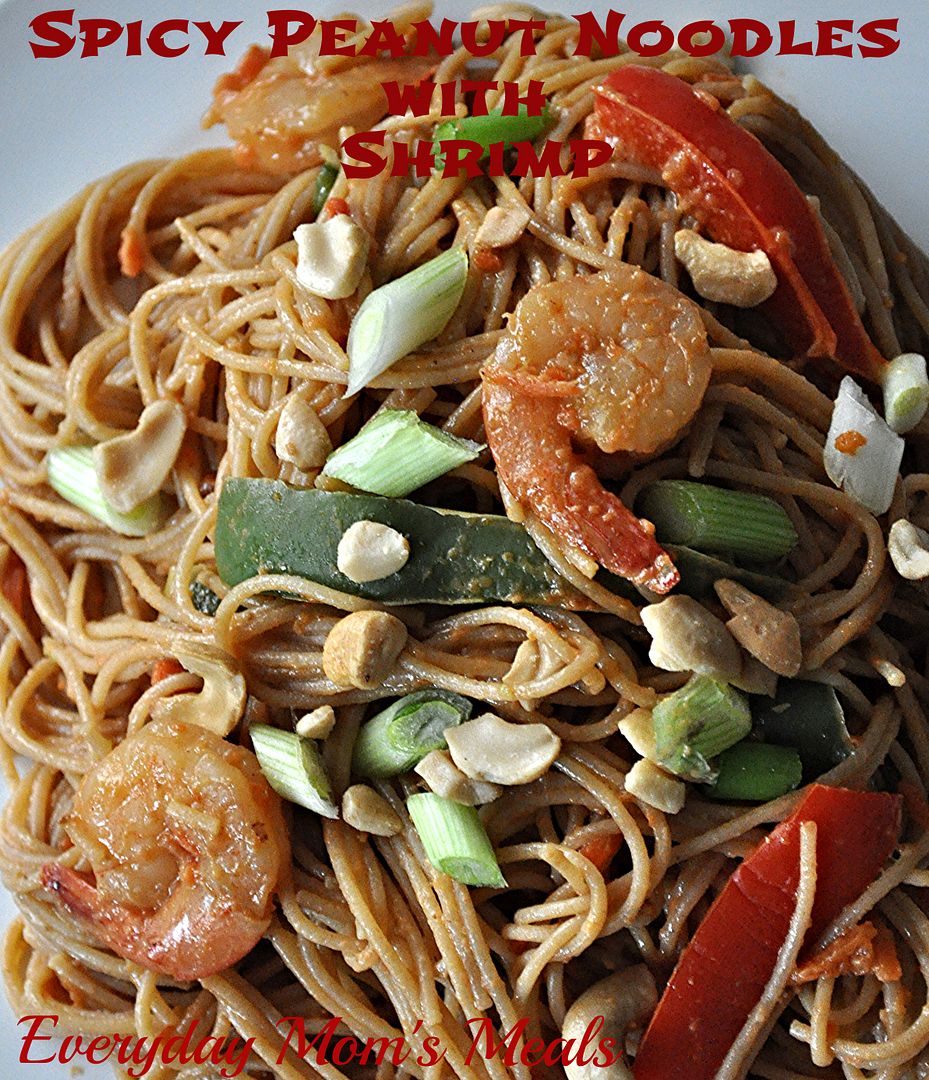
Need a seafood dish for your Lent meal tonight? This would certainly put a little spice in your step! I love this recipe because it's a great base that you can build from. Take the noodles, add whatever veggies you like, and swap out the shrimp for chicken or pork. You'll still get a tasty, simple meal! 

I'm not always a fan of surprises. I think sometimes life can throw you some doozies, but in this case, it was a fun, and even more importantly, absolutely delicious surprise. Oh, and my friends at Peanut Butter & Co. have some peanut butter they want to give you too! Just scroll down below the recipe to see how to enter to win! 

Spicy Peanut Noodles with Shrimp
2 TBS vegetable oil
1 (13.25 oz.) box whole grain thin spaghetti
1 (12 oz.) back frozen shrimp, thawed 
1 green bell pepper, thinly sliced
1 red bell pepper, thinly sliced
1 1/4 c. matchstick carrots
1 garlic clove, minced
1/4 c. soy sauce
1/4 c. creamy peanut butter
1/4 c. lemon juice
1/2 c. chicken broth
1-3 tsp. sriracha sauce, to taste
4 green onions, sliced on bias
1/3 c. chopped cashews

Cook pasta according to package directions. In a medium bowl whisk together soy sauce, lemon juice, peanut butter, chicken broth and sriracha until smooth. Set aside. In a large skillet, heat oil over high heat. Add shrimp and garlic. Saute' until shrimp are almost completely pink. Add peppers and carrots. Saute' stirring often until peppers are crisp-tender, about 5 minutes. Pour peanut butter sauce into skillet. Bring to a boil. Reduce heat to low and simmer, about 5 minutes until sauce is slightly thickened. When pasta is cooked, drain well. Add to a large bowl. Pour shrimp sauce down over. Mix well to coat evenly. Toss until completely combined. Garnish with chopped green onions and cashews. *NOTE* I like to use shrimp with the tail on to decrease shrinking. 


Shared on The Country Cook Mar. 6, 2015


To Enter: Leave a comment telling me what savory dish you love to make with peanut butter! 

(1) Winner Will Receive:


(1) Jar Smooth Operator (creamy) Peanut Butter
(1) Jar of His/Her Choice Peanut Butter 
(See flavors here.)

Disclaimer: I received free product as part of The Yum Squad. All thoughts and opinions are my own. 

Wednesday, January 7, 2015

Something Other Than Rice

Do you love making Asian food at home? Getting the same tasty dinner as you could if you reached for that take out menu, but made by you, fresh in your own kitchen? If so, then we are in the same boat and you are going to love this idea as much as I did!

I try to make an Asian inspired meal once every couple weeks, but I always seems to fall into the same rut. The side dish. Rice or Noodles. That's what it comes down to every single time. So it was time to find something else to serve with those egg rolls. Sure, rice and noodles are favorites in this carb loving house, but veggies are friends too, so this was sure to be a crowd pleaser.

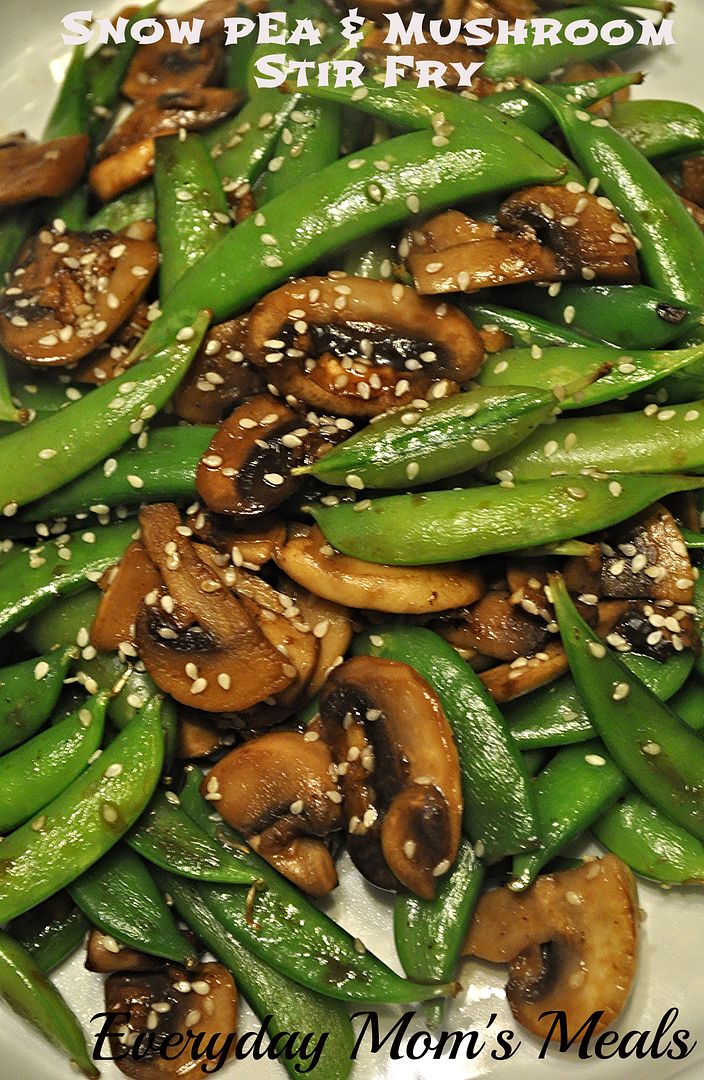
We also happen to be mushroom lovers, so this was a double win with us. If you're not, I'm guessing you could find another vegetable that would be just as delicious with the snow peas.

If you're looking for something else to add to your Asian arsenal, to make those take out favorites your way, with only ingredients you can pronounce...this has to be next on your list. Don't totally turn your back on the rice and noodles though, this could easily go with them too!

Snow Pea and Mushroom Stir Fry
8 oz. button mushrooms, sliced
8 oz. snow peas, ends trimmed if tough
2 large garlic cloves, minced
2 TBS vegetable oil
2 tsp. sesame seeds, extra for garnish
2-3 TBS soy sauce
Black Pepper to taste

Heat oil in large skillet, or wok, over high heat. Add mushrooms and peas. Cook and stir, about 7 minutes until mushrooms are browned. Add black pepper and garlic. Cook and stir for another 3 minutes. Add soy sauce, reduce heat. Cook for 4-5 minutes until peas are vibrant green and crisp-tender. (I like them pretty crunchy.)  Add sesame seeds. Stir to combine. Garnish with extra sesame seeds, if desired. 


Shared on The Country Cook Jan. 9, 2015


Wednesday, July 23, 2014

Try Something New with Maple Leaf Farms {A Review}

So, I guess the best way to start this post is ask, "Have you had duck before?" And then I have to also ask "Have you cooked duck at home before?" If you answered either or both of those with "no", then you've come to the right place because by the end of this I hope you are wanting to change that! 


First, let me introduce you to another foodie gem from right here in my home state. Maple Leaf Farms  began in 1958 in Milford, Indiana, producing 280,000 ducks that first year. Still family owned today, they supply high-quality, value added duck products for folks like you and me. 

Maple Leaf Farms duck products are available in both raw and fully cooked varieties. Their original line includes whole body duck and cuts that can be easily prepared by both a chef and the home cook. 

I can honestly say until about a year ago, I had no idea these duck experts were right here in Indiana, let alone almost in my own backyard. (I'm talking less than an hour away!!) You know how much I love to support our local farmers, and now I have another one to add to my list! 

So you can imagine how excited I was when the great folks at Maple Leaf offered to send me a box of goodies to try in my kitchen! Now, I have only cooked with duck one other time, and never with the breast meat, so I was eager to try! 

I knew I wanted to grill them, and probably add a glaze. So I took a couple different Asian inspired ones I've used before and tweaked them here and there, and this is what I finally came up with. Sweet, succulent and oh so yummy! 

Now, if you've never cooked a duck breast either, let me tell you the Maple Leaf Farms site has some great tips. In fact, the directions you find below are 99% from them! For grilling, they suggested I would have the best results if I rendered them in a skillet first, and I am convinced this step is the #1 key to success! 

If you have been wanted to try duck, but have been too apprehensive, take it from me. You can do it! And to stay up on all things that are quacking ( ha ha) be sure to follow the great folks at Maple Leaf Farms on Facebook, Twitter  and Pinterest.


Brown Sugar and Soy Glazed Duck
2 duck breasts
1/4 c. dark brown sugar, packed
1/4 c. soy sauce
1 TBS rice wine vinegar
1/2 tsp. ground ginger
1/2 tsp. garlic powder
1 TBS vegetable oil
Salt and Pepper to taste

Pat duck breasts with paper towels to dry. Trim skin to size of breast. Using a sharp knife, score skin in a cross-hatch pattern. Season with salt and pepper. Heat a large non stick skillet over medium low heat. Place breasts skin side down and allow to render, about 10 minutes, until golden brown. While cooking, mix brown sugar, soy, vinegar, ginger, garlic and vegetable oil. Whisk well. When breasts are browned, remove to a paper towel lined platter. Preheat grill to high. When hot, place duck breasts skin side down, reduce heat to medium. Cook 15 minutes basting often on both sides, turning occasionally, until internal temp reaches 165. Serve on a bed of rice pilaf if desired.


Shared on The Country Cook July 25, 2014
Duck at Very Good Recipes

Wednesday, July 16, 2014

No Propane, No Problem

Apparently, it's chicken week here on EMM. I didn't plan it that way, but if you saw Monday's recipe for Apple Pecan Chicken Salad, you understand why I say that. I don't know if I have another one for Friday, but be sure to come back to see! 

Today's chicken star came to be for a simple reason. I went outside to grill chicken only to discover we were out of propane. (Thanks, honey, I really appreciate that.) Yep, I was the wife calling her husband at 5:30 pm asking "Um, did you know we were out of propane?" Like he could do anything about it from work. Look, I'm a pretty capable broad. Even things I didn't once do, I can now because over the years I've learned it's easier to do them myself. Hence why I was even attempting to grill in the first place. There was a time that would have never happened. 

But no matter how progressive I am as a woman, there are a few things I don't do...will never do...and have no desire to do. Mowing lawn? Yeah, that's never gonna happen. (You can blame my dad. He had me mow once. The lines were crooked. He was picky. He never asked again.) Changing a tire. Nope, never have, never will. (Again, you can blame my dad for this one too. See, he never taught me. He was always around. I would call him. Then after him, I'd call Adam. And if both of those don't work, road side assistance is terrific.) Swapping out a propane tank. Nope. Not gonna do that either. (This one you can't blame on my dad. I won't do it because I can't lift the tank....no throwing him under the bus this time.)

So anyway, there I was standing in front of the cold as ice grill saying "Great, now what am I going to do with this bird?" Thankfully, while I might not be schooled in the world of tire irons, I do think quickly on my feet, and within a few moments was creating this yummy recipe. 

If you love finger lickin', packed with flavor chicken, you're going to love this! I'm sure the same sauce would be delicious on the grill too, and now that my loving husband has refilled that tank, I could try it. But if you find yourself in the same predicament as me, or maybe it's raining out, fire up the oven and get your sticky on!

Baked Sticky Chicken
2 1/2 lbs. chicken drumsticks 
2 TBS canola oil
1/2 c. soy sauce
2 TBS ketchup
3/4 c. honey
3 garlic cloves, minced
Salt and pepper to taste

Preheat oven to 350. Place chicken in 9 x 13 baking pan, coated with nonstick spray. In a small bowl combine oil, soy sauce, ketchup, honey, garlic, salt and pepper. Pour over chicken and baste with brush. Bake for 1 hour until sauce caramelizes. Every 20 minutes spoon soy mixture over chicken. 


Shared on The Country Cook July 18, 2014

Monday, April 21, 2014

Take Out Casserole

I hope you all had a very nice Easter yesterday, surrounded by those you love, celebrating everything Spring and new life among us has to offer. And I guess my only question is "Are you tired of ham yet?" Did you get your fill or are you planning a week of leftovers? If you don't care to see another ham for quite a while, then you are going to be so happy you logged on today!

Sometimes I just get a craving and I get can't it out of my head until I satisfy it. Do you ever have that happen? And what do you do when there is no way you can "scratch the itch" so to speak? Do you simply try to ignore it, (which almost never works) or do you find another way? I'm more likely to find another way, and that's exactly how this recipe came to be.

See, I was craving Chinese take out...B.A.D. Like, it was the only thing I could think about. I have no idea why, but I do have my suspicions. If you read this post  back in March, then you know we aren't having very good luck with our favorite Chinese restaurants here in town. One closed and one burnt to the ground. So I believe my cravings came from a subliminal place. My brain knew I couldn't have the dishes I loved from those two places, so it decided to make them all I could think about. You know, tell someone they can't have something, and it only makes them want it more.

So I looked at what I had in the pantry, fridge and freezer. I looked at the time I had to give into my craving, and I thought "Why not take all the elements of this loved take out dish...and turn it into a casserole?" And that's exactly what I did. This would make a simple supper any night of the week. Prep the chicken in the morning, let it marinade all day, and then dinner can be on the table in almost no time at all that night. Oh, and it's very budget friendly too, especially if wait until the store is running specials on chicken and frozen veggies!

We all deserve to satisfy our cravings now and again. But if you can do it in a way that brings your family around the table to a new meal they love, well than that's just icing on the cake. Oh great...now I want cake...

Teriyaki Chicken Casserole
1.5 lbs. boneless chicken tenders, cut into bite size pieces
3 TBS vegetable oil
2 heaping TBS Asian seasoning blend*
2 garlic cloves, minced
3 c. chicken broth
3 1/3 c. instant white rice
1 (16 oz.) bag frozen broccoli, thawed and drained well
1 (12 oz.) bag peas and carrots, thawed and drained well
1 green pepper, sliced thin
1 1/3 c. teriyaki sauce, divided
1/3 c. water
Black Pepper to taste

In a medium bowl combine chicken, seasoning blend and garlic. Stir well. Marinade in fridge for at least 4 hours.

Preheat oven to 375. In a large skillet heat oil over medium heat. Brown chicken until golden on all sides. Add pepper, broccoli, peas and carrots. Saute until veggies are crisp tender. Add rice, chicken broth, water, 1 cup teriyaki sauce and black pepper. Stir to combine. Transfer to a greased 9x13 pan. Cover with foil and bake for 30 minutes. Remove from oven. Add 1/3 c. teriyaki sauce and stir. Bake for an additional 10 minutes. Allow to sit 5 minutes before serving. *NOTE* You can find an Asian seasoning blend with the regular dried herbs and spices, or on the international aisle. The one I prefer is a sesame ginger blend.


Shared on The Country Cook April 25, 2014


Wednesday, April 16, 2014

Panda Express At Home

I know I shouldn't, but I can't get enough of Panda Express food. Let's face it, on the list of things we should be eating on a regular basis, it's more than likely not at the top; but I can't help it, I'm addicted. And it's not like we don't have plenty of authentic Chinese restaurants around us. We do. But there is just something about the mall food court staple (Or if you are lucky to have a free standing one like we do!) that will always hold a special place in my heart...and stomach.

I always get pretty much the same meal every time I do, and even if the main dishes might vary a little, my side dish never does. I want their lo mein...and lots of it. Pile it up! I've been known to ask for a double helping. I've been known to get it and nothing else. Yes, I know I have a problem; but hey, admitting it is the first step! Sure, their rice is just as yummy, but for me there is just something about those noodles... with the veggies...in that sauce...okay, now I'm drooling.

Good thing I came up with this recipe so I can make it at home any time I want. It's a super easy, and economical side dish for any night of the week. Take some help from the store with some egg rolls, whip this up as a side and dinner is served. (Which is exactly favorite way to go.) Or bump it up with some additional veggies, making it a main dish. Either way, it's delicious and this way you know exactly what goes into it, so healthier too.

We all have to treat ourselves with "naughty" food choices now and again. After all, I live to eat, I don't eat to live. Food is meant to be enjoyed and craved. It is supposed to make us feel better after eating it. Maybe even brighten our day. But when I'm trying to be a little more responsible, or just plain don't feel like leaving the house for the drive thru, now I can have my treat any time I want!

Quick Vegetable Lo Mein
16 oz. spaghetti, cooked to al dente and drained
1/4 c. teriyaki sauce
3 TBS vegetable oil
1 garlic clove,  minced
1/2 c. soy sauce
1/4 tsp. red pepper flakes
1/2 c. match stick carrots
1/2 c. snow pea pods
1 bunch green onions, chopped
Black Pepper to taste

In a large skillet heat oil on high heat. Add carrots, pea pods, green onions, red pepper flakes, and garlic. Saute and stir until veggies are crisp tender, about 5 minutes. When pasta is cooked and drained, add to skillet. Toss with veggies. Add soy sauce and teriyaki. Stir to coat. Season with black pepper. Reduce heat to medium and cook about 5-7 minutes to allow flavors to develop.


Shared on The Country Cook April 18, 2014

Chinese at Very Good Recipes

Wednesday, September 25, 2013

Don't Put It Away Quite Yet

Yep, autumn is here. We already established that on Monday. And for many of you I know that means the end of grilling season, but in this house it never ends. That's right. We are those crazy people are stand outside in our snow boots to grill a good steak in the dead of winter. In fact, we have been known to grill in a blizzard. An actual blizzard!! While the snow fell at an alarming rate, our neighbors were outside trying to keep up with shoveling, they were all jealous of the smells coming from our backyard, as the T-bones cooked to perfection!

So if you're like us, and the falling of the leaves has no reflection on the use of your grill, today's recipe will totally excite you. But don't worry, if your grill is all tucked away until next spring, there is also an oven option noted in the recipe! 

We love chicken wings. Buffalo. Barbecue. They are all scrumptious to us. And when I was a teenager, there was a local Chinese restaurant that had these amazing lunch specials that included a bunch of appetizers with each entree, one being a glazed chicken drummette (the small piece of the wing) that would have you licking your fingers when you were done. These are the closest thing to that I've had in years. In fact, Adam described them as "Asian barbecue". Sweet like barbecue, but with some of the best Asian flavors around, soy and ginger. 

If you are grilling this weekend, these are a definite must. Maybe for the big game? I would love to see these at a big tailgating party! Or if you want to stay inside, see the note above the oven. Either way, they are yummy, and easy, two things that are always welcome, winter, spring, summer or fall!

Asian Glazed Wings
2 lbs. chicken wings, separated into 2 pieces each
2 TBS all purpose seasoning, your favorite brand
2 TBS honey
2 TBS soy sauce
1 cup vegetable juice
1 tsp. ground ginger
Garlic Salt to taste
Salt and Pepper to taste
Cooking Spray

In a large bowl combine vegetable juice, honey, soy sauce and ginger. Set aside. Sprinkle wings with seasoning, garlic salt, salt and pepper. Allow to marinade for at least 30 minutes. When ready, preheat grill to medium-high. Spray wings with cooking spray. Sear on both sides, about 2 minutes. Reduce heat to medium-low and continue cooking for 15-20 minutes until cooked through. For the last 10 minutes baste with sauce on both sides many times. 
*NOTE* These can also be cooked in the oven. Follow directions, but roast on a baking sheet in 400 degree oven for 20 minutes, and then baste and cook for another 20 minutes, basting often.


Shared on The Country Cook September 27, 2013

Monday, May 13, 2013

We Are Steak People

Yep. That's a fact. As much as my family loves our veggies, we could never  be vegetarians. And that's not judging those out there who are, more power to you! It's simply a statement of how much we love, no make that adore, meat!

All kinds of meat, from all walks of life. If it comes from a cow, pig, chicken, fish, buffalo, pheasant...I could go on, but I won't, we will eat it! We are most definitely carnivores.

Now, here is a little secret. When I was growing up, I wasn't that big of a beef fan. It wasn't until Adam came along (Mr. give me my steak as rare as it can be. Seriously, I'm talking, show it the grill and walk away!) and showed me there were other ways to eat steak other than "well done", that I really started to enjoy it. See, like many kids, I never had my own steak, I usually shared with my mom. And like many women out there, she was a big fan of "cook it til it's dead"! And that's okay. She liked her steaks well done, and a little bit crispy around the edges, so that's the only way I ate steak for many years. Then Adam explained this wonderful thing called medium rare, and to this day, that is how I love my steaks. In fact, we've even converted mom a little, and she is now a medium steak gal. We learned that many times, you can take a steak that is tender and fabulous and cook it that long, the flavor gets ruined, becoming tough and dry. This is especially true if ordering in a restaurant. If a steakhouse knows they are going to cook it that long, that will choose a piece of "substandard" meat, so to speak. (I am saying this as a former employee of a restaurant.) But if you order one that is less cooked, they know it better come out juicy and tender, so they choice a nicer piece of beef.

And we have passed this beef love onto our son, of course. Now, when he was younger, I will admit, I made sure his meat was very well done. But as he has gotten older and his stomach has "grown up" a little, I allow him to have one that is cooked a little more like ours. (Trust me though, he never eats one that is still mooing, like his father!) Alex needs one thing for his steak....steak sauce! He likes the bottled version just fine (He gets that from his Pa Pa...another meat lover!) but I thought making a homemade version might be fun.

With grilling season in full swing for a lot of us, it's the perfect time to have something yummy to dip that perfectly cooked steak into...rather it's well done (and if that's you, I respect that!)...or pink inside for me....or practically walking off the plate like my husband!

Homemade Steak Sauce
1/2 c. ketchup
1 TBS brown sugar
1 TBS soy sauce
1/2 TBS onion powder
1/2 tsp. garlic powder
1/8 c. water
1/8 c. lemon juice
1/8 c. Worcestershire sauce
1/2 TBS yellow mustard

Combine all ingredients in a small sauce pan. Bring to a boil. Reduce heat to low. Simmer, uncovered,  for 15-20 minutes until thickened. Allow to cool and then refrigerate until serving. If it thickens too much, just add a little warm water to thin. Serve with your favorite steak!


Shared on Make Ahead Meals May 13, 2013
Shared on Mandy's Recipe Box May 14, 2013
Shared on Lady Behind The Curtain May 15, 2013
Shared on The Country Cook May 17, 2013