Everyday Mom's Meals: Green Pepper
_____
Showing posts with label Green Pepper. Show all posts

Monday, December 15, 2014

Feed That Holiday Crowd

So, when do the holiday guests descend? Are you like the Griswold's and you will have a house full for a full week before Christmas? Or are they only going to be there for a few days until you kick them out, they sadly have to leave? Either way, you have to be prepared to feed them, but not blow the budget. After all, most of us have already done that buying gifts for everyone from Tiny Tim to the mailman!

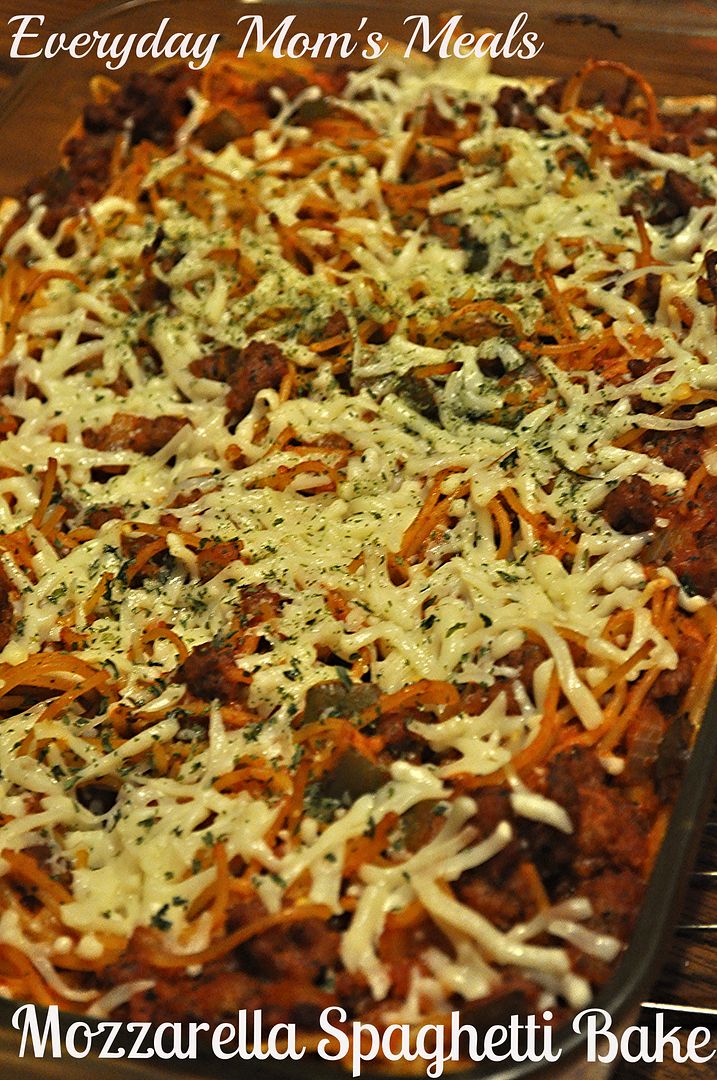
Whenever I am cooking dishes with feeding the masses in mind, pasta and/or casseroles come to mind first. A pound of pasta (or half that in this case) isn't going to feed many, but if you take that and add other ingredients and bulk it up, you can stretch it a lot farther, therefore stretching your dollars too.

I love the sausage in this one because with it, the green pepper and Italian seasoning, it almost has a pizza flavor! I can see your eyes lighting up right now if you picky eaters in the house. Tell them anything tastes like pizza and they will love it before they even taste it.

If you are meal planning for more people than usual; and you don't want to spend a lot of extra money, or time in the kitchen, save yourself some cash and enjoy more time with your guests with this tasty meal. Plus, I'm guessing it would even be a great make ahead freezer meal too! Holiday guests should be fun, not stressful!

Mozzarella Spaghetti Bake
1/2 lb. spaghetti, broken into thirds
1 lb. pork sausage
1 small onion, diced
1 green pepper, chopped
1 TBS Italian seasoning
1 tsp. garlic powder
1 3/4 c. spaghetti sauce
1 ( 8 oz.) can tomato sauce
2 TBS Parmesan Cheese
1 c. shredded mozzarella cheese
2 tsp. dried parsley
1 egg
1/2 c. milk
Salt and pepper to taste

Preheat oven to 350. Grease a 9 x 13 baking dish. Cook pasta to just al dente. Meanwhile, in a large skillet brown sausage, onion and green pepper. Season with garlic powder, Italian seasoning, salt and pepper. When no longer pink, drain well. Return to skillet. Add spaghetti sauce and tomato sauce. Stir to combine. Reduce heat and let simmer until slightly thickened. In a large bowl whisk together egg and milk. When pasta is cooked, drain well. Mix with egg mixture until coated. Transfer to baking dish. Spoon sausage mixture over noodles. Mix slightly. Sprinkle with Parmesan cheese. Bake for 20 minutes, uncovered. Top with mozzarella cheese and dried parsley. Bake 10 additional minutes until cheese is melted. Let stand 10 minutes before serving.
Wednesday, June 25, 2014

FOOLPROOF Family Recipes Day 1 {A Review and Giveaway}

It's time for another debut from my good friends over at Gooseberry Patch! Their newest cookbook, FOOLPROOF Family Recipes is stuffed full of easy to make, never fail, yummy to eat dishes you are going to love cooking and your family is going to love eating!


From breakfast, to salads, to mains, sides, desserts and appetizers, there is literally something simple to make for every meal of the day! Oh, and did I mention I just happen to have not one, but two recipes included in this collection? Yep, on page 98 you'll find Grandma's Baked Mac n Cheese (Everyone loves this no boil version!) and on page 65 you can see my Quick Tomato and Olive Salad, perfect for a busy summer night!


Now, I have to admit, I wasn't even able to get out of the Cool Refreshing Salads section before I was ready to start cooking and eating. And while there are many recipes I have marked to try, both of the ones I will be sharing with you (be sure to come back on Friday for the next) are indeed salads.

When I first say this, I thought what a great way to combine two of our summer times loves. Pasta salad and garden fresh veggies! I'm telling you what, if you garden and are always looking for ways to use those beautiful fresh vegetables, you're going to love this! It's so fresh, so creamy, so crunch and absolutely delicious...the perfect side dish for any backyard barbecue or picnic!

Summer is in full swing, and I think we've all got refreshing salads on the brain, not to mention easy foolproof recipes...so Gooseberry Patch has us totally covered. Oh, and they just happen to have a copy for one lucky EMM winner too. Just scroll down after the recipe to enter!

Garden Macaroni Salad
Submitted by Ellie Brandel Clackamas, OR Found on page 62
8 oz. elbow macaroni, uncooked
3/4 c. mayo
1 tsp. salt
1/4 tsp. dried basil
2 tomatoes, diced
1 c. cucumber, died
1 c. celery, sliced
1/4 c. green pepper, diced
1/4 c. radishes, sliced
2 TBS green onions, sliced

Cook macaroni according to package directions; drain and rinse with cold water. In a large serving bowl, stir together mayo, salt and basil. Add macaroni and remaining ingredients; stir to coat. Cover and chill until serving time. Makes 8 servings.  *NOTE* The only addition I made was black pepper to taste. 


Shared on The Country Cook June 27, 2014


********Giveaway********
Rules:
1. This contest is open to US Residents 18 and older ONLY.

2. The winner will be chosen by Random.org 

3. The winner will be notified by email and Facebook. He/she will have 48 hours to respond or another winner will be chosen. 

4. When leaving comments for entries, they MUST BE SEPARATE ones AND include an email address so it's easy for me to find the winner. If entries are together, it will only count as (1) and if no email, entry will not be considered.

5. If any of the extra entries are items you are already doing, please just remind me!


6. Contest Ends: July 10, 2014

(1) Lucky Winner will receive:
(1) copy of


Mandatory Entry:
1. Leave a comment telling me your favorite foolproof family recipe. 

Extra Entry:
1. Become a Gooseberry Patch fan on Facebook. Leave me a comment when you have.

2.  Follow Gooseberry Patch on Twitter. Leave a comment saying you've done so.

3. Follow Gooseberry Patch on Pinterest. Leave me a comment when you have. 


GOOD LUCK!


Disclaimer: I was given a free cookbook and one to give away to a fan for this review. All thoughts and opinions are my own.


Wednesday, May 7, 2014

101 Super Easy Slow Cooker Recipes Day 2

Yep, I've got another great recipe from Gooseberry Patch's latest cookbook to share with ya'll today. In case you missed it Monday, check out the first recipe I made, details about this fabulous book, and how you can win a copy for yourself. Just click here!

By now anyone that reads this blog on a regular basis knows we are pasta fiends in this house. I'm not kidding when I say we could eat it every single day, I'm not kidding. The three of us had be spend some time in Italy in our past lives.

And you also know what a friend I have in my Crock Pot. Any time I get to utilize it, is a good day. When a meal, or at least a good portion of a meal, can be cooking all day while I'm tackling my to-do list, it just makes my life so much easier.

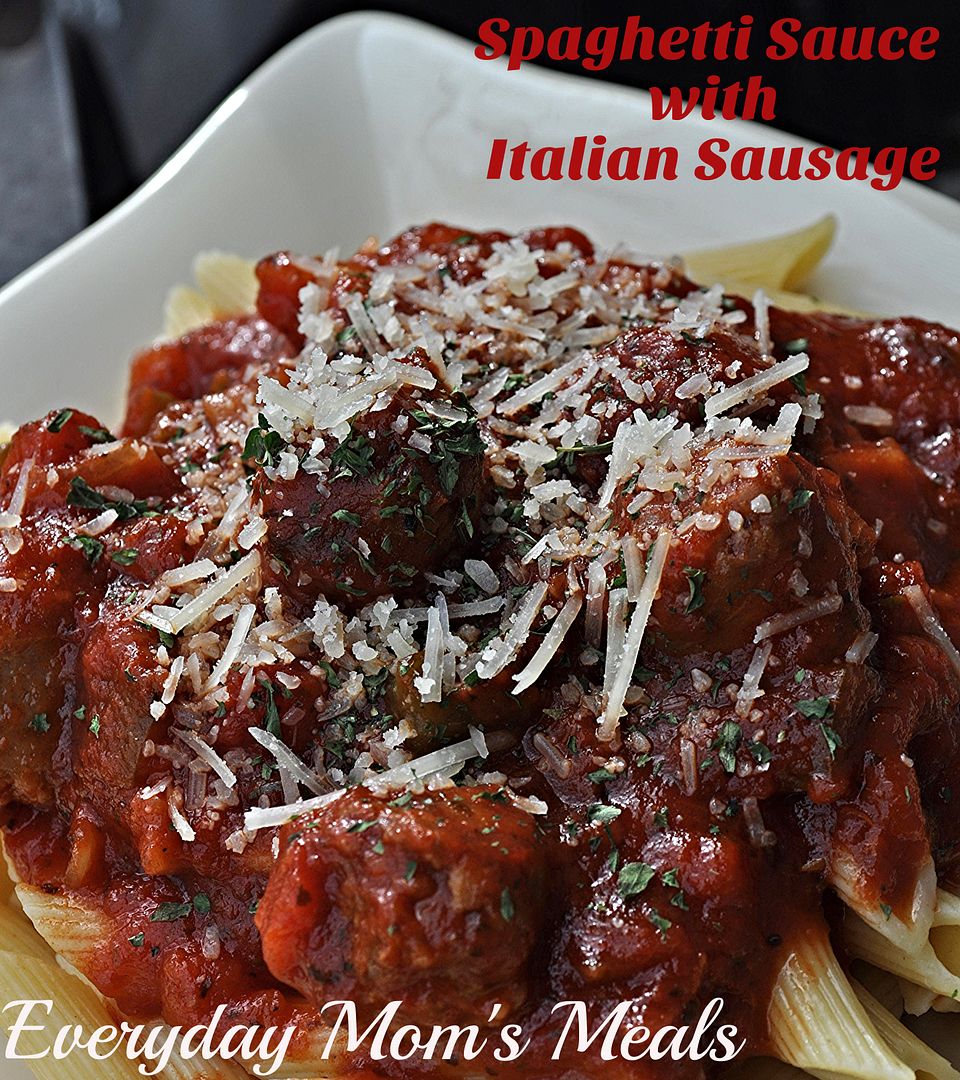
So can you imagine my level of excitement when these two loves combined into one dish in this new terrific GP book? I have made pasta sauce in the slow cooker before, and it ends up tasting like something Tony Soprano would sit down to for Sunday dinner. A cooked all day, mama slaving over the stove, taste without that much effort. Plus I knew this one would be a big hit with the boys because of the Italian sausage; and I was completely right... on both accounts. The deep, rich flavor this gets from slow cooking all day is just what you want in a homemade red sauce, but the Crock Pot does all the work for you!

Be sure to jot this one down for a hearty meal your family will love, that you can save for a day when you know cooking isn't high on your to-do list. And don't forget to enter to win a copy of 101 Super Easy Slow Cooker Recipes for yourself!

Spaghetti Sauce with Italian Sausage
Submitted by Amy Felhberg Allison, IA Found on Page 51
1 TBS olive oil
6 Italian pork sausage links (I cut mine into 1/2" circles)
1 c. green pepper, chopped
1 onion, chopped
2 cloves garlic, sliced
1 (28 oz.) can crushed tomatoes
1 (8 oz.) cans tomato sauce
1 (6 oz.) can tomato paste
1/4 c. sugar
1 TBS dried basil
1 TBS dried oregano
1 TBS Italian seasoning
Salt and pepper to taste

Heat oil in a skillet over medium heat. Brown sausages with green pepper, onion and garlic. Add tomatoes with juice and remaining ingredients to slow cooker. Mix well. Spoon sausage mixture into tomato mixture. Cover and cook on LOW for 6 hours. Serve over cooked pasta. *NOTE* Shown here over penne paste and garnished with Parmesan cheese and dried parsley.


Pasta at Very Good Recipes

Friday, April 18, 2014

Another One Pot Meal

So, I'm talking to my friend a few weeks back. The topic? Food of course. (I know it probably seems like I talk about nothing else. But I do. I promise.) We were swapping ideas for one pot meals because both of us are dealing with these extended school days; and to be quite honest they are monotonous, especially when trying to meal plan. 

Anyway, she told me about this new recipe she had just come across, and couldn't wait to try. Then she went one to tell me it just so happened to be for something I had been meaning to make for me boys anyway, red beans and rice. You mean I can score points with my family with something super easy that only dirties one pan? That's a double bonus to this mama! 

Well, you can imagine the little smile that I got when she shared the recipe with me, and I discovered that it was actually from a good foodie buddy, and someone I've already introduced you to before, Stacey from Southern Bite. Yep, I got to be one of those cool people who says "Oh, I know him. Yeah, we're friends." My friend was very impressed. Or at least she pretended to be to make me feel good. 

If you're always on the lookout for easy weeknight meals, you're going to love this one! Not to mention if you have no desire to use every pot and pan you have in the house. One skillet and dinner is on the table! I'm sure there are more complicated ways to make this dish, but for our family, this was perfect. The boys absolutely loved the flavors, and I enjoyed not having to work too hard after a busy day. In this house, that's what we call a yummy win-win!

One Skillet Red Beans, Rice and Sausage From Southern Bite
1 lb. smoked sausage, cut into 1/2 inch rounds
1 medium onion, finely chopped
1 celery rib, finely chopped
1 green bell pepper, seeded and finely chopped
2 garlic cloves, grated or minced
2 1/2 c. chicken broth
2 (15.5 oz.) cans kidney beans, rinsed and drained well
2 c. instant white rice
2 TBS Cajun seasoning
1 TBS vegetable oil

In a large skillet or dutch oven, heat oil over medium heat. Add sausage and cook 4-5 minutes, until edges being to brown. Add onion, green pepper and celery. Saute' until veggies are tender, about 7 minutes. Add garlic and cook another 1 minute. Increase heat to medium-high. Add broth and bring to a boil. Stir in the rice and beans. Add Cajun seasoning, stir to combine. Reduce heat to simmer and cook about 15 minutes until rice is tender.


Shared on The Country Cook April 18, 2014
 

Wednesday, March 5, 2014

Good-for-You Everyday Meals Day 2

Welcome to the 2nd day of Gooseberry Patch week here on EMM. All this week I'm featuring recipes from their fabulous new cookbook, Good-for-You Everyday Meals. (Yeah, is there a more appropriate title for the Everyday Mom to cook from??!!) Monday I shared a fantastic breakfast recipe with you; and today I've got hands down, one of the most delicious things I've put into my mouth in that last few months.

The second recipe that caught my eye while I was marking all the ones I wanted to try (which truthfully was pretty much every other page) was something I had heard of many times, but never tried, let alone cooked. But let's face it, if something has the word "mom's" in the title...it has to be good. And then, if it includes egg noodles...you're almost guaranteed a winner!

For those of you who don't know, chicken paprikash, is of Hungarian decent and one of their most popular stews; and seasoned with lots of red paprika. For me, I think a good way to describe it is a chicken version of stroganoff that has more veggies and a lighter sauce. Now, don't leave me comments telling me it's nothing like stroganoff, I'm just trying to come up with a way for those of you who have never heard of it, or seen it, to have a mental picture in your mind.

This recipe is the perfect weeknight supper because it cooks in one skillet; and is ready in almost no time at all. And even if you are only cooking for a few people, like our family of 3, be sure to make the entire recipe because the leftovers are totally amazing, and only taste better the next day...or the next! Head's up, the recipe below is the way it was published. Read my notes to see the slight changes I made for us.

Oh, and if you haven't heard yet, the great folks at Gooseberry Patch are giving you a chance to win a copy of Good-for-You Everyday Meals! Click here to see the giveaway details. And be sure to come back Friday to see my special week of features wrap up with yet another delicious dish!

Mom's Chicken Paprikash
Found on pg. 115 Submitted by Nancy Bogart, Euclid, OH
8 oz. wide egg noodles, uncooked
4 TBS butter, divided
1 onion, thinly sliced
1 green or red pepper, thinly sliced
2 TBS sweet paprika
2 cloves garlic, pressed
2 lbs. boneless, skinless chicken breast, cut into 2-inch cubes
1/2 tsp. salt
1/4 tsp. pepper
1 (14.5 oz.) can chicken broth
1 (14.5 oz.) can diced tomatoes
1 c. sour cream
Garnish: chopped fresh parsley

Cook egg noodles according to package directions; drain and set aside. Meanwhile, melt 2 TBS butter in Dutch oven over medium heat. Add onion, green or red pepper, paprika and garlic; saute' until onion is soft and aromatic. Remove onion mixture to a bowl; cover and keep warm. Melt remaining butter in pan. Add chicken, salt and pepper; cook until golden on all sides. Return onion mixture to pan; add broth and tomatoes with juice. Cover and cook about 20 minutes, until chicken juices run clear when pierced. Reduce heat to low. Stir in noodles and sour cream; warm through. Serve garnished with parsley. Makes 6 servings. *NOTE* I actually used boneless skinless chicken thighs, added much more salt and pepper, and 2 tsp. dried parsley, plus extra for garnish.


Shared on The Country Cook Mar. 7, 2014

Friday, November 29, 2013

A Classic Revisted

Today's recipe has been a staple in our house for a very long time. In fact, it was already blogged back when only maybe five people, including my mom, read EMM. And if you remember, my "foodie resolution" for 2013 was to revisit some of those "back in the day" posts, and re-blog them for everyone to enjoy again. So, since the year is quickly winding down, I had to make sure this was on the list!

The first time I ever had a Greek salad was at one of our favorite restaurants here in Fort Wayne. It's a nicer place, and one we go to for only special occasions, so in my mind this salad option will always be a little on the fancy side, when it reality, it could not be easier to make!

I love entertaining with salad, as a first course; but they also make an incredible light, but still filling, weeknight salad supper. They are a very common star on our dinner table during the warm summer months, but we love them so much I am required to make them year round. Especially now that the little man has also fallen in love with them; and not only does he love them, but he will actually eat the one part of this salad that I won't touch. The anchovies. His father loves them; and when I serve them to others, I always have them as an option, but to me, they just aren't appetizing. So to see my son not only like them, but ask for extra kinda makes me giggle. And proves once again, this child has the most diverse palate of any 9 year old I know!

Greek Salads
1 head iceberg lettuce, chopped
1 (15 oz.) can pitted black olives, drained (see note below)
1 (20 oz.) can pineapple chunks, drained
1 large green bell pepper, finely chopped
1 (15 oz.) can sliced beets, drained and chopped
1 small container crumbed feta cheese
1 small tin anchovies in olive oil, optional
Greek Dressing

Divide lettuce, olives, green peppers, pineapple, beets and feta among plates evenly. This amount will make 3 large dinner salads, or 4 small side salads. For those wanting anchovies, add to very top. Serve with dressing on side. *NOTE* I prefer to make these with kalamata olives. They are the most authentic. However, sometimes the budget doesn't allow it, and black olives work just as well.


Friday, October 11, 2013

Weeknight Rush

Is it just me or are the weeknights becoming more and more rushed? Between homework, after school activities and every day life, I am pretty sure the hours between 3:30 and 8 pm are some of the busiest in my life. So, it's so nice when I can come up with a meal that is quick, tasty and has us going back out the door on time!

You've heard me say it before, but I think it bears repeating. Casseroles are a mom's best friend. I know many people turn their noses up at just the word, but to me, if I can put a bunch of things into one pan, throw it in the oven and in about 30 minutes have dinner on the table, I am a happy mama. Sure, there are some casseroles out there that were simply never meant to be, most likely because someone started throwing ingredients together that had no business being paired, but those aren't the ones I'm talking about. I mean the ones that are made up of things we already love, that compliment each other, and simply make sense hanging out in one simple dish.

Tacos. We love them. Taco fixins'. We love those too. So why not take everything I would normally have out for a "taco bar", and see what kind of casserole I can make? See, this is my thought process. And I know I'm not the first one to have this crazy notion.

So here is a simple, delicious Mexican casserole perfect for any crazy, crammed full of things to do, weeknight! Adapt it with your favorite ingredients. Have the kids help pick out what things they want in it. Easy, yummy and fun for the whole family. I told you a good casserole is a mom's best friend!

Taco Casserole
1 lb. ground beef
1 packet taco seasoning
1 (16 oz.) can refried black beans with onion and garlic
1 (16 oz.) jar mild chunky salsa
1 green pepper, chopped
1 (2.2 oz) can sliced black olives
3 Roma tomatoes, chopped, divided
1 c. shredded taco cheese
Shredded Lettuce
Tortilla Chips, slightly crushed

Preheat oven to 350. Add enough broken tortilla chips to bottom of 9x13 dish to cover. In a large skillet brown beef until no longer pink. Add taco seasoning, stir well. Add beans and salsa. Stir well. Cook 5-7 minutes to allow flavors to combine. Add to top of chips. Spread evenly. Add green pepper and 2/3 chopped tomato. Sprinkle top with cheese and black olives. Bake for 20-25 minutes until cheese melts. Top with rest of tomato, lettuce and more broken chips.


Shared on The Country Cook Oct. 11, 2013


Friday, October 4, 2013

Retro Supper

Today's recipe is another one that has technically appeared on EMM...but long before most of you were here. One that I am "re-blogging" both so more of my readers can enjoy it; and also because my food photography skills have grown by leaps and bounds, and sometimes looking at those old photos literally makes my eyes hurt. 

I remember stuffed peppers being a huge treat when I was growing up. They were actually something we usually only had when my Grammy was visiting from Pennsylvania, and that was only once per year! Ironically enough though, their annual visit always happened about this time. The first weekend of October is when her and Popeye (that was what we called Grandpa) would make the 6 hour drive to visit for about a week. Why did they always come then? Well, because my dad's birthday (their youngest child) is October 2nd! So when I decided to re-share this recipe, it seemed only appropriate to do so now.

When I first decided I wanted to make these myself, I truly thought they were going to be complicated and time consuming. Well, thankfully they were much harder in my head than in reality. They could not be easier, and are even convenient for a weeknight supper! The oven almost does all the work for you. They are comforting and delicious, reminding us of our childhood. Perfect for a autumn evening supper. 

If you think stuffed peppers aren't something you can enjoy during the week, think again. This simple recipe proves a retro, scrumptious supper is 100% doable even on the busiest of days.


Easy Stuffed Peppers 
1 lb. ground beef
4 large green peppers
3/4 c. chopped onion
1/4 c. uncooked instant rice
3 TBS ketchup, divided
1 tsp. oregano, divided
1 (14.5 oz) can Italian stewed tomatoes
Salt and Pepper to taste

Preheat oven to 350. Cut tops off peppers; remove seeds and membrane. Combine ground beef, onion, rice, 2 TBS ketchup, 1/2 tsp oregano, salt and pepper. Mix lightly, but well. Spoon equal amount of beef mixture into each pepper. Place in 8x8 inch square baking dish. Combine tomatoes, remaining ketchup and oregano; pour over stuffed peppers. Cover tightly w/ foil. Bake for 1 1/2 hours. 


Shared on The Country Cook Oct. 4, 2013

Monday, June 3, 2013

Pennsylvania Girl

Yes, I am a born and raised Hoosier. I have corn in my blood. But in my heart? I am a Pennsylvania girl. See, my parents were born and raised in the Quaker State, and while I have lived in Indiana all my life, almost my entire family still resides in Pa, and to me, it will always be home.

Memories from my childhood are filled with trips to Pennsylvania. My parents grew up in two very small towns, and I spent many wonderful Christmases celebrating there. We are talking Norman Rockwell paintings. When I close my eyes and think of Christmas, those memories are what come to mind.

And then in the summer time, my mom and I would venture back for a two week vacation. Camping in a state park, bonfires into the late night, trips to different tourist spots...they were a fun filled two weeks.

But for having been traveling to Pennsylvania multiple times per year for over 32 years now, here is my little secret. I have never been to Philadelphia! Where my family is located, it's almost as far to drive to Philly as it is from Indiana to Pennsylvania, so it's never been "on the way" or even close to where we are.

But that doesn't mean I don't enjoy a good cheesesteak! That's right. The sandwich indicative to Philadelphia is one of my favorites. Tender beef, gooey cheese.....my mouth is watering just thinking about it. And yes, there are two sides to the sandwich debate in the heart of Philly. Some say it's got to have the provolone and others swear by the "whiz"...Cheez Whiz that is. For me...I fall into the first category. I want my cheesesteak topped with provolone and provolone only!

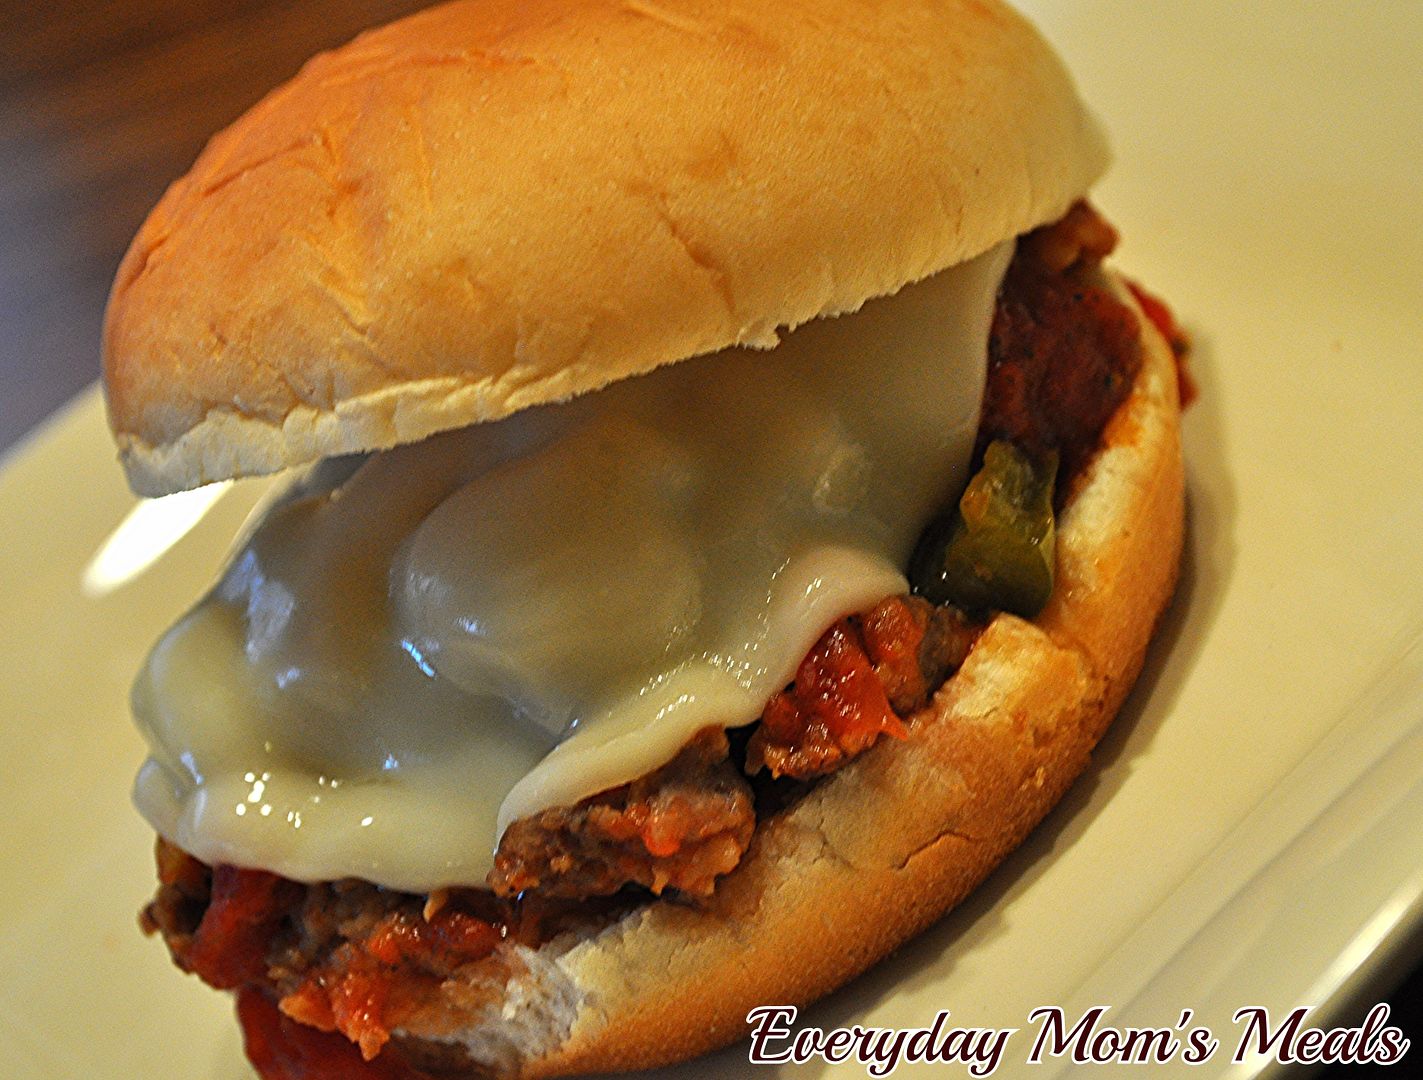
So when I was thinking of my next sloppy Joe creation, I thought why not make a cheesesteak variety; and it was the perfect combination. I love the open faced aspect of these. They are truly a sandwich you need a knife and fork for. The flavors we love from the original are all there, just in a fun new twist. They are a great weeknight sandwich supper, easy and delicious.

I am proud of my Hoosier roots, but everyone who knows me will tell you I have Pennsylvania blood running through my veins, and it will come out at any given time. This time, it showed itself in a yummy new sandwich on my dinner table!

Open Faced Cheesesteak Sloppy Joes
1 lb. ground beef
1 medium green pepper, diced
1 medium white onion, chopped
2 1/2 TBS steak sauce
1 tsp. Worcestershire sauce
6 slices provolone cheese, julienned
1/2 TBS dried parsley
Salt and Pepper to taste
Sliced Texas Toast
Butter

In a large skillet over medium heat,  brown beef until almost done. Add peppers, onions and season with salt and pepper. Cook and stir until beef is browned and veggies are soft. Add Worcestershire and steak sauce. Stir to combine. Turn heat to high and bring to a boil. Reduce heat to low and allow to simmer 10 minutes until meat mixture is coated in sauce. In a small bowl, combine cheese and parsley. Toss with finger tips. Butter both sides of Texas Toast slices. In another skillet over medium heat, toast on each side until crisp. To serve, spoon meat mixture over toast slices and top with cheese mixture.


Shared on Make Ahead Meals June 3, 2013
Shared on Mandy's Recipe Box June 4, 2013
Shared on Lady Behind The Curtain June 5, 2013
Shared on Miz Helen's Country Cottage June 6, 2013
Shared on The Country Cook June 7, 2013
Sandwich at Very Good Recipes
Pin It

Wednesday, April 24, 2013

Loving My Crock Pot Even More

As I am typing this, I have now been without an oven for almost two weeks! (Now remember, I blog ahead, so hopefully by the time this actually posts, that problem will be a thing of the past. But knowing repair shops, and the time it takes to order parts, and time to install it, etc, I'm not going to hold my breath!)

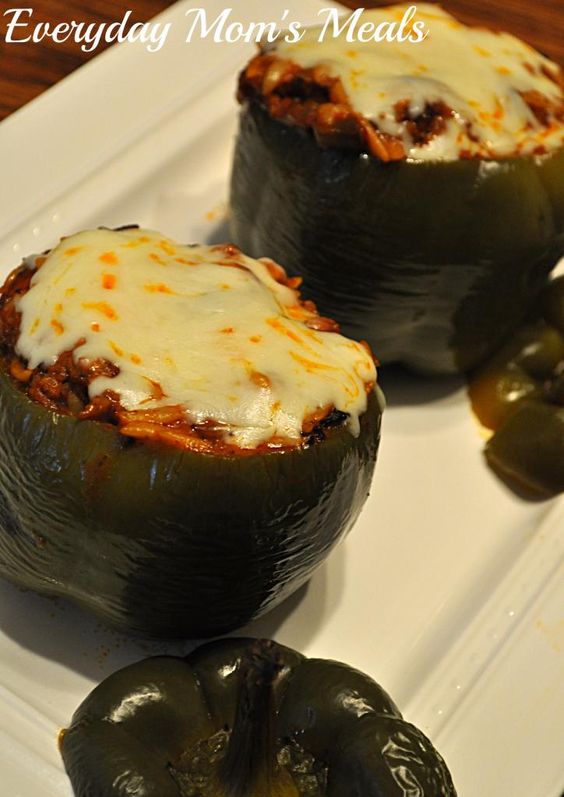
So you can imagine my frustration when I decided to create a recipe based on Stuffed Peppers, but pizza inspired, and then realized I would have to figure out how to slow cook them instead of bake, because let's face it...those aren't fitting in the toaster oven!

Luckily I was able to take my ideas, add a few from another recipe I found, and use their cooking instructions to develop them for the Crock Pot.

If your family loves stuffed peppers like mine, they will flip for these! Think all the flavors of a supreme pizza stuffed inside a pepper for easy access! Not to mention, it's a fantastic recipe to adapt for the number of people in your family. And if your kids normally turn their noses up at stuffed peppers...then maybe, just maybe these will pass inspection a little easier since you can tell them they taste like pizza, just without the crust; and let's face it, a lot of little ones don't eat the crust any way, so they won't even miss it!

I am always a huge fan of my Crock Pot, but without a working oven, it's quickly becoming an even better friend to me. If it weren't for it...I might just be ordering take out every night. Mmmm....maybe the Crock Pot should hide for a bit...that sounds a bit like a cooking vacation! Just kidding...

 Crock Pot Pizza Stuffed PeppersAdapted from Betty Crocker
4 large green bell peppers
1/2 c. orzo pasta, cooked to package directions an drained
5 large white button mushrooms, diced
1 lb. Italian sausage
2 tsp. Italian seasoning
1 (15 oz.) can pizza sauce
1 1/2 c. mozzarella cheese
1/2 c. water
Salt and Pepper to taste

In a large skillet, brown sausage until no longer pink. When sausage is almost done, add mushrooms and brown. Drain if necessary. Add in pizza sauce, orzo, seasoning and 1 c. cheese. Stir until mixed well. Cut tops off peppers and set aside. Remove seeds and ribs from peppers and rinse. (If they won't stand up on their own, slice a tiny bit off bottom to make flat.) Fill peppers with filling and replace tops. Spray Crock Pot with cooking spray. Add water. Place peppers in, standing up. Cook on LOW 4-5 hours. In the last 10 minutes, remove tops, and sprinkle with remaining cheese. Cook until cheese is melted. To remove, carefully use a slotted spoon and tongs, but do not squeeze.


Shared on Lady Behind The Curtain Apr. 24, 2013
Shared on Miz Helen's Country Cottage Apr. 25, 2013
Shared on The Country Cook Apr. 26, 2013

Wednesday, March 13, 2013

I'm A Sloppy Girl

Okay, here is my confession. I love Sloppy Joes...every kind...all kinds...any day of the week and twice on Sunday. Okay, so maybe that last one is a bit of a stretch, but seriously, they are absolutely 100% one of my go-to meals. I think it's because they were one of mom's also. They remind me of my child hood. They are fun to eat, easy to make, and super satisfying. I've done them all kinds of ways, each one just a little different, but I'm always on the lookout for new ones to try. So when I came across this one day while strolling through the blogisphere...I knew it would be showing up on our dinner table very soon.

I already do an Italian spin on the "Joe" with my Pizza Joes, hands down one of Alex's favorites of all time. So when I first read that word-Italian- I almost dismissed it. Only because it was kind of a "been there, done that" mindset. But oh how happy am I that I kept reading! First off, my original version is done stove top, and that's perfectly fine. But these...these included 2 of my favorite words...Crock Pot. Oh, how my heart skips a beat reading those. Easy, cooked all day, deep flavored things come out of the slow cooker, and I'm always game! Not to mention, these used sausage instead of ground beef, and that was going to be a nice change. Something just a little different!

I guarantee your kids will love these. I mean...pizza on a bun...with melted cheese...what kid is going to turn that down? Heck, what adult is going to? And if you are a "pot-lucker" these would be a huge hit with any crowd! What can I say? I'm a sloppy kind of girl, and if you are to flip over this new version.

Crock Pot Italian Sloppy Joes From Skinny Taste
1 lb. ground Italian sausage
1/2 c. chopped onion
3 garlic cloves, minced
1 red bell pepper, chopped
1 green bell pepper, chopped
1 1/3 c. canned crushed tomatoes
1/2 tsp. Italian seasoning
Salt and Pepper to taste
Buns
Sliced Provolone Cheese

In a large skillet over medium heat, brown sausage, onions and garlic until no longer pink. Drain if necessary. Transfer to Crock Pot. Add peppers, tomatoes and seasonings. Cook on LOW for 4 hours. To serve, scoop onto bottom buns and add sliced cheese, allowing to sit for a few minutes to melt. 


Shared on Lady Behind The Curtain Mar. 13, 2013
Shared on Miz Helen's Country Cottage Mar. 14, 2013
Shared on The Country Cook Mar. 15, 2013
Italian at Very Good Recipes
Pin It

Tuesday, February 5, 2013

Packaging Dilema

Today you are going to take a little trip. A trip inside my head during my random thoughts at the grocery store. Hey, what can I say? Sometimes I do my best thinking while wandering the aisles. This wasn't really a pondering moment as much as a rant. A rant that occurred totally in my head.

I found myself once again standing in front of the chicken selection, feeling irritated. Why? Because of the packages of boneless chicken breasts. I don't know how it is at your store, but at 99% of the ones I shop at, if I want them here are my choices. Three per pack or seven per pack. Really? Can't we find a happy medium? Yes, there are only 3 members in my family, but I have a growing boy on my hands! And yes, I could buy the bigger pack and then freeze the extras, which I will, when they are on sale, but that doesn't always happen or isn't always in the budget. So there I was ticked off I was only getting three in the pack, knowing they weren't going to be enough for the meal I had planned. Solution? I just added extra side dishes, and we still had enough to eat. So I guess in the end, it wasn't that big of a deal, and we survived, but at the time it was annoying.

You can imagine my excitement then, when my friend shared this recipe with me. The first ingredient on the list? THREE boneless skinless chicken breasts! How perfect! I could buy one package and have it be exactly enough! In fact, I knew by shredded it, it would really stretch and might even end up being more than enough...and I was correct!

If you love Mexican food, and also love your Crock Pot, you are going to enjoy this just as much as I did. It literally took about 5 minutes to put together, cooked all day while I was busy and then was ready to serve at dinner time. Deep in flavor, moist and tender, those three chicken breasts are definitely the star!

If there is a petition out there to demand companies start putting 4 chicken breasts in a package, please let me know where I can sign! Or maybe I'll start one! Oh heck, I'm too busy to lead that movement. I'll just keep making this recipe using the three they want to give me!

Crock Pot Chicken Fajitas 
3 boneless skinless chicken breasts
3 bell peppers, green, yellow and red, thinly sliced
1 packet Fajita seasoning
1 medium white onion, thinly sliced
1/2 a medium red onion, thinly sliced
Salt and Pepper to taste

Place peppers and onions in Crock Pot. Toss to combine. Lay chicken on top. Sprinkle with salt and pepper. Sprinkle with seasoning packet. Cook on LOW 6-8 hours. (Mine were done after 6.5) Remove chicken and slice or shred. Serve with warm tortillas.
*NOTE* I removed the peppers and onions with a slotted spoon. I sliced the chicken and placed everything on my cast iron crepe pan. I then set it on the stove on LOW until I could hear it sizzle. It created that restaurant wow factor!


Shared on Mandy's Recipe Box Feb. 5, 2013
Shared on Lady Behind The Curtain Feb. 6, 2013
Shared on Miz Helen's Country Cottage Feb. 7, 2013
Shared on The Country Cook Feb. 8, 2013

Saturday, January 19, 2013

Weekend Company {Guest Blogger Bekki}

Good Morning and welcome to another weekend. Was your week a busy one? Ours sure was, so I'm very happy to have the next 3 days "off". Yep, that's right we have a 3 day weekend and it's definitely appreciated!

Today I welcome Bekki, EMM super fan and regular here on Weekend Company, back into the kitchen with me! So grab a seat, something warm to drink and join us!


I am married to my wonderful husband Josh, have a beautiful 12 year old step daughter Amy and 2 fur baby sweethearts Minnie and Shadow. I am a self taught baker/cook. I taught Wilton cake decorating for a while, worked in a grocery store bakery and have even spent time baking wedding/birthday cakes as a hobby on the side. My love for cooking has been since childhood. Spending time with my mother, aunts, and grandmothers. Aiding in their recipes or just being there for the conversation. Its always been a source of calm, peace, and ultimate fulfillment. The idea that you add your love to each recipe and share it with the people you care about is such an amazing blessing to me in more ways then I can ever put on paper. I have decided writing a cookbook was something I could do to share my love of food with family, friends, and whomever else comes my way. I hope your day is blessed with all your favorite things. 

Happy Saturday EMM family! I hope the New year is treating you all well, and finds you in great spirits! Thank you again, Mrs. EMM for inviting me back to spend some time with you. :D

With the holidays now behind us and the new years resolutions still strong in our minds. I thought this recipe would warm us all and keep our goals in sight. I have been able to lose over 60 pounds in the past 6 months and I feel I still have a way to go. So, one of my goals is to cook at home more often. Keeping good hearty recipes, and my pantry full will surely help me. What goals have you set for yourself this year? Who's up for the challenge of meeting our goals? I know I am! Blessings and good luck in all of your endeavors. 


Turkey Chili
 2 c. precooked turkey, chopped
1 green bell pepper, chopped
1 medium onion, chopped
1 tbsp. olive oil
1 40 oz. can pinto beans
1 28 oz. can baked beans
1 28 oz. can diced tomatoes
1 ½ tbsp. chili powder
1 tbsp. granulated garlic
1 tbsp. cumin
½ tbsp. red chili flakes
Salt to taste
In medium soup pot, over medium heat add olive oil, onions, and bell peppers.  Stirring occasionally, cook until onions are clear and bell pepper has softened 7-10 minutes. Add beans and seasonings. Allow to simmer about 25 minutes until beans are completely heated through and veggies have softened slightly. Add turkey and stir to combine. Check seasoning for desired taste, adjust as needed. Chili is ready when turkey has warmed through. Serve hot with your choice of toppings, shredded cheese, sour cream, over tortilla chips, Fritos or with your favorite bread. Enjoy!


Pin It

Tuesday, January 8, 2013

And The Recipes Too

For those of you who read my posts immediately following Christmas, you may remember that I got a new Crock Pot as a gift from my parents! I was so excited; but the Crock Pot fun didn't end there. See, they also got me a great collection of Crock Pot recipes to go with it.

Photo from Lakeside.com where my mom ordered it.

Now, I will be perfectly honest with you, the recipes weren't the only thing I was thrilled with. I love cute containers, and these come in an adorable tin that looks so good in my kitchen. With over 76 recipes to choose from, I didn't know where to begin. But actually, I started right at the beginning. That's right, the absolute first recipe in the tin was the first one I made, and is what I'm sharing today.

We are mac and cheese fiends. I have a thousand different recipes, and am always looking for new versions to try. When I saw this, I paused a moment, because six months ago I probably would have passed it by due to the extra "spice" in it. But alas, Monkey's palate has come to appreciate a little heat; he truly is his father's son! Actually, he can handle more spice and heat than Mommy, so I knew if it was something that looked acceptable to my delicate taste buds, he would be just fine. 

This is a great side dish for any meal, or even double the recipe for a main dish. Full of tomato, peppers, onion and just a little heat from green chilies  it's not your every day mac and cheese! I served it alongside a new sandwich, which I will be sharing tomorrow, so be sure to come back for that. I love gifts that are so "right on", and foodie gifts are quickly becoming some of my favorites. 


Southwest Mac and Cheese From Crock Pot
8 oz. elbow macaroni, uncooked
1 (15 oz) can diced tomatoes with green peppers and onion, undrained
1 (10 oz) can diced tomatoes with green chiles, undrained
1 1/2 c. salsa
3 cups Mexican blend cheese, divided

Lightly coat the inside of Crock Pot with cooking spray. Stir together macaroni, tomatoes with juices, salsa and 2 cups cheese in Crock Pot. Cover and cook on LOW 3 hours 45 minutes or until macaroni is tender. (Mine actually look only about 3 hours) Sprinkle with remaining 1 cup cheese and cook for 15 minutes more, or until cheese is melted.


Shared on Mandy's Recipe Box Jan. 8, 2013
Shared on Lady Behind The Curtain Jan. 9, 2013
Shared on Miz Helen's Country Cottage Jan. 10, 2013
Shared on The Country Cook Jan. 11, 2013

Pasta at Very Good Recipes
Pin It

Disclaimer: This is NOT a paid endorsement from Lakeside or Crock Pot. All thoughts and opinions are mine. 

Thursday, January 3, 2013

Really?

I have had this dish a thousand times. I always get so happy when I see it at graduation parties, bridal or baby showers, and wedding receptions. But honest to goodness, I had never made it until this week. And even more so, I had no idea how easy and truly uncomplicated it was! I think because it was something I enjoyed long before I became more proficient in the kitchen, it was filed in my brain under "Eat only when others prepare." This can be made with so many different veggies, you can truly make it your own but adding and subtracting those you enjoy the most. And to be honest, appetizer or not, I can totally eat this as a light lunch! In fact I went to a baby shower/luncheon recently where the entire meal was planned around this dish, making it the "main staple" of the meal; and it worked perfectly! It's also a fantastic make ahead dish too. I actually prepared the crust earlier in the day, and after cooling, covered it and set it on the counter top until I was ready to finish. Plus, you can make the sauce, and chop the veggies ahead of time too, so when your party guests are arriving, it's simply assemble and eat. I'm so happy I finally made this for myself, because I guarantee I will be many, many, many more times in the future!

Veggie Pizza
2 (8 count) cans crescent rolls
8 oz. whipped cream cheese
1/2 c. sour cream
2 tsp dill weed
1/8 tsp garlic powder
Salt and Pepper to taste
1 small cucumber, peeled and diced
1 small head of broccoli, florets chopped
2 small carrots, peeled and thinly sliced
1 medium green pepper, seeded and diced

Preheat oven to 375. Remove crescent rolls and separate into rectangles. Place on ungreased 15x10 baking sheet and using your fingers, push together seams up sides and edges forming crust. Bake for 13-17 minutes until golden brown. Set aside to cool for 30 minutes. In a medium bowl combine cream cheese, sour cream, dill, garlic powder, salt and pepper. Stir well to combine. Chill until ready to use. When crust is cool, spread evenly with cream cheese sauce. Top with chopped veggies. Place in refrigerator for 1 hour before serving. Cut into small squares to serve.


Shared on Miz Helen's Country Cottage Jan. 3, 2013
Shared on The Country Cook Jan. 4, 2013

Tuesday, December 18, 2012

Two Pot Wonder

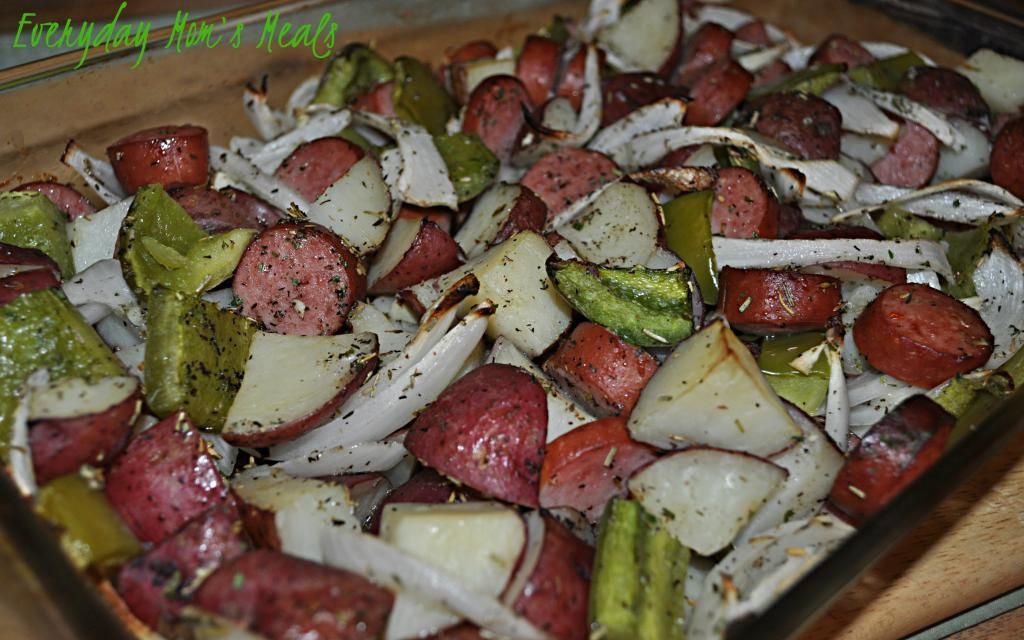
When I find something in my freezer that I didn't even know was there (okay, maybe I knew and forgot) sometimes I look as it as an opportunity, Sure, I could go ahead and make whatever I had originally planned with it, but most times when I this happens, it's something that leftover or "extra" from another recipe. For example, this came about because I found an extra package of smoked sausage, after buying three when I only needed two. So yes, I could have went ahead and bought one more package and fixed the same meal I had the previous time, but instead I went looking for something new. And what I found is not only delicious and easy, it's a great recipe to feed a crowd. The way it is written here, I would say it would feed 4-5 comfortably. But it could simply be doubled (If you do, use two separate pans for more even cooking) to feed a group much bigger! Plus it has your protein, starch and veggies all in one place! Technically I can't call it a one dish wonder, because you do have to prepare the potatoes in a separate pan, but if you're like me, that one can be washed, dried and put away by the time the oven timer chimes, and you are left with only one to clean after supper! If you are planning on a full house at some point over the next couple weeks, and want to serve more than just one big meal with leftovers for days, this is would be a great solution! Remember to check that freezer now and again too. You never know what inspiration you might find.

Sausage, Potato and Pepper Bake From Hillshire Farm
1 (1 lb.) package turkey smoked sausage, sliced into 1/4" pieces
6 cups red potatoes, cut into 1 inch cubes
2 green peppers, seeded and cut into 1 inch pieces
1 large onion, thinly sliced
2 garlic cloves, minced
1/4 c. chicken broth
1 TBS olive oil
1 tsp dried rosemary
1 tsp dried thyme
Salt and Pepper to taste


Preheat oven to 400. In a medium saucepan, cover potatoes with water. Bring to a boil. Reduce heat to simmer. Cook 10 minutes until crisp-tender. Drain well. In a 9x13 pan, combine potatoes, peppers, onions, garlic and sausage. In a small bowl combine chicken broth, oil and seasonings. Mix well. Pour oil mixture over sausage mixture. Gently stir well to combine and coat. Bake uncovered for 40-45 minutes until veggies are tender and potatoes are browned around edges.


Shared on Mandy's Recipe Box Dec. 18, 2012
Shared on Lady Behind The Curtain Dec. 19, 2012
Shared on Miz Helen's Country Cottage Dec. 20, 2012
Shared on The Country Cook Dec. 21, 2012

Monday, October 22, 2012

Ground Beef Overload

All of you have heard me say that we are so incredibly lucky to always have a side of beef (and various other meats too) in our deep freezer. There was a day we weren't as lucky and I remember the cost of buying meat each week, and it wasn't cheap. And with a growing boy to feed, our family, even though there are only 3 of us, goes through a lot of meat! Last month, just as we were nearing the end of our supply it was time for another cow to be butchered and we were once again bringing home enough meat to fill our chest freezer to the brim once again. Each time we "refill" alongside the roasts and steaks, there is always an abundance of hamburger. Package after package, it is definitely what we end up with the most. So when I know there are more than enough packages to go around, I start to come up with as many recipes as I can using ground beef. Let's face it, it's kind of the "go-to" meat for busy moms. From burgers and sloppy joes, to casseroles and tacos, there are an infinite possibilities to what a mom with hungry eyes staring at her can do with a pound of ground beef. These sandwiches are a great new twist on a classic loose meat (basically a sloppy joe without the sloppy) and are just as easy to make. They would also be terrific cut into smaller portions for a tailgate party! If you have ground beef "coming out of your ears" too, maybe I just helped you use some it!!

Cheesy Hot Beef Sandwiches Adapted from Pillsbury
1 1/2 lbs. ground beef
1 small green bell pepper, finely diced
8 oz. Cheddar-Monterey Jack Cheese
2 tsp. dried parsley
1 envelope French onion soup mix
1/4 c. water
1 large loaf French bread
Salt and Pepper to taste

Preheat oven to 350. In a large skillet, brown beef seasoned with salt and pepper until no longer pink. Drain if necessary. Return to skillet. Add green pepper, parsley, water and soup mix. Stir well to combine. Add cheese a little at at time allowing it to melt and combine. Cut bread lengthwise. Carefully remove inner part of both halves, leaving 1/2 inch around edges. (Basically make 2 bread "boats".) Carefully spoon meat mixture into both halves, pressing down. Gently flip top half onto bottom and wrap in double layer of foil. Place on baking sheet and cook 20-25 minutes. Cut into sections to serve.


Shared on Make Ahead Meals Oct. 22, 2012
Shared on Mandy's Recipe Box Oct.  23, 2012
Shared on Lady Behind The Curtain Oct. 24, 2012
Shared on Miz Helen's Country Cottage Oct. 25, 2012
Shared on The Country Cook Oct. 26, 2012

Ground Beef at Very Good Recipes
Pin It

Tuesday, October 16, 2012

Frozen Is My Friend

In a perfect world I would have a fish market just down the street where I could go and get fresh seafood any day I wanted, every day if I wanted. But alas, this is northern Indiana and while some of our supermarkets have a nice seafood counter, it's just not quite the same. Yes, I can go to the nearest Kroger and get some fine looking fish and seafood out of their case, and it tastes great, but sometimes I wish for what we were lucky enough to have in Florida during our summer beach vacation. When I shared my Fried Oysters and Crispy Cajun Shrimp with you I told the story of how we love visiting the market as soon as the boats come in with the fresh catch of the day~ it doesn't get more fresh than that! Not to mention taking out the "middle man" makes it so much more affordable. In fact, the only problem with using my supermarket's seafood counter is that it can get a bit pricey. But I have found one way around this...bagged frozen shrimp. I can find various sizes, tail on or off, EZ peel, already deveined, etc at an economical price to feed our family of 3. Yes, I still buy fresh, but I save that for special occasions when we are home in the Hoosier State. Other nights when I just want shrimp for an "everyday" supper I turn to the frozen and they work really great in recipes. And I have found that since I discovered this little trick we are able to eat shrimp more often because I'm not waiting for those special occasions or trying to find room in the grocery budget for them. If you are blessed to live on a coastline where seafood is at your fingertips any time you wish, I am green with envy. But if you are like me and want to cook with shrimp but not break the bank, check out the frozen section the next time you are at your store. You might be just as pleasantly surprised as I was!

Shrimp Stir Fry
1 12 oz bag (71/80ct) frozen deveined shrimp, thawed
1 c. frozen broccoli, thawed
1 c. frozen asparagus, thawed and cut into 1 inch pieces
3 medium carrots, peeled and julienned into 1 inch pieces
4 scallions, greens only, cut on a diagonal into 1 inch pieces
2 small green bell peppers, seeded and julienned into 1 inch pieces
2 (4 oz) cans mushrooms, drained
1/4 c. teriyaki sauce
Soy sauce to taste
3-4 TBS vegetable oil
Salt and Pepper to taste

To begin, make sure all thawed veggies and shrimp are VERY dry. Preheat vegetable oil in an electric skillet to 375. The key to this is making sure the oil is screaming hot and the ingredients are super dry. You don't want spatter if water hits the oil. When oil is hot, add carrots, mushrooms, peppers and broccoli. Stir and cook for 5 minutes. Add asparagus and scallions. After about 2 minutes, add shrimp, season with salt and pepper and cook until pink and opaque. At this point, turn heat down to 325. Add teriyaki sauce and soy. Stir and let flavors combine until veggies are completely cooked and flavors are combined, about 5-7 more minutes. Serve over rice, noodles or on the side with some egg rolls.


Shared on Mandy's Recipe Box Oct. 16, 2012
Shared on Lady Behind The Curtain Oct. 17, 2012
Shared on The Country Cook Oct. 19, 2012
Shrimp at Very Good Recipes
Pin It

Thursday, September 20, 2012

Pasta, Okay Now What

If your family enjoys a good pasta dish as much as mine, then maybe you find yourself in the same dilemma as I do each time one goes on my meal plan. What to have with it. Sure, I can make a simple side salad, or even my Easy Caesar Salad, or garlic bread, but with as much pasta as we eat (I try to limit it to once per week though) the side dish can become a little tiresome. I have a bazillion (yes, that is a number) pasta dishes, just not an equal amount of sides to go with them. So a few weeks ago when I was baking yet another pasta creation, I decided since I had some extra time on my hands I was going to come up with something new. Now it wasn't that I needed the time to make it (this comes together in about 10 minutes) but instead I needed those extra minutes to figure out just what it was going to be. I knew I had some yummy fresh veggies left from the Farmer's Market in the crisper, so salad was definitely at the top of my list. Then in the cupboard I found some white cannellini beans. Presto!! I knew exactly what my plan was, and was on my way to a brand new side dish for any pasta night. Use the beans as the base, and then add in any veggies you like~the sky is the limit. For all you fellow pasta addicts out there, garlic bread is okie dokie with me (we love bread to), but if you want something new, give this a try the next time it's Italian night at your house!

White Bean Salad
2 (15oz) cans cannellini beans, rinsed and drained well
1 small cucumber, peeled, seeded and diced
1 c. grape tomatoes, halved
1/3 c. diced red onion
1 small green pepper, seeded and diced
1/4 c. real bacon bits
1/2 c. Italian dressing
Salt and Pepper to taste
Dried Parsley, for garnish

In a medium bowl combine beans and all veggies. Stir well. Add bacon bits and dressing. Stir to combine. Season with salt and pepper. Garnish with parsley. Chill until serving. Serve with a slotted spoon.


Shared on Miz Helen's Country Cottage Sept. 20, 2012
Shared on The Country Cook Sept. 21, 2012
Beans at Very Good Recipes
Pin It