Everyday Mom's Meals: Walnuts
_____
Showing posts with label Walnuts. Show all posts

Sunday, April 21, 2019

Salad Season

When the sun decides to come out and play more, and the temps begin rise, my summer taste beds set in, and fast.

I start to crave all things fresh, light, grilled, from the garden, cookout staples, picnic favorites. ALL. OF. IT.

Last week we had some crazy weather. That's quite common for Indiana in spring. How crazy you ask? On Sunday we had snow. By Tuesday, it was sunny and 75.

Since I am a meal planner, when there is a sudden shift like that, supper doesn't always line up with the weather. Like on a 80 degree day in October, we might be sitting down to a piping hot bowl of soup. But not this time. As luck would have it, I had planned barbecue chicken and this salad.

Oh, how delicious it was. It was the perfect meal to sit down to after a walk outside, with the sun still shining through the windows, and even thought it wasn't quite time to eat outside yet, that's what it put me in mind of. A meal we could enjoy on the patio table, or even at a cookout. I know what I'm taking to the first one we are invited to this summer, and I bet everyone will want the recipe too.

This salad might be simple, but it brings BIG flavors. I think it could even be made into an entire meal if you added some grilled chicken to it, perfect for a hot summer night!

I think we might finally be turning a corner here as far as seasons go. Winter lasted 927 days, spring has been wet and kinda cold, but there just might be light at the end of the tunnel. And with it, more and more fresh dishes like this to enjoy all season long.

Asian Romaine Toss
3 Romaine lettuce hearts, chopped
2 crowns broccoli, chopped
1 package Ramen noodles, broken, seasoning packet discarded
1 c. chopped walnuts
3 TBS butter
1/2 c. sugar
1/4 c. red wine vinegar
1/2 c. vegetable oil
2 tsp. soy sauce
Salt and Pepper to taste

In a medium bowl whisk together oil, sugar, vinegar, soy sauce, salt and pepper until well combined. Set aside. In a large skillet melt butter over medium heat. Saute broken noodles and walnuts until browned, about 5-7 minutes. Transfer to a paper towel lined plate to cool.

In a large bowl combine lettuce, broccoli and cooled nut mixture. (Reserve a little nut/noodle mix for top.) Toss well. Pour dressing down over. Toss to coast. Chill for 10-15 minutes before serving. Add extra nuts/noodles to top. 


Inspired by Plain Chicken
Shared at Weekend Potluck

Monday, October 16, 2017

Simple Weekend, Simple Dessert

Do you ever have those weekends you have to actually schedule time at home? That was us this past weekend. There was so much to get done outside, and Alex had a big project for school...I knew it was time for mama to step in and black out a couple days on the calendar. 

It feels like if the weeks fly by, the weekends are on jet speed. Like I told my mom, "It is nice to know we don't have to be anywhere." 

I had gotten a couple frozen pizzas at the grocery store, some chips, the boys and I had made some Halloween and Star Wars Jell-O Jigglers, all I needed was dessert.  And I had just the thing.

I had this bad boy tucked away on my "must try before holidays" list and I knew this was the perfect time to test it out. I love being able to give you guys ideas way ahead of time so you can plan, and hopefully be a little less stressed out. 

I had actually planned on making this Sunday to go with our "big meal" but couldn't wait any longer! Plus I figured we would have some leftovers so it could work for both days.

This is something magical. First of all, your house is going to smell like fall while it cooks; and even more so, like a holiday. Secondly, if you can chop, stir and set a timer, you will rock this. 

I'm not much of a baker. I wasn't before Max, and now with the 14 month old literally hanging on my legs while I'm in the kitchen, there is no crust making going on! The best way I can describe this is "naked apple pie". (Thank you to my friend Roxie who gave me that!)

In fact, when I was trying to figure out what to call this, I asked friends and fans on Facebook, and promised to mention the one I liked best. Well, Roxie's worked perfectly as a description, but as far as the actual recipe name, I took a few suggestions and put them together to find the right one.  So thank you also, for everyone who left a comment and totally inspired me! 

This is so simple it's perfect any night of the week, or on your simple weekend. Or like I said, save it when Thanksgiving rolls around...which is quicker than you might think!

Autumn Apple Delight
5 Honeycrisp Apples, cored and chopped SKIN ON
1 c. golden raisins
1 c. brown sugar
1 c. chopped walnuts
1 TBS ground cinnamon
1 tsp. ground allspice

Preheat oven to 350. In a large bowl combine all ingredients. Stir well to coat. Transfer to a deep dish pie plate. Cover with foil. Bake for 20 minutes. Stir gently. Bake another 20 minutes, uncovered, until apples are tender. Serve alone or over dessert shells, pound cake, angel food cake or ice cream. Store in fridge and reheat as wanted.


Inspired by Southern Plate

Wednesday, September 2, 2015

Ice Cream...It's Not Just For Summer

It's been almost a year since I developed this recipe for my friends over at Indiana Dairy, so I thought it was about time I shared it here too. Especially since many of you (in fact thousands of new readers) have joined the EMM family since last October when I did.

We all know summer's favorite sweet treat is ice cream. It's an American classic that is almost a mascot of summer time. But with September upon us, does that mean we have to stop? I say heck no! Now, you are talking to an ice cream fanatic, so quite frankly, you'll find me in the Culver's drive through year round, but when I created this, I thought it was about time ice cream got an autumn flare added to it!

If ice cream is the flavor mascot of summer, then pumpkin and apple have to be the ones for fall. Pumpkin spice everything is every where; and trips to the apple orchard are a favorite pastime. And once you're back home with those bushels of goodies, it is time to put them to good use.

Think about a big piece of warm apple pie, with a big scoop of vanilla ice cream on it. That will get you in the mood for this. It has all the same flavors, but in a new, fun, yummy twist. They are perfect for fall time parties, bonfires and tailgating. If you make the sauce ahead of time, you could easily keep it warm in the slow cooker for all day/night fun.

It's time to say good-bye to summer and hello to fall. But no matter what the calendar says, I don't think we have to stop eating our favorite summer time foods quite yet, especially if we transform them just a little to incorporate fall favorites too!

Apple Pie Sundae
Originally Posted on Indiana Dairy
4 large apples, cored, peeled and sliced into 1/4" slices
1/4 c. butter
1/2 c. chopped walnuts, a few reserved for garnish
1/4 c. packed brown sugar
1 tsp. lemon juice
1/2 c. apple cider
1 TBS cornstarch
1 tsp. ground cinnamon
1/8 tsp. ground nutmeg
1/8 tsp. allspice
Vanilla ice cream
Waffle bowls
Melt butter in a large skillet over low heat. Add apples in a single layer. Sprinkle with lemon juice, brown sugar and spices. Stir to coat. Cover and simmer on low until tender, about 10 minutes. Remove apples with a slotted spoon. In a small bowl combine apple cider and cornstarch. Whisk well. Pour into skillet with drippings from apples. Increase heat to medium. Whisk continuously until thickened. Combine apples, sauce and walnuts in a large bowl. Stir gently to combine. Allow to cool slightly. Scoop ice cream into waffle bowls, spoon apple mixture over top. Add a few walnuts to top. *NOTE* You can serve this right after cooking, when it's very warm, but I find it works better when it's cooled slightly. You can also make it ahead of time and reheat in the microwave, for about 1-2 minutes until it's warmed through.


Shared at Weekend Potluck

Monday, July 13, 2015

Another Sweet Side Dish

So...I need a vacation from my vacation. You know how it is. You come home after being gone, and you hit the ground running, trying to get back into the swing of things, you blink and a week has gone by and the laundry still isn't caught up, you still aren't 100% unpacked, and you feel like you've been going nonstop--totally cancelling out the two weeks of rest and relaxation you just had. Yep, that's where I'm at.

Plus, we had some added stress to our return. We had a death in our family, and we had to break to the news to our son that his teacher from this past school year had also passed away after a battle with cancer. It was a very sad week in our house. Alex loved Mr. Thorn, and when he became ill back in April, and had to leave the classroom for the rest of they year, he was crushed. But nothing could have prepared him for when we had to tell him back in June just how sick Mr. Thorn was, and then when we had to tell him his suffering and battle was over because God had called him home. Having to share with a 10 year old such devastating news (plus the added death of my husband's great uncle) was not how I wanted to spend the first few days post-vacation. But such is life, and we are now entering into a new, hopefully better week.

But you can see why I might feel like I've been going 100 mph since we got back, in every direction, with a million things to do. So cooking and blogging has kind of had to take a back seat. However, I did manage to make this new treat and just had to share.

I was making breakfast sandwiches and wanted something light to go with them. I wasn't in the mood for any of the "normal" things I serve with them, and then I remembered this recipe I had seen. Ya'll know how much I love these sweet salads I can call a side dish and be done with it. Plus, a little creamy fruit salad seemed appropriate as a breakfast for supper thing.

I am slowly but surely returning to normalcy around here. Or at least trying. In the meantime, I'm so thankful for quick and easy dishes I can whip up, we can enjoy, and then I can share with all of you.


Pineapple Fluff
Inspired by Southern Bite
 2 (20 oz.) cans crushed pineapple, drained well
8 oz. block cream cheese, room temperature
1/2 c. powdered sugar
1 tsp. vanilla
1 (8 oz.) tub Cool Whip
1 1/2 c. chopped walnuts, reserve a few for garnish

In a large bowl combine drained pineapple, cream cheese and vanilla. Stir until mixed well. Fold in Cool Whip until combined. Add powdered sugar and walnuts and stir again. Scoop into parfait glasses or dishes. Garnish with extra walnuts. Chill several hours before serving. 


 Shared at Weekend Potluck

Wednesday, February 4, 2015

A Gadget Makes All The Difference

So, I might have a new obsession. Well, I guess when it comes to food, I have quite a few, so I better narrow it down. The latest addiction I have to add to my list is muffins. I am constantly looking for new flavors, and a lot of this new infatuation has to do with one small thing. A cookie scoop.

See, until last year about this time, I had to use a normal, every day spoon to transfer the muffin batter to the muffin tin. But then something magical happened. I received a cookie scoop for my birthday. Do you know what I'm talking about? The kind with the spring loaded handle that when pressed, allows whatever is in it, to be removed quickly and easily. Nothing special, nothing fancy. But absolutely life changing.

Oh, and the funny part? I've never made cookies with it! For almost a year now, it has been used exclusively for muffins. I'm sure it would be fabulous for cookie dough too, believe me. It makes scooping anything so much easier. I can literally fill a 12 well muffin tin in almost no time at all! Plus, it helps to keep the mess down too! (I'm all about less clean up when I'm done!)

If you love banana bread, you're going to love these as much as we did. Plus these come with a glaze that banana bread usually doesn't, so they are that much sweeter! Perfect for breakfast, brunch, an after school snack or dessert.

Do you have a great kitchen gadget that makes all the difference in your life? Share it with me in the comments! I'm always looking for new ones!

Banana Nut Muffins
1/4 c. butter, softened
1/2 c. sugar
1 egg
1/2 tsp. vanilla
3/4 c. mashed banana (about 3)
1 c. flour
3/4 tsp. baking powder
1/4 tsp. salt
1/8 tsp. cinnamon
1/8 tsp. baking soda 
1/2 c. chopped walnuts
1/4 c. powdered sugar
Milk

Preheat oven to 350. Line muffin tin with papers or grease. Cream together butter and sugar. Beat in egg, vanilla and banana until smooth. In a separate bowl combine flour, baking powder, salt, cinnamon and baking soda. Mix well. Pour into moist mixture and combine just until moisten. Fold in walnuts. Fill muffin cups 2/3 full. Bake for 20-25 minutes until tooth pick comes out clean. Cool on wire rack. Mix together powdered sugar and enough milk to make glaze, usually about 2 tsp. When muffins are cool, drizzle with glaze.


Shared on The Country Cook Feb. 6, 2015

Disclaimer: As a Field Editor of Taste of Home, I share my own thoughts and opinions of this recipe. I am not a paid employee. 

Wednesday, November 5, 2014

An Affordable Thanksgiving {Indiana Family of Farmers}

Back in the Spring when I agreed to team up with my good friends over at Indiana Family of Farmers for this incredible Affordability Series, I remember thinking "Wow, the last post is in November. That seems so long away." And wouldn't you know it, forever came very quickly! But in case you need to catch up, check out the first three posts below:

* Stretching Your Grocery Store Budget

* Affordable and Nutritious Options at The Grocery Store

* Out The Door and On The Go


So here we are, Thanksgiving in just 3 weeks, and it's time to look at how we can entertain on a budget. How we can enjoy our big family gatherings without breaking the bank. How we can delight in all of our favorite holiday table staples in an affordable, but still tasty way. So here are a few tips on doing just that, from me to you. Plus, the last tip...it just happens to come with a fantastic recipe too! 

1. Start Planning Early The best way to make sure you stay on budget for a holiday is to start brainstorming early...before most people around you are probably even thinking about the holiday. Start planning that menu so early people might think you're crazy; but you're not. You are the smart one. See, the earlier you plan, the earlier you can adjust it, change it, and finalize it. So what does that mean for your budget? It means you won't be at the mercy of the grocery stores. You won't be shopping at the last minute, having to pay whatever price they want, no matter how high, because you have to have it.

2. Use Sales To Stock Up This goes right along with #1. See, if you're planning early, then you can be watching sale ads and stock up on things you know you will need, long before you actually need them. Now of course, I'm talking about things that have a great shelf life, or can be frozen. (Please don't go buy celery in September and then send me hate mail because it's growing fuzz by November...ha ha.) If you use stuffing mix, some stores have it on sale at the end of summer for really cheap. Or maybe you enjoy Cool Whip on your pumpkin pie. That stuff goes on sale year round, and can last in the freezer forever. So once that menu is set, grab your rewards card and sale ads and figure out those things that can be bought ahead of time and still be yummy come the day of.

3. Don't Be Afraid Of "Off" Brands If you are a shopper who 99% of the time buys name brand products, holiday meal planning is a great time to step out of your comfort zone, if you're looking to stay on budget. Take it from me. The generic, or store brands, taste just as good as their more pricey counter parts. I use them in my every day cooking, and we notice absolutely no difference. For example, the name brand of canned pumpkin (the one most of us would recognize) can run you anywhere between $1.50-$2.00. However, at one of the discount stores I shop at, their brand is currently on "seasonal" special, and only $.89/can!!! That's like finding money!

4. Ask Others To Contribute If you are hosting a huge holiday gathering, there is absolutely nothing wrong with asking others to bring a dish to share. In fact, I am not the one who hosts our family for neither Thanksgiving or Christmas. We are at our parents' houses for both. And while I'm not responsible for the entire meal, I always take something; and the couple times I have hosted, I've others have always done the same for me. Taking the task and cost of the entire spread on yourself, is absolutely daunting, and expensive, so don't be afraid to say to your guests "What dish would you like to bring?"

5. Leftovers Isn't a Dirty Word Sure, we all make the joke about eating leftover turkey every day from Black Friday to Christmas Eve, but in reality, having things left over after a huge holiday meal really isn't that bad, especially if they are items that can be morphed into new, yummy dishes. After all, if you're going to spend the time and money making this huge meal, why not make it even more economical by lasting for meals to come. Remember, the freezer is your friend. Freeze some of those leftovers, until inspiration finds you for ways to use them. In fact, with a little planning ahead, you can even know what kinds of things you will have to work with after the guests have done home and the clean up has begun. Knowing what you're having for the holiday meal, you can easily figure out a few days' meals afterwards working with what's left; and not just the "main" things, but ingredients also...as you'll see below.

And that is exactly what inspired me to share this recipe with you today. I will tell you upfront, when I developed this recipe, I fully intended you to make it with leftover turkey, not chicken. But in  the spirit of affordability, I used chicken because it was what I had in the freezer already. Without a doubt, it would be just as delicious with Thanksgiving turkey!

Plus, it's filled with things you more than likely will have on hand for making all those traditional holiday dishes we love. Celery from stuffing. Cranberries and walnuts from stuffing or pies. You see where I am going. Using every last bit of every last thing you had to buy, and turning all of them into a tasty dish you can enjoy for lunch or a light supper days after the holiday is over.

The holidays and all the food that comes with them, are coming...fast! Be prepared to feed the masses, with these easy, money saving tips...and yummy recipe! 

Cran-Apple Chicken Salad
3 large boneless chicken breasts
Olive Oil
Salt and Pepper to taste
1/2 c. dried cranberries
1/2 c. chopped walnuts
2 small apples, chopped
3 ribs celery, finely chopped
1 c. mayo
1 TBS lemon juice

Preheat oven to 375. Rub chicken with olive oil, salt and pepper. Place on a foil lined baking sheet. Roast for 45 minutes until juices run clear. Allow to slightly cool. Shred using two forks or a stand mixer. In a large bowl combine chicken, cranberries, walnuts, apples and celery. Mix well. In a small bowl whisk together mayo, lemon juice, salt and pepper. Pour over chicken. Stir very well. Chill until serving, or at least an hour. Serve on bread, croissants, rolls, etc. *NOTE* Leftover turkey would be a perfect substitute for the chicken! 


Shared at The Country Cook Nov. 7, 2014

Chicken at Very Good Recipes

Disclaimer: As an IFOF Ambassador for the  Affordable Food Tips For Your Family, From Our Family Series, I was compensated for this post. All thoughts and opinions are my own. 

Monday, September 8, 2014

I Can't Pass Up A Good Deal

A couple weeks ago my mom and I were having a little QT together. We had lunch and had shopped til we dropped. We were driving back to her house when we passed this gorgeous farm house with a little table of vegetables out front. That's when the magic happened. I spotted a sign with that word every bargain hunter like myself (and mom too) loves to see...FREE!!!

Of course we had to stop. And let's just say, we know the brakes on mom's SUV work great! I jumped out and they had beautiful sweet corn, cucumbers, tomatoes and zucchini fresh from the garden. I really was only in need of some cukes for dinner that night, but I couldn't just walk away. I already had corn and maters in the fridge, but no zucchini. So I grabbed one. A huge one. I got back in the car and mom asked me what I was going to do with it. "I have no idea. But it when it's this nice and free, I have to take it." She laughed and knew exactly what I was talking about, because it was something she would totally do too.

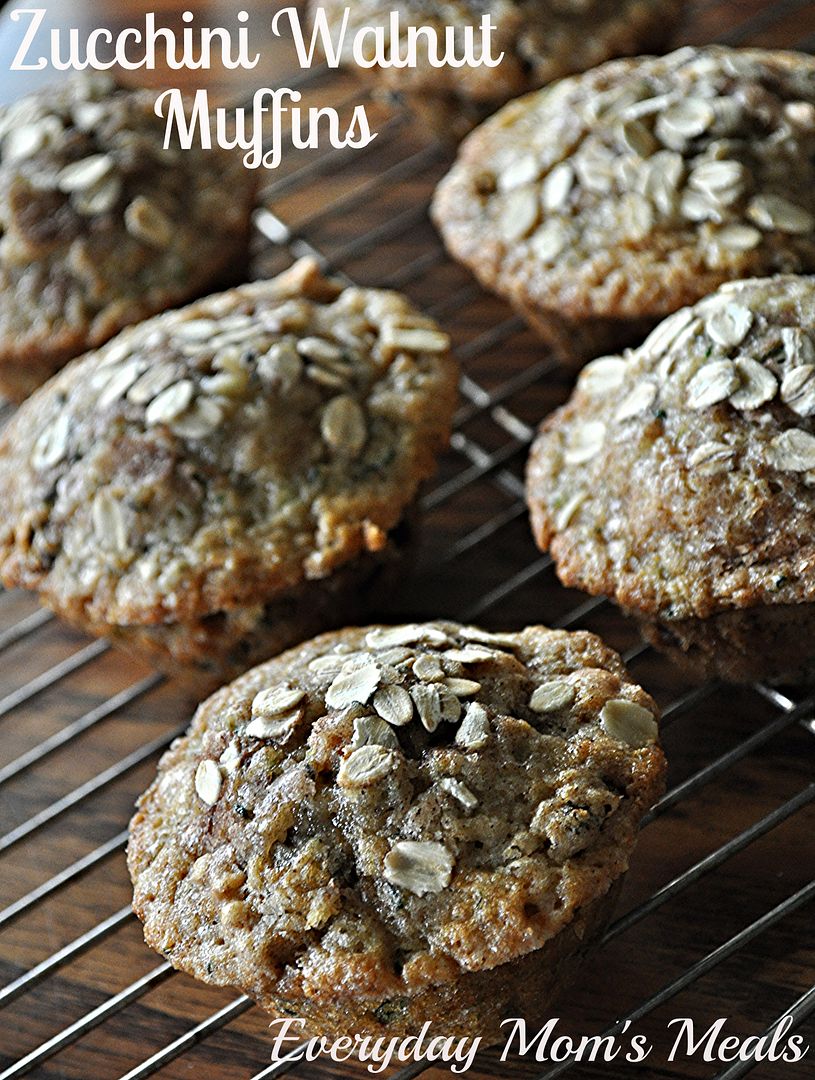
So it resided in the fridge for a few days until I finally figured out what I wanted to do with it. This was about the time little man got sick with strep throat too, so I wanted to bake him something yummy, but still soft enough he could swallow it. I knew some muffins warm from the oven, were just what he needed to brighten his day. (After all, the poor kid was missing a day of school after only being back for nine!)

If you are in the need of quick breakfasts for busy mornings, these would be perfect. They can even be eaten on the go! Or make them for a delicious after school snack when the kiddies get off the bus. Or they make a fantastic dessert, warm with a little butter spread on...mmmmm.

If your garden is still giving you plenty of zucchini, here is a great way to use it up. Or maybe you're like me and you have some free produce sitting in the crisper drawer because you too can't pass up a good deal. Either way, these are simple, delicious and zucchini's new best friend.

Zucchini Walnut Muffins From Taste of Home
3/4 c. flour
1/2 c. sugar
1 c. finely shredded unpeeled zucchini, extra water squeezed out
1/2 c. chopped walnuts
1/4 c. raisins
1/4 tsp. baking soda
1/4 tsp. baking powder
1/4 tsp. cinnamon
1/4 tsp. salt
1 egg
1/4 c. canola oil
Cinnamon/Sugar Mixture
Old Fashion Rolled Oats

Preheat oven to 350. Grease 6 large muffin cups, or use paper liners. In a large bowl combine flour, sugar, baking soda, baking powder, salt and cinnamon. Stir to combine. In a small bowl whisk together oil and egg. Add to flour mixture. Stir until moistened. Fold in zucchini, walnuts and raisins. Scoop into muffin in, filling each 3/4 full. Sprinkle with cinnamon/sugar and a few rolled oats. Bake for 20-25 minutes until a tooth pick comes out clean. Cool 5 minutes on wire rack. Remove from pan. Finish cooling on rack. Makes 6 extra large muffins. *NOTE* To make cinnamon/sugar mixture combine combine 1/4 c. sugar and 1 TBS cinnamon. Mix well. Store in airtight container. I keep this on hand at all times. It's great for toast, muffins, etc.


Disclaimer: As a Field Editor of Taste of Home, I share my own thoughts and opinions of this recipe. I am not a paid employee. 

Saturday, July 26, 2014

Soul Food Saturday


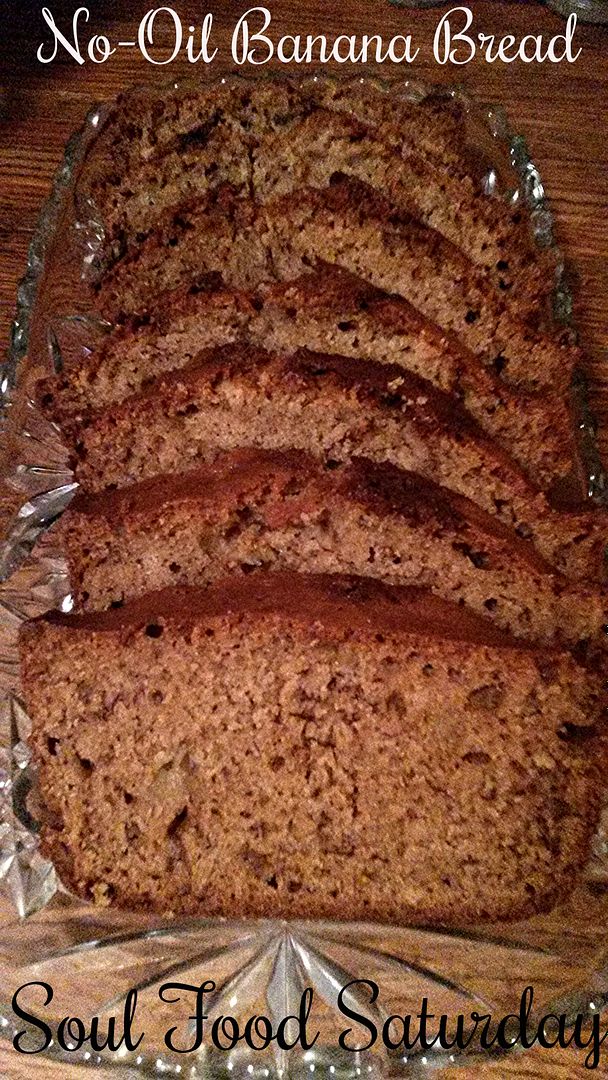
What is it about banana bread that makes us think, something healthy? Is it all the times we have heard the health benefits of bananas; or just one more reason to have an extra slice without any of the guilt? I don’t really need many; I love banana bread any way I can get it. So here is one more recipe to add to your collection, and we are calling it “healthy” because the oil has been replaced in this recipe. But the flavor hasn’t been altered one bit, promise! Grab a cup of coffee, and a friend. This one is best when shared with ones we hold dear.

No-Oil Banana Bread
2 eggs, beaten
1/3 c. half and half
1/2 c. unsweetened applesauce
1 c. mashed bananas
1 c. sugar
 1 3/4 c. flour
1 tsp. baking soda
1/2 tsp. salt
1/2 tsp. cinnamon
1/2 c. chopped walnuts, optional

 Preheat oven to 325 degrees F. Spray one 9x5 inch loaf pan with non-stick spray coating. Set aside. In a medium bowl add eggs, half and half, apple sauce, and bananas. Mix until combined. Sift together sugar, flour, baking soda, cinnamon, and salt. Add to banana mixture a third at a time, stirring to combine. With last addition add in walnuts. Stir to combine, completely. Pour into prepared pan and bake 1 hour and 20 minutes, or until toothpick inserted in the center comes out clean.


Monday, December 9, 2013

Sweet Little Bite

Sometimes the most simple conversations, that begin one way, can totally go in another direction, and lead to something wonderful (and in this case, delicious)!

A couple weeks ago I posed a question to all of my Facebook fans asking what one dish they were looking forward to most on Turkey Day. Many wonderful folks shared their family favorites, their tried and trues, their most loved traditions with me. One fan, answered with "cream cheese stuffed dates." That was it. And as I sat there reading the responses, that was one of them that really caught me eye.

I couldn't remember if I had ever had a date--that wasn't chopped up in something. I know my Grammy makes a Christmas cookie with them inside, and I'm sure I've had other sweet confections during the holidays that included them too. But to have a "whole" one so to speak, I didn't think I ever had.

So I asked the fan more about them, and she was so generous to tell me they were something her mom had always made, and were simply cream cheese and dates, and then maybe rolled in a little sugar.

Using that for inspiration, and brainstorming about some other flavors I think go so well together, especially this time of year, I came up with these little gems! They are truly the perfect sweet little bite. Finger friendly, and great for any holiday party! Plus, they can be made ahead of time, and more can be made as the party goes on, without you having to be in the kitchen too long. Simply make the filling mixture, store in the fridge, and fill as needed!

I'm so grateful for all of my fans and readers who not only enjoy making my recipes in their homes, but are so nice to share their family favorites with me! Food truly does bring people together!

Orange and Walnut Stuffed Dates
6 oz. cream cheese
6 TBS orange marmalade
1/2 c. walnuts, finely chopped (I did mine in an electric chopper)
10 oz. container pitted dates  (I found mine in the produce section)
Powdered Sugar

In a medium bowl combine cream cheese, marmalade and walnuts. Beat with an electric mixer until mixed well and somewhat smooth. Transfer to a small plastic bag. Cut tip off bag. Slice each date down center with a very sharp knife, but not the whole way through. Lay open like a book. Squeeze cream cheese mixture into each, and then fold sides back up. Chill until ready to serve. Sprinkle with powdered sugar.


Shared on The Country Cook Dec. 13, 2013


Friday, September 20, 2013

Coming Soon...Autumn

If you haven't been paying attention to the calendar, the first day of fall (according to the calendar) is this Sunday. Now I realize that for many, the minute the clock struck midnight on September 1st, you were in full on autumn mode; while some, including us, still had some 95+ degree weather ahead of them, so summer was lingering in our minds. No matter what the thermometer says though, it is time to at least enjoy the flavors fall has to offer!

So I thought the perfect way to kick off the season here on EMM would be with something featuring one of autumn's greatest treats, apple!

This is the perfect dessert for a busy schedule like mine, hence the word "lazy". Taking a little help from the store with the cake mix, this comes together in no time. Plus, the use of pie filling makes it something you can make rather the fresh apples look good or not.

Rather it is for a weeknight supper, or a nice bonfire party, complete with warm cider and a hayride, this simple dessert will be loved by all, and ring in the new season with a taste bud celebration!

Lazy Apple Crisp
1 (21 oz.) can apple pie filling
2 TBS brown sugar
1 (16.5 oz) yellow cake mix, DRY do NOT add other ingredients
1/4 tsp. cinnamon
1/2 c. chopped walnuts
6 TBS butter, diced

Preheat oven to 375. In the bottom of a 8x11 pan, spread pie filling. Sprinkle with brown sugar. Evenly sprinkle cake mix until completely covering pie filling. Sprinkle with cinnamon and walnuts. Dot with diced butter. Bake for 45 minutes or until browned and bubbly. *NOTE* I did NOT use the entire package of cake mix. I probably had about 1/4 c. leftover.


Shared on The Country Cook Sept. 20, 2013
Apple at Very Good Recipes

Thursday, December 27, 2012

A Quick Breakfast With Better Oats

Do you struggle to get breakfast into your little ones' tummies every morning? Are you constantly looking for new and simple things to fuel the rest of their day? Well, our friends at Better Oats are making it even easier!


Better Oats oatmeal comes in 23 delicious varieties  including Raw Pure & Simple, Pomegranate  Blueberry Muffin and Apple & Cinnamon. Kids love it because it's fun and yummy; parents love it because it is nutritious and convenient. Better Oats uses 35% less packaging than other instant oatmeal brands, so more room on your pantry shelf, and the pouch doubles as a measuring cup!

Made with 100% whole grain oats and flax seeds, this complete line offers a simple and healthy option when it comes to instant oatmeal. But it's not only a great breakfast (or lunch... or snack...) but also a better ingredient to spice up a cookie or other baked goods.

 Their thick and hearty oatmeal is also a good source of fiber and omega-3, so it's better than good, it's good for you. Start your day off right with the indulgent taste of real muffin flavor in every bite...mmm.


Better Oats


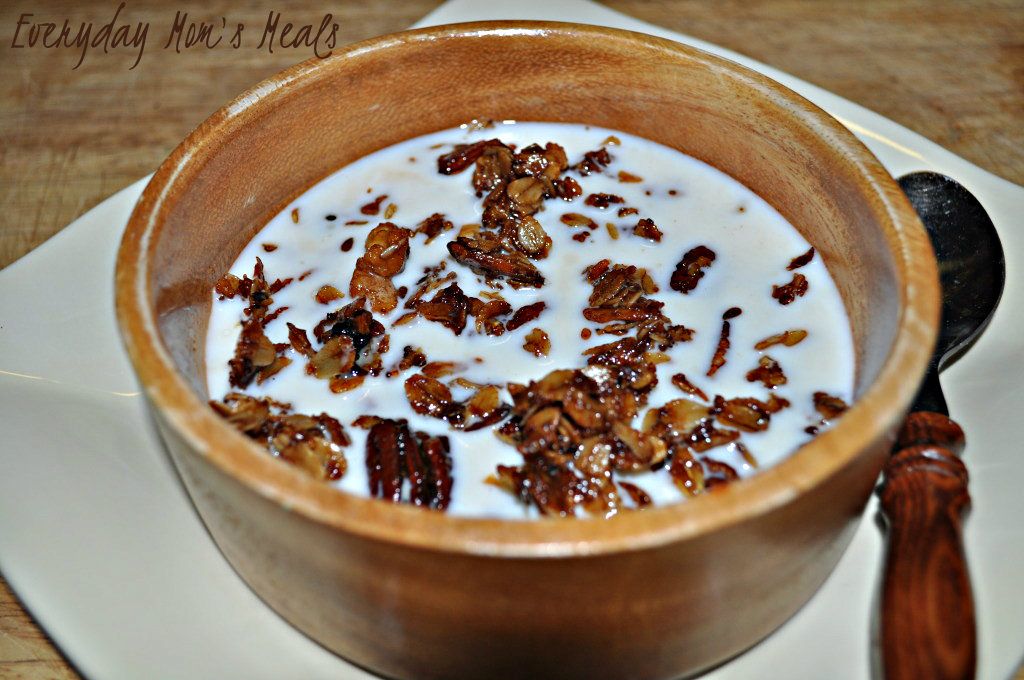
So when I was given the opportunity to use Better Oats oatmeal in a new recipe, I immediately thought of granola! It's one of my favorites, and my son's too. Put it in individual bags for simple after school snacks, or even quick on-the-go- breakfasts. Perfect for taking with you to the gym in the morning, or in the car for the kids. Eat it as is, or my choice, with a little milk poured over the top. However you serve it, this granola is so easy to make, and absolutely delicious to eat!

Blueberry Nut Granola
5 packets Better Oats Blueberry Muffin Instant Oatmeal
3 packets Better Oats Bare Instant Oatmeal
1/2 c. honey
3/4 c. vegetable oil
1/2 c. walnuts pieces
1/2 c. sliced almonds
1/2 c. pecan halves

Preheat oven to 350. In a small bowl whisk together oil and honey. In a large bowl combine oatmeal and all nuts. Pour oil mixture over. Stir well until coated. Spread onto a baking sheet. Bake for 45 minutes, stirring every 10 minutes. Remove from oven and allow to cool on pan. When cool, break up. Store in an airtight container.


Shared on Miz Helen's Country Cottage Dec. 27, 2012

Pin It

Disclaimer~ This sponsorship is brought to you by Foodie Blogroll who we have partnered with for this promotion.

Saturday, October 27, 2012

Weekend Company {Guest Blogger Amber}

Good Morning and welcome to the last weekend of October. Yes, you read that correctly. Hard to believe, right??!! But to celebrate, my guest is sharing an awesome autumn recipe that I could absolutely see on your Thanksgiving table. So beautiful and festive.

Today's guest blogger has such an interesting story to tell. I have known Amber since high school, but we've really reconnected over the last year through Facebook...and FOOD! She too is a mama and a blogger; and I have so much respect for how she has totally revamped her family's eating habits. But I will let her tell you more about that. Please welcome Amber to EMM~


Hi, I’m Amber from Whole Foods for Whole Families, and I’m excited to be doing my first-ever guest blogging post here for Krista. Like most of you on here, I LOVE food. But our family eats a little differently. My husband and I follow a Paleo lifestyle – grain-free, dairy-free and legume-free. Since I started eating this way about 6 months ago, I have cured my Chronic Fatigue and GERD, lost 8 lbs (I’m a size 2), and have enjoyed more energy, clearer thought processes (no more brain fog!) among other things. My husband has also had noticeable changes to his health; he’s lost 25 lbs (and counting), his cholesterol levels have come into a healthy range, his skin has cleared up all over his body (his back used to be red and bumpy, now it’s super soft and smooth) and he has much more energy, just to name a few.

But the biggest change has been with my youngest daughter, Little A, now 4-and-a-half-years-old. When she just turned three, she became very sick after having a routine surgery to remove her adenoids and insert a new set of ear tubes. She was diagnosed with Chronic Benign Neutropenia of Childhood which is a fancy way of saying that her neutrophils, the white blood cells that fight bacteria, are chronically low. After taking her to one of the best pediatric hospitals in the country, we were left with no treatment options, just a wait-and-see approach. This wasn’t good enough for us. I didn’t want to sit around, waiting to see if my child was going to fall seriously ill again, so my husband and I researched and researched… and then we researched some more. Our research led us to how our diets can affect our health so we completely changed the way we eat. After being gluten- and dairy-free for a year, Little A’s health has completely transformed. She used to be sick nearly all the time with constant fevers, colds, runny noses and ear infections (even after having ear tubes). Winter time meant endless trips to the pediatrician, but the first winter after we became gluten-free, neither Little A nor my oldest, Big C, had to go to the doctor. Not even once. For us, that was a huge deal! In fact, Little A has not had one fever since going gluten-free. She also put on weight, her skin no longer looks pale and pasty, the dark circles under her eyes have diminished and she is full of much more energy while requiring less sleep. The transformation of Little A’s health has inspired me to blog about our journey on my site in the hopes of helping other families find their path to health as well.

But enough about me; let’s get down to some food. I promised Krista I would come up with a recipe that was gluten-free but without any of the “weird” ingredients we gluten-free people tend to use. I didn’t want to post a recipe that required ingredients most people don’t have, like almond flour or coconut flour, staples in a Paleo diet. And I also wanted to come up with a good fall recipe, something you can make as a special treat for Halloween or even the upcoming holidays. This recipe for Baked Apples is easy, but the results look impressive. And it tastes unbelievable. I’ve been making this for years, long before we became gluten-free, and I’m happy that one of my old favorites still has a home in my new dietary repertoire. I hope you enjoy, and if any of you have any questions about eating and living a gluten-free lifestyle, please stop by my site or my Facebook page and drop me a message.

Baked Apples
4 apples, cut in half across the equator
¼ cup pure maple syrup
1 tsp cinnamon
1/3 cup chopped walnuts
½ tsp vanilla extract
4TBSP butter, divided

Preheat oven to 350 degrees.
Scoop the seeds and core out of the apple halves, creating an opening inside the apple to hold the syrup. Place in an 8x8 square baking dish.
In a small saucepan, gently heat syrup and cinnamon over low heat. Cook, stirring constantly, until syrup has slightly thickened, about 2-3 minutes. Off the heat, stir in walnuts and vanilla extract. Pour syrup over apples, filling the openings created from the cores. Divide the butter into 4 equal parts and place pats of butter on top of the apples.
Bake for 30-40 minutes until apples are tender. Ladle syrup drippings over the apples. Serve warm.


Pin It

Friday, September 21, 2012

Autumn Picnic 2.0

Last fall when I shared my Picnic Potato Salad I shared that in my family picnics happen during the summer months, but not so much in the fall, but I knew many of you do enjoy a beautiful autumn picnic. So when I found this recipe I knew it would be yet another perfect dish to enjoy on a blanket in the middle of a park on a sunny day surrounded by golden and orange foliage. Or if your are like me and tend to only picnic between Memorial and Labor Day, then this could be your contribution to any tailgate party! That's right, football season is back upon us, and in our house that means we are all very happy. I am the wife my husband's friends are jealous of. I watch every game I can each weekend, both college and pro, and am usually the one yelling at the television! I love me a good pigskin throw down! And one of the best parts of football season is tailgating and parties. Whether you are gathering outside the stadium before cheering on your favorite team, or gathered in a friend's living room enjoying the game on the big screen, food and football just seem to go together. However you decide to enjoy this coleslaw, it will be a huge hit with the addition of two of fall's favorite flavors, apples and cranberries! This might even be something you want to tuck away in the back of your mind for your Turkey Day table! Embrace autumn and all it's splendor...including new and unique foods.

Apple Slaw From Gooseberry Patch
1 c. coleslaw mix
2 green apples, cored and cubed
1 red apple, cored and cubed
1/3 c. chopped walnuts
1/3 c. dried cranberries
1 c. sour cream
3 TBS lemon juice
1-2 TBS cider vinegar
1 TBS poppy seeds
1 TBS sugar
Salt and Pepper to taste

In a large bowl combine coleslaw mix, apples, walnuts and cranberries. Mix well. In a small bowl, combine sour cream, vinegar, lemon juice, poppy seeds, sugar, salt and pepper. Whisk to combine. Pour over coleslaw and apple mix. Stir well to coat. Garnish with extra cranberries. Chill until serving.


Shared on The Country Cook Sept. 21, 2012
Shared on Make Ahead Meals Sept. 24, 2012
Shared on Mandy's Recipe Box Sept. 25, 2012
Shared on Lady Behind The Curtain Oct. 3, 2012
Apples at Very Good Recipes
Pin It

Thursday, September 6, 2012

Just Around The Corner

Yes, that's right folks, even though most of us are still enjoying summer like temperatures, and probably will be for the next couple weeks, autumn is just around the corner. And I can't help it, when I flip the calendar to September, I start to think of autumn recipes and everything apple and pumpkin. It can still be 80 degrees outside, but my mind is going down the fall path. For those closest to me, this shouldn't come as a surprise. After all, our house is the one that is decorated for Halloween by the 2nd week of September because Monkey loves to have it done for his birthday on the 16th; and most years I am putting everything up in the sun and heat. But that is okay with me. The warmer the better, and I don't need cooler temps to get my taste buds ready. I can eat pumpkin pie in a bikini if I have to. Okay, maybe not a bikini...but shorts at least. This is another one of those dishes like my Strawberry Cream Salad and Pistachio Salad that can be used for either side dishes or desserts. For this one, I tend to think of it more as a dessert. Why? I have no idea because it's a close cousin to the Pistachio and I use that as a side dish. I guess it just depends on the mood I'm in. But the great thing about this one is the use of apples. Apples seem to be the thing that we all have so many of during the fall months and can always appreciate a new use for. I'll be honest though, the thing that first caught my attention with this was the butterscotch, because it has always been my favorite flavor of pudding, and I can't get enough. If you are looking forward to fall, or like me are just craving the foods it brings, this yummy dessert will definitely satisfy it!

Butterscotch Apple Delight From Recipezaar.com
1 (8oz) tub Cool Whip, thawed
1 (20oz) crushed pineapple, with juice
1 (3oz) box instant butterscotch pudding
1/2 c. chopped walnuts, reserve a few for garnish
3 large Gala apples, chopped

In a large bowl combine Cool Whip with DRY pudding mix. Stir in crushed pineapple. Fold in apples and walnuts. Chill for several hours to set. Garnish with reserved walnuts.


Shared on Miz Helen's Country Cottage Sept. 6, 2012
Shared on Gooseberry Patch Sept. 6, 2012
Shared on The Country Cook Sept. 7, 2012

Apples at Very Good Recipes
Pin It