Everyday Mom's Meals: Honey
_____
Showing posts with label Honey. Show all posts

Sunday, November 8, 2020

Turkey Day Side Dish

Can you believe Thanksgiving is only a little over 2 weeks away? I swear, as soon as Halloween is over, it's a downward coast to the holiday season and they come, and pass quicker and quicker every year. 

There is no doubt Turkey Day will look different for so many this year, but no matter if you're only cooking for your immediate family, having a few guests over, or going for a traditional family gathering, menus need to be planned. And even if you are only cooking or a few, it is still a holiday, and your meal can still be special, delicious and festive. 

In that spirit, I've got a couple new side dishes coming your way before Thanksgiving, and this is the first. A sweet and savory version of autumns favorite spud, the sweet potato. This is perfect to make for a small gathering, or easily double or triple it! 

Sweet potatoes have been on holiday tables for years, and finding new ways to enjoy them can give your meal a little breath of freshness. Tradition means so much when planning a holiday meal, so it's great when you find ways to enjoy the same dishes you have for years, just in a new way.

 The reason I chose this dish (and a outstanding squash recipe later this month) is because not only would they be perfect alongside that big roasted bird, but a nice glazed ham as well. I wanted to give you double the dishes this time of year. If you are planning turkey now, ham for Christmas, or ham instead of turkey, or both...now you've got some dishes that would be so good with either. 

However you are planning on spending Thanksgiving this year, it is coming fast, and I hope you are looking forward to it. Even if you have find joy in a new way of celebrating. Surround yourself with love, happiness, gratefulness and some yummy food!

 Cinnamon & Honey Roasted Sweet Potatoes

4 medium sweet potatoes, peeled and cubed

1/4 c. olive oil

1/4 c. honey

2 tsp. cinnamon

Salt and Pepper

Preheat oven to 375. Toss all ingredients in a large bowl until well combined. Transfer to a large baking sheet. Roast for 30 minutes until fork tender.


 Shared at Weekend Potluck

Sunday, April 29, 2018

A Spring Saturday at Home

Are Saturdays a day of relaxing in your house? Lucky you! At our house, they don't turn out that way very often. Saturdays are sometimes grocery day. Others we have plans with family. And most of the time, we have church in the evening, followed my dinner out. 

I'm not complaining. I love getting out and about on the weekends since I'm home a lot during the week. I feel blessed we have the option of a Saturday casual church service so Sunday mornings aren't rushed and hectic. But sometimes, once in a blue moon, we find ourselves with a Saturday with no plans, and that is a nice change of pace. 

This past weekend was one of those. We had taken a mini road trip on Friday, headed to Indianapolis and The Children's Museum (a post sharing our adventure will be coming soon) and didn't get home until after 9pm Friday night. (That's late for us!) We had a super fun day, soaking up family time. In preparation for this, I had gotten groceries on Thursday, and purposely made sure our Saturday was open on the calendar. I knew we would be tired from our big day, and I would need a day to catch up on all the chores I had left behind. 

So, Saturday rolled around, and yes, we were all a little tired, and very thankful we didn't have to be anywhere. I caught up on laundry, worked on a couple other projects around the house, and we grilled out. Hog dogs, potato salad, sliced veggies and I wanted one more thing. Fruit. More specifically, fruit salad. 

A friend had just told me about this amazing fruit salad she had made with a really easy dressing, that included lime...one of my boys' favorite flavors. I had plenty of fruit on hand (thanks to Aldi's great prices) and I decided to throw it together for our simple supper.

So fresh. So tasty. So easy! You can easily switch out whatever fruits you have on hand, or whatever is in season. I can't wait to make it again once we go strawberry picking, and maybe add in some blackberries or raspberries, another of my boys' favorites. 

We are all so busy days at home have become a welcomed treat. I hope we get more of them this summer, so I can make this over and over!

Honey Lime Fruit Salad
1 lb. strawberries, sliced
1 pint blueberries
1 cup green grapes, halved
1 (11 oz.) can mandarin oranges, drained
1 banana, sliced
3 TBS honey
1 lime, juiced and zested

In a large bowl, combine all fruit. In a separate small bowl whisk together honey, lime juice and zest. Pour over fruit. Chill for 2 hours before serving. Stir before serving. *NOTE* To measure honey easily, spray measuring spoon with cooking spray or dip in warm water. Honey will slide right off!


Shared at Weekend Potluck

Wednesday, October 7, 2015

Celebrate #Oatober with Peanut Butter & Co.

Just in time for Halloween, and all the sweetness that goes with it, I've teamed up with my good friends at Peanut Butter & Co. and Bob's Red Mill to transform October into "Oatober"!

I've got something that the little ones can not only enjoy for an after school snack, lunchbox treat, or Halloween party dish, but can also help make! They will love getting their hands sticky and messy, and then maybe even licking them when done!

So many schools don't allow homemade treats at classroom parties, but if yours is okay with it, these would be perfect! So yummy and a perfect little sweet bite.

We love peanut butter. Like eat from the jar with a spoon love, so the double peanut butter punch in these, with the Reese's candies, makes them extra special.

If you're looking for something fun to make with your kids, or maybe something to feed all those little goblins and witches that come to your big Halloween bash, I've got you covered!

No Bake Halloween Balls
2 1/2 c. old fashion oats ( I used Bob's Red Mill)
1 c. creamy peanut butter (I used PB & Co. Smooth Operator)
1/2 c. honey
1 tsp. vanilla
1/2 c. mini chocolate chips
1/2 c. Reese's pieces

Combine all ingredients in a large bowl. Mix well. Roll into balls. Chill for 30 minutes to set. Store in fridge in airtight container. *NOTE* When rolling, some of the candies will want to fall out. Just keeping pressing. 


Shared at Weekend Potluck

Disclaimer: As part of Yum Squad I received product in exchange for this post. All thoughts, opinions and the recipe are all mine.

Wednesday, December 10, 2014

Chicken Rut

Do you find yourself falling into a rut with your food? More specifically do you suffer from a rut with one particular ingredient? I think for many of us, both of these are true. In fact, there is a rule in our house that was made almost 12 years ago, when we were still newlyweds, based on one such rut.

See,  I love chicken. I could eat it all the time, in a hundred different ways; and  unfortunately right after we were married when I was still finding my comfort level in the kitchen, I tested this theory. I made chicken all the time, and Mr. E got so incredibly tired of it, he flat out asked me to keep it to only once per week; and that rule still stands today. Sometimes it's not easy to abide by, but I really, really try.

To compensate, I try to come up with as many new ways to prepare my favorite poultry as I can. I guess I figure if it's served in a new way, maybe he won't notice it as much??!! Believe me, it doesn't work...but it makes me feel better, so I keep doing it.

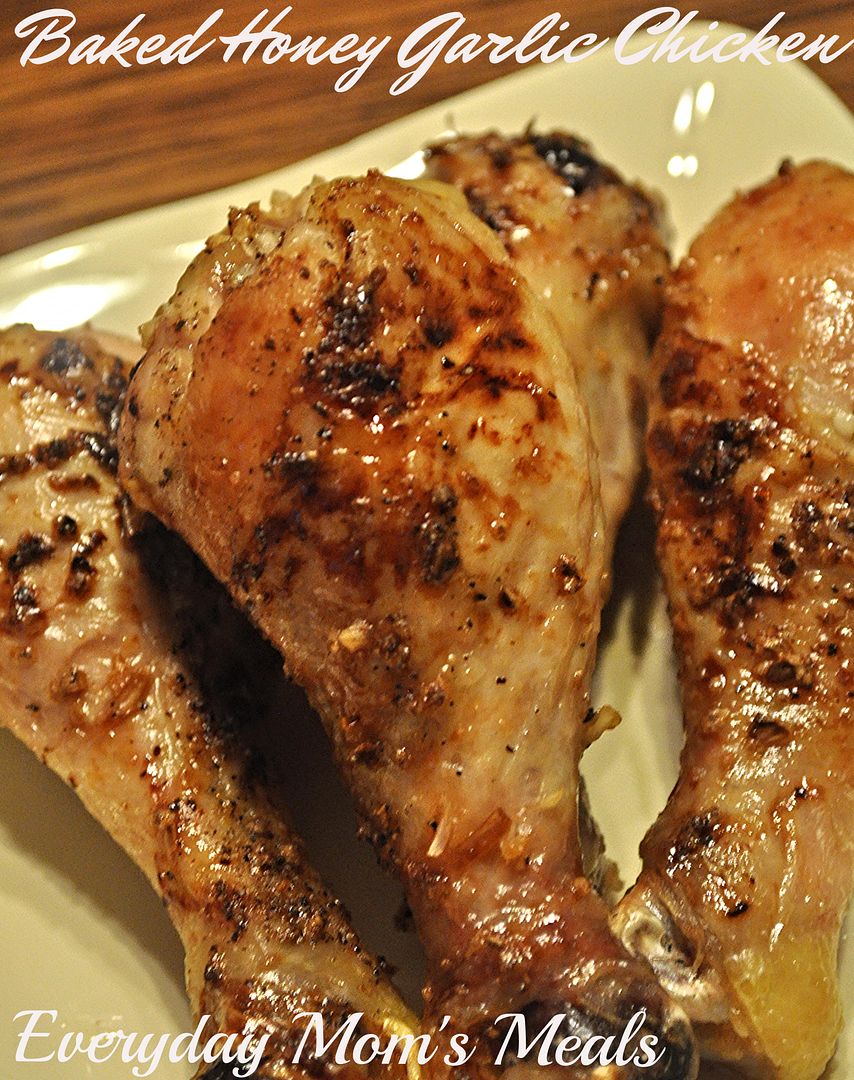
This chicken dish is actually perfect for a busy weeknight when you want something delicious, but it needs to be quick and easy. It comes out with amazing flavor with only a few ingredients! Plus, I'm guessing you could use this same method for wings and get an amazing new party food for all those holiday gatherings right around the corner.

Try not to fall into ruts. Keep your meals new and exciting! But if you do fall down the dark hole of a rut, don't feel bad, I'm sure you'll find myself and many others down there with you!

Baked Honey Garlic Chicken
12 chicken drumsticks
1/2 c. honey
2 TBS minced garlic
1 TBS hot sauce
Salt and Pepper to taste

Preheat oven to 400. Line baking sheet with wire racks. Spray with nonstick spray. Place drumsticks on wire racks. Season with salt and pepper. Bake 30 minutes. Meanwhile in a microwavable bowl combine honey, garlic and hot sauce. Microwave 30 seconds and mix well. Remove chicken from oven. Baste liberally with honey sauce. Bake 25 additional minutes or until juices run clear.

Monday, October 6, 2014

Eat It or Save It

I love potato salad. I can't get enough of the stuff. I have a hundred different recipes for it, each one delicious and mouth watering. But I make all of them mostly in the summer months. You know, picnic weather. Grilling and cookout season. But when the leaves begin to fall, and the days are cooler, my craving doesn't stop there.

 Normally I just say forget the season and I make one we enjoy during summer, and it tastes just as delicious. But this time around, I remembered a recipe a friend had given me, and I decided to put a little autumn into our tater salad. 

This makes a terrific side dish to any fall inspired meal. I served it with some ham and cheese sammies. (That recipe is coming later this week!) And it travels very well too, because it can be served warm, chilled or at room temperature. Since we ate at different times the night I made this, that theory was actually tested, and it was just as delicious two hours after it had been in the fridge and then sitting out. Mr. E. said so! 

But here's how my mind works. I'm sitting there eating this delicious combination of flavors, looked at the beautiful autumn colors, and thinking " This would make a great dish at Thanksgiving time as well." Maybe a new twist on your traditional Turkey Day sweet potato dish. It would taste terrific with turkey. Or a day after fix for those leftovers you might have. A couple extra sweet potatoes, the pecans from pies, the cranberries from dressing...they could all come together in something new to go with turkey sandwiches! 

Rather you eat this, or save it, this recipe is going to become a new favorite potato salad in your house too. A great addition to those foods you look forward to eating every fall! 

Autumn Sweet Potato Salad 
2 large sweet potatoes, peeled and cut into 1 inch pieces
1 tsp. olive oil
1/2 tsp. dried rosemary
3 TBS finely diced white onion
1/2 c. chopped pecans
1/4 c. dried cranberries
2 tsp. dried parsley
Salt and Pepper to taste

Dressing:
2 TBS olive oil
2 TBS lemon juice
2 TBS honey
Salt and Pepper to taste

Preheat oven to 350. In a baking dish combine sweet potatoes, rosemary, olive oil, salt and pepper. Stir to coat. Roast in oven for 30-35 minutes until just fork tender. Do NOT over cook. Remove and allow to cool slightly. In a small bowl, combine all ingredients for dressing. Whisk well. In a large bowl combine potatoes, pecans, onion, and cranberries. Stir well. Pour dressing over and toss gently. Sprinkle with parsley. Serve slightly warm, chilled or room temperature...it's delicious any way!


Shared on The Country Cook Oct. 10, 2014


Wednesday, September 24, 2014

Autumn Chicken {A Post For Earth Fare}

I wish I had some wonderful autumn themed story to tell you that was my inspiration for this recipe. A day spent picking apples that led to me coming home to a fire in the fire place and sitting around with the family eating this delicious dish. Well...not so much. Apple picking? That's still on our to do list. Sitting around the fire place? Yeah, we don't have one of those. What I do have is a simple explanation that is going to give you a new chicken recipe you're going to love.

It was time for me to go shopping at my local Earth Fare for my monthly post. It just so happened they had beautiful chicken thighs on sale for $.99/pound! It was a deal I couldn't pass up. The second part of the story is while we grill year round, when the days start to get a little chilly, and then down right cold, Mr. E. is in charge of manning the grill. Sure, he normally is anyway, but I have actually gotten pretty proficient  at it myself over the last few years, but only when it's warm outside.

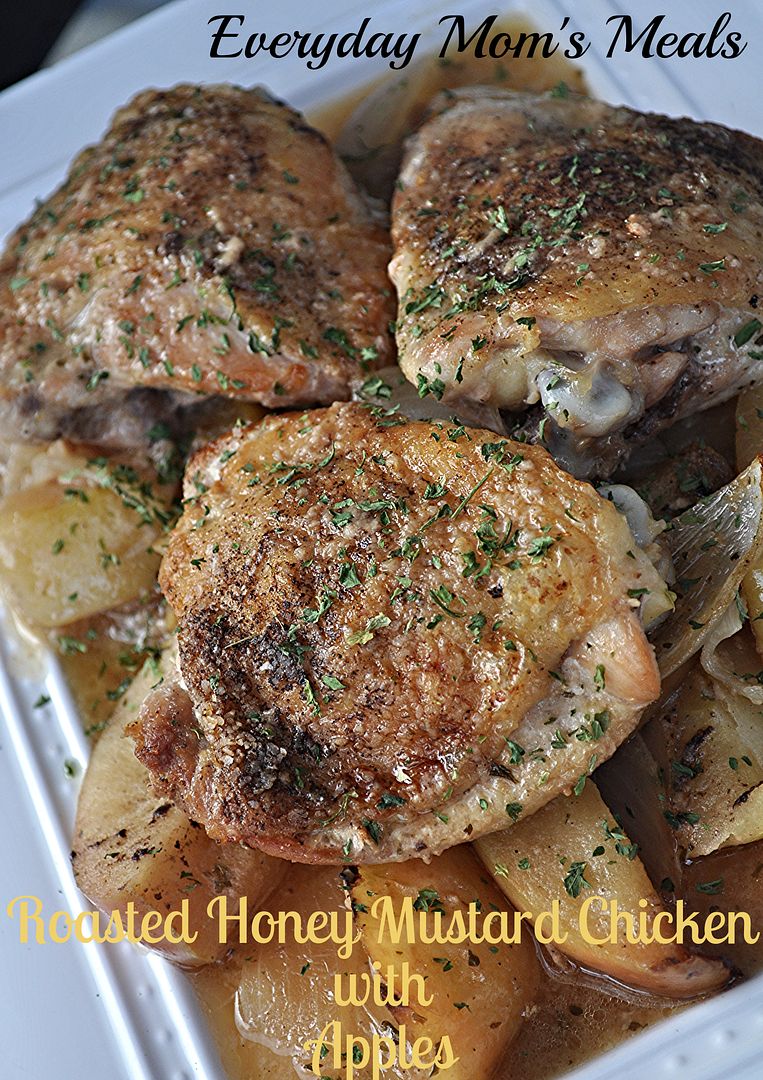
So there I was. I had these gorgeous chicken thighs that needed to be cooked in the oven. Okay, that's easy enough. I love roasted chicken. And why not add in some autumn flavor with apples. Do you cook savory dishes with apples? They are fantastic in dishes other than dessert. And if you've never tasted the way they compliment onions, you must! When they cook together (think a stuffing that has apple in it) it's a match made in fall heaven.

This would make a terrific Sunday supper but is also easy enough for any weeknight. It's a beauty to entertain with, and can be adapted to feed more without much hassle

Not every recipe has to have some magical story behind it. Sometimes the yummiest of dishes come by the most simple of means. A good deal + A chilly day = Your lucky day!

Roasted Honey Mustard Chicken 
with 
Apples
6 bone in chicken thighs, patted dry
2 large Cortland apples, cut into large chunks
1 large white onion cut into large chunks
1 c. chicken broth
2 TBS honey mustard
1 1/2 TBS olive oil
Salt and Pepper to taste
Dried Parsley

Preheat oven to 450. Grease a 9x13 baking dish. Heat oil in large skillet over medium high heat. Season chicken with salt and pepper. When oil is hot, place chicken in, skin side down, and cook for about 6 minutes until golden brown. Flip. Cook 3 additional minutes. Remove to a platter lined with paper towels. Drain off all but 2 TBS drippings. Add apples and onions to skillet. Season with salt and pepper. Sprinkle with parsley.Saute' until softened about 4 minutes. Mix honey mustard with broth. Pour into skillet. Increase heat to high and bring to a boil. Carefully transfer to baking dish. Lay chicken on top. Roast in oven for 20-25 minutes until chicken cooked through. To serve, remove chicken and then using a slotted spoon, lay apples and onions on platter. Lay chicken on top. Spoon pan juices over top. Sprinkle with extra parsley. *NOTE* This honey mustard is NOT the salad dressing. It can be found in the condiment aisle next to the other varieties of mustard.  


Shared on The Country Cook Sept. 26, 2014


Disclaimer: I was provided with a gift card in exchange for this post. All thoughts and opinions are my own. 

Wednesday, July 16, 2014

No Propane, No Problem

Apparently, it's chicken week here on EMM. I didn't plan it that way, but if you saw Monday's recipe for Apple Pecan Chicken Salad, you understand why I say that. I don't know if I have another one for Friday, but be sure to come back to see! 

Today's chicken star came to be for a simple reason. I went outside to grill chicken only to discover we were out of propane. (Thanks, honey, I really appreciate that.) Yep, I was the wife calling her husband at 5:30 pm asking "Um, did you know we were out of propane?" Like he could do anything about it from work. Look, I'm a pretty capable broad. Even things I didn't once do, I can now because over the years I've learned it's easier to do them myself. Hence why I was even attempting to grill in the first place. There was a time that would have never happened. 

But no matter how progressive I am as a woman, there are a few things I don't do...will never do...and have no desire to do. Mowing lawn? Yeah, that's never gonna happen. (You can blame my dad. He had me mow once. The lines were crooked. He was picky. He never asked again.) Changing a tire. Nope, never have, never will. (Again, you can blame my dad for this one too. See, he never taught me. He was always around. I would call him. Then after him, I'd call Adam. And if both of those don't work, road side assistance is terrific.) Swapping out a propane tank. Nope. Not gonna do that either. (This one you can't blame on my dad. I won't do it because I can't lift the tank....no throwing him under the bus this time.)

So anyway, there I was standing in front of the cold as ice grill saying "Great, now what am I going to do with this bird?" Thankfully, while I might not be schooled in the world of tire irons, I do think quickly on my feet, and within a few moments was creating this yummy recipe. 

If you love finger lickin', packed with flavor chicken, you're going to love this! I'm sure the same sauce would be delicious on the grill too, and now that my loving husband has refilled that tank, I could try it. But if you find yourself in the same predicament as me, or maybe it's raining out, fire up the oven and get your sticky on!

Baked Sticky Chicken
2 1/2 lbs. chicken drumsticks 
2 TBS canola oil
1/2 c. soy sauce
2 TBS ketchup
3/4 c. honey
3 garlic cloves, minced
Salt and pepper to taste

Preheat oven to 350. Place chicken in 9 x 13 baking pan, coated with nonstick spray. In a small bowl combine oil, soy sauce, ketchup, honey, garlic, salt and pepper. Pour over chicken and baste with brush. Bake for 1 hour until sauce caramelizes. Every 20 minutes spoon soy mixture over chicken. 


Shared on The Country Cook July 18, 2014

Wednesday, May 14, 2014

Springtime Snack with Peanut Butter & Co. {A Giveaway}

I don't know how it is in your house, but when the temps start to rise, and we are spending more and more time outdoors, our appetites begin to rise with them. I guess we're so busy and doing so many fun activities outside, instead of sitting inside avoiding the cold of winter, we burn more calories and need to refuel more often. 

And then when summer vacation arrives (In this house, that's in 17 days...not that I'm counting or anything!) it takes me a few days to remember I'm responsible for feeding this little person lunch every.single.day. until school starts again! Not to mention snacks while he is enjoying time outside, or while we are on the go doing all the things we love to during summer. 

Needless to say, easy, effortless, yummy snacks are a must in this house! They have to be something you can eat with your hands, no matter what you're doing, and they need to give us the energy we need to suck every last drop of fun out of summer we can! 

That's exactly what I had in mind when I created these using my buddy's Peanut Butter & Co's The Bees Knees Peanut Butter! My son loves the flavor of peanut butter and honey. In fact, during the school year, it's one of his favorite sandwiches for me to pack in his lunch. So when I remembered a friend telling me about these no bake peanut butter balls she makes for snacks after her trip to the gym, I knew this peanut butter would be perfect in them! 

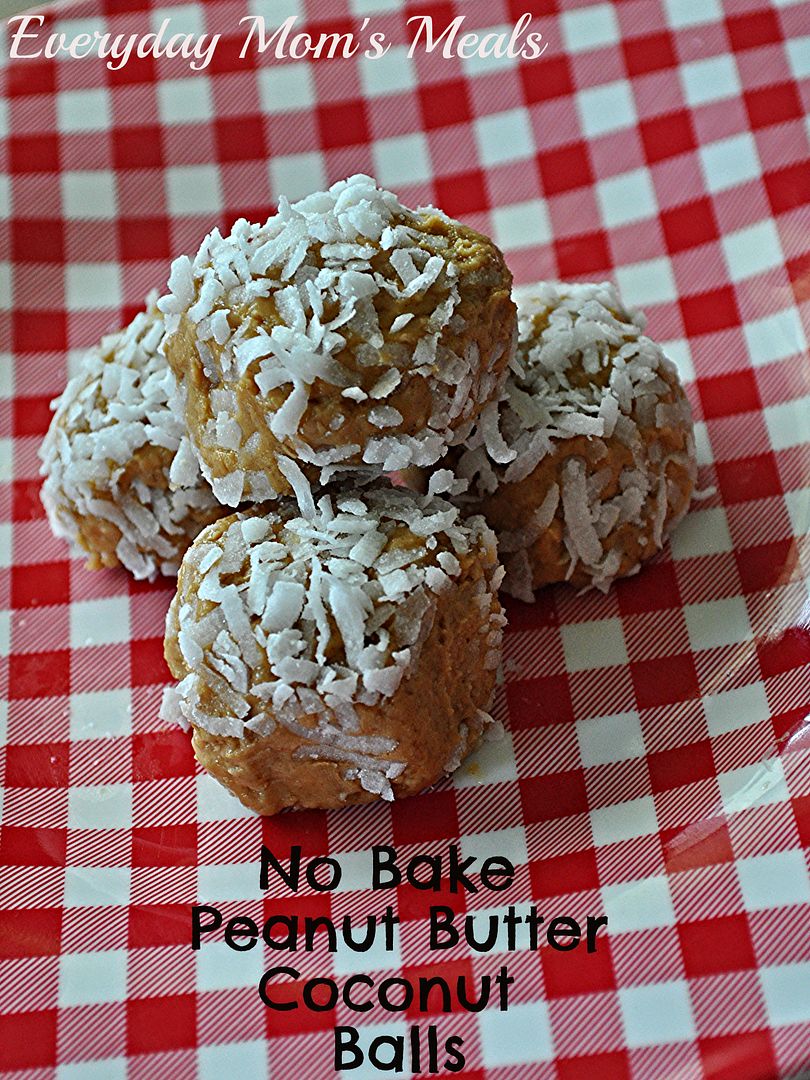
If you love peanut butter, you're going to flip for these. If you love no bake sweets, you're going to flip for these. If you love coconut, you're going to flip for these. (Oh, and if you don't, you can easily roll them in something else. Chopped nuts perhaps!) These are so easy, even the kids can get in the kitchen and help make them. Yet another thing we love to do during summer vacation...usually on rainy days! 

The summer months are just around the corner, and your family is going to need extra energy to stay ahead of the sun. So be sure to make a big batch of these for them to nibble on while around the pool, enjoying a ball game, having a picnic, whatever summer means to you. Oh, and Peanut Butter & Co. wants to send (1) lucky winner 2 jars of The Bee's Knees to try in your kitchen! Just scroll down for the giveaway!! 

No Bake Peanut Butter Coconut Balls 
1/2 c. old fashioned oats
1 c. Peanut Butter & Co. Bee's Knees Honey
1 tsp. vanilla
2 pinches salt
1/3 c. sweetened flaked coconut

Place oats in a food processor and pulse until very fine. (Think flour consistency) In a large bowl add ground oats, peanut butter, vanilla and salt. Stir well. Using a cookie scoop, form balls, about 1 inch in diameter. Roll in coconut. Place in fridge for 1 hour to set. Refrigerate leftovers.


Shared on The Country Cook May 16, 2014


a Rafflecopter giveaway
Disclaimer: As a member of Peanut Butter & Co.’s Yum Squad food blogger club, I received product in exchange for this post. All opinions expressed are my own.

Friday, April 4, 2014

Even Better Biscuits

Do you eat with three utensils or four? I know many of you are thinking...pondering...counting on your fingers. Don't worry. I haven't created a new piece of cutlery. What I'm referring to is bread. See, in our family, you have the knife, fork, spoon, and with 99% of meals, some sort of bread product. Biscuits, rolls, sliced bread, muffins, etc...they show up so often we just consider them another utensil to get the food in our mouths.

Even when we go out to eat, some of our favorite go-to places are those we know we will be served complimentary rolls or bread before the meal. What can I say? We are carb lovin' people. And one of those which we enjoy the most are the rolls and butter at a certain steak house. I probably don't even have to say the name. Ya'll know exactly which one I'm talking about. The warm, butter topped rolls with this amazing flavored butter that only makes them "more melt in your mouth" fantastic.

This is so simple, the food processor does all the work for you! Plus, it holds up in the fridge really well. I think it would make a great addition to your Easter table as well. Sure, your guests will be excited with fresh baked rolls, but imagine how giddy they will be when they find this to top them with!

If your family has to have some variety of bread with almost every meal, almost more than they need that spoon, give them a little something extra special to go with it!

Cinnamon Honey Butter
1 stick butter, room temp
1/4 c. honey
1/2 tsp. cinnamon

Combine all ingredients in food processor. Pulse until creamy and combined. Use on biscuits, rolls, bread, toast, etc. Refrigerate leftovers.


Shared on The Country Cook April 4, 2014
 

Saturday, February 8, 2014

Soul Food Saturday #42


So many of us start off the New Year with resolutions to eat healthier. So we gather recipes to fit those needs. This recipe is perfect for any occasion, because no one would ever know it's supposed to be a healthier version. And isn't that exactly what we want? To have a dessert you don't feel guilty about eating? Or better yet ones you feel good about giving your children! Grab a spoon and a friend we're having a healthy dessert.


Paleo Apple Crisp
5 medium apples, cored, seeded chopped
1 1/2 cups of almond meal
1 tbs of cinnamon
3 tbs honey, melted
4 tbs coconut oil, melted
Pinch of salt
Juice of 1 lemon
2 tbs coconut sugar


Preheat oven to 300 degrees
In a medium bowl add chopped apples and lemon juice. Toss lightly to combine. In a 8x8 baking dish add apples in a single layer. In a separate bowl mix together the almond meal, cinnamon, melted honey, melted coconut oil and salt. Spread the crumble topping over the apples, then evenly sprinkle the coconut sugar on top. Bake for 50 minutes. Whether you top it with whipped cream and a sprinkle of cinnamon or have it plain it's sure to please ones on a Paleo friendly diet or not. Enjoy! *NOTE* Almond meal can be found in the specialty baking aisle at your grocery store. Or sometimes in the gluten free section too.


Wednesday, September 25, 2013

Don't Put It Away Quite Yet

Yep, autumn is here. We already established that on Monday. And for many of you I know that means the end of grilling season, but in this house it never ends. That's right. We are those crazy people are stand outside in our snow boots to grill a good steak in the dead of winter. In fact, we have been known to grill in a blizzard. An actual blizzard!! While the snow fell at an alarming rate, our neighbors were outside trying to keep up with shoveling, they were all jealous of the smells coming from our backyard, as the T-bones cooked to perfection!

So if you're like us, and the falling of the leaves has no reflection on the use of your grill, today's recipe will totally excite you. But don't worry, if your grill is all tucked away until next spring, there is also an oven option noted in the recipe! 

We love chicken wings. Buffalo. Barbecue. They are all scrumptious to us. And when I was a teenager, there was a local Chinese restaurant that had these amazing lunch specials that included a bunch of appetizers with each entree, one being a glazed chicken drummette (the small piece of the wing) that would have you licking your fingers when you were done. These are the closest thing to that I've had in years. In fact, Adam described them as "Asian barbecue". Sweet like barbecue, but with some of the best Asian flavors around, soy and ginger. 

If you are grilling this weekend, these are a definite must. Maybe for the big game? I would love to see these at a big tailgating party! Or if you want to stay inside, see the note above the oven. Either way, they are yummy, and easy, two things that are always welcome, winter, spring, summer or fall!

Asian Glazed Wings
2 lbs. chicken wings, separated into 2 pieces each
2 TBS all purpose seasoning, your favorite brand
2 TBS honey
2 TBS soy sauce
1 cup vegetable juice
1 tsp. ground ginger
Garlic Salt to taste
Salt and Pepper to taste
Cooking Spray

In a large bowl combine vegetable juice, honey, soy sauce and ginger. Set aside. Sprinkle wings with seasoning, garlic salt, salt and pepper. Allow to marinade for at least 30 minutes. When ready, preheat grill to medium-high. Spray wings with cooking spray. Sear on both sides, about 2 minutes. Reduce heat to medium-low and continue cooking for 15-20 minutes until cooked through. For the last 10 minutes baste with sauce on both sides many times. 
*NOTE* These can also be cooked in the oven. Follow directions, but roast on a baking sheet in 400 degree oven for 20 minutes, and then baste and cook for another 20 minutes, basting often.


Shared on The Country Cook September 27, 2013

Wednesday, July 31, 2013

Football and Soul Food { A Review and Giveaway with KYVAN }

"Cooking is a way of life in the South, and nobody knows that better than NFL Pro Reggie Kelly, owner of KYVAN Soul Food Selections." 

The above line is the first in the "about" section of the KYVAN website. I couldn't introduce today's new products to you any better than that, so I decided to allow them to do it for me. For those of you who don't follow NFL football like we do, Reggie Kelly played 13 years professionally with the Cincinnati Bengals and the Atlanta Falcons; and even though he has traveled the world, he never forgot where he came from.


 "Since I was a little boy, cooking in my household has been an event within itself and my family is a big reason why I love to cook.  Growing up, they would always tell me, "Reggie, when you cook, make sure you do it with love."  "My family believed  that great meals should be prepared  in such a way that once eaten,  it would touch your "SOUL". I gathered that I should cook in such a way that first time visitors would feel welcomed..feel as though they are a part of my family."

Named after his children, Kyla and Kavan, KYVAN is truly a family owned and operated business. And I love that! From barbecues sauces, to salsa to seasoning mixes, they have a little something soul for everyone! So I was honored when Reggie's wife, Sheila contacted me about trying some of their delicious products in my kitchen and then sharing with you!

I decided on the Sweet Barbecue Sauce and the Blackberry Honey, and I can tell you right now I made a very wise, and yummy, choice. I am a barbecue sauce snob. I'm the first one to admit that. I have to love it from the first bite, or I won't enjoy it. And with KYVAN's...I certainly did. It's sweet but not too sweet. It really allows the flavor of the meat (or in this case seafood) still shine through. It compliments without overpowering. 

And the Blackberry Honey...well, let's just say that I could drink that stuff with a straw! It is truly some of the best honey I've ever had. (Oh, and after you use it in this recipe, try it on some cornbread still warm from the oven. We did and Oh My-lanta...it was to die for!) 

I didn't just taste quality, I could taste the love and attention that goes into every single KYVAN product. You can tell they enjoy what they are doing, and want to bring the very best products to their consumers. 

I thought the flavors of the barbecue sauce and honey would actually compliment each other very nicely, so I decided to feature them both in a light summer time salad, perfect for lunch or supper. The crunch, fresh veggies, sweet barbecued shrimp and tangy yet sweet dressing all play off each other so well, it's a real flavor extravaganza for your taste buds! 

We love a big salad meal during these dog days of summer, and if you do too, you are gonna love this one. Plus, you have the chance to win your very own samples of the same things I used in this recipe. Just keep scrolling down for the GIVEAWAY! And be sure to check out KYVAN on all their social media outlets (Listed below) for more info!

Barbecued Shrimp Salad with Blackberry Honey Vinaigrette

14 medium shrimp, tail on
2 garlic cloves, minced
1 TBS lemon juice
3 TBS olive oil
Salt and Pepper to taste
1/4. KYVAN Sweet Barbecue Sauce
1 (5.5 oz) container field green lettuce mix
1/4 c. sliced almonds
1/2 c. red onion, sliced thin
4-6 medium radishes, sliced thin

Dressing:
2 TBS Dijon mustard
2 TBS red wine vinegar
1 TBS olive oil
1 tsp. KYVAN blackberry honey

In a medium bowl combine shrimp, garlic, lemon juice, olive oil, salt and pepper. Mix to combine. Marinade 1-2 hours in fridge. When ready, preheat grill to medium-high. Spray with cooking spray. Skewer shrimp. Sear on both sides for about 1 minute. Reduce heat to low. Baste shrimp with barbecue shrimp until cooked through and pink. About 5-7 minutes.

To make dressing, whisk together all ingredients until well combined. To assemble salads, divide lettuce, onions, radish and almonds evenly on 2 large plates. Top each salad with 7 shrimp each. Serve with dressing on side. Makes 2 dinner size salads.


Shared on The Country Cook Aug. 2, 2013
Shrimp at Very Good Recipes
Pin It


********Giveaway********
Rules:
1. This contest is open to US Residents 18 and older ONLY.

2. The winner will be chosen by Random.org 

3. The winner will be notified by email and Facebook. He/she will have 48 hours to respond or another winner will be chosen. I will then pass on your address to the sponsor for shipping.

4. When leaving comments for entries, they MUST BE SEPARATE ones AND include an email address so it's easy for me to find the winner. If entries are together, it will only count as (1) and if no email, entry will not be considered.

5. If any of the extra entries are items you are already doing, please just remind me!


6. Contest Ends: Friday Aug. 9, 2013  


One Lucky Winner Will Receive:
(1) Sweet Barbecue Sauce
(1) Blackberry Honey


Mandatory Entry:
1.Become a fan of KYVAN on Facebook. Leave a comment when you have.

Extra Entries:

1. Follow KYVAN on Twitter. Leave a comment when you have.

2. Follow KYVAN on Pinterest. Leave a comment when you have. 

3. Follow KYVAN on Instagram. Leave a comment when you have.

4. Take a look around the KYVAN site. Tell me what other product you would love to try.

That makes up to 5 entries per person!!!

Good Luck!

Disclaimer: I was provided with free product for this review, and an extra one for a fan giveaway. All thoughts and opinions are my own.






Wednesday, May 1, 2013

Too Good Not To Repeat

Today's recipe is yet another one of those that I blogged before most of you were even reading EMM. It also happens to be a recipe that I find myself turning to again and again, especially in the warm months of the year. So you can see why I say it's "too good not to repeat." 

Chicken on the grill has always been a favorite of mine, all the way back to my childhood. One of the best memories I have of the summer time is my mom and I  visiting my grandparents in Pennsylvania for 2 weeks in the summer. We would go on mini trips sight seeing to various sights like Gettysburg, Niagara Falls, Hershey...lots of fun places! We spent some of the time camping...or should I say  our version of camping in a nice air conditioned Winnebago! (And to this day I don't camp in a tent. If I camp, it's going to include all the amenities I remember from those trips!) And sometimes we would just stay at home and have bonfires, grill out, and swing by the local ice cream stand! 

Nobody could grill a chicken wing like my grandpa! There was nothing special about them. Grandma literally put salt, pepper and garlic salt on them; but something about the way he cooked them...they were juicy, but crispy on the ends, moist and oh so flavorful. In later years, we've talked about just how yummy they were and why; and we've come to the conclusion it has to have something to do with the fact he wasn't cooking on a charcoal or propane grill. Those wings were cooked over the flames of natural gas, and evidently it worked magic on them!

This is a great recipe for all of you who love to grill too. My dear friend gave it to me a  few years ago, and I'm so happy she did! It's simple, quick, and can be marinating all day while you are at work, and ready to grill when you get home. It has amazing flavor and can easily be adapted to feed a huge crowd for a backyard barbecue. (The season is coming!)

Whenever I get the chance to make chicken on the grill, no matter what kind, it makes me smile and think of Grandpa. I will be honest, not once have I tried to recreate those wings. I know I never could. Simply put, his were the best, and I want to remember how they tasted, and eating them with him on a warm summer night. It's been 12 years since my grandpa passed, and I still smile thinking of those summer vacations, riding up front in that camper while he drove, riding on the John Deer with him while he mowed, his favorite "look" of sandals with socks, begging to go get ice cream again...even though we just had the night before (Pa Pa never could say no to his Punkin!), and eating delicious chicken wings, loving every minute. 

Food is definitely love, and that love remains in memories even when the people we love are no longer with us~

Grilled Honey Soy Chicken
1.5 lbs. chicken of your choice, we like boneless tenders
2/3 c. honey
2/3 c. soy sauce
2 garlic cloves, minced
1/2 c. vegetable oil
1 TBS prepared horseradish
2 tsp. grill seasoning
2 green onions, chopped, optional

In a medium bowl combine all ingredients for marinade. Stir well until combined. Measure out a cup of marinade and refrigerate. Place chicken in remaining marinade and allow to chill for 5-6 hours. When ready to grill, remove chicken and discard marinade. Preheat grill to medium high. Spray with cooking spray. Place chicken on grill and sear for 2 minutes per side. Lower heat to medium low and continue cooking and basting with reserved marinade for 20 minutes until chicken no longer pink. Garnish with green onions, if desired.


Shared on Lady Behind The Curtain May 2, 2013
Shared on Miz Helen's Country Cottage May 2, 2013
Shared on The Country Cook May 3, 2013

Pin It

Thursday, February 7, 2013

Monday Brainstorms

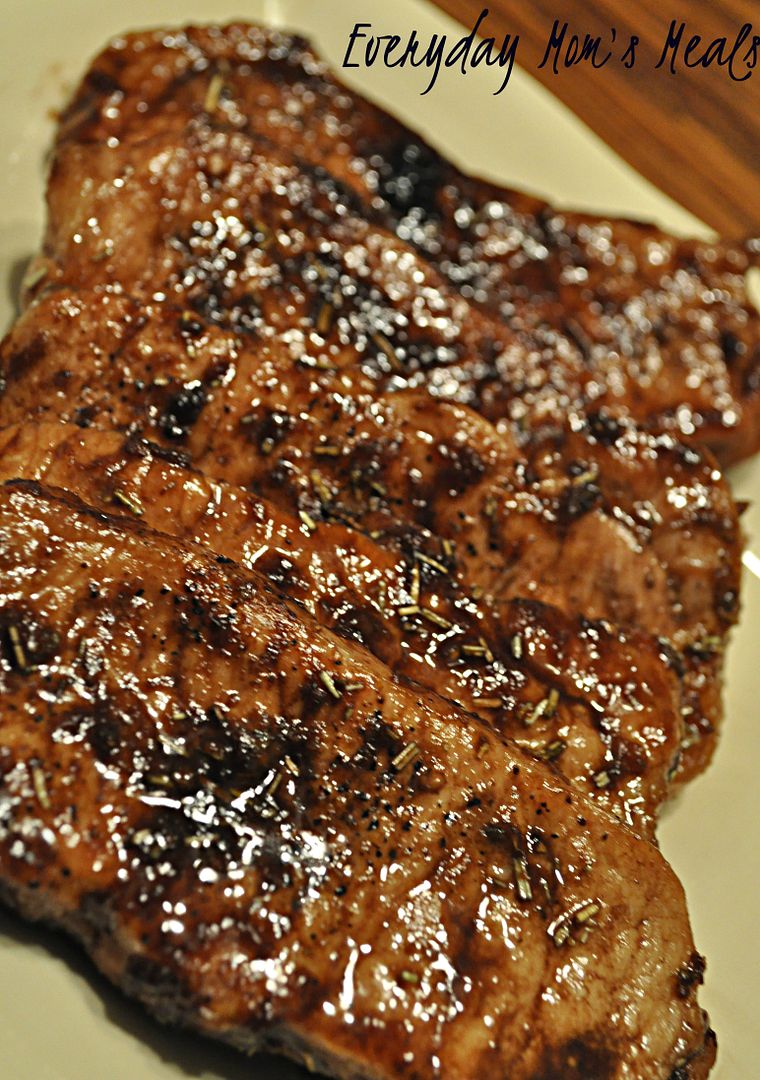
A couple weeks ago on a rainy Monday afternoon as I sat in the pick up line waiting for Alex to get out of school I started to ponder our supper. I knew what we were having, after all that's why I take the time to plan those menus each weekend! But I wanted to experiment with the main course a little. Pork Chops. They are one of my favorite things, and sometimes I want them prepared very simply with some olive oil, salt and pepper, grilled or sauteed. But on this day I felt like jazzing them up a little bit. Maybe it was my way of getting over a dreary Monday, or maybe it was because my subconscious knew I had more brand new vinegars sitting in my cupboard. 

I told you about the vinegar/oil gift set I received for Christmas when I shared my Black Cherry Balsamic Chicken, and I'm having so much fun playing around with them! This time I wanted to try a new one, and I thought the flavors in the one I chose would go so well with pork. It is such a great meat to take on flavor, but can really stand up well to flavor at the same time. These turned out moist and delicious, and really added an unique flavor to those "every day" pork chops.

Now I will tell you if you can't find the flavored balsamic vinegar, the original recipe used regular, and I'm sure it would be just as delicious. Or maybe you have some flavored vinegars you have been wanting to experiment with too, and I've inspired you. Either way, who knew such great brainstorms could happen while sitting in the parent pick up line!

Blackberry Ginger Balsamic Adapted from Food Network
                  and 
Honey Glazed Pork Chops 
5 boneless center cut sirloin pork chops
1/2 c. blackberry ginger balsamic vinegar
3 TBS honey
1 TBS Dijon mustard
1 tsp dried rosemary, crushed
4 garlic cloves, minced
2 TBS olive oil
Salt and Pepper to taste

Season pork chops with salt and pepper on both sides. In a large skillet over medium high heat, sear for  2-3 minutes per side. (If you aren't using non stick, coat with cooking spray). In a small bowl combine vinegar, honey, mustard, rosemary, garlic, oil and salt and pepper. Whisk to combine well. Pour over pork chops, turning to coat. Increase heat to high and bring to a boil. Reduce heat and simmer for 7-10 minutes until pork is cooked through, turning occasionally. Remove pork to platter and spoon sauce over top. 


Shared on Miz Helen's Country Cottage Feb. 7, 2013
Shared on The Country Cook Feb. 8, 2013

Miz Helen’s Country Cottage
Pork at Very Good Recipes
Pin It

Monday, February 4, 2013

Put Away The Milk

A few weeks ago I was given a brand new box of cinnamon toast cereal. You know the kind. The tiny crispy squares covered in cinnamon and sugar. Well, I knew I was going to have a very happy little boy, because he loves that kind, but I don't buy it very often, so it was going to be a huge treat. And I can't lie, I love it too, so I was a little excited myself. But when I brought it home, I realized he was still working on another box of cereal (I only have one box open at a time to prevent it getting stale before he can finish it.) so I put the new one away for a bit.

Then the next week, we were driving and passed one of our favorite Mexican restaurants, but a different location than we usually go to. We asked Alex if he remembered going there when he was just little, and having fried ice cream for the first time. He said "No, what's fried ice cream?" Wow, I guess he was younger than what we remember, because this kid has a memory like an elephant, and I know he would remember that experience, especially since food was involved!

And that was when these two stories came to a crossroads. I had seen many recipes online for using cinnamon toast cereal to make "fake" fried ice cream, so I immediately knew what I could do with some of that brand new cereal!

This is a great make at home version of the Mexican classic, and it's really easy too. It would be a great way for your kids to play with their food, and not get in trouble for it! This time, cereal isn't just for breakfast, and you can go ahead and put the milk away!

"Fried" Ice Cream From Betty Crocker
1 1/2 c. cinnamon toast cereal, crushed
3 c. vanilla ice cream
4 TBS honey

Measure out six 1/2 c. scoops of ice cream. Roll into balls. Put in freezer for 15 minutes. In a shallow dish, combine crushed cereal and 2 TBS honey. Mix well until crumbly. Gently and quickly roll ball into cereal mixture, pressing gently to adhere. Put back in freezer, for at least 20 minutes, or if waiting to serve, cover to keep. To serve, warm remaining 2 TBS honey in microwave for 10 seconds. Drizzle ice cream with warm honey.


Shared on Make Ahead Meals Feb. 4, 2013
Shared on Mandy's Recipe Box Feb. 5, 2013
Shared on Lady Behind The Curtain Feb. 6, 2013
Shared on Miz Helen's Country Cottage Feb. 7, 2013
Shared on The Country Cook Feb. 8, 2013
Dessert at Very Good Recipes
Pin It

Thursday, January 17, 2013

Lower Sodium Lunch


This is a Sponsored post written by me on behalf of Boar's Head for SocialSpark. All opinions are 100% mine.

It's a new year. And so many of us are trying to fit food goals into our resolutions. Now, as I've said before, I don't make resolutions because I simply think they set us up to fail and then feel guilty. And as far as diet plans go, I live by the "all things in moderation" mantra. However, I too am always looking for ways to sneak healthier foods into our meals. No because we won't eat them if we know they are a tad better for us, but "sneak in" as far as taste goes. When something touches my tongue I don't want my first thought to be "Oh this must be the healthier version." So when I had the chance to try the new Boar's Head lower sodium deli meats and cheeses I jumped at the opportunity.

Boar's Head is a name synonymous with great tasting deli items, many of which I used for simple lunches. And now they have over 20 Lower Sodium products to choose from. I decided to work with The Branded Deluxe Ham, which is 42% less sodium and the White American Cheese which is 25% lower sodium. Plus, both are gluten free! The ham is also milk free, and is certified by the American Heart Association as a heart healthy food! From Bologna and Turkey to Provolone and Swiss, there is something for everyone in the lower sodium choices!

This salad makes a great lunch or brunch. Serve it as is, or with some crackers or pita chips on the side. How many times a week do you hit a drive-thru on your lunch break? This makes a great take along meal or even a quick snack. It's light yet filling and satisfying. And knowing you're eating something with less sodium, only adds to the satisfaction! Be sure to look for the new Boar's Head Lower Sodium products the next time you visit your local deli counter!

Ham and Cheese Salad Adapted from Boar's Head
1/2 lb. Boar's Head Lower Sodium Deluxe Ham, sliced thick and diced
1/2 lb. Boar's Head Lower Sodium White American cheese, sliced thick and diced
3-4 large radishes, thinly sliced
2 celery stalks, diced
2 green onions, finely chopped
1/4 c. Honey Dijon salad dressing
1 tsp. dried parsley, plus extra for garnish
Salt and Pepper to taste
In a large bowl combine all ingredients except dressing. Gently toss to combine. Pour dressing over, and mix well until coated. Chill until serving, at least 15 minutes. Garnish with extra parsley.


Shared on Miz Helen's Country Cottage Jan. 17, 2013
Shared on The Country Cook Jan. 18, 2013
Visit Sponsor's Site

Friday, October 26, 2012

It Was SO Monday....

So I think most of us can say that we are not huge fans of Mondays. Or should I say Monday mornings. As the day goes on, I'm fine, but the minute the alarm goes off that first morning after 2 days off, I groan, I moan, I try to rationalize how I can ignore it...and then I suck it up and hit the shower. Now like I said, as the day progresses, I'm good...that is until the curse of Monday morning drags on during the entire day. You know what I mean. The kind of day that everything goes wrong, anything you go to do takes twice as long, and if **it can happen, it will! Well, that was the kind of Monday I was having a couple weeks ago. First off, I hadn't slept well the night before, so I was extra exhausted. Then I was late getting to where I needed to be that morning because I had hung out at the house waiting on the mail...only to remember it was Columbus Day. Then even though I was late, I stopped by the bank to do my normal Monday business...only to remember it was Columbus Day. (Do you see a pattern?) Then after cleaning my mom's house, we were on our way to lunch and needed to stop by her post office...only to remember it was Columbus Day. Yep, it took 3 times for me to remember!! (I told you I was extra tired!) Then the next few hours went fine. Mom and I had lunch, we did a bit of shopping (she treated me to a few nice things...this would wind up being the highlight of my day) and I even got new shoes. That always helps to make the day better, right ladies! Then I headed home to pick Alex up from school, do homework, housework and start supper. This was about the time the day went to hell in hand basket. I got the pleasure of doing extra laundry because Alex had found the wet grass during a game of soccer. I discovered even more surfaces in the house that needed cleaned. I got dirt on my shirt, so instead of changing I just put on my pjs. Alex, having to have his clothes washed due to those pesky grass stains, was in his undies playing video games... and that's when the phone rang. It was my husband. It wasn't a "I just called to say I love you" call. It was a "I just got a flat tire, and need the spare in the back of your car" call. Yep, I got the pleasure of driving 30 minutes north of our house to take him the spare, of course hitting every red light possible, only extending the trip.  And before you ask, yes, I went in my pajamas and my child did put clothes on, but they were ones from the hamper, and his shirt was on backwards (which I didn't notice until we returned home) Yep, we were those people. Thank God nobody saw us! By the time we got home, I knew the pasta supper I had planned was not going to happen; but luckily I had these planned for later in the week and I knew I could have them on the table and us eating before too long. Thank goodness for meal plans that can be adjusted at the last minute if need be! These were quick, tasty and the perfect Monday, I need a break before I cry, supper!

Ham and Cheese Crescents
6 slices deli ham, cut into quarters
1 (8 ct) can crescent rolls
8 slices Velveeta singles cheese (found in dairy section), cut into pieces to fit rolls
1/4 c. honey mustard
Poppy Seeds

Preheat oven to 375. Unroll crescents and separate. Using 1 piece of cheese per roll, lay cheese out fitting onto roll. Using a pastry brush, spread with honey mustard. Add three quarter pieces of ham. Roll up, wide edge to thin. Sprinkle with poppy seeds. Press gently to adhere. Lay on baking sheet and cook 15 minutes until golden brown.


Shared on The Country Cook Oct. 26, 2012
Shared on Make Ahead Meals Oct. 29, 2012
Ham at Very Good Recipes
Pin It

Thursday, October 4, 2012

They Better Be The Best Apples Ever...

The weekend of Alex's birthday, one of the fun things we treated him to was a trip to Fort Wayne's fall classic, The Johnny Appleseed Festival. My boys had actually been a couple years ago, but in my 31 years of living here this was my first time! For those of you who don't know, John Chapman, also known as Johnny Appleseed, was an American pioneer nurseryman who introduced apple trees to large parts of Pennsylvania, Ohio, Illinois and Indiana. And for the 38th year in a row, our city held a festival over 2 days celebrating all things apple and autumn related. There are crafts, fall inspired foods, military reenactments, all sorts of fun for the whole family. We had such a great time, and one of my favorite parts was, as we were leaving, I found the Farmer's Market table with fresh produce and fall decor. I treated myself to some pumpkins and gourds to decorate our landscaping with, and then I saw these beautiful bags of fresh apples. I asked Mr. Everyday to please get us some, and at $1.99/bag, I said "get two bags." Well, he came back  and said "I only got 1 bag." I was about to ask why when he offered up the explanation. "They were actually $1.99 per pound, not bag, and after spending over $9 on one bag, I thought it was enough." Oops. Well, didn't I feel silly! I couldn't believe we had just spent that on apples. Don't get me wrong, they are beautiful, but I could have gotten something very close at the grocery store for much cheaper. Yes, I realize these were straight from an area farmer, and it's better to buy from them, and I'm okay with that, I'm just pointing out the other side. But my hubby is such a good sport. He never flinched. He knew I wanted some apples, so he gladly paid the $9...but not without teasing me for the rest of the night saying over and over "Those better be the best apples ever!" And actually, they are pretty tasty and I'm super excited to have a whole bag of them, but I wanted to make sure I came up with something yummy to make with them, or in this case, for them! I guess next time I need to read a little closer, or if it's going to turn out this yummy, maybe not!

Cinnamon Dip for Apples Adapted from Yummly.com
1/2 c. vanilla yogurt
1/4. c. packed brown sugar
1/2 tsp cinnamon
1 tsp honey
1 tsp butter

In a microwave safe bowl combine sugar, cinnamon, honey and butter. Don't stir. Microwave for 20 seconds until butter is melted. Remove and whisk well to incorporate. Add yogurt and stir to combine. Chill about an hour before serving.
*NOTE* If you use stick butter like me, 1 tsp is equal to 1/3 of a TBS. So cut 1 TBS into 3 equal pieces and use 1.


Shared on Miz Helen's Country Cottage Oct. 4, 2012
Shared on Jen's Favorite Cookies Oct. 4, 2012
Shared on The Country Cook Oct. 5, 2012
Apples at Very Good Recipes
Pin It

Tuesday, September 25, 2012

Thanks, Martha

If you read that title, and know my family and I personally, you might be thinking this is yet another recipe from my Grammy, since to me she is Grammy, but to the outside world, she is Martha. I've already shared so many of hers with you, I wouldn't blame you for thinking that. However, this time I'm giving gratitude to another lady...Martha Stewart. I will be very honest with you. I'm not always impressed with her food. Sure it looks pretty, and probably tastes amazing, but I'm a busy mom and sometimes the amount of time she wants me to put into a recipe is just a little out of the question in my life. I will read something in one of her cookbooks, or watch her talk show and think "Seriously, who has this kind of time?" But every once in a while I will come across something of hers that is "fancy" enough for Martha, but simple enough for this everyday mom. These make a great seafood supper any night of the week, but after cooking and plating them, I realized they would also make a fantastic party food too. Plus, since you can roast them in the oven (see notes below) they can be made year round! A big tray of these, the dipping sauce and a bowl of toothpicks next to it would work perfectly for your guests. (Just be sure to set out an extra empty bowl for tails too!) Spicy, but not enough to be overpowering, these have just enough heat to be counteracted by the cool sauce for a perfect combo. So while this recipe worked out great, I'm definitely going to stick with my first Martha for the majority of my inspiration!

Grilled Buffalo Shrimp with Green Onion Dipping Sauce Shrimp Adapted From Martha Stewart
1 (12oz) bag frozen (41/60 count) large shrimp, peeled, deveined and tail left on
Zest of 2 lemons
2 garlic cloves, grated
2 TBS honey
1/2  tsp. celery seed
2 tsp paprika
1/4 tsp chili powder
1/4 c. vegetable oil
1 c. sour cream
2 TBS lemon juice
1 tsp hot sauce
2 green onions, chopped
Salt and Pepper to taste

In a large plastic bag place shrimp, lemon zest, garlic, honey, celery seed, paprika, chili powder, oil, salt and pepper. Close bag and shake around to coat shrimp. Let marinate for 1 hour. When ready, preheat grill to high. Using a grill pan, grill shrimp on high for 2 minutes. Stir and flip. Reduce heat to medium and cook until opaque and pink, about 5 minutes. In a small bowl combine sour cream, lemon juice, hot sauce, green onions, salt and pepper. Stir well. Chill for 30 minutes.
*NOTE* You can also roast these shrimp. Preheat oven to 450. Place a baking sheet in the oven to heat. Roast shrimp without stirring  for approximately 10 minutes until opaque and pink. Also, the 12 oz. bag of shrimp fed our family of 3 very nicely. If you increase the amount of shrimp, be sure to adjust seasoning amounts to get same flavor.


Shared on Mandy's Recipe Box Sept. 25, 2012
Shared on Lady Behind The Curtain Sept. 26, 2012
Shared on Miz Helen's Country Cottage Sept. 27, 2012
Shared on The Country Cook Sept. 28, 2012
Shrimp at Very Good Recipes
Pin It