Everyday Mom's Meals: Snack
_____
Showing posts with label Snack. Show all posts

Sunday, September 12, 2021

Welcome Back Football

If you aren't a football fan, you might not even realize or care that the season is officially here! This past weekend was the kickoff to NFL, but high school and college teams have been playing for a couple weeks now. While I never look forward to the end of summer, the return of pigskin fun is something our whole family looks forward to every single year. 

Let's face it, part of the fun of watching football is the food that comes along with it. Even those who don't care about first downs, penalties and the score can get behind some tasty game day eats. 

With stadiums filling up once again, you know there are going to be some outrageous tailgate parties pre-game! But even if you are cheering your favorite team from home, you can enjoy some great snacks! 

If we are going to have an entire day of football watching, I love putting out a mini spread and we graze through every touchdown. From hot dips to sandwiches or a big batch of chili, game days in our house mean something yummy to eat too. 

These pretzels have become our latest addiction. Seriously. You can't eat just one, or just one handful! They are buttery, salty and filled with flavor. I don't drink, but my husband tells me a big handful of these and a cold beer are a perfect match. 

Game days are some of the most fun, and most delicious! Football fans and non-fans alike can always agree on a big plate of tasty dishes.

If you love game day food as much as we do, please be sure to check out some of the fantastic collections I've written for Parade Magazine!

 Everything Pretzels

1 lb. bag mini twist pretzels

2/3 cup butter, melted

6 TBS everything bagel seasoning 

 Preheat oven to 325. In a large bowl combine pretzels and butter. Gently stir to coat. Sprinkle with seasoning. Gently stir well. Transfer to large rimmed baking sheet. Bake 10-120 minutes until butter is absorbed. *NOTE* Some of the seasoning will fall off, you can't help it. The 6 tablespoons allots for that. We like dark pretzels, so I let mine bake for 20 minutes. 


Shared at Weekend Potluck

Sunday, August 8, 2021

Hello School Lunch Boxes

When does the school year begin for you? I know so many that have already stepped back into the classroom and for us, this week is our time. As of Tuesday my first baby will be a JUNIOR in high school, and quite frankly, I am not that comfortable with it. I'm pretty sure we were buying his Kindergarten backpack yesterday. But here we are, another school year upon us. 

Oh, and let's not forget, the little guy also turns FIVE this week....on the second day of school actually, so it's going to be an emotional one for Mommy. Luckily, since he doesn't make the age cutoff, he is going to have another year of homeschool/preschool with Mommy. 

Alex's high school is once again in person this year (they were last year too) and he is ready to get back to more of a normal school day routine. They have been able to go back to a few pre-Covid things while still maintaining safety too. One thing will never change though, yummy lunches are a must! 

This copycat recipe is one I was super excited to share for an easy summer lunch for kids....but time got away from me. That's okay though! Many kids are still remote learning, or like my little guy, home schooled, so lunch time still needs to be easy and kid friendly. Or, maybe you are always looking for ways to jazz up that packed lunch! 

Do you remember when McDonald's value menu included the Chicken Snack Wrap? When Alex was little, it was one of our favorites! For a light lunch or a snack in the car they were absolutely perfect for him and I both! I actually had forgotten all about them, but am so happy to have them back! Made in my own kitchen, super easily with a little help from frozen chicken tenders. 

These would work so well in a packed lunch too since they are just as tasty cold. We actually prefer to let the chicken tenders cool down before assembling the wrap, so added to a lunchbox sounds good to me! 

If you still have some summer left, you're probably running out of fun ideas for the kids' lunch. Copycat McDonald's Chicken Snack Wraps to the rescue! Or grab the lunch box, add some fruit and yogurt on the side and know they are getting a treat in the middle of their school day!

 Copycat McDonald's Chicken Snack Wrap

6 fajita size flour tortillas

1 medium head leaf lettuce, chopped

1 cup finely shredded cheddar Jack cheese

 6 frozen extra crispy chicken tenders

Ranch Dressing

Cook chicken tenders on a baking sheet, according to package directions. Add a few minutes for extra crispiness. Once cooked, allow to cool until you can handle them. On each tortilla, add some lettuce, cheese, and one chicken tender. Drizzle with ranch dressing, wrap and serve!


Shared at Weekend Potluck


Sunday, December 27, 2020

Happy (Almost) 2021

 How was your Christmas? I hope it was a day surrounded by those you love most in the world, with magic, joy and peace. (Even if some had to join virtually!)

We had a wonderful holiday, with celebrations over a couple days. According to the mound of presents under our tree Christmas morning, our boys were VERY good this year. (But Mommy could have told Santa that!) 

Now that my most favorite time of year is behind us, I tend to get a little depressed. I won't even lie. December 26th is my least favorite day of the year. But I do have something to look forward to! Our annual New Year's Eve Buffet! 

If you've been following me for a good amount of time, you know our tradition. Every NYE, I make a huge appetizer buffet filled with yummy things. We stay in, my parents come over, we eat, we watch movies, we play games, we eat, we stay up for the ball drop, we eat....you get the picture. 

So while many will be doing an "at home New Year's Eve" for the first time this year, we are experts and it's one of our most fun traditions!

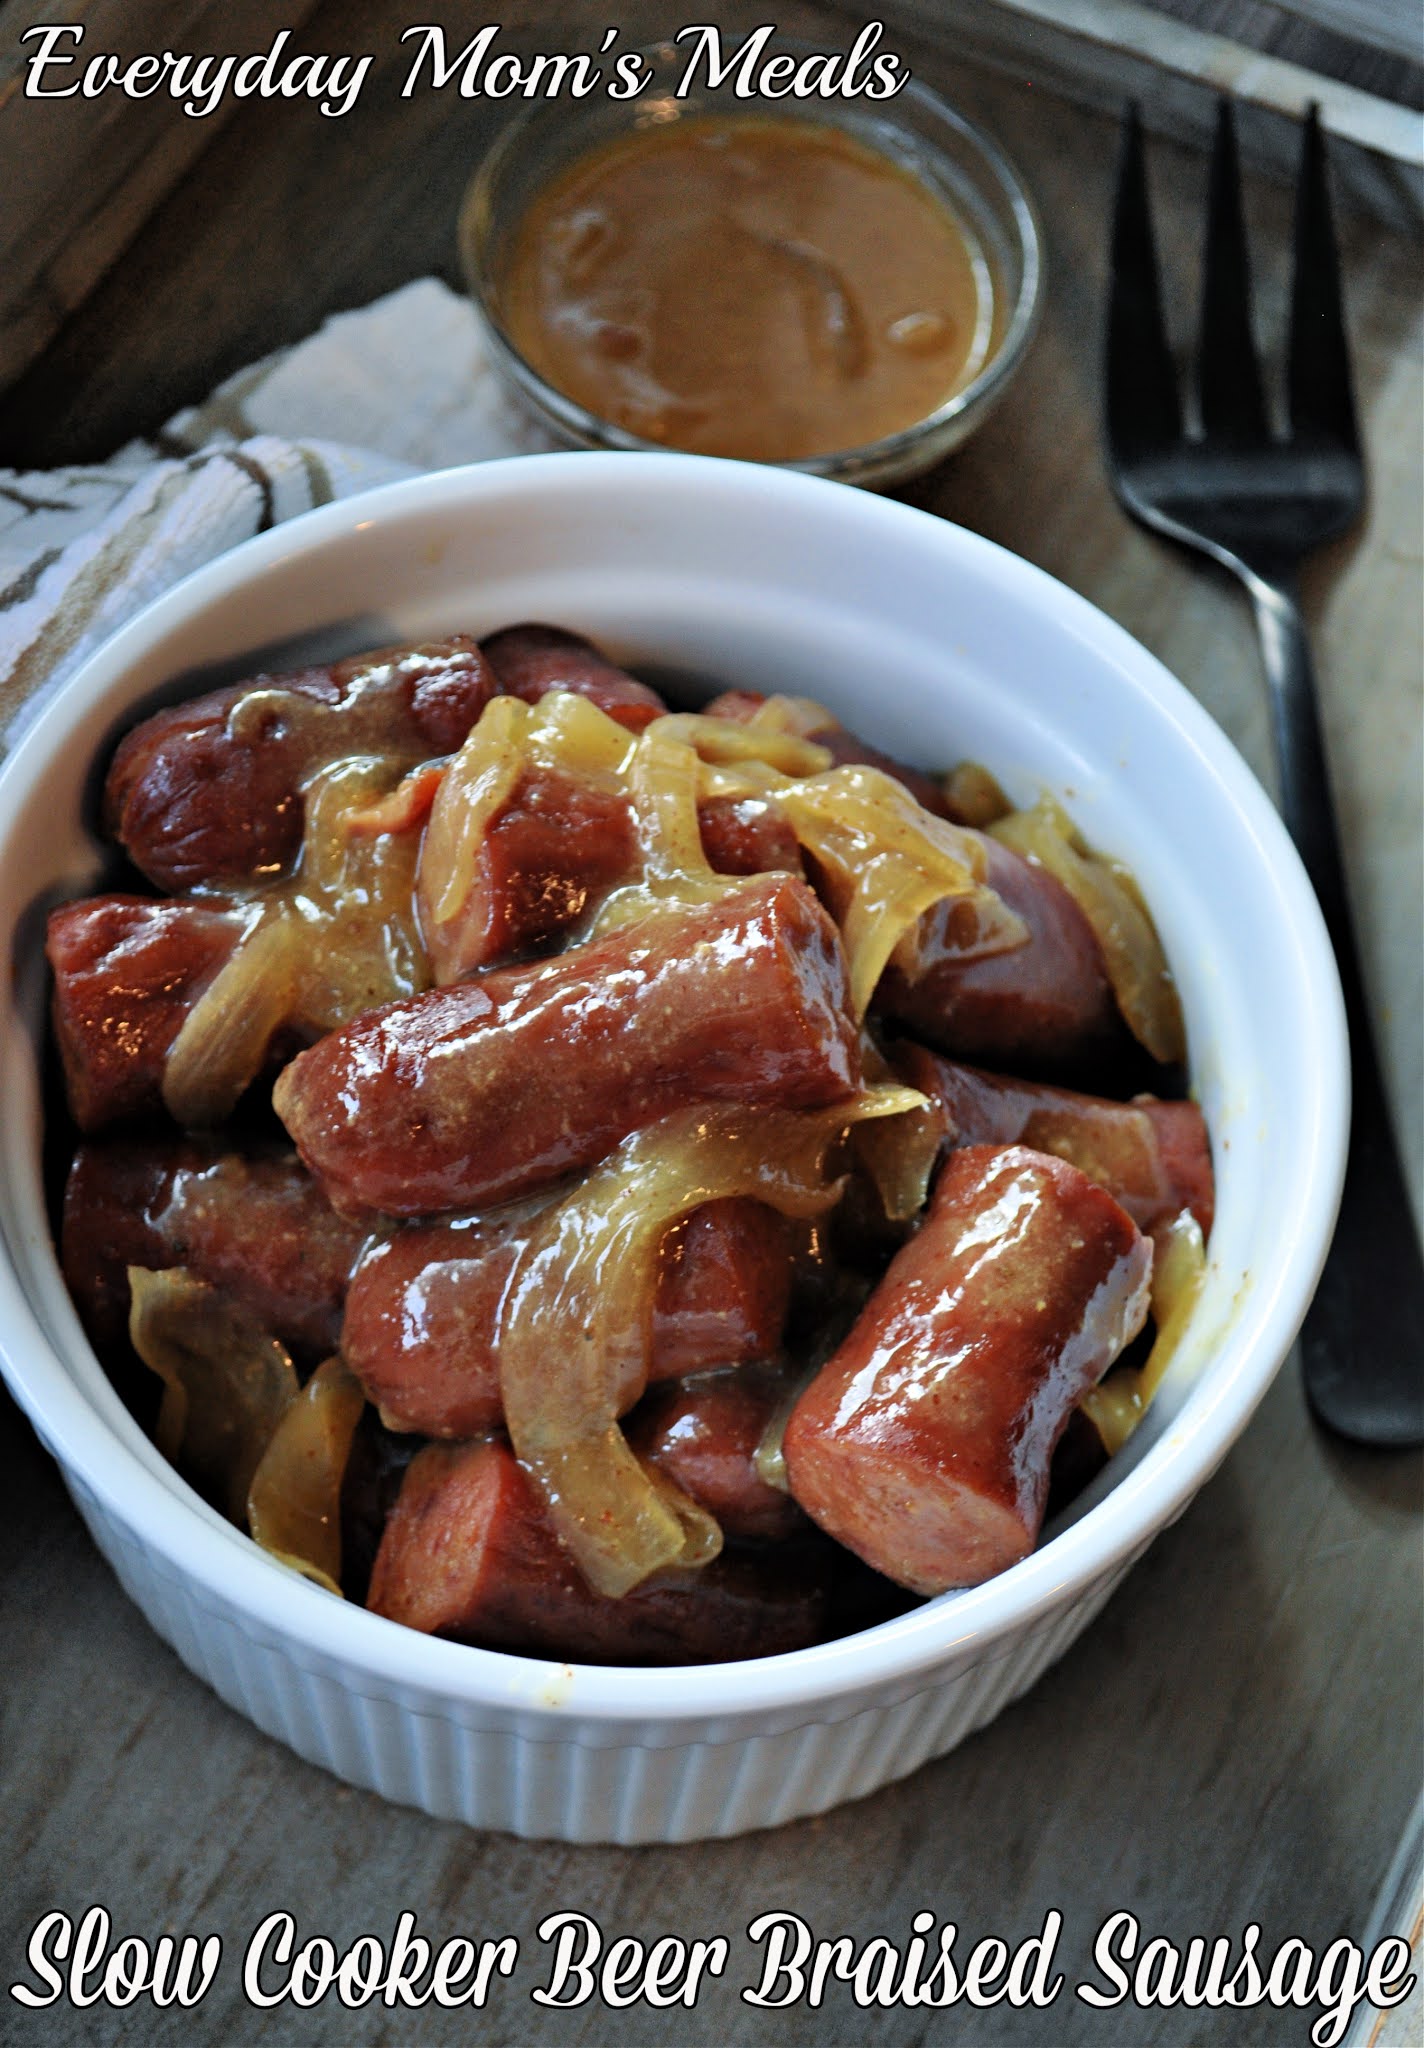
If you're planning some tasty food to welcome 2021, this slow cooker beer braised sausage could definitely be added to the menu! This is a versatile recipe that you can serve as an appetizer (just cut it into smaller pieces) or for a simple weeknight supper. It's delicious right out of the Crock Pot, but we also love putting it on some hoagie buns for a sandwich dripping in yum factor. 

I know many like to serve pork for good luck in the New Year, so this could be a fun twist on that tradition too! 

Without a doubt, 2020 will go down in history as one of the worst years ever, at least in most of our lifetimes. But I think there is a lot to be thankful for as we look back too. Sure, it might not always be the easiest to see, or focus on, but even in the darkest days this year, our family has been so incredibly lucky. So I am trying to focus on that as we say goodbye to another year, but am also ready to welcome 2021 with open arms. I wish you a happy, healthy and delicious New Year...only good things ahead!

 Slow Cooker Beer Braised Sausage

3 (9 oz.) packages smoked sausage

1 large white onion, thinly sliced

1/2 c. brown sugar

2/3 c. light beer

1/4 c. spicy brown mustard

1/4 c. apple cider vinegar

1 TBS water

2 tsp. cornstarch

Slice sausage into 1-2 inch pieces. Spray the slow cooker with nonstick spray. Lay sliced onions in bottom. Lay sausage on top of onions. In a medium bowl, whisk brown sugar, beer, mustard and vinegar. Pour over sausage. Cover and cook on LOW for 6 hours. About 15 minutes before serving, mix water and cornstarch. Add to slow cooker. Stir and cook on HIGH about 10 minutes until thickened. Serve as is or on hoagie buns with sauce drizzled over top.

 Shared at Weekend Potluck


Sunday, September 27, 2020

Welcome October(ish)

With posting new recipes on Mondays, the timing of something I want to say doesn't always line up perfectly with the calendar. Thus is the case this week. I wanted to welcome the new month with this simple, fun, autumn inspired snack...but October doesn't begin until Thursday. Oh well. I think you appreciate my effort. 

By now, you have seen quite a few snack mixes from me like my Sweet n Salty Snack Mix, Halloween Snack Mix, and Harvest Party Mix. I try to come up with a new one every fall, and my boys always look forward to my yearly creation.

I don't know what it is about autumn that makes me want to dig into a big bowl of salty, sweet goodness, but it never fails- the minute the temps drop a bit and pumpkins are on the porch, I find myself walking up and down the grocery store aisles waiting for inspiration.

 This year's is especially simple because there is no baking. No sauce. No cooking. You literally dump, stir and eat. It will last forever (okay, not really, but a long time) in an airtight container at room temp, so it's perfect to enjoy all season long. My boys love it for an afternoon snack, road trip treat or movie night! With Halloween just around the corner, you're going to need plenty of spooky movie snacks and this will satisfy both the popcorn and candy taste buds, all in one handful! 

Get the little ones in the kitchen and have them help make a big batch of this, get out side and enjoy some crisp, sunny days, visit a pumpkin patch or U pick apple orchard...soak up all October has to offer!


Scarecrow Crunch

2 (6 oz.) boxes butter toffee popcorn

2 c. buttered popcorn

1 (16 oz.) bag candy corn

1 (16 oz.) bag candy pumpkins

2 c. Cheerio cereal

1 (5 oz.) box Whopper candy

1 (4 oz.) box Reece's pieces candy

In a very large bowl combine all ingredients. Gently stir. Store in an airtight container at room temperature. Stir before each serving, as some of the smaller pieces will fall to the bottom.  


 Shared at Weekend Potluck

Shared at Meal Plan Monday

Sunday, August 30, 2020

No Tomatoes? No Problem!

 A few weeks ago, I shared my Copycat Chili's Queso with you, and today, we are rounding out the perfect Chili's experience with a tasty make at home version of their salsa. 

I could literally drink Chili's salsa with a straw, so I am super excited to be able to have it in my own kitchen any time I want, without having to order take out!

You want to know the biggest recipe I love salsa recipes like this so much? The use of canned tomatoes. My go-to Restaurant Style Salsa recipe is the same way, and it is always a hit no matter what time of year I serve it. 

I know so many of you are enjoying your summer garden's bounty of tomatoes, but some of us aren't as lucky. Okay, so Max actually did grow a couple of tomato plants in pots this summer, and is oh so proud every time one ripens, but they are tiny, and few and far between. (We won't tell him though. Mommy is always super excited when he brings me one!) It would just take a ton to make a batch of salsa. 

But the beauty of this recipe is with canned tomatoes, you aren't at the mercy of mother nature, and you can whip it up for any Mexican night supper, even if the snow is falling! (Shudder...I don't even want to think about that yet!) 

I actually learned years ago many restaurants use canned tomatoes for their salsa, and ever since, it has become easier and easier to recreate their recipes at home. Thank goodness too, because I am a chips and salsa fanatic, and have passed that addiction onto both of my sons.

 The biggest difference in flavor in this one from others is the addition of cumin. That little hint of smokiness really sets it apart from not only other restaurant recipes, but my own. 

With the Labor Day holiday weekend coming up, and football/tailgating season (no matter how different it might look) just around the corner, this is sure to become a favorite in your house too!

 Copycat Chili's Salsa

1 (14.5 oz.) can diced tomatoes with chilies, with juice

1 (14.5 oz.) can whole tomatoes, with juice

1 small yellow onion, coarsely chopped

1/2 jalapeno pepper, coarsely chopped 

1 tsp. garlic salt

1 tsp. salt

1/2 tsp. cumin

1/4 tsp. sugar

Place all ingredients in food processor and pulse until well combined. Stir, checking for large pieces. Pulse again. Transfer to a bowl. Chill, covered, for at least 4 hours before serving. Serve with limes if desired.


Sunday, May 10, 2020

Summer Time Cookout Season

I know, I know, many of us across the country are still social distancing, and not planning any get togethers for a while. However, I am the type that can plan a cookout when it is just the 4 of us; and we have been seeing grandparents again, after 8 weeks. Many don't feel comfortable visiting relatives yet, and I respect that. I think we all have to do what we are most comfortable with at this point. Things are starting to open back up, and with as much caution as possible, we can start to live a little again.

With Memorial Day just around the corner, it's time to start thinking about our first backyard barbecue of the summer! Even if it's just your family, with no extra guests, you can still make it as delicious as always and ring in the season on a yummy note!

I love a great dip! I will eat it with veggies, crackers, chips..heck, just pass a spoon! Seriously, I am a dip connoisseur from way back, and at any party, you will find me filling my plate multiple times. Add in the fact that I am a dill fanatic, and this is a dream come true!

I've been making this for years, most of the time on a whim because I always have the ingredients on hand! You can easily double or even triple it for a big crowd, but I enjoy the fact I can make a small batch when I'm craving it!

The weather might not feel like summer is on it's way, but I have faith. I am counting the minutes until these chilly temps are gone, the warm sun shines and the thermometer hits 80.

Summer cookout season is one of my favorite things in the world. Grilling, eating on the deck and enjoying great company, big or small is truly one of life's simple pleasures.

Dill Veggie Dip
1 c. sour cream
1 c. mayo
2 TBS dill weed
2 TBS dried minced onion
1 TBS dried parsley, extra for garnish
1 tsp. garlic powder
Salt and pepper to taste

In a medium bowl combine all ingredients and mix well. Chill several hours before serving. Serve with fresh veggies, chips, crackers, etc.  


Shared at Weekend Potluck

Shared at Meal Plan Monday

Sunday, April 19, 2020

Check Your Bananas

Do you have fresh bananas on the counter? Are they starting to look like a science experiment? If they are brown, even blackish, and starting to get squishy...they are PERFECT for this recipe!

How is grocery shopping for you these days? I haven't stepped foot in a grocery store in over a month. See, since Mr. E works in healthcare, he is already exposed to Covid 19 daily, so we decided it was smart for him to venture into the stores weekly.

And oh what an adventure it is! I don't just hand him a list and say see you in a couple hours. Oh no. See, when I was pregnant, both times, I was extremely sick. More so with Alex, but Max too. So for weeks he did the grocery shopping and I learned letting him loose with a list is not a good idea. Therefore, to avoid that disaster again, we virtual shop. Yep, he Facetimes me and I instruct him on what to get.

But here is the ironic part. Something happened to me when this whole quarantine started. Those first few shopping trips were a nightmare of empty shelves, revamping meal plans and substituting products. So now that stores are better stocked, I still find myself having him get things simply because they have them, and didn't at one point.

Case in point? Bananas. We already had some. But he found more. So I had him get a few. Now, my boys eat fresh fruit daily, and we go through a lot of it, but bananas go from green to black in about 35 minutes! So I found myself needed to use some up, and fast.

Banana bread came to mind instantly, but I only had 2 bananas. So muffins it was, and a small batch at that. But it was the perfect amount for us, and can easily be doubled for more.

They are perfect for a quick breakfast before your Zoom meetings, or a snack in the afternoon, since I know the kids are asking for those every 10 minutes!

I hope you're staying healthy and safe. Sheltering in place with as much ease as possible. We can all get through this quicker if we do what is asked. No doubt, some yummy muffins will make it a bit easier too!

Banana Bread Muffins
2 over ripe bananas, divided
1/2 c. white sugar
1 c. flour
1/2 tsp. vanilla
1/4 tsp. salt
1 tsp. baking soda
6 TBS butter, melted and cooled
1 egg

Preheat oven to 350. Grease muffin tin, or use papers. In a large bowl mash one banana with a fork. Add sugar. Whisk until well incorporated. Add butter, vanilla and egg. Whisk well. Add flour, sugar, baking soda and salt. Using a spatula, fold together until just mixed. Mash remaining banana and fold into batter. Fill wells 3/4 full. Bake for 20-25 minutes until toothpick comes out clean. Makes 6-9 muffins. 


Shared at Weekend Potluck

Sunday, September 22, 2019

Hello Fall

If you aren't paying attention, we have arrived at the first day of fall. Sure, some of us have had our autumn decor out since the calendar still said August (*cough cough*...I might resemble that remark) but it's official. Now our husbands can't make fun of our pumpkins and scarecrows anymore.

Autumn brings so many reasons to "party". Between bonfires, those last few warm evening cookouts, Halloween parties, Game Day...the list goes on and on! And if you don't have a reason to party, make one! There are days when we are outside raking or doing jobs around the house, and I have a big pot of chili or soup cooking, plus some snacks for motivation too! So you can't make it to the stadium to tailgate for your favorite team. Have a football day at home in your living room!

My point is a delicious party mix can be appreciated for so many reasons this time of year. This would be great for an after school snack, kids' Halloween party or classroom party (if home made is allowed).

We love Chex Mix, or more specifically Adam's late grandma's Chex Mix recipe. I make it a lot. It's the perfect salty snack. But this time I wanted something a little sweet, and of course autumn inspired.

Oh. My. Gosh. As Alex said, "This stuff is dangerous!" Talk about addicting! We couldn't stay out of it! Sweet, salty...mmmmm. We have a couple days trips planned for this fall, and I think I will make sure we have a bag of this for the car too!

Fall might not be my favorite season, but I do enjoy it and all the fun activities it brings. Add in some yummy snacks and it's a party any day of the week!

Harvest Party Mix
1 (12 oz.) box rice cereal, like Chex
4 c. pretzel twists
1 (7 oz.) bag original Bugles
2 ( 4 oz.) boxes Reece's pieces
2 ( 9 oz.) bags autumn candy mix
3/4 c. margarine, melted
3/4 c. brown sugar, packed
2 TBS vanilla extract

Preheat oven to 275. In a medium bowl whisk together margarine, brown sugar and vanilla until combined. In a very large bowl combine cereal, pretzels and Bugles. Pour sauce over mix. Stir gently, but well. Spread evenly on a baking sheet* and bake for 45 minutes, stirring every 15 until crisp and brown. Remove and allow to cool. Add candy and stir well. Store in airtight container.  
*NOTE* You will either need to do this in batches, or use 2 cookie sheets at a time. 


Inspired by One Little Project

Sunday, July 14, 2019

All That & A Bag Of Chips

Many years ago, my husband had what he proclaimed to be the BEST potato chip of his life. Now, I have actually heard him say this about a couple kinds, but that's okay. In that moment, in his excitement, that's how he felt.

One of those brands/flavors he can still readily find. In fact, I ordered him a case for our 16th anniversary this year. Nothing says love like a spicy potato chip! But the other, the one I started this story with? We haven't been able to find it for years. At least not in our area. And that makes him sad. To the point that he talks about it quite a bit.

What is this magical chip you ask? It was a Steak & Worcestershire flavor, and for him it was love at first bite. For years, it has been the one he mentions any time we try a new one. The one he longs for. So, how many wife points do you think I scored when I found a way to recreate that for him, kind of?

The minute I saw a new dip by buddy Mandy over at South Your Mouth debuted, I knew I could take that idea, build on it, and recreate those flavors for him!

I couldn't wait to make it for him; and it didn't disappoint. He said it is "spot on" and could not stop eating. Woo hoo!

Need another snack for around the pool? A big bowl of this and a couple bag of chips. Done! I bet it would be super tasty with a big veggie platter too!

Making things for my boys they love gives me so much joy. But nailing something he loved and has been missing? That's just the icing on the cake, or the dip on the chip in this case!

Steak & Worcestershire Dip
16 oz. sour cream
2 1/2 TBS steak seasoning (like Montreal)
1/2 tsp. garlic powder
1/2 tsp. onion powder
1 TBS Worcestershire sauce
1 tsp. dried parsley

Mix all ingredients in a medium bowl. Chill a few hours before serving. Serve with chips, veggies, crackers, etc.


Sunday, June 2, 2019

Tweaked and Tweaked Again


I first debuted this terrific salsa on the blog about 5 or 6 years ago. Since then, it's become a staple in our house and requested by countless family members for parties.

When you make something literally hundreds of times, sometimes a funny thing happens. You end up tweaking it, making it even more your own, and one day you realize you aren't following the original recipe you began with. Sure, the base it still there, and the concept is the same, but it's now one you have memorized and the exact formula that makes it perfect every time.

This comes with a few warnings. One, if it's sitting in your fridge, nobody will be able to stay out of it. Two, if you take it to a party, be sure to take the recipe too. Everyone will want it. Three, make sure you only make it for people you really, really like because they will keep coming around for more!

From Mexican night to snacking around the pool all summer, this will be your go-to. From start to finish, you have about 10 minutes in the whole thing, making it perfect for those impromptu guests too!

Restaurant Style Salsa
1 (28 oz.) can whole tomatoes
2 (10 oz.) cans diced tomatoes with green chilies (like Rotel)
1 medium yellow onion, chopped
1 garlic clove
1 bunch cilantro, stems removed
1/4 tsp. sugar
Juice of a lemon
Salt to taste

Combine all ingredients in food processor and pulse until fine. (This might require batches) Check for salt and season again if necessary. Transfer to a large bowl and chill. Allow to come to room temperature before serving.


Shared at Weekend Potluck

Sunday, June 3, 2018

Summer Time Snacking

School is out! Hooray!!! Seriously, those last couple weeks were rough! And then the fact we had to go back after Memorial Day for 1.5 days was almost torture. But we persevered and don't have to set an alarm or pack a lunch until August!

I adore summer vacation. I realize it is different for me because I am at home, and don't have the stress of additional child care, but I cherish every minute he's home with me. And now that Max is old enough to understand "Bruh Bruh" is home with us, well let's just say it even more special.

One of the things that I do recognize has being harder during these months is the fact I have to feed the teenager that extra meal every day, every week! I find myself going to make Max's lunch and saying "Oh that's right. Alex might want something too." Now, to be fair we are only a few days into summer vacation, so I'm still getting into my groove. But it isn't just lunch! He wants snacks too! I swear, these kids...they think they need fed 24/7. LOL

I love making trail mixes because we can all enjoy them. Even Max now! (Sure he likes to pick out the M&Ms, but he does like the pretzels and cheese crackers too) And in the summer, they are perfect for snacking in the car, at the park, beside the pool, or just hanging out in the back yard. True story, if you would have seen us last weekend in our back yard, Max was in his baby pool, and the three of us were sitting around it, watching him, and passing around a huge bowl of this!

Sweet and salty together are one of my favorite things. Even flavor combos you think might not work do. Mr. E made the comment he didn't know how the candy and cheese crackers would taste, but they were really good!

You can always add some other ingredients your family loves too. Make it your own! Let the kids get in on the action too--they could come up with some interesting combos!

Summer break is something I look forward to all school year long. My boys, with me, adventures to be found, and yummy snacking on the way!

Sweet n Salty Trail Mix
4 c. twist pretzels
3 c. cheese crackers
2 c. honey roasted peanuts
1 1/2 c. roasted almonds
1/2 c. M&Ms
1/2 c. Reece's Pieces
1/2 c. raisins

Mix all together in a large bowl and store in an airtight container. 


Shared at Weekend Potluck

Disclaimer: I received free samples from Kroger and MyMagazine Sharing Network for use in this post.

Thursday, April 5, 2018

Upping Your Frozen Food Game

I am so blessed to have so many connections because of what I do here. One of my favorite communities I've been working with lately is MyMagazine Sharing Network through the Kroger family of stores. 

I receive free samples or coupons for free items and get to try them and let the powers that be know what I think of them. Plus, share my thoughts on social media too! 

My latest campaign came at a perfect time. They sent me coupons for various items from the frozen food section of my local Kroger store, and asked I try to elevate one or more of them to something new. 

Mission accomplished! I knew exactly which one I was going to play around with first too. The oldest was home for Spring Break and it was time to come up with a fun, tasty lunch for him using Farm Rich Mozzarella Cheese Sticks.


I looked in the pantry to see what I had on hand, and about 30 minutes later I had a dish he loved and I knew would be a big hit with your kids too! Rather it be lunch, after school snack or a kids' party these will be the star! I can just see a bunch of littles around the pool, soaking up the sun, scarfing these down!

Oh, and if you wonder why there is no sauce on this pizza? I was afraid it would make it too wet, but some on the side to dip might be good. I just didn't have any on hand! 

If you want to learn more about MyMagazine Sharing Network, click here & maybe you can start to receive yummy free samples too!

Cheese Stick Pizza 
15 frozen mozzarella sticks*
Sliced Pepperoni
3/4 cup shredded mozzarella cheese
Sliced Black Olives
Canned Mushrooms
Dried Oregano

Cook cheese sticks according to package directions. When finished, allow to cool for just a couple minutes. Reduce oven temp to 350. Transfer to a 9 inch pie plate. Top with cheese, pepperoni, olives and mushrooms.  Bake for 5-7 minutes until cheese is melted. Sprinkle with oregano. *NOTES* 15 cheese sticks fit in my pie plate perfectly, be sure to check yours. Some marinara on the side for dipping would be fun too, I just didn't have any on hand. 


Disclaimer: I received a free sample I used in this recipe. The blog post and recipe were all my ideas.

Monday, October 19, 2015

Halloween Party

In just under two weeks our streets are going to fill with ghosts, goblins, witches, zombies, super heroes, ballerinas, princesses and more! Yep, all the little ones will begin their annual neighborhood, door-to-door candy marathon.

In our house, the Halloween celebrations start well before the 31st, and basically mean Mommy coming up with yummy treats for the boy to enjoy all month long. But I know for many of you, a big Halloween bash is on the menu, and you need ideas that are both easy and yummy.

That's where I come in. This was actually my last post for The Children's Museum of Indianapolis this month. I can't believe my 6 months with them has come and gone, but I enjoyed every minute. What a thrill for me to work with a place that not only does my child adore, but I have very fond memories of growing up as well.

I wanted to give them a recipe that kids can enjoy as an after school snack, or like I said, at a big Halloween party. Something so simple it can come together in almost no time, and enjoyed all night long, or in our case, be munched on for days!

Even if you don't have huge Halloween plans, you can still make it a fun day for the little ones. And more importantly, a really delicious one!

Halloween Snack Mix
2 ½  heaping cups. Apple Cinnamon Cheerios
2 cups pretzels
1 (7.5 oz) jar salted roasted peanuts
1 (8 oz.) bag candy pumpkins
1 (8 oz.) bag candy corn
2 (3.4 oz) boxes M&M’s
Mix all in a large bowl. Store in an airtight container.


Originally Posted on The Children's Museum
Shared at Weekend Potluck

Friday, April 10, 2015

Easter Treat Withdrawal

So, we have amazing friends. No doubt. But in the past week, one of those friends definitely scored extra bonus points with us. (Okay, that's not how it really works, but she really did treat us!)

Starting quite a few years ago, this friend would get us the same Easter treat every year. A giant, homemade peanut butter egg chocolate. I'm talking big enough for several portions. This started back before we even had Alex. And I'm not joking when I said Mr. E and I would fight over this egg every year. It became a joke between us her, because I would always tell her about us chasing each other around the kitchen for the last bite. Don't judge. You have no idea how delicious this egg is.

Then little man came along, and we realized we were going to have to share our egg with him. Well, not for the first few years. When he was really little, we just hid it from him. He had no idea it even existed. Again, don't judge. This egg is the best thing ever. But then he got old enough to know about the egg, and after one bite was as hooked as we were. So now we had to split this egg three ways. Sigh...

Then there were a couple years we had to do without our egg. Gasp! I know! So sad. Each Easter we would talk about the egg. Dream about the egg. Lament we didn't have the egg. Then last week this friend told me she had something for us. "An Easter treat." Could it be? Could we be that lucky? YES! We got our egg! Oh, it was just how we remembered it too!

And now, here we are a week later, and the egg is gone. We are trying to keep our chins up. But in the meantime, I needed to satisfy our withdrawal symptoms. These muffins were our answer! Oh my gosh, they are so yummy! They taste just like a peanut butter cup, and are the perfect bite size for snacking! Use them for breakfast, after school snacks or packed lunches.

If you love peanut butter and chocolate as much as we do, you will flip for these as much as we did. And now, we can have our favorite flavors the other 11 months of the year too! 

Peanut Butter Cup Mini Muffins 
Makes 36 mini muffins 
1 3/4 c, flour
2/3 c. packed brown sugar
2 1/2 tsp. baking powder
1/4 tsp. salt
1 egg
3/4 c. milk
2/3 c. chunky peanut butter
1/4 c. vegetable oil
1 1/2 tsp. vanilla
2/3 c. miniature chocolate chips

Preheat oven to 350. Line a mini muffin tin with papers. In a large bowl combine flour, brown sugar, baking powder and salt. Mix well. In a medium bowl whisk together egg, milk, oil, peanut butter and vanilla. Add to dry ingredients and mix just until moistened. Fold in chocolate chips. Fill each muffin well 2/3rd full. Bake for 15-17 minutes until toothpick comes out clean. *NOTE* This batter is VERY thick. If you think it's a little too thick when you are stirring, add a splash more milk to make it easier to combine.


Shared on The Country Cook April 10, 2015


Wednesday, November 26, 2014

A Little Spice For Mr. Everyday

So, tomorrow is the big day! Do you have your cooking game plan down? Maybe you've been cooking all week so there isn't as much to do tomorrow. You're so smart! Either way, we are coming down to the wire, and it's time to loosen our belts and bring on the feast!

For today's post I could have easily shared another holiday idea, but instead I thought I would post something for those pre-feast hours. When everyone is sitting around, watching football, or the parade, playing games. The snacking time. I'm not even kidding you. My Grammy is famous for all the "nibbly bits" (as Monkey calls them) she puts out to tide everyone over until the big meal. So many delicious things that many times they are a meal in themselves; and by the time the turkey hits the table you're almost too full to eat. Almost. 

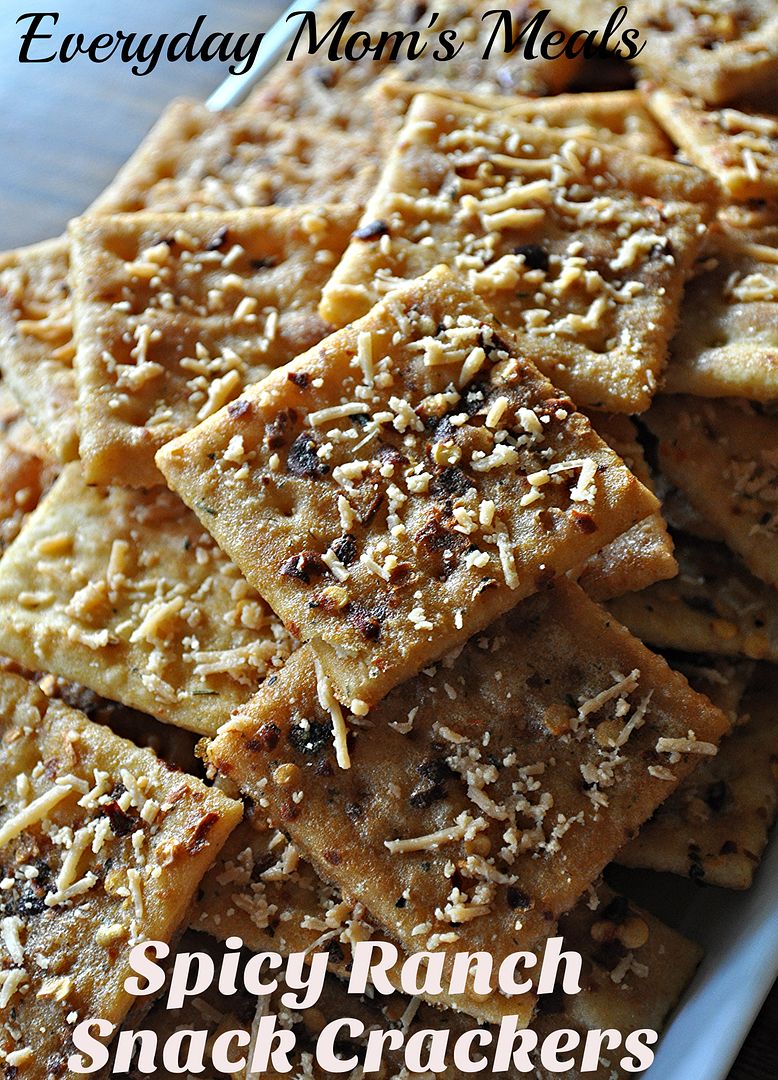
When a friend gave me this recipe I knew it would be perfect for Mr. E. He likes spicy things, and while many times I shy away from recipes that have a kick to them because my taste buds are wimps, I thought these would be a nice treat, just for him. And I will be honest...he ate the whole batch because after trying one, I was gasping for water. These. Are. Spicy. Very. Spicy. So, if you can't stand the heat, be sure to adjust the amount of red pepper flakes!! 

The turkey may be thawing, and the side salads might be waiting in the fridge, but that doesn't mean we can't still look for things to munch on all holiday weekend long. And if you like a little spice in your snack, these are just for you.

From our family to yours, I wish you a very

~*~Happy Thanksgiving~*~

Spicy Ranch Crackers
4 sleeves saltine crackers
1 package ranch dressing mix
2 TBS red pepper flakes
1/4 c. shredded Parmesan cheese
1 c. canola oil

In a large bowl whisk together oil, ranch mix and red pepper flakes. Working in batches dip crackers in mixture, covering completely. Lay on baking sheets. Sprinkle liberally with Parmesan.  Bake at 250 until golden brown and crunchy, about 45 minutes. (Check often as not to burn!) Store in airtight container. 


Snacks at Very Good Recipes

Friday, November 21, 2014

Day After Bite {A Post For Earth Fare}

 Less than a week people. That's right, by this time next week all the menu planning, eating and football watching will be over. And we will have moved onto all those leftovers and tree trimming! 

Today I've got a great idea you can either serve before the big Thanksgiving meal, or wait and put some of those leftovers to good use with. 

Let's face it, while we all look forward to the huge Turkey Day meal, the entire day is really about eating, and even when dinner isn't served until 3 pm, you find yourself looking for things to snack on all day long. You're sitting on the couch, watching football, or the Macy's Parade, and you just have to have something to munch on. It's just part of the Thanksgiving aura. 

The first time I made these years ago, I wasn't sure about the flavor combo because of the addition of the cheese (after all, turkey and cranberry are a no brainer together) but they are like the perfect bite every time you put one in your mouth. 

If you need some ideas for the pre-feast snacks, let this be the first on the list. Or you know you will be in desperate need of ways to use the pounds of turkey you have left come Black Friday, this is the answer to either!

Cranberry Turkey Bites
Snack Crackers
Deli Turkey or Leftover Roast Turkey, sliced thin
Whole Cranberry Sauce
Sharp Cheddar Cheese, sliced tin to fit crackers

Lay cheese on crackers. Top with turkey and cranberry sauce. Serve immediately. 


Shared on The Country Cook Nov. 21, 2014

Cranberry at Very Good Recipes

Disclaimer: I received a gift card in exchange for this post. All thoughts and opinions are my own. 

Monday, September 1, 2014

Celebrate Whole Grains Month with Post Great Grains {A Feature}

Welcome to September, and Happy Labor Day! Did you know that September is also National Whole Grains Month? Don't feel bad, I didn't either until my friends over at Post Great Grains filled me in, and I'm more than happy to celebrate with them!


And what a better way to enjoy an entire month dedicated to whole grains than with a new fun recipe including Great Grains cereal? Did you know that each Great Grains variety has at least 30g of whole grains per serving and is an excellent source of fiber? Just what you're looking for in a breakfast to fuel your entire day! Or even better, take what you love from your cereal bowl, and experience it in a whole new, unique way? 

This recipe can be enjoyed for breakfast, a midday snack or even a nutritional dessert. Oh, and did I mention, it's super simple too??!! Give your kids something fun they will gobble down before the school bus comes, or give them something to look forward to after a full day of classes. Packing lunches for school and/or work? These would be great for that too! So versatile, you will find a hundred different ways to use it, each more tasty than the last. 

Whole grains are something we are all looking to add more of into our diets, and with yummy recipes like this, and delicious cereal from Post Great Grains, it's so easy to do just that!

Banana Crunch Parfait
1 cup Great Grains Banana Nut Crunch cereal 
1 cup vanilla low-fat yogurt
1 cup honey
1 medium banana, sliced 
1 can (20 oz.) pineapple chunks, drained

Spoon half of the yogurt evenly into six parfait glasses; top with layers of half each of the bananas, pineapple, cereal and remaining whipped topping. Repeat layers. Drizzle honey over final layer.


Disclaimer: I was provided with free samples in exchange for this feature. All thoughts and opinions are my own. 

Wednesday, May 14, 2014

Springtime Snack with Peanut Butter & Co. {A Giveaway}

I don't know how it is in your house, but when the temps start to rise, and we are spending more and more time outdoors, our appetites begin to rise with them. I guess we're so busy and doing so many fun activities outside, instead of sitting inside avoiding the cold of winter, we burn more calories and need to refuel more often. 

And then when summer vacation arrives (In this house, that's in 17 days...not that I'm counting or anything!) it takes me a few days to remember I'm responsible for feeding this little person lunch every.single.day. until school starts again! Not to mention snacks while he is enjoying time outside, or while we are on the go doing all the things we love to during summer. 

Needless to say, easy, effortless, yummy snacks are a must in this house! They have to be something you can eat with your hands, no matter what you're doing, and they need to give us the energy we need to suck every last drop of fun out of summer we can! 

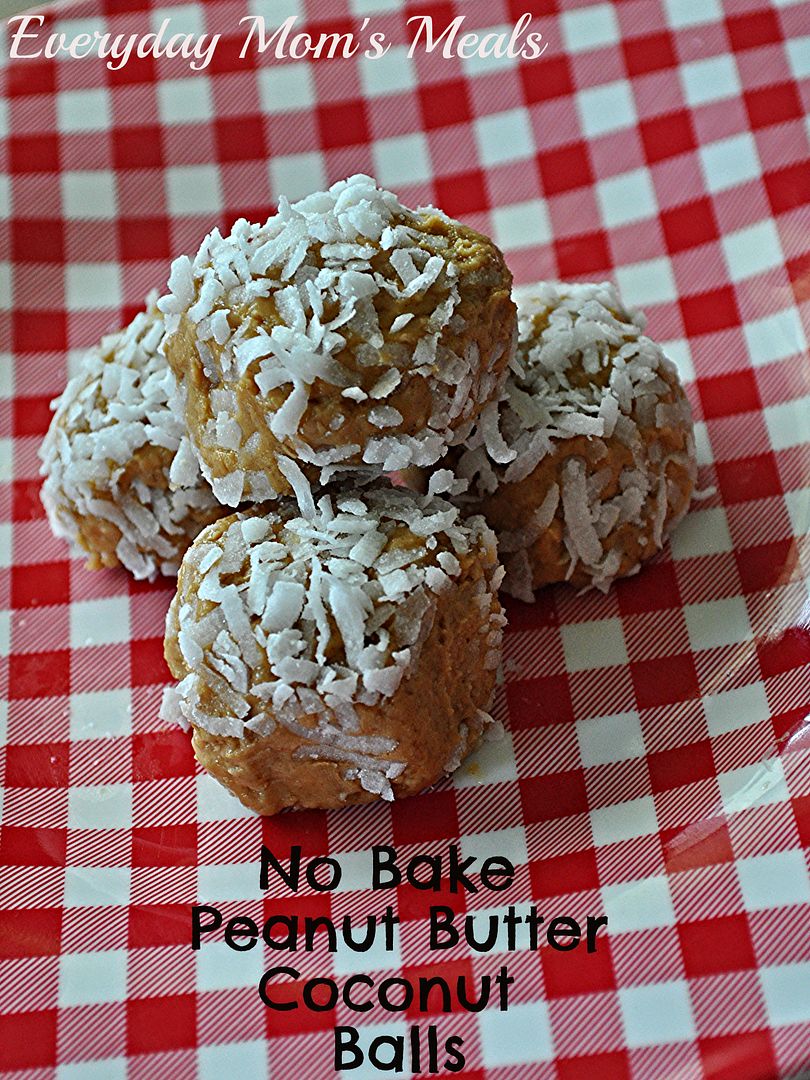
That's exactly what I had in mind when I created these using my buddy's Peanut Butter & Co's The Bees Knees Peanut Butter! My son loves the flavor of peanut butter and honey. In fact, during the school year, it's one of his favorite sandwiches for me to pack in his lunch. So when I remembered a friend telling me about these no bake peanut butter balls she makes for snacks after her trip to the gym, I knew this peanut butter would be perfect in them! 

If you love peanut butter, you're going to flip for these. If you love no bake sweets, you're going to flip for these. If you love coconut, you're going to flip for these. (Oh, and if you don't, you can easily roll them in something else. Chopped nuts perhaps!) These are so easy, even the kids can get in the kitchen and help make them. Yet another thing we love to do during summer vacation...usually on rainy days! 

The summer months are just around the corner, and your family is going to need extra energy to stay ahead of the sun. So be sure to make a big batch of these for them to nibble on while around the pool, enjoying a ball game, having a picnic, whatever summer means to you. Oh, and Peanut Butter & Co. wants to send (1) lucky winner 2 jars of The Bee's Knees to try in your kitchen! Just scroll down for the giveaway!! 

No Bake Peanut Butter Coconut Balls 
1/2 c. old fashioned oats
1 c. Peanut Butter & Co. Bee's Knees Honey
1 tsp. vanilla
2 pinches salt
1/3 c. sweetened flaked coconut

Place oats in a food processor and pulse until very fine. (Think flour consistency) In a large bowl add ground oats, peanut butter, vanilla and salt. Stir well. Using a cookie scoop, form balls, about 1 inch in diameter. Roll in coconut. Place in fridge for 1 hour to set. Refrigerate leftovers.


Shared on The Country Cook May 16, 2014


a Rafflecopter giveaway
Disclaimer: As a member of Peanut Butter & Co.’s Yum Squad food blogger club, I received product in exchange for this post. All opinions expressed are my own.

Saturday, March 15, 2014

Soul Food Saturday #47


I saw this recipe for the first time on Facebook, and had to give it a try. The perfect combination of garlic bread and pizza. How could that be wrong? Now that I have your full attention. This would be perfect for movie night, or a quick after school snack. This combinations are endless. Grab the kids because pizza bread is what's for dinner!

Pull Apart Pepperoni and Extra Cheese Pizza Bread 
1 Can Grands buttery Biscuits
½ c. Mozzarella /cheddar cheese blend
2 tsp. dried parsley flakes
1/4 c. olive oil
4 oz pepperoni
½ c. Parmesan cheese
½ tsp. granulated garlic powder

Preheat the oven to 350 degrees. Cut biscuits into quarters. Cut the pepperoni into smaller pieces. Mix all the ingredients in a bowl and toss so that the oil is spread evenly on each piece of dough. In a 9 inch pie plate, bake for about 20 minutes (or until the top is brown and the center is thoroughly cooked)
TIP: Be sure to check it in the middle before you pull it out. If the middle is still not cooked through allow another 5 minutes at a time until center is done. 


Saturday, March 8, 2014

Soul Food Saturday #46

Can you ever get enough of anything stuffed with sausage and cheese? I thought not! I know I sure can't. So after seeing this recipe several different times I knew I had to try it. So how could I make it over the top? With more cheese of course! Yep a cheese blend with cream cheese makes these even better! Take these to your next party or just make them for a movie night they are sure to hit the spot. 


Super Stuffed Jalapeños
1 lb. ground hot sausage 
40 jalapeños
4 oz cream cheese, softened
1 c. Shredded Mexican cheese blend
Preheat over 350. In a medium skillet add sausage and cook until cooked through. Drain and set aside. In a large bowl add cream cheese, shredded cheese, and cooked sausage and mix well. Rinse jalapeños. Cut each jalapeño lengthwise and remove seeds. Stuff jalapeños with sausage mixture. Bake in a 13x9 un greased pan. Cook until cheese bubbles and jalapeños are tender. Approx. 20 minutes. 
Weather you like them hot or room temperature they are sure to be a new favorite!