Monday, December 12, 2016

Holiday Blogger Challenge with Cape Cod Select


You know I can't resist a great recipe contest! And when that also includes one of my very favorite holiday flavors, well, that is just icing on the cake, so to speak.

So when my new friends at Cape Cod Select Premium Frozen Cranberries asked me to come up with something festive using their yummy cranberries, I jumped at the chance! 


Cape Cod Select Frozen Cranberries are all natural, farm fresh, contain NO additives or preservatives, and best of all, are recipe READY! They allow you to have fresh cranberries year round, not just when they show up in your produce section! To find out if they are sold in your neck of the woods, check out their store locator. Plus, you can find out more about them, and keep up on all things cranberry by following them on Facebook, Twitter, Instagram, and Pinterest.


Now when it was time for me to think about what I wanted to make with these festive little berries, that was easy. I was going to bake. And to take it a step further, I had Christmas morning on the brain. I wanted something super easy I could make ahead, and then enjoy while we are opening gifts in those wee hours of the morning. I decided I would combine the classic holiday flavors of cranberry, orange, and add in some nuts too. Well, I think I nailed it. I got exactly what I was looking for; and I know these will be perfect on December 25th.

Thanks to the great folks at Cape Cod Select, now my family will have something delicious to eat, bursting with fresh cranberry flavor! I think your family will love them too!

Cranberry Pecan Muffins 
with 
Orange Glaze 
1 1/2 c. Cape Cod Select Premium Frozen Cranberries
1 1/4 c. white sugar, divided
 3 c. flour
4 1/2 tsp. baking powder
1/2 tsp. salt
1 stick butter, room temperature
2 eggs
1 c. milk
1 c. chopped pecans
1 1/2 tsp. grated orange peel, divided
1 c. powdered sugar
1-2 TBS fresh orange juice

Preheat oven to 400. Place frozen cranberries in food processor. Pulse until coarsely chopped. Place in bowl, add 1/4 c. white sugar. Mix together. Set aside. In a large bowl combine flour, baking powder, salt, and 1 cup white sugar. In a small bowl lightly whisk together eggs and milk. Add to flour mixture and combine until just moistened. Fold in pecans, 1 tsp. orange peel and cranberries. Line muffin tin with papers and fill each well 2/3 way full with batter. Bake for 20-25 minutes until toothpick comes out clean. While baking, combine powdered sugar, 1/2 tsp. orange peel and orange juice, gradually until smooth glaze forms. When muffins done, transfer to wire racks to cool. When completely cooled, spread orange glaze on top with a spatula and allow to sit for 1 hour to set.


Monday, December 5, 2016

Bitter Cold Winter Days

Brrrr....Who turned down the heat? Yep, there is no more denying it. Winter is here. With the extra warm autumn we had here in Indiana, the temperature drop is even more a shock to the system than normal. But I guess it is December, so we better get used to it.

Does anything taste better on a bitter cold day than a bowl of piping hot soup? I don't think so. Well, maybe one thing. A bowl of soup that has been cooking all day while you are busy. That's right, your slow cooker is going to take care of today's recipe while you're at work, or out and about in the wind, and snow, looking forward to coming home to something that will warm you up and fill you up at the same time. 

Now, we aren't just talking about your every day soup here. This. Is. Chili. The ultimate winter food. A meal that will thaw you out from the inside and warm your soul to the core. A classic, made even easier with the help of your Crock Pot.

If you've been following the blog for a while, you will recognize this somewhat. I have had a recipe published for a long time for our favorite Buffalo Chili. (If you've never tried buffalo, do it! So lean, so delicious!) Unfortunately, we don't have any buffalo left in our freezer, so I had to take that recipe and adapt it a little so I could use the ground beef we do have. It still tastes just as great, and is just as easy. 

I love to serve this with some cheese and crackers on the side. And of course all the traditional toppings: diced onion, shredded cheese, sour cream, or even some elbow macaroni for chili mac. In fact, if you're having a party this holiday season, a chili bar would be so fun! Or maybe some house guests you need to feed? A big pot of this will get the job done!

Most people have a favorite chili recipe they rely on all winter long. But if you don't, or maybe you're just looking for a new one, I hope this is it! 

Crock Pot Chili
1 lb. ground buffalo or beef
1 lb. bulk pork sausage
1 large can Brooks Mild Chili Beans
1-2 large cans tomato juice, depending on how thick you like it
1 medium white onion, finely chopped
1 TBS garlic powder
1 TBS chili powder, more if you like it spicy
Salt and Pepper to taste

In a large skillet brown beef. Drain. In same skillet brown sausage and chopped onion. Drain. Add both meats to Crock Pot. Add beans, garlic powder, chili powder, salt and pepper. Pour in juice. Stir to combine. Cook on LOW for 6 hours. Serve with desired toppings. 


Monday, November 28, 2016

Holiday Ham

Okay, so the turkey is so last week. It is time to move on. Now it's time to talk ham.
Well, that might not be totally true, because I know many, many people who will enjoy another bird come Christmas. But in my head, as soon as Thanksgiving is over, it's time to think about that big, beautiful, tasty, holiday ham.

In fact, as you can see from this recipe I actually started thinking about it pre-Turkey Day. I have to. I'm a food blogger, and while holiday recipes are terrific, it means we foodies are developing, testing and re-testing weeks before the big day.

I made this for a simple weeknight meal (Yay for Crock Pot!) but I think it would be terrific for those upcoming holiday parties and family gatherings. Plus, if you make a big ham one day, and need another meal the next, you could usually substitute the deli ham with some leftovers, and make it even more delicious.

I served this family style, with the buns on the side. The ham has a pretty tasty sauce that comes with it, and if it sits on the rolls or buns too long, they will get soggy. So if you're thinking of putting this out for a Christmas party, I suggest doing the same thing; and that way, you can keep the meat on warm in the slow cooker all night long.

I can't believe Christmas is less than a month away. We are super excited at our house of course, with this being Max's first. These boys are by far the two most precious gifts of my life and I'm going to enjoy every single minute of this holiday season.


If you're looking for something new to do with your holiday ham, I think this is just what you've been wanting. A good ham sandwich is a classic, and these have a little something extra to make your guests say YUM!

Slow Cooker Ham Sandwiches
1 1/2 lbs. deli ham, sliced thin
1/2 c. sweet relish
2/3 c. packed brown sugar
2 c. apple juice
2 tsp. yellow mustard
1 tsp. paprika
Buns
Extra mustard/relish for serving

Spray slow cooker with nonstick spray. Layer ham in bottom. In a medium bowl whisk together apple juice, relish, brown sugar, mustard and paprika. Pour over ham. Cook on LOW for 4-5 hours. Serve on buns with extra mustard and relish if desired. 


Monday, November 21, 2016

Turkey Day, Made Easy

So, I can't lie, I am not on the hook for hosting Thanksgiving. In fact, most years I'm not. In the 13 years we've been married, I've only had to worry about cooking on Turkey Day twice. Why? Because we live 20 minutes from both my mom and mom in law, and they both have our family over on the holiday.

But just because I am not having a huge crowd over to my house doesn't mean I can't appreciate the need for some easy dishes to fall back on. One because I have hosted and know the stress that can go into preparing the biggest meal of the year. And two, this is what I do. I try to find ways to help your holiday cooking be more simple and less stressful each year.

This recipe is actually something I've made for years now, and we enjoy all autumn long. Seriously, as soon as the calendar says October, you can find me in the grocery store aisle looking for canned pumpkin. (By the way, if you live near an Aldi, their pumpkin is a "seasonal item" they only carry for a few months, but is ONLY $.89 per can! You won't find it cheaper anywhere else!)

So not only can you whip this up quickly, it's also totally adaptable for a few or a house full, plus it's 100% budget friendly!

I love a good pumpkin pie, but if I'm being honest, I don't need the crust. Give me the filling and some Cool Whip and I'm a happy girl. In fact, when I was little my grandma would take the extra filling she had after her pies were made, put it into custard dishes and bake it just for me.

This will be our first Thanksgiving since Grandma passed, and I felt it was time to revamp this recipe a bit, and bring it back to the blog (it's been 5 years since I first shared it) in her honor. Every time I make this, I am transported back into her kitchen with those little glass custard dishes and her saying " Geez Punkin (that's me), do you want a little pumpkin with your Cool Whip?" Yeah, I'm that girl. Pile on the topping!

If you are hosting Turkey Day this year, give yourself a much needed break and add this to your dessert menu. Sure, bake some pies too, by all means, but cross one or two off the list, replaced by the easiest recipe you'll make this holiday!

Pumpkin Fluff
2 (15 oz.) cans pumpkin 
2 small boxes instant vanilla pudding, DRY do NOT add milk
2 (8oz.) containers Cool Whip
1/2 tsp. cinnamon, extra for garnish
1/4 tsp. ground ginger
1/8 tsp. ground cloves
1/8 tsp. ground nutmeg

In a large bowl whisk together pumpkin and pudding mix. Fold in one container of Cool Whip. Add spices. Stir well. Chill for at least an hour before serving. Garnish with extra Cool Whip and cinnamon. 


Shared at Weekend Potluck

Monday, November 14, 2016

Your Holiday Guests


So we are only 10 days away from Thanksgiving. Are you ready? Or was this a rude awakening and now you're having a panic attack? It's going to be okay. Take some deep breaths. I'm here to help.

Did your stomach just jump into your throat because you are going to have a house full of people come next week? I understand completely. Did you just remember you need to feed all of them for multiple days, and not just the big one? Sure, you will have leftovers after Thursday, but what the heck are you gonna do until then? Again, don't worry, calm down, EMM is here.

This is actually a tried and true recipe from my Grammy. It's something I've been making for years, and is perfect for any busy weeknight. So why not plan it for those couple days when you're still working before the holiday, but have to come home to a house full of people asking "What's for dinner?" Let's face it, if you are going about your normal day of work, school and life, plus prepping for Thanksgiving, coming up with dinners every night that week isn't going to be too easy. But this is!

Now, heads up! When you read the recipe, and see it calls for margarine, many of you are going to be inclined to say "Oh I can use butter instead." Don't do it. Seriously. I did the same thing once and regretted it. I don't know why, but the flavor completely changes and I don't like it. It's about the only recipe I have that flat our calls for margarine. Most of the time I am an all butter all the time girl, but not with this.

This feeds the 3 of us quite comfortably with a good sized portion each. So, if you're cooking for a big crowd, I suggest making two pans of it. It's going to go quick, I promise.

But if you aren't expecting house guests, don't feel like this isn't for you. It makes a terrific comfort meal any time, and once you make it once, it will become a part of your regular meal rotation, just like it did in my house!

Don't worry if you aren't quite ready for Thanksgiving. You still have time...just not too much, so start planning those meals now and cross one thing off that to-do list!

Chicken on Rice Casserole
2 lbs. boneless chicken tenders (about 8-9)
1 1/2 c. instant rice, uncoooked
1 can cream of mushroom soup
1 can cream of chicken soup
1 can cream of celery soup
1 stick margarine, melted
1 tsp. sugar
1/4 c. lemon juice 
Garlic Powder to taste
Salt and Pepper to taste
Dried Parsley for garnish

Preheat oven to 350. Grease a 9 x 13 baking dish. In a large bowl combine rice, soups, salt and pepper. Stir well. Transfer to baking dish and spread evenly. Lay chicken on top of rice. In a small bowl whisk together melted margarine, sugar and lemon juice. Pour over top of chicken. Season chicken liberally with salt, pepper and garlic powder. Bake for 1 1/2-2 hours until rice is tender. Stir well before serving. Garnish with parsley.


Monday, November 7, 2016

Beef On a Budget


 If you are anything like me, you are always watching the bottom dollar when it comes to putting meals on the table for your family to enjoy. And if you've been reading this blog for any length of time, you know we are "freezer beef" people. We are lucky and blessed to always have fresh beef in our freezer at all times. In fact, we've had to upgrade to two freezers to accommodate it all.

And truthfully, if you are able to find a decent price around you on a quarter or half or even whole beef, I would highly recommend it. Yes, it's not a cheap investment, but in the long run, it will save you money, and the quality is so much better than anything you can find at the grocery store.

But if you are buying beef in the regular store, one of the best values you can find is round steak. It's normally cheaper than other cuts, and  I know most stores around us run a special on it a couple times each month. So keep an eye out for it, and you can not only make this delicious, budget friendly supper, maybe you can stock up too!

This meal is the ultimate "throw it together and come home to dinner" dinner. Not to mention being comfort food! If you're looking for a great side idea, potatoes! I did boiled ones, but mashed would be perfect too. Why? Simple. The gravy. It's SO good, you're going to want to drink it with a straw, but spooning it over some taters seems more appropriate.

 Being this easy should tell you how I could pull it off with Max! Yes, our little guy is now almost 3 months old, and I'm really trying to do more "real" cooking when I can.

Beef doesn't have to be something you only serve on holidays or a treat. You can have a delicious, easy steak dinner any night of the week that doesn't break the wallet!

Slow Cooker Round Steak
2-3 lb round steak, cut into portions
1 envelope onion soup mix
1 (10 3/4 oz.) cream of celery soup
1/4 c. water
Salt and Pepper to taste
Dried Parsley for garnish

Spray slow cooker with non stick spray. Season steak with salt and pepper. Place inside slow cooker. In a medium bowl whisk together water, soup and soup mix. Pour over steak. Cook on LOW for 6-8 hours. Garnish with parsley before serving.


Wednesday, October 19, 2016

Perfect Timing, Max


So, we are 2 months in, and our schedule is getting a tad more back to normal. Yes, it's super hard to believe Max has been with us for over 8 weeks now, and we fall in love with him a little more each day.

Anybody that has ever had a baby will tell you, your schedule is not your own. Your schedule becomes the baby's schedule. When he/she wants to nap, the house is quiet, no matter how badly you should be vacuuming, emptying the dishwasher or rearranging closets. When it is time to eat, the world stops, and revolves around a bottle or breast. So, when Max was eating right around supper time every night, things were a  little hectic around here. I mean, how was I supposed to cook and sit down to feed him at the same time?

But luckily, his schedule has shifted a tiny bit and he has started to around supper time, making it easier for me to not only cook, but try some new recipes I've been wanting to. Or, at least it seems easier!

This was our Mexican night treat a few weeks ago. It comes together in almost no time, can even be made ahead if that helps you out, and tastes great. Oh, I will put this disclaimer on it. You might look at it and say "Why isn't the cheese melted all the way?" Well, that's easy. It had 5 minutes left to cook when Max decided he was starving. So I had to decide to pull it early, or let it burn...obviously I chose the first.

Things are beginning to feel a little more "old school" around here, and I would tell you more about that, but I hear my little chipmunk from the next room...must be time to eat again!

Green Chile Mexican Pie
10 small corn tortillas
1 lb. ground beef
1 (10 3/4 oz.) can cream of mushroom soup
1 (4 oz.) can diced green chilies
1 tsp. onion powder
1 tsp. garlic powder
2 c. shredded cheddar cheese
Salt and Pepper to taste 
Dried Parsley

Preheat oven to 350. Grease a 9 inch pie plate. In a large skillet brown beef until no longer pink. Drain if necessary. Season with garlic powder, onion powder, salt and pepper. In a medium bowl whisk together soup and green chilies. In the bottom of pie plate layer half of the tortillas, overlapping them. Add half the soup mixture. Top with half the meat and then cheese. Repeat layers. Sprinkle top with dried parsley. Bake for 20-25 minutes until cheese begins to melt. 


Monday, October 17, 2016

Uh-Mazing Fall Fun!

 Autumn is in full swing here in Indiana, and we've been having some absolutely gorgeous weather. Some days it still feels like summer, but with the sights and smells of fall! 

One of our favorite annual traditions is heading about 20 minutes north of Fort Wayne to the little town of Waterloo where our friends at Amazing Fall Fun Corn Maze and Pumpkin Patch are always nice enough to have us out for an afternoon of fun.  


With their 17 acre corn maze, and super fun activity area, there is always so much to do for kids young to not so young! Of course, for us, it was even more exciting this year because Alex was able to share in the fun with Baby Max, not to mention how special it was for mommy too.


One of the things we love about the incredible event they put on is every year they try to add some new things to keep it fresh. This year was no exception. Right away Alex was quick to point out the baseball throw and bouncy ball area...both of which he found to be great entertainment.


After some time playing around, it was time for him and I to hit the corn maze. Since we had Max in the stroller, we decided Daddy would stay behind with him and the 12 year old and I would conquer the maze on our own. 

It was an absolutely beautiful afternoon to get a little lost, and have some fun trying to find our way out. It wasn't long before Alex was very "corn fused" deciding which way to turn, but pretty sure we found our favorite spot, the lookout, and knew we were on the right path.


I am proud to say we had complete success. We did phase 2, the bigger side, which is supposed to take approximately 40 minutes, and we were out in about 30! Victory!

Oh, that's another thing I love about this corn maze. They split it into two parts, one smaller for little legs that can't maybe last as long in the bigger side. That way the whole family, all ages, can enjoy the fun!

I am so blessed when these work days can be family days as well. If you are looking for a fun fall day for your family, and you live anywhere Waterloo, Amazing Fall Fun Corn Maze and Pumpkin Patch is the place for you! 

For more info, be sure to check them out online and Facebook.

Friday, September 30, 2016

Game Day Food

If you've been logging onto the blog lately, you know new recipes are few and far between right now. I can't help it. Max is keeping me pretty busy, and just getting supper on the table is sometimes a chore, let alone making something new, and then having the camera handy to snap a photo.

I mean, how can you worry about food photo lighting when you've got this face looking at you?


But there was a night last week that Max was napping, and knew it was time to try a recipe a friend had given me back during the summer that I hadn't had the chance to make yet.

She had shared it thinking it would be a perfect idea for summer time cookouts or barbecues, but obviously the time has passed for those. That's okay though, because I don't think anything goes with football better than a great dip. This would be perfect on Game Day! Rather you've got a big crowd coming over to watch, or it's just your family. Maybe you are tailgaters, that's even better. It doesn't matter where you serve it, as long as you've got plenty of chips for dipping!

As we get more of a schedule, I hope to get back to posting new recipes on a more regular basis, but if you follow me on Facebook, I am always sharing photos of Max (and his Big Brudder Alex too) and old recipes too. I haven't disappeared. I promise. In the meantime, enjoy this dip and think of me!

Warm Corn and Bacon Dip
2 (15 oz.) cans NO salt added corn, drained
6 slices bacon, cooked crisp
4 oz. cream cheese, softened
1/4 c. sour cream
2 c. finely shredded sharp cheddar cheese
2 TBS dried chives, extra for garnish
Salt and Pepper to taste

Preheat oven to 350. In a large bowl combine corn, bacon, cheeses and sour cream. Gently stir until well combined. Add salt, pepper and chives. Stir again. Transfer to a baking dish. Bake for 30 minutes until cheese is bubbly and golden on top. Garnish with extra chives. Serve warm with tortilla chips. 


Thursday, September 8, 2016

I Am Back

Whew. It's hard to believe my last post was back on July 18th. What can I say? We've been a little busy!!

For those of you who don't know, we welcomed our baby boy on August 11, 2016 at 1:37 pm.

Maxwell Charles Shartle Marshall was 8 lbs. 4 oz. and 19.5 inches long. He was born with a full head of hair, and we were in love at first sight, including Big "Brudder" (as we like to say) Alex. 


Alex was actually given the honor of naming his baby brother, and he chose "Max." The first time they met was one I had waited 9 months for, and one I will never forget.


His two middle names come from both of this grandpas. Charles is my father-in-law's middle name, and Shartle is my maiden name, and my dad is the last one, so we wanted the name to be carried on in some way.
Max is an absolute joyous addition to our family. We have all adjusted well to having a newborn in the house, and almost a month in, he has yet to wake up his big brother at night, which is good because the day I went into labor, was also his first day of 6th grade, at a brand new school.


It's hard to believe Max will be a month old this weekend, and I am simply trying to treasure every single second. Plus, Alex turns 12 on the 16th....so my boys are growing and I'm looking for the pause button.

So, you can understand why things on the blog are a little slow right now. Sure I'm still in the kitchen making sure my family is fed, but I won't lie, suppers are quick and easy right now, and I'm not really ready to try anything new yet.


This happened to be the last new recipe I did make about 2 weeks before Max was born. It's my take on a dish Alex had at Popeye's Chicken and loved. It's a super simple all in one meal with just enough kick to make it exciting. Add a salad or some fresh fruit on the side and dinner is done.

I promise to get back into the swing of things at some point. But right now baby snuggles are a little higher on my priority list!


 Cajun Dirty Rice
4 c. instant white rice, cooked
1 lb. ground beef
1 medium orange bell pepper, finely chopped
1 small red bell pepper, finely chopped
2 tsp. Cajun seasoning, or to taste
1/2 tsp. garlic powder
1/2 tsp. dried celery flakes
1/4 tsp. red pepper flakes
2/3 c. beef broth
Salt and Pepper, to taste
Dried Chives, for garnish

In a large skillet over medium high heat, brown beef with peppers until no longer pink. Drain if necessary. Add rice and mix well. Add seasonings and beef broth. Reduce heat to medium low and cook and stir until liquid is absorbed, about 5-7 minutes. Garnish with chives before serving.


Monday, July 18, 2016

Another Recipe Contest

Yep, once again I am trying to see if a recipe I create can be named "best in show." I have to admit, I really enjoy entering recipe contests, but just don't have as much time to do them right now as I would like. (For those of you keeping track, I am almost 9 months pregnant...hence the short on time issue!)

But when I heard about this one from JSL Foods, I decided to make the time to enter one more before my days are completely full of bottles, diapers and cooing!

The idea was simple. They would send me whichever of their products I wanted to incorporate into a recipe and then I got to play and create in my kitchen. How cool!

I decided to use their Teriyaki Yakisoba Noodles, but in a different way than I normally would.


We are Asian food fanatics, but in the summer time, we are also salad ones too. We like eating lighter, cooler and more refreshing meals when the sun is beating down and it's too hot to move. So I decided I could take these tasty noodles, add some fresh ingredients, a tasty sauce and create a salad that is both filling and light at the same time.

This makes a terrific main dish, with some fresh fruit on the side. Or whip up a big batch of it for your next cookout. Feel free to add whatever veggies you think you would be delicious, I think I might add zucchini next time.

If you want to learn more about JSL Foods and all the great products they have to offer, check them out online, on Facebook and Twitter. Or, look for them at your local Safeway or Target store. Oh, and wish me Good Luck!!

Sweet n Spicy Asian Noodles Salad
3 packages Fortune Teriyaki Yakisoba Noodles, sauce packets discarded
1 (12 oz.) bag frozen cooked medium shrimp, thawed and tails removed
1 (8 oz.) bag frozen shelled edamame, thawed
1 lb. fresh broccoli crowns, cut into florets
1 red bell pepper, julienned
1/4-1/3 c. creamy peanut butter
1/4 c. soy sauce, extra for serving
1/4 c. lemon juice
1/2 c. chicken broth
3 TBS sesame seeds, extra for garnish
1-3 tsp. sriracha, to taste

Bring 2 large pots of water to a boil. When they are rapidly boiling, add noodles to one, and broccoli to the other. Cook EACH 2 minutes total. Immediately transfer both the noodles and broccoli to a large bowl of ice water to stop the cooking process. Drain well.  In a medium bowl whisk together soy sauce, lemon juice, chicken broth, peanut butter, sriracha and sesame seeds. Transfer noodles and broccoli to a large bowl. Pour sauce over. Add shrimp, peppers and edamame. Toss to combine. Chill for at least an hour before serving. Stir well again. Sprinkle with extra sesame seeds. Serve with extra soy sauce on the side. *NOTES* I use 2 teaspoons of sriracha, because I can't take much heat. Feel free to use less or more depending on the heat level your family enjoys. Or, you can always serve extra on the side. When you pour the sauce down over the noodles, you will notice extra. This is fine because it will absorb a lot while chilling. 

Monday, July 4, 2016

Cookies At Your Door { A Review}

It seems like we are doing more and more of our shopping online. I don't know about your family, but I can honestly say a large majority of our "gift giving" shopping involves me on the Internet instead of me in the car driving around. From online stores to being able to order fantastic foodie gifts, there is nothing you can't order online these days. And if you are like us, and always looking for the next delicious thing to send to your loved ones, I've got a great idea for you today!


Since 1983 Gimmee Jimmy's Cookies has been offering their home baked cookies to the public in simple cookie tins. And today their love of cookies and desserts is shared with sweet lovers worldwide. Their line of fresh baked gourmet cookies and Kosher desserts are:

Baked Fresh, All Day, Every Day

Use All Natural Ingredients

No Artificial Anything

Kosher Certified


Perfect for birthday gifts, fund raising, or "just because", Gimmee Jimmy's Cookies are sure to please the dessert lover in your life. 

Now, for this review I was asked to keep a 7 day diary of our 2 pound cookie tin to show just how fresh they stay, and how they are as delicious on day 7 as they are on day 1. 

I can honestly say it was hard for us to even have any left by about day 5, they are that delicious, but we persevered!!


Day 1: The cookies look like they were just taken out of the oven, fresh baked and taste great.

Day 2: No change. Still taste as fresh as yesterday.

Day 3: No complaints, taste the same.

Day 4: Even the ones that have been laying underneath others taste fresh.

Day 5: These two were the only ones that seemed just a tad dry to me, but I honestly think it was the type of cookie, not due to anything else. My husband ate them and said they tasted just right to him.

Day 6: After almost a week, we are into a layer of a ones we haven't touched and they are soft and yummy.

Day 7: As you can see, they look just as fresh as the ones we enjoyed a week before.

In conclusion, I have NO complaints about the freshness level these cookies maintained after sitting on our counter top for a week. We did nothing special. We kept them in the tin, in a cool dry place in our kitchen, just as was suggested, and honestly where we would have anyway.

I am so impressed with these cookies and would not hesitate to order them as a gift for someone I love. I know their eyes would light up at the variety and freshness of such delicious sweet treats!

Want to know more? Be sure to check Gimmee Jimmy's Cookies online, and on Facebook, Twitter and Instagram.


Disclaimer: I was provided with free samples in exchange for this review. All thoughts and opinions are my own.

Wednesday, June 29, 2016

Cool Suppers for Hot Days


Oh summer, how I love thee. Even when the thermometer reads 90 before noon, the Indiana humidity is at 110%, and my 8 month pregnant body has sweat coming out of places I never knew existed. Yes, even with all of that, I am still summer's #1 fan. See, we have a saying in our family, "You don't have to shovel sunshine."

Did you catch that? 8 months pregnant. So many people are telling me "Wow this is flying by, but I'm sure it's not for you." Well, I have to be honest, IT IS! I can't believe our baby boy will be here in such a short amount of time. But, with so much left to do to get his nursery ready, he needs to keep baking a while longer!

Being pregnant in the summer isn't something many women would be okay with, but I am. Alex's birthday is in September, so apparently I'm just destined to enjoy the dog days of the season carrying a few extra pounds; and it's a blessing I am so thankful for.

But that doesn't mean I can't find my own ways to beat the heat. We are regulars at our local splash pads and pool. And I can always get inside with AC and put my feet up. Plus, when it comes to dinner time, I can make sure meals are light, cool and refreshing.

Such is the case with this terrific salad. Sure, it would be great at a picnic or at your July 4th cookout, but it also makes a tasty meal on a hot evening. I served it with some fresh fruit on the side and we were all satisfied without feeling stuffed.

These hot days are what I long for during those bitter cold winter months, so I for one will not complain. I will just find ways to make it a little easier on myself and this little bundle of joy of ours!

Shrimp Pasta Salad
1 lb. medium shell pasta
1 (12 oz.) bag frozen cooked shrimp, deveined, shell off, tail on, thawed
1 red bell pepper, diced
3 ribs celery, diced
1/4 c. mayo
1/4 c. zesty Italian dressing
2 tsp. Chesapeake Bay Style seasoning, plus extra for garnish
Salt and Pepper to taste

Cook pasta according to package directions. Meanwhile, remove tails from shrimp and cut each shrimp in half. In a large bowl combine shrimp, pepper, and celery. In a small bowl whisk together mayo, dressing and seasoning. When pasta is cooked, drain, rinse with cold water and drain well. Add to shrimp mixture. Pour dressing over. Season with salt and pepper. Mix well. Chill 2 hours. Before serving, sprinkle with extra seasoning. *NOTE* You might ask why buy tail on shrimp if you're going to take them off? I find with frozen shrimp, they keep their shape better if they are frozen with the tails on, and then removed later.


Saturday, June 18, 2016

Zoo To You 2016

Yes, it's that time once again. When our family ventures out to one of our favorite summer time spots, The Fort Wayne Children's Zoo, and then report back to all of you what's going on at one of the country's BEST zoos! 


We are always so excited to visit the zoo, see all of our favorite animals and check out everything new they have going on; and this summer there are definitely new and adventurous attractions to see. Plus this year, we were extra lucky because Maa Ma got to join us for our day of fun!


Now for us, part of exploring the zoo is seeing what new food/menu options they might have added since our last visit; and to best do that, we decided to ask Chef Matt, the zoo's executive chef some questions we had about what we saw. We were lucky enough to meet Chef Matt in person last year and wanted to follow up on a couple things, and had some new thoughts too.

1. Last year when we spoke, you mentioned you had some new ideas you were looking to develop for this season. Have you been able to implement any of those?

  I did work on some new ideas for this season unfortunately a lot of them were put on the back burner. This tends to happen a lot in our environment. We did work on other projects such as building more shelves and storage for product, revamping the line at Rays by pulling out the registers and adding a grab and go cooler, adding a second soft serve machine to Matilda’s, adding an Icee mix up station in Africa, and purchased some much needed equipment for all the stands. I did get a chance to play with Mt. Dew ice cream. It turned out great and we run it on occasion and on holiday weekends. Right now I am working on doing something fun for Zoo Brew.


 2. We noticed a family meal available at the Tree Tops Cafe and were wondering if there are any other family options we didn't see. 

 Unfortunately at this time Tree Tops is the only place we offer family meals. 
 
3. Have you ever considered having daily lunch specials (especially sat Ray's Grille)? 

We do run specials quite a bit. I have not made it a mandatory daily thing at this point, but I can tell you that Ray’s has ran Krab Rolls, Strawberry Short Cake, and Banana Pudding with Nilla wafer cups. In other locations we have done Chicken and Waffles, Specialty Pizzas, Pizza Fries, Pizza Pretzels, Deep Fried Cookie Dough, and Brownie Sundaes.

 4. What is your biggest meal seller? We realize popcorn and ice cream are crowd favorites, but besides those. 

Chicken Tenders Baskets, Burger Baskets, Pizza, then Ice Cream…… In that order.
 
5. Have you ever looked into offering Lemonade Shake Ups? We love them and know they are a hit at other places we enjoy during the warm months. Just a suggestion :) 

  Funny you asked this. This was one of the concepts that got put on the back burner, but yes I have the concept all drawn up and was looking at putting it in Africa. Bees are always a problem with a concept like this especially at a zoo. So for now it’s still just a concept, but it is still on my radar and something I’d like to do. 

If you don't know about all the new and exciting things going on at the zoo this summer, you have to check out the completely remodeled Australian Adventure. Part of this was finished last year when we were there, but not Sting Ray Bay is open, where you can actually pet a sting ray! Not to mention a gorgeous outdoor eating area perfect to grab some shade and rest. Plus, there are plenty of great photo opportunities as well.


Oh, and while you are there, you have to take a ride on the new Crocodile Adventure River Ride. If you've been before, it's the log ride we all loved as kids, but even better! So relaxing, but still exciting too! 


And of course no trip to "our" zoo is complete without seeing our favorite exhibits as well. For us, it doesn't get better than watching the Sea Lions play. Seriously, we could sit and watch these adorable friends all day long. They are definitely the boy's favorite!


The Fort Wayne Children's Zoo has been a family favorite since I was a little girl. If you live in our neck of the woods, and haven't planned your summer trip yet, you MUST! Or even if you live within a couple hours, it is definitely worth the drive. You won't regret it! To learn more, buy tickets or plan your visit, be sure to check them out online, on Facebook, Twitter and Instagram! Follow along for all the zoo fun!

Disclaimer: I received free tickets in exchange for this feature. All thoughts and opinions are my own.  

Monday, June 6, 2016

Summertime Picnics

Tis the season! No! Not that one. We've got another 6 months before that. I'm talking about outdoor eating season! All those occasions we find all summer long to enjoy our favorite summer time foods in the warm sun! From cookouts and barbecues, to one of our families favorites, picnics, this time of year we find ourselves eating outside more and more!

Does your family still enjoy a good old fashion picnic? If you haven't went on one in a while, I say seize the day! They are literally one of the summer time activities we look forward to the most! Plus, they can be a ton of fun on cheap! Pack up the trusty picnic basket (I have a couple!) with yummy food, find a local park and you've got yourself a days worth of fun.

Now when it's picnic time in our house, we all of our assigned jobs. Little E usually gets to have input into which of his favorite spots we are going to visit. Mr. E loads up the car and drives. And me? Well, I'm in charge of food of course! We have the standbys we like to have every time, but I also like to come up with new things to make each picnic a culinary adventure.

So when my new friends at Smithfield offered to send me some of their delicious boneless sliced hams to play around with, I knew it was time to take my every day ham salad recipe and kick it up a notch. A friend had recently shared with me her version, and I thought combining the two would be a perfect match.

You can serve this on bread, toast, rolls, or what I used, some buttery croissants. In fact, I love using those on picnics because I can pack them separately from the salad itself and easily assemble them on site. That way our sandwiches aren't mushy by the time we are ready to eat. If you love deviled eggs, this tasty twist will be right up your alley!

Summer was made for getting outside and enjoying every last sunny minute. And what makes it even more fun? When you can take some delicious food with you and only add to the enjoyment!

Deviled Ham Salad
2 c. finely chopped ham
2 ribs celery, diced
4 hard boiled eggs, chopped
2/3 c. mayo
1/2 tsp. yellow mustard
1/2 tsp. Cajun seasoning
1 TBS dried parsley, plus extra for garnish
Black Pepper to taste

In a large bowl combine ham, eggs and celery. In a medium bowl whisk together mayo, mustard, Cajun seasoning, pepper and parsley. Pour over ham mixture. Chill for at least an hour before serving. Serve on buns, toast, with croissants or crackers. 


Disclaimer: Smithfield provided me with some samples to use in recipes. The thoughts and opinions are all my own.

Thursday, May 19, 2016

On The Go Summer Snacking with Smithfield {A Feature}

We have less than a week of school left. I can't tell you who is more excited, me or the boy, but there is definitely excitement in our house. 

The only downside to having him home with me every single day (and believe me, it's a very small one) is I have to feed him! This kid wants three meals per day, plus snacks in between! And even though it is summer, so of course we treat ourselves now and again, as a mom I also want snacks I can feel good about giving him too. Plus, if they are ones he can enjoy on the go during our busy days, even better. This is where my friends at Smithfield come in.  

Their new line of Ready, Snack, Go! snack packs are exactly what we look for in a convenient, tasty and feed good snack all summer long. They come in 6 flavor varieties of Smithfield lunchmeat paired with fresh cheese. Plus, with a low MSRP of $1, they are budget friendly too! 

My son loves all the flavor combos and different options. He can grab one out of the fridge anytime instead of having to say "Mom, what can I have for a snack?" I love that I can throw some in a cooler for a trip to the splashpad or pool! 


Oh, and they can help with easy lunches and summer time picnic menus too, with Smithfield Anytime Favorites. The quarter boneless sliced ham comes pre-sliced, so it's super easy to use for sandwiches or easy weeknight meal prep. I'm thinking ham salad for our next summer time picnic! 


If summer time snacks and meals have you scratching your head, look no further than these delicious and easy new products from Smithfield for all of your sunny day, on the go, treat needs! 


Disclaimer: I received free samples in exchange for this feature. All thoughts and opinions are my own. 

Monday, May 16, 2016

BEST Potatoes EVER

Yeah, so that's a pretty big claim, huh?! How can I be so bold? Well, it's because I can honestly say of all the roasted potatoes I've made over the years, and trust me, there have have been a lot, these are hands down the best tasting, most tender, perfectly what I was looking for version.

How did these magical potatoes come to pass? It's simple. The same way most new recipes are coming out of my kitchen these days. Baby cravings!!

For those keeping track, I am now 6 1/2 months pregnant, and yeah, pretty much hungry all the time. When my tongue sets it's sights on something I can't let it go. I obsess about it until the craving is satisfied. Just like with Alex, my cravings aren't really strange or made up of weird combos, they are just foods I love, and when I want them, I want them NOW.

Such was the case with this recipe. I was having Mr. E barbecue a roast on the grill, had our first batch of sweet corn of the summer, and wanted some tasty taters to go with it. I'm not joking when I say I planned this meal on a Wednesday, before my weekly grocery trip, and literally could not stop thinking about it until Sunday when it was finally time to execute.

These come out of the oven with just the right about of crispy outside, but tender, buttery inside. They have such a robust flavor, with only a few ingredients, making them super easy too. Serve them with whatever you've got coming off the grill, from steak to chicken!

I'm sure everyone has that one potato recipe they consider to be the best ever, and right now, for me these are it!

Garlic Roasted Potatoes
3 lbs. honey gold potatoes, or any small yellow potato, quartered
1/4 c. olive oil
6 cloves garlic, minced
Salt and Pepper, to taste
Dried Parsley 

Preheat oven to 400. In a large bowl whisk together oil, garlic, salt and pepper. Leave at room temp for about 5 minutes. Add potatoes and toss to coat. Allow to marinate at room temp for 20 minutes. Transfer to a large baking sheet. Add extra salt and pepper.  Bake for 1 hour, stirring a couple times, until browned and fork tender. Garnish with parsley before serving.


Wednesday, May 11, 2016

Meatballs Made Easy with Aidells®

I was recently asked by  Aidells® to create a recipe and share their product using it.

As a busy mom, I know how hard it is to find the time to put good food on the table...fast. We all want to feel good about the meals we give our families, but none of us have the time to spend all day in the kitchen. So what's a lady to do? Well, this is when I look to the store for a little help; and this time that meant a trip to my local Meijer store and my new friends at Aidells®.

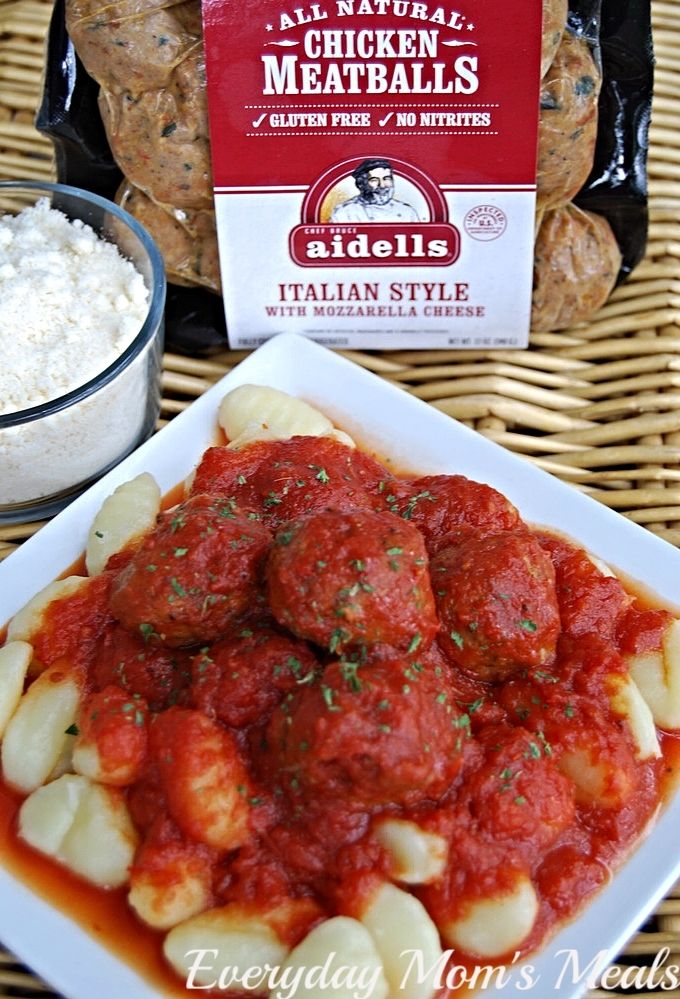
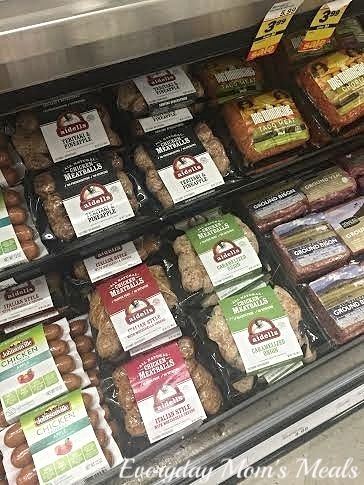
Aidells® packaged Sausage Links and Meatballs come in unique, bold flavors, have incredible taste, and are made from hand picked ingredients. These aren't your everyday meats! They are also gluten free, contain NO nitrates, and have NO added hormones. For home cooks like me who care about what they see on the ingredient label, that is like icing on the cake! 

I cant' wait to try the sausages too, but this time around I was focusing on meatballs, which come in three tasty varieties, so it's easy to find the one that compliments the dish you're making. 


Aidells®  Meatballs Terriyaki and Pineapple (12oz)

Aidells®  Meatballs Italian Style with Mozzarella (12oz) 

Aidells®  Meatballs Caramelized Onion (12oz)

For me, they were super easy to find at Meijer, next to the " butcher" counter, not too far from the other packaged meats. 


 Oh, and right now you can get a $1/1 coupon through mPerks to make these even more budget friendly! This promotion runs from 5/1-5/28, so make sure you get to Meijer quick! Plus, on 5/1 there will be live in-store demos as well!


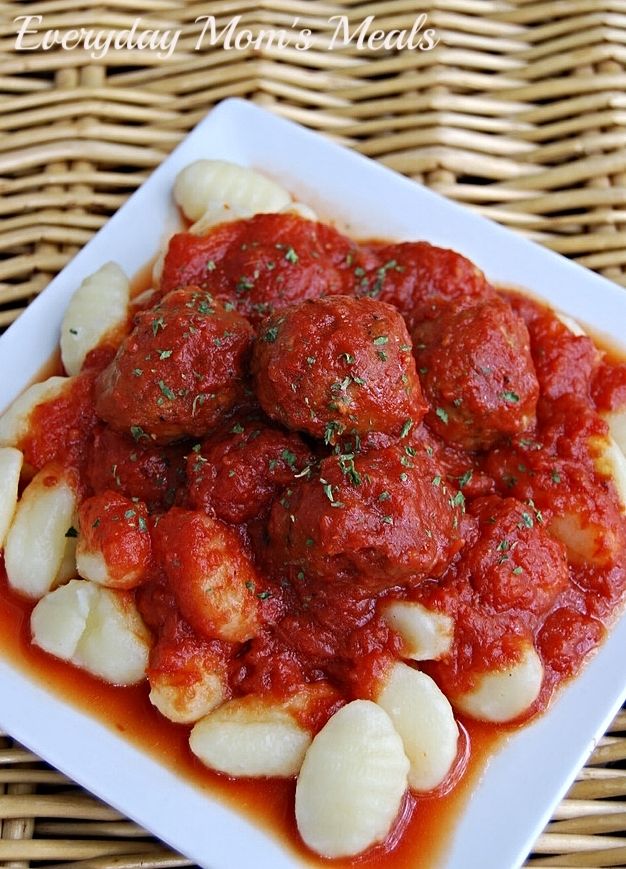
So, now that I have your attention, and probably drooling, I know you are wondering what did I choose to make with these yummy meatballs. Well, I had a rustic, hearty, but still simple meal on the brain, so I decided to try the Italian Style with Mozzarella.

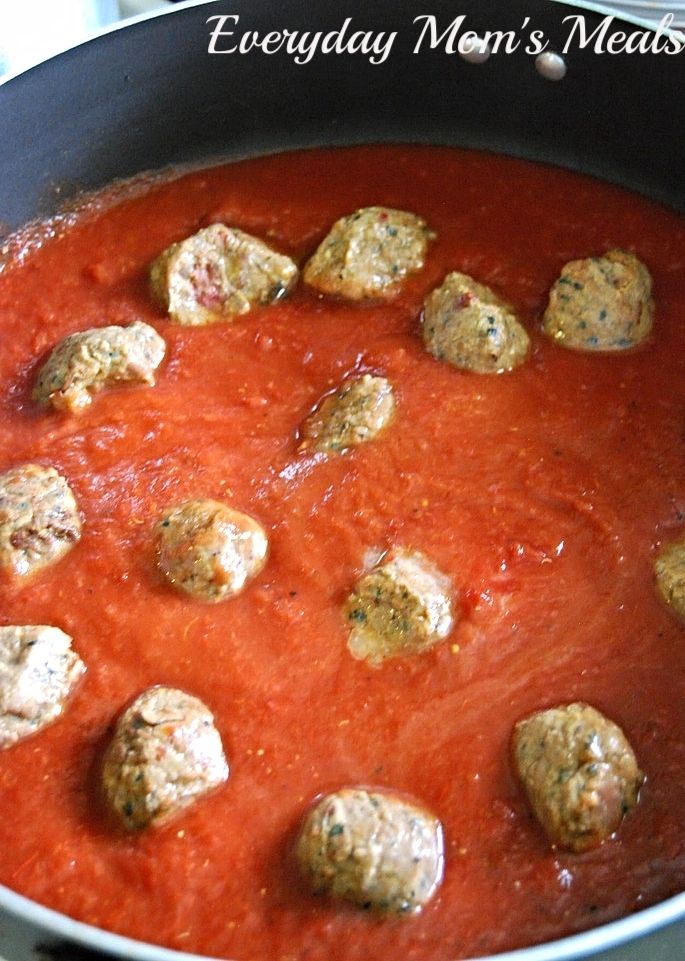
This dish will have your family convinced you were sweating over the stove all day, when in reality you can have it on the table in about an hour. You can even make the sauce the day ahead to save even more time! (See notes in recipe.) Plus, since the meatballs are fully cooked, once the sauce is ready, you simply have to warm them in it for about 10 minutes to have a finished marinara with meatballs ready to go! 


So, if you're looking for a way to get dinner on the table in an easy, time friendly, but still delicious way, that you can feel good about...be sure to download that mPerks offer, head to Meijer and bring some Aidells® meatballs home today! 


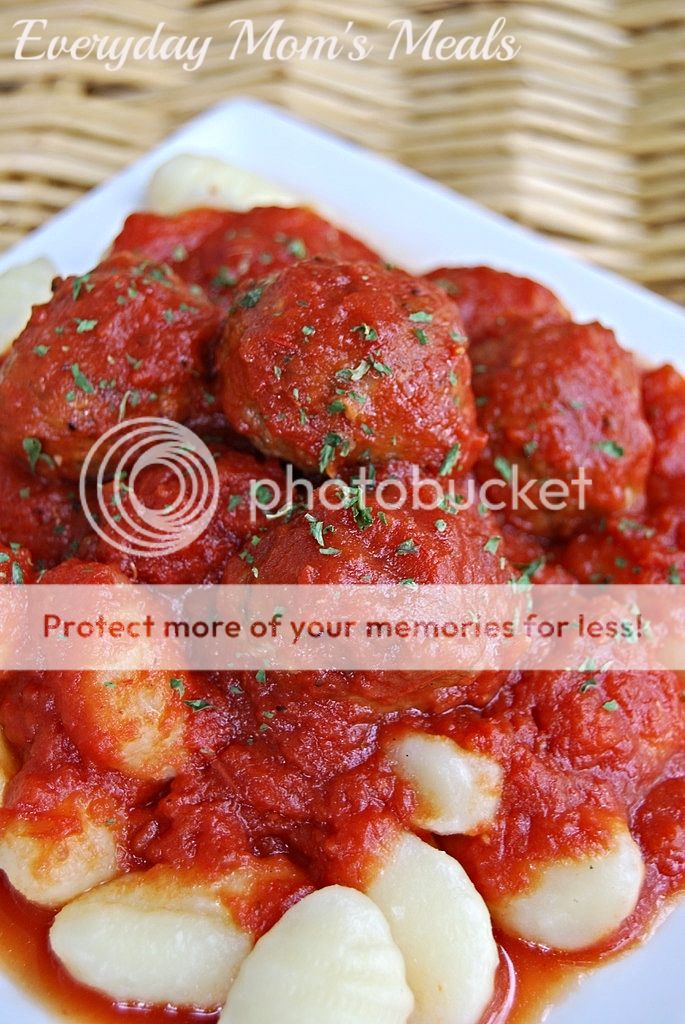
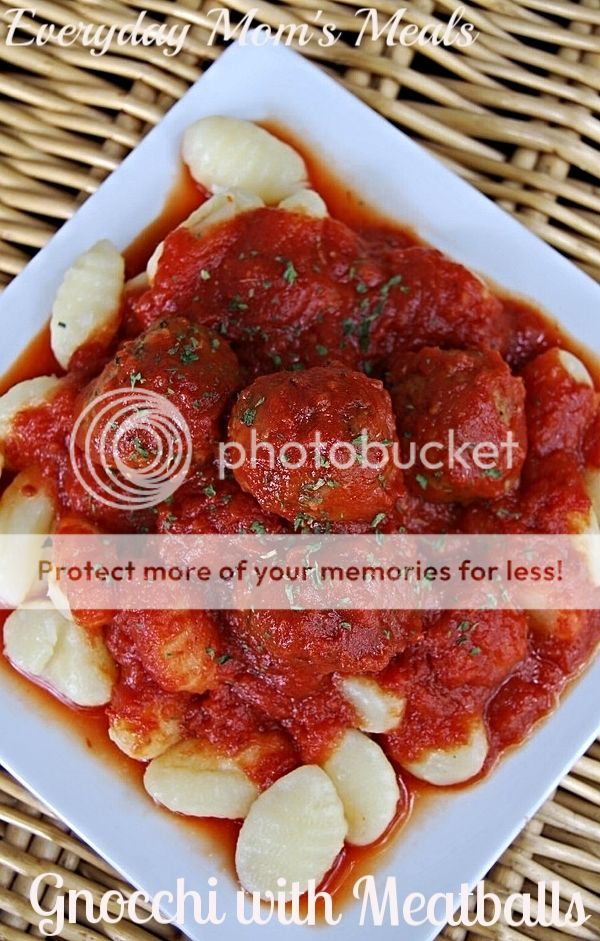
Gnocchi with Meatballs
 2 (1 lb.) packages potato gnocchi
2 (28 oz.) cans crushed tomatoes
2 (12 oz.) packages Aidells® Italian Style Meatballs
2 celery stalks, cut in half
2 carrots, peeled and cut in half
2 garlic cloves, peeled
1 medium white onion, peeled, left whole
2 dry bay leaves
2 TBS butter
Salt and Pepper to taste
Dried Parsley
Parmesan cheese

In a large pot or dutch oven, combine tomatoes, onion, celery, carrots, bay leaves, garlic, salt and pepper. Stir to combine. Cook on low for 1 hour, stirring occasionally. Add butter, stir well. Add meatballs and allow to cook for 8-10 minutes. Meanwhile, bring another large pot of water to boil. Cook gnocchi according to package directions. Drain well. Serve meatball sauce over gnocchi. Garnish with dried parsley. Serve Parmesan cheese on side. *NOTE* You can make the sauce a day ahead, cool and refrigerate. When ready, warm on stove top over low, add meatballs and follow remainder of recipe.


This is a sponsored conversation written by me on behalf of Tyson. The opinions and text are all mine.