Everyday Mom's Meals: April 2013
_____

Tuesday, April 30, 2013

Change Your Oil

This is a Sponsored post written by me on behalf of Pompeian for SocialSpark. All opinions are 100% mine.

Nope, I'm not talking about the 3,000 mile check up on your car. I'm talking about your cooking oil! And with Pompeian’s Time to Change Your Oil campaign, it's never been easier!

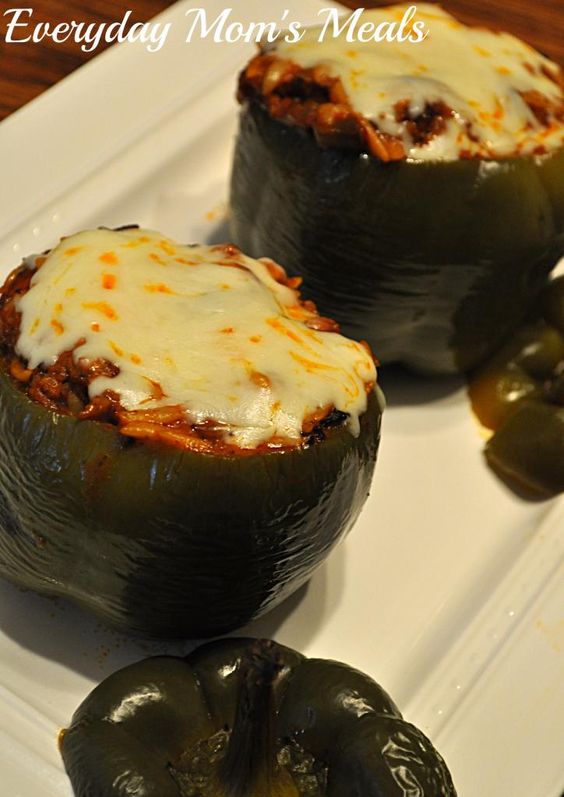
Thanks to recent scientific findings, the Mediterranean diet has boosted the popularity of olive oil. As a leader in olive oil, Pompeian wants to share a much less known oil (not to mention chef's secret for years now), grapeseed oil
 photo PMPNGrapeseedbottleF2_NewLabel_zpsc8e278d3.jpg
Grapeseed oil has similar health benefits to olive oil, but is even more versatile in cooking due to its light taste and high smoke point. I can tell you from personal experience, I love using grapeseed oil in my kitchen for some of my favorite recipes. However, I've never tried it in a stir fry recipe, and this Beef-Stir Fry from Pompeian would be a great place to start:

INGREDIENTS
1/2 cup low-sodium beef broth
1/3 cup teriyaki sauce
1/4 cup rice vinegar
3 tablespoons Pompeian OlivExtra Premium Mediterranean Blend oil
2 tablespoons sugar
2 tablespoons cornstarch
1 tablespoon Asian dark sesame oil
1 pound flank steak, cut against the grain into 1/4-inch strips
4 cups broccoli florets
1 green pepper, seeded and thinly sliced
1 small red onion, thinly sliced
1 bag (8 ounces) carrot matchsticks
cooked brown rice
Preparation
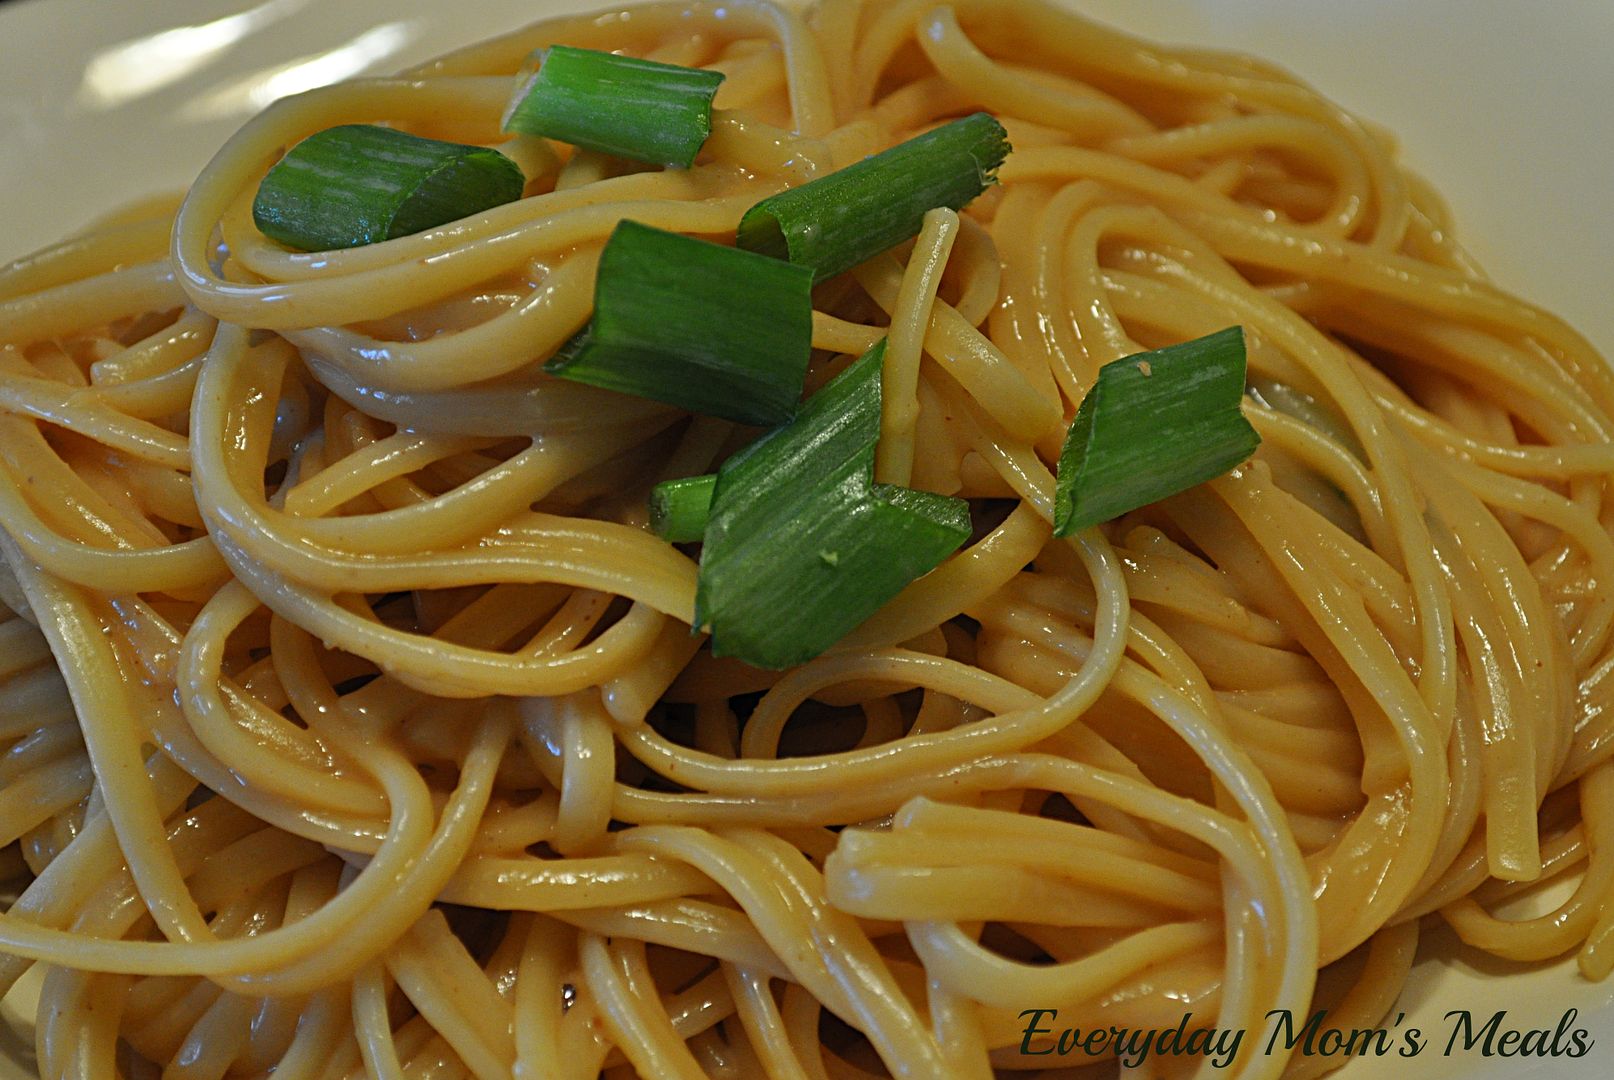
1. In a bowl, whisk broth, teriyaki sauce, rice vinegar, 1 tablespoon of the olive oil, sugar,  cornstarch and sesame oil.

2. In a large skillet, heat 1 tablespoon of the oil over medium-high heat. Add flank steak and cook for about 3 minutes, stirring occasionally. Remove from pan and set aside. Drain any oil from pan.

3. Return skillet to medium-high heat; add broccoli and 1⁄2 cup of water. Cover and cook for 5 minutes, or until tender. Remove cover; cook until water has evaporated. Add remaining 1 tablespoon of olive oil to pan; add peppers and red onion. Cook, stirring occasionally, for 4 minutes or until crisp-tender. Add carrots; cook 1 minute. 

4. Return beef to skillet. Add reserved sauce; cook 2 minutes or until thickened. Serve with brown rice.
 photo BeefStir-Fry_zps9a92bde5.jpg

Right now, Pompeian and Hungry Girl are encouraging bloggers  to test this "swap out" in a recipe that usually uses butter or vegetable oil; using Pompeian's Grapeseed Oil or OlivExtra Premium Mediterranean blend instead. Simply post the recipe, with photo, on your blog, and then head over to the Pompeian Facebook  page, enter your contact info, and hit SUBMIT. It's that easy! The winner will be selected by Hungry Girl Lisa Lillen, and receive an all expenses paid trip to BlogHer Food '13 in Austin, TX June 7-8. Plus, his/her recipe will be promoted by Pompeian throughout the event!
Sounds pretty exciting right? So get in the kitchen, and start overhauling some of your favorite recipes tonight! Then blog them, enter and come back here to let me know why you want to win!

 photo Screenshot2013-04-12at25040PM_zps5776d459.png

Visit Sponsor's Site

Monday, April 29, 2013

My Boys' Favorite

I am never shy about sharing favorites of mine with all of you. Heck, that's why I am here! To bring things I love into your home, and hope maybe you will love them too! But today I'm actually sharing a favorite of my "boys". Something they will both gobble down, rather it's my version or the original.

See, this is also a copycat recipe. I've told you before how our favorite Italian restaurant here in Fort Wayne is the family owned Casa's. (Plus, it is where Adam took me on our very first date, almost 16 years ago!) With a menu containing countless delicious dishes, sometimes it is hard to choose only one...or at least it is for me. I have 3-4 favorites that I usually alternate between each time we visit. But if you were to walk up to our table any given time we are eating, 9 times out of 10 you would find this dish in front of my husband. This wasn't something he always ordered, but once he did, it quickly became his favorite. And when Alex was little and still ordering off the kids' menu, Daddy was always nice enough to share a few bites with him. But now, as Alex has gotten older, and eats even more, he orders his own plate. 

They serve this dish with the option of mushrooms, olives, or both. Well, for my guys there is no question...it is always both! The salty, briny flavor of the olives compliments the deep flavor of the mushrooms and sauce so well, it is a match made in heaven. And while this isn't something I order there (I have too many other faves to add another!) I really love the flavor too.

Copycat recipes are so incredibly fun, not to mention affordable. Now I can make something I know my boys' adore, any night of the week, save a little money and treat them to a special meal without leaving our kitchen!

Cappellini con Pomodoro
1 lb. angel hair pasta, cooked according to package directions and drained
7 oz. jar pitted kalamata olives, drained and lightly chopped
8 oz. button mushrooms, thinly sliced
3 cloves garlic, minced
2 TBS butter
Salt and Pepper to taste

Sauce:
28 oz. can whole peeled tomatoes
1/2 c. olive oil
2 garlic cloves, minced
1/4 tsp. sugar
Salt to taste


Pulse tomatoes with juices in a food processor until pureed but still thick. Heat oil in a medium saucepan over medium heat. Add garlic and cook, stirring often, until beginning to brown, about 2 minutes. Add tomatoes, sugar and season with salt. Bring to a boil, reduce heat, and simmer gently until sauce is slightly thickened, 10-15 minutes. In a separate skillet, heat butter on medium. Add mushrooms and garlic and cook until starts to brown, about 5 minutes. Add olives, salt and pepper. Cook and stir until mushrooms are completely cooked, about 5 minutes more. Add mushroom mixture to sauce. When pasta is cooked, drain well. In a large bowl combine sauce and pasta. Toss to coat well. Garnish with dried parsley if desired.
*NOTE* I use angel hair because I can't find true cappellini. Also, this sauce recipe makes about 3 cups. For an even easier version, use 3 cups of your favorite spaghetti sauce.


Shared on Make Ahead Meals Apr. 29, 2013
Shared on Mandy's Recipe Box Apr. 30, 2013
Shared on Lady Behind The Curtain May 2, 2013
Shared on Miz Helen's Country Cottage May 2, 2013
Shared on The Country Cook May 3, 2013
Pasta at Very Good Recipes
Pin It

Sunday, April 28, 2013

Church Supper #84

Good Morning and welcome to another Sunday! I hope this finds you enjoying your weekend and ready to share in some good fellowship and great food!
Thanks for stopping by today. I truly appreciate you sharing with our foodie family!
Please link up your favorite recipes from the week. And remember I wish you God's blessings all week long!
 " Rejoice in the Lord always. I will say it again: Rejoice!" (Philippians 4:4)


Last Week's Most Viewed Recipe:


From:

Congrats! Be sure to grab my Featured On Button!

Rules:

1. Feel free to link up as many recipes, butrecipes ONLY please, as you like!

2. Link up to your ACTUAL recipe, not just your homepage. Much easier to find you that way!

3. Include a link back to EMM on your recipe post or grab my button!

4. Leave comments so I can visit you back!

5. Visit at least 2 other sites and tell them you joined them at my Church Supper!

6. Follow my blog here w/ GFC and on Facebook :)


Saturday, April 27, 2013

Soul Food Saturday #2

Good Morning, and welcome to the second week for Bekki to be in the EMM kitchen. And this week, she has a super yummy dessert that I know you're just gonna love at first sight...and bite!


Dessert, anyone? Now how can you say no to that? This week I decided in honor of my mother’s birthday I would put together 3 of her favorites all in one. I am taking about strawberry shortcake, cheese cake and a pudding all in one. Yep, it’s a celebration in a glass! Champagne glass that is! So here’s a toast to you, my sweet mother and soul food Saturday!


Strawberry Cheesecake Parfait
1 small  box cheesecake instant pudding
2 c. cold milk
1 package vanilla sponge cakes
1 container fresh strawberries approx 1 pound
Whipped topping
Mix pudding following package instructions. Place in refrigerator to chill and set. Cut sponge cakes into pieces. Set aside. Rinse strawberries gently under running water and lay on a kitchen towel to remove excess water. Remove tops from strawberries and slice. Set aside. Take pudding out of refrigerator and mix again lightly. Spoon pudding into Ziploc bag and remove air and seal bag. Set aside.
In a champagne glass, add some sponge cake pieces to the bottom creating a layer. Next place strawberries in another layer. Take zipped bag and cut one corner off the bottom, creating a piping bag. Add pudding next, creating another layer. Top with whipped cream. Continue layering until you have reached the top. Garnish with a sliced strawberry on top if desired.
Serves 4


Pin It

Meal Plan April 28- May 3

*New Recipe
Links to Recipes on Blog
^Recipes being "re-blogged"

Sunday
BLTs
Ranch Bacon Pasta Salad
Corn on the Cob

Monday
Grilled Pork Chops
Stuffing
Winter Squash
Applesauce

Tuesday
Creamy Chicken Sausage Rice Pilaf*
Green Beans

Wednesday
Philly Cheese Steak Sloppy Joes*
Skillet Homefries*
Cottage Cheese
Sliced Pears

Thursday
Greek Salads
Dinner Rolls

Friday
Linguine with Green Olives and Capers^
Italian Bread


Friday, April 26, 2013

Spring Break Barbecue

The first week of April was our Spring Break, and I have to admit, I was worried it wouldn't really feel like "spring" at all. Thankfully though, the sun came out, and it warmed up nicely...a couple days very nicely!

And by end of that week, with the warm sunshine on my face, the capri pants on my legs, flip flops on my feet and sun staying out until past 7:30 pm, I was ready to barbecue! Plus, my oven was still on the fritz, so it was good timing!

I will pretty much eat anything you slather in barbecue sauce. I'm not picky. Cooked over an open flame, covered in a sweet, smoky sauce...just the thought makes me drool. There are so many options when it comes to barbecue sauce, but for me, I want great flavor, not a lot of heat, and a good mix of sweet and savory; and this is the perfect combination of both. I chose to use it with chicken, but honestly, it would be delicious on pork or beef too. Heck, mix it with some ground beef, and make some of my Barbecue Burgers, another one of our summer time favorites. I guarantee whatever meat you choose to use it with, your family and your guests are going to love every bite.

If you enjoy a good barbecue like we do, be sure to save this for when the time comes. Or, join us in starting the season now, no matter what the weather is doing!

Jack Daniels Chicken
1 3-4 lb. whole chicken, cut into 8 pieces (skin left on)
1/2 c. canola oil
2 TBS grill seasoning
Salt and Pepper to taste

Sauce
1/2-3/4 c. Jack Daniels, or to taste
1/2 c. onion, chopped
4 cloves garlic, minced
2 c. ketchup
1/3 c. vinegar
3 TBS Worcestershire sauce
1/2 c. brown sugar, firmly packed
3/4 c. molasses
1/2 tsp. pepper
1/2 TBS salt
1/4 c. tomato paste
1 tsp. Liquid Smoke
1/2 tsp. Tabasco sauce, or to taste


Combine onion, garlic and Jack Daniels in a 3 quart saucepan. Sauté until translucent, about 10 minutes. Add all remaining ingredients, bring to boil. Simmer uncovered until reduced and thickened, about 15 to 25 minutes. Add more Jack Daniels if a stronger flavor is desired.

In a large bowl combine chicken, oil, grill seasoning, salt and pepper. Allow to sit at room temperature about 20 minutes. Preheat grill to high. Spray with cooking spray well. Sear chicken on each side for 2 minutes. Reduce heat to medium and continue cooking for about 25 minutes turning every 3-4 minutes to crisp both sides. Baste with barbecue sauce and continue cooking for 6-7 minutes, turning often and re-basting.


Shared on The Country Cook Apr. 26, 2013
Shared on Make Ahead Meals Apr. 29, 2013
Shared on Mandy's Recipe Box Apr. 30, 2013
Chicken at Very Good Recipes

Wednesday, April 24, 2013

Loving My Crock Pot Even More

As I am typing this, I have now been without an oven for almost two weeks! (Now remember, I blog ahead, so hopefully by the time this actually posts, that problem will be a thing of the past. But knowing repair shops, and the time it takes to order parts, and time to install it, etc, I'm not going to hold my breath!)

So you can imagine my frustration when I decided to create a recipe based on Stuffed Peppers, but pizza inspired, and then realized I would have to figure out how to slow cook them instead of bake, because let's face it...those aren't fitting in the toaster oven!

Luckily I was able to take my ideas, add a few from another recipe I found, and use their cooking instructions to develop them for the Crock Pot.

If your family loves stuffed peppers like mine, they will flip for these! Think all the flavors of a supreme pizza stuffed inside a pepper for easy access! Not to mention, it's a fantastic recipe to adapt for the number of people in your family. And if your kids normally turn their noses up at stuffed peppers...then maybe, just maybe these will pass inspection a little easier since you can tell them they taste like pizza, just without the crust; and let's face it, a lot of little ones don't eat the crust any way, so they won't even miss it!

I am always a huge fan of my Crock Pot, but without a working oven, it's quickly becoming an even better friend to me. If it weren't for it...I might just be ordering take out every night. Mmmm....maybe the Crock Pot should hide for a bit...that sounds a bit like a cooking vacation! Just kidding...

 Crock Pot Pizza Stuffed PeppersAdapted from Betty Crocker
4 large green bell peppers
1/2 c. orzo pasta, cooked to package directions an drained
5 large white button mushrooms, diced
1 lb. Italian sausage
2 tsp. Italian seasoning
1 (15 oz.) can pizza sauce
1 1/2 c. mozzarella cheese
1/2 c. water
Salt and Pepper to taste

In a large skillet, brown sausage until no longer pink. When sausage is almost done, add mushrooms and brown. Drain if necessary. Add in pizza sauce, orzo, seasoning and 1 c. cheese. Stir until mixed well. Cut tops off peppers and set aside. Remove seeds and ribs from peppers and rinse. (If they won't stand up on their own, slice a tiny bit off bottom to make flat.) Fill peppers with filling and replace tops. Spray Crock Pot with cooking spray. Add water. Place peppers in, standing up. Cook on LOW 4-5 hours. In the last 10 minutes, remove tops, and sprinkle with remaining cheese. Cook until cheese is melted. To remove, carefully use a slotted spoon and tongs, but do not squeeze.


Shared on Lady Behind The Curtain Apr. 24, 2013
Shared on Miz Helen's Country Cottage Apr. 25, 2013
Shared on The Country Cook Apr. 26, 2013

Tuesday, April 23, 2013

Happy Birthday, Crayola!


To celebrate their 110th birthday, the 8 original crayons are throwing a birthday bash at the new fun-omenal Crayola Experience, the world's only interactive Crayola family attraction. Right now, they're out on a colorful adventure to spread the news, and you're invited to join the fun!

How can you join in on the fun? You can FOLLOW the crayons on their adventure, LEARN more about each color and enter to WIN a trip for 4 to celebrate their birthday and the Grand Opening of the all new Crayola Experience this coming May, 2013!

Visit the Crayola Facebook page and click "enter now" for your chance to be first in line when the Crayola Experience reopens.

The new Crayola Experience features four floors of new interactive exhibits and one-of-a-kind attractions that will bring the magic of color and your child's creativity to life! The winner will be among the first to experience the fun, along with a three- night, all-expenses paid stay. It's an experience your kids will never forget - and neither will you!

Disclaimer: I received a package of Crayola crayons for sharing this information.

Monday, April 22, 2013

Perfect (Asian) Side Dish

When I plan an Asian inspired meal, sometimes the main dish is just the beginning. I want sides that match the "star" of the meal in deliciousness, bite for bite. And sometimes, that is a challenge in itself. Not because I can't find anything to make, but because I find myself making the same things over and over because we enjoy them so much. So when can take something I know we love, like noodles, and switch them up a little bit with a new recipe, I am almost insured a success.

I have never had Thai food, but I've been wanting to try it for quite some time now. And one of the things I hear about over and over in Thai cuisine are "peanut noodles." But usual, those two words are preceded by another which doesn't go well into my vocabulary....spicy. I've shared with you before how Mr. Everyday loves spicy food. In fact the hotter, the better. And yes, Little Everyday definitely inherited the "hot" gene from his Daddy. Which is funny because Adam inherited it from his grandpa, so I guess the tradition lives on. But mama just can't handle it...at all!

So you can understand how excited I was when I found a peanut noodle recipe that in no way included the word spicy, or after looking at the ingredient list, anything that could even be considered spicy! This recipe couldn't be easier. We're talking boiling water, stirring pasta, making a quick sauce and wah-lah...a side dish is born.

If your family loves Asian food, I know they will adore these noodles. Such great flavor, and the perfect compliment to any Asian inspired meal!

Easy Peanut Noodles Adapted from Food Network
12 oz. linguine, cooked and drained
1/4 c. creamy peanut butter
2 TBS rice vinegar
3 TBS soy sauce
1 TBS vegetable oil
1 TBS honey
1 TBS grated fresh ginger
4 green onions, chopped on a diagonal, a few left for garnish

While pasta is cooking, add peanut butter to medium glass bowl. Microwave for 15 seconds until soft. Whisk in vinegar, soy, oil, honey and ginger. Mix until well combined. Before draining pasta, add 2 TBS starchy cooking water to peanut sauce. (It should be thick but pourable) Stir well. Add noodles to a large bowl. Add green onions. Pour sauce over. Combine well, coating all noodles with sauce. Garnish with green onions. Serve warm, room temp or cold!
*NOTE* When measuring ingredients, use the same TBS for the oil, and then the honey, it will slide right out!


Shared on Make Ahead Meals Apr. 22, 2013
Shared on Mandy's Recipe Box Apr. 23. 2013
Shared on Lady Behind The Curtain Apr. 24, 2013
Shared on Miz Helen's Country Cottage Apr. 25, 2013
Shared on The Country Cook Apr. 26, 2013
Asian at Very Good Recipes
Pin It

Sunday, April 21, 2013

Church Supper #83


Good Morning and welcome to another Sunday! I hope this finds you enjoying your weekend and ready to share in some good fellowship and great food!
Thanks for stopping by today. I truly appreciate you sharing with our foodie family!
Please link up your favorite recipes from the week. And remember I wish you God's blessings all week long!
 " Rejoice in the Lord always. I will say it again: Rejoice!" (Philippians 4:4)


Last Week's Most Viewed Recipe:


From:

Congrats! Be sure to grab my Featured On Button!

Rules:

1. Feel free to link up as many recipes, butrecipes ONLY please, as you like!

2. Link up to your ACTUAL recipe, not just your homepage. Much easier to find you that way!

3. Include a link back to EMM on your recipe post or grab my button!

4. Leave comments so I can visit you back!

5. Visit at least 2 other sites and tell them you joined them at my Church Supper!

6. Follow my blog here w/ GFC and on Facebook :)


Saturday, April 20, 2013

Fun Snacking with Goodies Co.


Have you ever seen a new snack item in the store and thought "Wow, I bet my family would love this." Only to purchase it, take it home and find out...not so much! I've done this too many times to count, and I hate when it happens. Not only is it disappointing, but a huge waste of money. We love trying new things, but I hate throwing money out the window!

So what if I were to tell you there is a company providing their users the chance to try new snacks, every month, for one low price? Sounds pretty good, right?? A fun, inexpensive way to introduce new foods to your family!
Subscribers to the Goodies Co. Taster’s Box receive a monthly box of 5-8 snacks for $7/month. Customers are asked to review products they have received, and can accumulate points to redeem for a free Taster’s Box and other rewards. Since trying new snacks can be risky and time-consuming, the Goodies Co. Taster’s Box gives everyone a chance to discover their tastes. Plus, they are giving readers of my blog a chance to try it without waiting in line!


Goodies Co. is a highly sought after monthly subscription and to get yours, you will need to visit and enter the code BLOGVIP to instantly receive your invitation. Typically, there is a wait list to get an invitation, however through our partnership with Goodies Co. you can skip the line and get right in. How cool is that? I always hate waiting in line...even online :)


Once you enter the code into the promo page, you will receive 2 emails from Goodies. The first will state you are in line for your invitation, the next will instantly tell you your invitation has arrived. This shows you how you skipped the line!

Plus, not only do you get the chance to try new snacks, but at Goodies, your opinion matters, and you get rewarded for it. After you try your snacks, go back to the Goodies website and give a review of your box. By doing this you will earn points to redeem for rewards and free Taster's Boxes.


Sounds great, right? So if you are interested in bringing new snacks into your home for one low price a month, be sure to visit their site and enter the promo code above for your invite, with no waiting! Imagine the fun of opening the box every month to new yummy things!


*NOTE* If you click outside of the signup window you will be be directed to the Goodies Co. homepage. If this happens and you, have trouble locating the promo page again, click on the "use promo code" link located under the "request an invite" button. Also, Goodies Co. currently only ships to the continental U.S.


Disclaimer: This article is sponsored by Goodies Co. I was compensated for it, but my thoughts and opinions are always my own.

Soul Food Saturday

Good Morning and welcome to the first edition of Soul Foul Saturday! I am so incredibly excited for this new weekly feature and adventure on EMM. For those of you who didn't see the announcement last week, every Saturday my dear friend Bekki will be in the kitchen with you, creating something delicious!


In case you are in new here, let me tell you a little bit about Bekki. She is such a sweetheart, always thinking of others before herself, and willing to help at a moment's notice. She is so incredibly generous to my son, always sending him little treats in the mail, simply to make him smile. We've only known each other for about a year, but I feel like she is a friend I've had all my life. God truly sent me a special gift when he placed Bekki in my life. And now for the secret...Bekki and I have never met in real life! That's right, we met through this blog, and this incredible friendship that I treasure so much, developed. Bekki began as an avid supporter of my blog, and quickly became a blessing in my life, for which I'm so thankful for.

So please join Bekki and I for this new chapter on EMM. I hope you enjoy every word....and bite!


What could feed your soul better than a big bowl of pasta? Not many things in my opinion. My favorite recipes are ones that you can whip up any night of the week, to fill your belly and your heart whenever the need arises. So, kicking off this new Soul food Saturday is a quick recipe that feeds a crowd to the brim! Doubling this recipe won’t take any extra time, and the sauce freezes beautifully. Throw in another box of pasta and you can invite your neighbors over too!


Penne and Pork Ragu
1 tbsp. olive oil
1.25 lb extra lean ground pork
1 c. sweet mini peppers, sliced
1 14.5 oz. can rosemary and oregano diced tomatoes
1 ½ c. Hunt’s no sugar added pasta sauce
1 pound of cooked Penne
In medium pan heat oil and add pork and peppers. Cook until pork is no longer pink, and peppers have softened. About ten minutes. Drain. Add tomatoes and sauce and stir to combine. Allow to cook through until sauce has thickened. About 10-15 minutes stirring often.

Whether you love your pasta combined with your sauce or portioned out later for those who love EXTRA sauce. It’s just as delicious. Grated Parmesan  shredded cheddar, or a little extra oregano finishes it perfect!


Pin It

Meal Plan April 21-26

*New Recipe
Links to Recipe on Blog
^ Recipes being "re-blogged"

Sunday
Grilled Steak
Pan Roasted Brussels Sprouts
Baked Potatoes

Monday
Pizza Style Mac n Cheese^
Garlic Toast

Tuesday
Crock Pot Broccoli and Cheese Soup*
French Bread
Sliced Peaches

Wednesday
Grilled Shrimp Skewers
Parsley Red Potatoes^
Sauteed Mushroom*

Thursday
Barbecued Pulled Chicken Sliders*
Marinated Cucumbers
Broccoli Slaw*

Friday
Pancakes
Eggs
Bacon


Friday, April 19, 2013

It's Almost Time

Berry season is just around the corner for most of us; and for some of you, maybe it's even closer than it is for me. We usually kick off our Memorial Day weekend with strawberry picking, and then the berry love continues right on through summer. Raspberries, red and black, blueberries....oh we love our berries!

I've told you before how raspberry crazy Mr. and Little Everyday are, so during the warm months, I try really hard to find as many recipes as I can using them. But during the colder months, they aren't something I'm really on the lookout for. However, I was always taught to never look a gift horse in the mouth. See, back in February my father in law was given an obscene amount of frozen black raspberries and he generously offered to share with us. So I filled a few bags, brought them home and popped them in the freezer, knowing at some point I would find the perfect use for them.

Then all of a sudden it was Easter weekend, and we were going to be celebrating with my parents on Good Friday evening, mom making a huge meal (it was actually the "re-do" from my birthday supper she was to ill to make), and I offered to take dessert. I knew I wanted something spring inspired, maybe with berries...and that's when I remembered those beauties just hanging out in the chest freezer.

These are so incredibly pretty! The layers of berries and cream create these perfect colored bars. Oh, and not to mention they are super easy and scrumptious too. Plus, with warmer weather coming, they would make a great dessert for a hot summer day when only a frozen treat will do!

Berry season is coming, and will be here before we know it' I'm so glad I'm prepared with this great new recipe, and I hope you are too!

Frozen Raspberry Cream Bars  
Adapted from Taste of Home
2 c. crushed vanilla wafers (about 65 wafers)
1/4 c. butter, melted
2 c. frozen unsweetened black raspberries, do NOT thaw
3/4 c. sour cream
1 c. half and half
1/2 c. sugar

In a bowl, combine the wafer crumbs and butter. Grease a 8 x 8 baking dish. Press half of the crumb mixture into dish. Set remaining crumb mixture aside. Sprinkle berries over crust. In a bowl, combine sour cream and sugar; gradually stir in half-and-half until smooth, whisking to combine. Pour over berries. Sprinkle with remaining crumb mixture. Cover and freeze for 3 hours or until firm. You can allow these to sit for about 10 minutes to make for easier cutting, but I actually prefer to serve them frozen.


Shared on The Country Cook Apr. 19, 2013
Shared on Make Ahead Meals Apr. 22, 2013
Shared on Mandy's Recipe Box Apr. 23, 2013
Shared on Lady Behind The Curtain Apr. 24, 2013
Shared on Miz Helen's Country Cottage Apr. 25, 2013

Wednesday, April 17, 2013

Copycat Breakfast For Dinner

Breakfast for supper. It's an American institution. Okay, so maybe not, but it's definitely something many families across the country enjoy. When I was growing up, it was always such a huge treat when my dad would make a big breakfast spread for dinner (Yes, it was always dad when it came to eggs and pancakes) and now it's a treat when I make it for my son. 

Now most of the time when I plan a morning time meal for our dinner, I tend to go the eggs route. Eggs cooked to order, bacon, toast. Or maybe a quiche or baked omelet. Maybe some corn beef hash. (Okay, now I'm hungry again.) But then I remember my sweet tooth and decide to do a meal based on a batter item...pancakes usually. However, for our most recent breakfast supper, I decided to recreate a restaurant favorite at home, and satisfy that sweet craving a different way.

French Toast. I know many of you are drooling at just the words. But what if I add Cracker Barrel to the those words? Have you had it? Do you love it? Is it the best or at least one of the best versions you've ever had? Well, all of these statements ring true for us. In fact, I can honestly say I was never much of a French Toast fan until I had Cracker Barrel's...and then I was hooked. 

For those of you who have never indulged, if you frequent their restaurants, I encourage you to try the original. For those of you who have, I think you will be pleasantly  surprised at just how my copycat it is. The only difference we could notice was the bread. They are famous for using sourdough for their delicious version, but I prefer a little thicker variety, so I chose thick cut Texas toast. (If you've never seen it at your store, look in the bread aisle. I find my at Kroger.) But if you want it to be exact, go ahead and go with sourdough. It's definitely yummy!

If your family loves breakfast for supper too, maybe this French Toast can be on your table soon. Or if your family prefers their breakfast foods for breakfast...try this tomorrow morning!

Copycat Cracker Barrel French Toast
4 eggs
1 c. milk
2 TBS sugar
2 tsp. vanilla
2 pinches salt
8 slices Texas toast

In a large bowl whisk eggs, milk, sugar, vanilla and salt well. Preheat griddle to 350. (Or a skillet to medium) Grease griddle with margarine or cooking spray. Dip bread in egg mixture for 30 seconds on each side. Place on griddle and cook for 4-5 minutes per side until golden brown. 
*NOTE* The first few slices will take a little longer to cook, but after the griddle is heated completely, it might take less time.


Shared on Lady Behind The Curtain Apr. 17, 2013
Shared on Miz Helen's Country Cottage  Apr. 18, 2013
Shared on The Country Cook Apr. 19, 2013

Monday, April 15, 2013

Only Two Hours

Like many of you, the Crock Pot recipes I usually cook are the "low and slow", cook all day types of dishes. Let's face it, that's why we love our Crock Pots. But here is a little secret about me. Ninety-nine percent of the time when I plan those meals, they are prepared on days when I'm going to be home all day. Why? Well, I'm a little OCD when it comes to my Crock Pot cooking. See, I am a checker, a stirrer if you will. Yes, even though I know that for every time I take the lid off the Crock Pot while cooking I loose 30 minutes of cooking time, (Did you know that? It's true, because of the heat being released.) I can't help myself. If I have something in there all day, I have to check it. I have to stir it. I have to taste test it. Silly, yes I know, but hey, the stuff still turns out yummy, so no complaints!

But my days at home are getting fewer and farther between. Now, will I leave something to cook all day? Sure I will. Have I don it before? Sure I have. Do I prefer not to? Of course I do. But that means planning my slow cooker meals is sometimes a bit tricky around our busy schedules. So you can imagine my delight when I found this little gem. It only takes 2 hours to cook, beginning to end! Well maybe 2 hours and 10 minutes with prep time. That means I can come home after a busy day, after getting Alex from school and still have a Crock Pot meal done and on the table in time for supper. Plus, I can stir, check, taste, and recheck all I want within those two hours!

Now, I served this with a pre-packaged rice mix because they were on sale the week before for less than a dollar, and sometimes even though I know they aren't the healthiest for us, the bargain calls my name and I pick them up anyway. But if you want a great fried rice recipe this would top off very nice, click here for my homemade version that is easy and tasty.

If you are a "fix it and forget it" kind of slow cooker, my hat is off to you. For while I can do , it's not my first choice. But even if you are, I bet this two hours only dish might just peak your interest too! Not to mention awaken your taste buds!

Crock Pot Chicken Teriyaki Adapted from Crock Pot
1 (1.25) lb. package chicken tenders, cut into medium pieces
6 oz. pineapple juice
1 TBS molasses
1 TBS vegetable oil
1 TBS minced fresh ginger
1 TBS minced garlic
1/4 c. soy sauce
1 TBS Asian seasoning blend (I like this one), plus extra for garnish
1 TBS sugar

Combine all ingredients in Crock Pot. Cook on LOW for 2 hours. Serve chicken and sauce over rice if desired. Sprinkle with extra seasoning blend.
*NOTE* To easily peel fresh ginger, scrape it with the back of a spoon. Also, when measuring the molasses, use the same TBS you used for the vegetable oil. The molasses will slide right out!


Shared on Make Ahead Meals Apr. 15, 2013
Shared on Mandy's Recipe Box Apr. 16, 2013
Shared on Lady Behind The Curtain Apr. 17, 2013
Shared on Miz Helen's Country Cottage Apr. 18, 2013
Shared on The Country Cook Apr. 19, 2013
Asian at Very Good Recipes
Pin It

Sunday, April 14, 2013

Church Supper #82


Good Morning and welcome to another Sunday! I hope this finds you enjoying your weekend and ready to share in some good fellowship and great food!

Thanks for stopping by today. I truly appreciate you sharing with our foodie family!
Please link up your favorite recipes from the week. And remember I wish you God's blessings all week long!
 " Rejoice in the Lord always. I will say it again: Rejoice!" (Philippians 4:4)

Last Week's Most Viewed Recipe:

Congrats! Be sure to grab my Featured On Button!
Rules:

1. Feel free to link up as many recipes, but recipes ONLY please, as you like!

2. Link up to your ACTUAL recipe, not just your homepage. Much easier to find you that way!

3. Include a link back to EMM on your recipe post or grab my button!

4. Leave comments so I can visit you back!

5. Visit at least 2 other sites and tell them you joined them at my Church Supper!

6. Follow my blog here w/ GFC and on Facebook :)


Saturday, April 13, 2013

Saturdays on EMM

Over the last year, I have welcomes many guests to my kitchen on Saturdays to share their food and offer my readers new things to try. I have appreciated these bloggers, readers, and fans so much and want to thank each and every one of them who volunteered for the job.

But in the life of this blog, I've tried really hard to come up with new ways to entertain you and provide you with delicious dishes to feed your families. Keeping things "fresh", so to speak, is always a goal of mine. I never want my loyal readers to become bored with what I'm doing here.

So, it's in that spirit I am happy to announce a new weekly feature on EMM...


That's right! A whole new chapter for the weekends on EMM. My dear friend Bekki has stepped up to the challenge and can't wait to start cooking for ya'll. Most of you will remember her from being a frequent guest on Weekend Company, and now as I told her, "Saturdays are hers on the blog." I will still post my meal plan like I always have, and then Bekki will be here to share something scrumptious for all of us to try. 

I hope all of you will join us next Saturday for the start of this new foodie journey. I'm excited to see what Bekki has in store for us, and super happy to be sharing even more food and recipes with my EMM family!!